The iPhone as a camera

IMG_1310b copy
Angles.

I admit to being one of the skeptics who didn’t believe that anything that wasn’t designed primarily as a camera would be able to function in a worthwhile capacity as one – I remember my first camera phone having all of VGA resolution (a Nokia 6600) and not being very much good under any conditions. In fact, the thing didn’t even have autofocus, much less any sort of manual adjustments. Successive phones thereafter all came with cameras of some sort, mostly held at the 1.3 megapixel level with sensors about the size of this full stop. In the meantime, I was shooting with APS-C DSLRs – no comparison!

IMG_0940b copy
Rain

But the relentless pace of miniaturization eventually delivered a sensor of sufficient quality and resolution, coupled with a decent enough optical system, that I put aside my biases for long enough to give one a decent try. That was the iPhone 3GS – it had a 3MP camera with autofocus; tap to select the focus point and lock exposure. A little, bit like weighted spot metering. I got a decent image or two out of that.

IMG_1319bw copy
The waiters

The iPhone 4 was a revelation, however. Not only was the sensor and optics greatly improved, we finally got a decent field of view – my favorite 28mm! Still tap to focus and expose, with no provision for adjusting any controls anywhere. Despite all that, it was (and is) possible to get some pretty good shots out of the camera – especially considering it’s a phone first, small computer second, and camera somewhere around a distant third.

IMG_1665b copy
Filling stop

In other ways though, it shows. Despite the increasing complexity and controllability of competitors’ offerings, Apple decided to keep it idiot-proof and deny the iPhone user any sort of exposure control other than the pseudo-spot meter. Nokia released a 41MP sensor that used binning to generate some of the most amazing 8MP images I’ve seen from a small sensor camera – let alone a phone – and Apple just quietly went to 8MP, and fiddled a bit with the FOV again, so it’s probably closer to 30 or 32mm in the 4S than the previous 28mm.

IMG_1446b copy
Shards

I don’t have a 4S, nor do I intend to pay the Apple ‘upgrade tax’ every year to buy one. The iPhone is a great piece of technology, but I’m entirely happy with mine until it breaks, or the new model actually offers something I want that I can’t currently have. And only then will I think about buying another one. (From a commercial point of view, I actually find it pretty amazing that they can turn a $800 precision device into a piece of fast moving consumer electronics.)
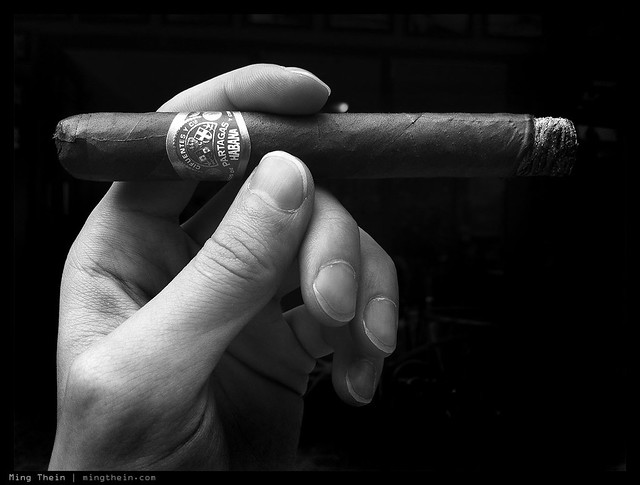
IMG_1281bw copy
Partagas

What the iPhone lacks in controllability it makes up for in development possibilities – just so long as you stay within Apple’s limits. I still remember the app which had a shortcut option to put the camera shutter onto one of the volume release buttons – it got pulled, only for Apple to subsequently add it as a system option to the latest version of iOS. To be honest though, I’ve tried most of the popular photo apps and find them a bit cheesy. Instagram, Hipstamatic and Camera+ are the prime offenders: use the app, and your images look the same as everybody else’s who used the app – what’s the point of photography if you’re going to produce the same work as the next guy? They might as well forgo the camera and just put in a library of random images that appears whenever you press the shutter instead.

IMG_0838b copy
Auckland marina sunset

There are some good apps, however – PhotoForge is one of them. It comes much closer to being Photoshop lite than Photoshop Mobile does; that I find pretty amazing. Still, I wouldn’t do any serious editing work on that because it lacks the fine control of the real desktop version.

IMG_0926b copy
Dew on leaf in playground

I want to talk about three more things before I close.

Firstly, real world limitations:
– You can’t control white balance. This is the biggest of them all, to me – especially when the iPhone 4 does a pretty poor job at deciding what color something is. Shade is much too cool, and incandescent is much too warm. And worse still, it tends to blow out the channels so you have no hope in hell of recovering any tonal information later.
– You can only control exposure to a certain degree, and that’s linked to focus point. Generally, this is okay because it’s how spot metering works – you expose for your subject, which you also obviously focus on. However, I find again that the latitude of adjustment for exposure is limited – perhaps because the camera has an electronic shutter only – so sometimes it can’t give you a fast enough shutter speed, or a slow enough one. It would actually be nice to know what exposure parameters the camera chose, too.
– You can’t control the output JPEG parameters. All you get is Disneyland color mode – that’s it. Again, once a channel goes, so does any hope of recovering tonal information.
– Speed. Focusing speed, shooting speed and shutter lag are all slow – the 4S improves on this slightly, but still feels unresponsive compared to a good compact like the Ricoh GR-Digital III or IV. Realistically, that means you’re not going to be shooting anything moving, unless you prefocus.
– Tap to shoot. The lack of a physical shutter button means awkward hand positions and ensuing camera shake while trying to poke the button on the screen. Sure, iOS5 gives you the option of using one of the volume buttons, but it isn’t a solution – you still need to touch the screen to focus.

IMG_0912bw copy
Relax.

Secondly, advantages and strengths:
– It’s always there. We always carry our phones, and even if I didn’t, the iPhone 4 is small enough and sleek enough that I wouldn’t notice it in my pocket.
– The image quality is finally good enough. Hell, even Getty Images thinks so – I’ve got photos in the library that were shot with an iPhone 4.
– It’s silent. Thankfully that annoyingly cheesy shutter sound can be silenced by putting the phone in vibrate mode; or you could just stick your finger over the speaker opening.
– Connectivity. Sometimes, you need to share an image – something stupid, something important, something for information only. And you can’t do that easily with a camera that isn’t also internet-connected.

IMG_1663bw copy
Just another KL traffic jam

Finally, possible improvements for a future version, bearing in mind the original Apple gestalt for simplicity:
– More latitude for auto white balance and the touch-spot meter
– Show us what the exposure is! I want to know in advance if it’s too dark or will be grainy etc.
– Two more manual settings: ISO, and image output parameters.
– RAW files (we can dream, I suppose). I still have to run the jpegs through photoshop to pass muster, so I might as well start from a better base. Sorry Apple, there’s just no way you can develop one set of color/ tone/ sharpening settings that are going to work under all situations.
– Two stage shutter button, or if Jonathon Ive lost a few points of his bonus percentage for each button he added, then make both of the volume buttons do double duty: one to AF and lock exposure, and the other to shoot.
– Put the damn camera in the middle of the phone, at least in a position where you’re not likely to stick your hand into it if held in landscape orientation. The design of the phone is superb, but it’s way too easy to stick your finger into the lens.
– Better low light performance (taken as given)
– More speed! (taken as given)

IMG_1209bw copy
The Interrogator, or Behind the two way glass

In conclusion, I use the iPhone a lot as a camera because of one reason and one reason only: it’s the one I know I always have with me. (And even if I did have another camera, what would I use to take pictures of the camera? photographer’s joke 😉 MT

IMG_0682b copy
Magritte strikes again

____________

Visit our Teaching Store to up your photographic game – including Photoshop Workflow DVDs and customized Email School of Photography; or go mobile with the Photography Compendium for iPad. You can also get your gear from B&H and Amazon. Prices are the same as normal, however a small portion of your purchase value is referred back to me. Thanks!

Don’t forget to like us on Facebook and join the reader Flickr group!

appstorebadge

Images and content copyright Ming Thein | mingthein.com 2012 onwards. All rights reserved

Photoessay: Burlesque party

A continuation of the sequences theme from a few weeks ago; let’s just say this was one of the more fun parties I attended. And being a party, it’s a social occasion; I certainly wasn’t working, but that didn’t prevent me from packing some pocket firepower in case photographic opportunities presented themselves, or I simply got bored with the conversation. (My wife is a long-suffering social and conversational martyr when it comes to me, photography, vacations and parties – thanks Nadiah!) Yes, it was dark, and there is motion blur because I ran out of apertures and shutter speeds (not to mention having trouble focusing on the rapidly moving dancers) – but I definitely think the motion blur adds to the action and slight sense of chaotic fun. MT

This series shot with an Olympus E-PM1 Pen Mini and Panasonic 20/1.7 G.

_PM03612 copy

_PM03580 copy

_PM03592 copy

_PM03625 copy

_PM03594 copy

_PM03589 copy

Leica M rangefinder calibration service

_D90_DSC4448 copy

I’ve had a number of enquiries about focus precision, rangefinder calibration and adjustment etc. in the last couple of weeks – I suppose it’s because of the need for precision highlighted by the Monochrom’s resolution and 50 APO’s resolving power.

I had the same problem myself in 2009 when shooting with M8s; new lenses would require calibration adjustments and the RF alignment would drift over time with frequent mounting and unmounting. A return trip to Solms for the entire kit of two bodies and several lenses would of course be impractical (both expensive and hugely time consuming), so I learned how to do it myself.

For Leica M shooters in Kuala Lumpur, I offer a rangefinder calibration service for the digital M8/ M9 bodies. It takes an hour, and you pick which lens you would like the body calibrated for – I recommend either your most used lens, or your shallowest DOF one. It is possible to have all bodies calibrated for all lenses, but this will require a long and expensive German holiday for your entire kit as there’s some lens disassembly involved to realign the helicoids…

The adjustment leaves no trace and will therefore not affect your warranty.

Please send me an email if you’d like to make an appointment or enquire about this service. MT

Video: A B&W workflow tutorial

After the series of articles on color and B&W – and of course the M-Monochrom review – I got a huge number of emails asking about my workflow for B&W conversion. I originally tried to put this post into a conventional text and image format, but gave up shortly after I realized it would be impossible. Instead, have a video! I don’t claim to be any good at video production (forays into this are are another topic for another day), but I think this should give you a good idea of how it all comes together. Excuse the lousy sound, that bit I still haven’t quite gotten figured out yet. I suppose I need some collar mics or something – the equipment buying never ends…

Anyway, enjoy the video. MT


____________

Visit our Teaching Store to up your photographic game – including Photoshop Workflow DVDs and customized Email School of Photography; or go mobile with the Photography Compendium for iPad. You can also get your gear from B&H and Amazon. Prices are the same as normal, however a small portion of your purchase value is referred back to me. Thanks!

Don’t forget to like us on Facebook and join the reader Flickr group!

appstorebadge

Images and content copyright Ming Thein | mingthein.com 2012 onwards. All rights reserved

Shooting professionally with the Olympus OM-D E-M5

_5003127%20copy
Rice. Olympus OM-D and Panasonic Leica 45/2.8 Macro-Elmarit

I had an interesting food assignment recently, which was challenging for several reasons – not least the location:

_5002420 copy
Doesn’t look so bad? Look again:

_5002274 copy

Turns out this particular client’s restaurant wasn’t ready; the assignment was concept food for the menu, website and marketing materials for a new local chain. So they borrowed the (primitive) kitchen of another friend, who happened to run a small cafe in an office-building-cum-training-center-cum-community-college. The only place they had for me to shoot that was both close to the kitchen and powered (for the lights) was literally off to the side of a hallway! I’ve never thought of photography as performance art before, but judging by the crowds that stopped by to rubberneck throughout the two days, I should probably have charged admission. To be honest though, I was more worried about people tripping over the cables or moving lights, or worse still, equipment going missing. (Fortunately, none of that happened – thanks in no small part to the wonders of duct tape.)

IMG_1850 copy
Setup shot – Apple iPhone 4

In the past, I would have done this shoot with a Nikon FX body, macro lens, tilt-shift, and a few speedlights and umbrellas. After much experimentation with LED panels for both casual work and teaching – I’ve come to the conclusion they’re a much better option for food photography, both enabling you to see straight away the light effects, plus minimize the effects of heat on food – especially important with things like ice cream or raw fish.

I don’t have any questions about the image quality of the OM-D – at base ISO, it’s better than the D700 – but what did concern me was the client reaction to me using a ‘small’ camera, given their expectations and my rates. I even packed a D700 and full set of lenses just in case. However, so far those concerns have been completely unfounded. I’ve mixed in a number of images from the OM-D with a recent submission to a watch client, and they haven’t said anything negative (the bulk of the job was shot with a D800E; the OM-D images were upsized to 25MP) – however, they didn’t see me shoot as I wasn’t working on location.

Fortunately those fears turned out to be unfounded. There was no negative reaction from the client to the camera or image quality. (Though to be on the safe side, I added the HLD-6 to bulk things out a bit – and give me some more battery life.) In fact, I have to say I’m extremely impressed with the color reproduction of the OM-D – after shooting a WhiBal card under the LED panels to lock in the white balance, the images needed almost zero color correction in ACR – this is something I’ve never experienced before. I think the combination of high CRI LED panels and the OM-D for food photography is a revelation, and not having to do extensive color rebalancing work to achieve perfect color saves a huge amount of processing time afterwards. The extended DOF for a given FOV/ aperture combination helped too; f8 was about as low as I could go with the LED panels and still manage 1/90s or so at base ISO. I did bring a tripod along – my shiny new Gitzo GT1542 Traveller which I haven’t had a chance to use yet – but didn’t need it due to the image stabilization and reasonably high shutter speeds.

_5002312 copy
More rice. Olympus OM-D and Panasonic Leica 45/2.8 Macro-Elmarit

A note on the gear used – one OM-D body with HLD-6; the Panasonic Leica 45/2.8 Macro-Elmarit for the majority of the shots, with the Voigtlander 25/0.95 (the near focus ability is extremely useful for food photography, but I’m not so enamored with the wide open performance – review coming soon) for the wider shots; I brought the 12/2 and 45/1.8 just in case, but didn’t land up using either. A D700, 24/1.4, 60/2.8 G Macro and 85/2.8 PCE rode shotgun as backup. In future, I think I’m just going to bring a pair of OM-D bodies and save a lot of space and weight. Battery life on the OM-D was pretty good – not as good as the Nikons (the D700 usually gets me around 700-800 shots per charge with the commander flash firing, or 1000+ with no flash; the D800E is good for 2000+) – but a respectable 650-700 per charge with heavy chimping. One slightly concerning behavior I did see with the OM-D was an occasional lockup – it seems that if I review and zoom in fairly soon after taking the shot, the camera sometimes freezes on zooming out again. Popping the battery from the grip is the only way to solve this. I only see this behavior with the battery grip, and it’s not always repeatable. Hmm. Fortunately, it doesn’t eat shots or corrupt things. I will be following up with Olympus in due course…probably after I’m done processing this assignment, and after next week’s assignment in Geneva.

All in all – a positive experience. I was surprised by how much less fatiguing using the OM-D is for studio work; I always thought I didn’t really notice the weight of a full sized DSLR, but I guess it turns out I do. Even with the HLD-6 and heaviest Voigtlander 25/0.95 – it weighs in at just over 1kg instead of the 1.6kg or so for a D700/D800 and 85 PCE; more if I’m using the vertical grip for those cameras.

Now, time to decide if my second body should be black or silver…MT

A note for all of those complaining my previous images were over sharpened – I think I’ve fixed the problem, but please let me know if they still look off. I can’t do anything about the images already in the system, so there may still be a few that I post in the future that appear a little over sharpened.

____________

Visit our Teaching Store to up your photographic game – including Photoshop Workflow DVDs and customized Email School of Photography; or go mobile with the Photography Compendium for iPad. You can also get your gear from B&H and Amazon. Prices are the same as normal, however a small portion of your purchase value is referred back to me. Thanks!

Don’t forget to like us on Facebook and join the reader Flickr group!

appstorebadge

Images and content copyright Ming Thein | mingthein.com 2012 onwards. All rights reserved

Photessay: Thean Hou temple by night

Thean Hou temple is a famous Buddhist location just outside Kuala Lumpur, popular as a place of worship during the new year and various lunar festivals. It’s also home to various martial arts groups. The temple belongs to the Selangor and Federal Territory Hainanese association, and was constructed from 1981 with funds donated by the community.

This set shot with an Olympus E-PM1 Pen Mini.

_PM00711 copy

_PM00719 copy

_PM00703 copy

_PM00720 copy

_PM00784 copy

_PM00776 copy

How serious do you want to get?

At some point, every enthusiast photographer is going to want an upgrade. It’s a natural consequence of human society; more and newer is better. Since money doesn’t necessarily correlate to ability – in fact, it’s frequently the complete opposite situation – the people who’ve bought the best and latest gear generally aren’t the best photographers. In fact, I think a solid argument can be made that if you are very committed and passionate about your hobby, then you’ll find ways to make do without resorting to technology.

Advance warning: this article is as much about individual soul searching as it is about gear lust. Many of you will probably disagree with what I have to say, or find the truths a little uncomfortable; you of course don’t have to listen to me, but you might well find doing so unburdens you and allows you to develop even more as a photographer. Why am I saying this? Because I went through the process myself, and have to make a conscious effort to stop myself from falling into the gear trap. (It’s actually a lot worse when you’re a pro because you can justify buying anything as ‘work related’ and a tax-deductible expense.)

Notice the question I asked was ‘how serious do you want to get?’ not ‘how serious are you?’. There’s a difference: the former is aspirational, and the latter is slightly insulting, specifically in the implied stagnation and doubt of one’s ability.

Rule Number One: don’t confuse need and want.

There’s nothing wrong with wanting something. It’s what makes us human, in many ways. But don’t think you need it. Having a D800 will not make you a better photographer than D700. In fact, it might well make your images worse if you lack the discipline to use it properly. But if you desire one, and that’s all there is to it, then go ahead. If the ownership experiences gives you pleasure, and you’re happy carrying the weight around, then who’s going to stop you? These types of purchases tend to be accompanied by positive personal emotions.

Need is different: you’re going to find it difficult to do product photography without lighting gear. That’s a need, if the situation calls for it. I wouldn’t argue any other way. These types of purchases often feel like paying tax: we do it because we have to, not because we want to.

This brings me on to Rule Number Two: only buy something if you know you’ve exhausted the limits of your equipment.

There are so many advantages here: you’ll buy exactly what you need. You won’t waste money on trying things that ‘might’ be useful. You will actively seek the skillset required to make the most of the new acquisition.

Rule Number Three: learn to use what you’ve got. This one is a biggie. The number of people who keep buying bigger and faster lenses and cameras thinking that it’s going to solve basic compositional problems never ceases to amaze me. Fps and bokeh are tools and enablers, not a crutch for compositional imbalance! Yes, the ‘Photoshop tax’ is painful, but if you think about it, not unreasonable. I use photoshop for every single image I shoot. There is no other piece of equipment that falls into this category, yet some of the other tools I own cost far more. How is this unreasonable? I look at it as cheaper than having a darkroom, or paying somebody to develop films for you. Furthermore, signing up for a decent course or educational program is going to cost less than a new camera, but teach you far, far more. Buying a professional camera without understanding photography is like driving a Ferrari with traction control off in the rain: you can go fast, kinda wing it, probably hold it together most of the time, but sooner or later, you’re going to crash in a big, messy way.

This brings us around full circle. I don’t define seriousness in photography as whether you make your living from it or not; there are plenty of ‘pros’ who make big money but don’t really care about the output – so long as it’s about 90% there, the clients can’t tell the difference. Even more shockingly, I was told this in person, by more than one person whose fees are rather high. Similarly, there are amateurs who are outstandingly good photographers – probably without the commercial inclination or personal interest in making a living out of it – but their shooting discipline and workflow shows incredible attention to detail, even though very few people (if any) see their images.

Rather, seriousness is probably closer to how much of a sacrifice you’re willing to make; this comes in many forms. Cost. Weight of equipment. Time spent processing, which could be spent on other things. Sleep sacrificed for that perfect sunrise or sunset. Personal security, to get the shot in a dangerous area. Photographers who try to capture things they cannot control – think photojournalists and wildlife shooters – rank pretty darn high on the seriousness ladder.

I think it’s very important to know where this boundary lies personally. Like every other wildlife photographer, I once had aspirations to shoot for National Geographic; the reality is that after a bit more research into what they do while on assignment; I don’t think I’d be happy with that kind of life; sacrifices are high. But on the opposite side of the coin, I’m willing to put up with PC lenses, tripods, focusing racks etc. in order to eke out a tiny bit more image quality for my watch photography – which I don’t think many people would bother with.

Perhaps another definition of the spectrum is whether you’d go out of your way to get the shot or not: a serious photographer would either go far, far out of their way and plan specifically to get that one image; a not-serious one would be more opportunistic and just make causal images as and when the opportunity arises.

Knowing where you stand on this continuum  – enables you to make decisions without that slight discomfort and doubt that you’re compromising on other things at the expense of photography – but without really knowing why. It’s a lot easier to be happy about the choice to carry 20kg of equipment on holiday because you know that you aim to get some very specific shots that can only be done with that equipment; as opposed to bringing-it-along-because-you-bought-all-of-it-already-because-it-made-you-look-like-a-pro-and-now-you-should-probably-use-it. Similarly, you won’t feel bad about missing that amazing sunset your 20kg-toting friend got because he woke up at 5am, and you were hungover after partying the night before – but you know how to make a decent shot with your mirrorless camera when the opportunity arises, even if you don’t actively go out of your way to look for it.

That liberation brings happiness and contentment. Very simply, that makes it a hell of a lot easier to enjoy what you do; the fact that you’re here and reading means you’ve got a choice. And given that choice, would you want to do anything for any other reason? MT

____________

Visit our Teaching Store to up your photographic game – including Photoshop Workflow DVDs and customized Email School of Photography; or go mobile with the Photography Compendium for iPad. You can also get your gear from B&H and Amazon. Prices are the same as normal, however a small portion of your purchase value is referred back to me. Thanks!

Don’t forget to like us on Facebook and join the reader Flickr group!

appstorebadge

Images and content copyright Ming Thein | mingthein.com 2012 onwards. All rights reserved

Photoessay: Kitchen portholes

I’ve never understood why kitchen windows are always round, but they are. Maybe because square is too much like a hospital or school. Nevertheless, they provide an interesting view into the inner workings of the place where our food comes from. The square format of the D-Lux 5 was perfect for this. MT

Series shot with a Leica D-Lux 5 and M9-P with 35/1.4 ASPH FLE.

_DL5T_L1000887 copy

_DL5T_L1000915 copy

_DL5T_L1000873 copy

_DL5T_L1000872 copy

_DL5T_L1000871 copy

_DL5T_L1000884 copy

_M9P1_L1015667bw copy

On Assignment: Architecture and the concrete jungle

_DL5T_L1000581 copy

I recently shot a commission for the famous Japanese architecture firm Kenzo Tange Associates – whilst I’d heard of them before and seen their work in Japan, I didn’t realize that they had a number of projects closer to home. Turns out there are four buildings in downtown Singapore – all fairly close together – plus another one or two a little further out, and another under construction. And there are some underway in Kuala Lumpur. The scope of this assignment was to get a variety of general exterior views of the buildings during the day, at night and in the context of their environment.

_DL5T_L1000547 copy

Architectural photography has always been something I’ve done out of personal interest – followers of this site or my flickr page will undoubtedly have noted my predilection for geometry, abstracts and general building form. The interplay of light, shadow, texture, and how the building sits in its environment are something that I pay perhaps an unhealthy amount of attention to. You just know if the design is balanced and ‘feels right’ by looking at whether it dominates the surrounding landscape, if it disappears and looks insignificant, or whether it looks comfortable.

_DL5T_L1000615 copy

That said, although Singapore is an interesting architectural environment – there are a lot of modern, different cutting edge designs and a huge variety of facade treatments (that’s what happens when you have a lot of money flowing into the country; notably most of the places that spend big on their real estate are banks and malls – go figure) there’s also not a huge amount of landscape left to dominate (and that’s what happens when you’re a small island). This of course means that the dominating landscape is urban and of very high density; from a photographic point of view, this presents a huge number of challenges because of lines of sight and vantage points, not to mention permits, access and the like – you’ll need permits to shoot from somebody’s property, even if you’re not taking photos of their property itself.

_DL5T_L1000539 copy

Since real estate is expensive, everything is high rise. The challenge then becomes perspective: how do you find the right position to get a perspective that somehow looks natural, but at the same time isn’t blocked by a huge amount of other stuff? It all depends on location. Some buildings can be shot from their plazas with a wide angle (though this is quite conventional and boring); across the street from another building’s rooftop (if the height is right, and the street is wide enough); or much further down the street with a telephoto. Ideally, you’d want a helicopter at low height and a telephoto, but that isn’t practical most of the time.

_DL5T_L1000573 copy

Perspective is very important here because anything too wide will look unnatural; this isn’t how the eye sees it. I find when shooting architecture that the best results aren’t from extreme angles: they’re from natural perspectives and details; you want to be able to appreciate the building from a human perspective, because that’s how and why the damn thing was designed in the first place. It’s great if it makes a stool for King Kong, but an architectural failure if the podium steps are too high for people to climb easily.

_DL5T_L1000625 copy

That said, shooting in tight confines requires you to get creative. Although you do want to see the whole building, there’s nothing wrong with focusing in on the details and going for some degree of abstraction; I’m sure every architect wants the attention to detail in their work to be seen. I know I would.

_DL5T_L1000610 copy

For this assignment, I shot exclusively Leica; their M wide angles are superb, and much superior to anything available for the Nikon F system, though the Zeiss 21/2.8 runs pretty close. The other reason why I went with the Leica system was weight: there’d be as lot of moving around on foot to get the best angles and unique perspectives, which means schlepping everything around like a mule. Lightness is your friend. Oh, and don’t forget that the heavier your camera, the more rigid (and thus, heavier) your support needs to be.

_DL5T_L1000564 copy

Sadly, there are no tilt-shift lenses for Leica M; in any case, they wouldn’t have been wide enough in some of the quarters I was working in. I used the new 21/3.4 Super Elmar ASPH M with finder, 35/1.4 ASPH FLE and 50/0.95 ASPH. In hindsight, the noctilux was not the best choice for this – not because of its optics, but because I never used anything larger than f5.6 (you do want everything in focus, and critically sharp, everywhere). I wanted the 50/2.5 Summarit, but turns out it was on loan already. Oh well. The 21 and 35 performed superbly, as expected. In fact, I was surprised by just how good the 21 was – even wide open, in the corners. I think I’ll need to do a full review of this lens in future. Suffice to say, if you don’t need the f1.4 speed of the ‘lux – it’s a no-brainer. (Aside: I owned and shot with the 21/1.4 ASPH as my primary lens extensively during the M8 days, on which it became a handy fast 28mm; however, it wasn’t great for architecture because of the distortion and ever so slight field curvature. Also, overkill when you need f5.6 and smaller.). A D-Lux 5 Titanium rode shotgun for spontaneous shots and the B-roll for this article (due to licensing reasons, I obviously can’t use the original images.) I also used the S2, 30mm and 70mm lenses for some of the daylight work.

_DL5T_L1000540 copy

On the support side, I used my old Manfrotto 444 Carbon One – I think this thing must be at least ten years old by now, if not more. I got it used from a friend. Whilst it’s rigid and relatively light, I’d still like something lighter for travel – especially if I’m not putting anything heavier on it than a Leica M. Perhaps one of those Gitzo 00 series things. The problem is I can’t justify one because I do so little tripod work. The head – very important – was my favorite Manfrotto 468RC2 Hydrostat bullhead. This thing is amazing: it locks at any angle, with no ‘droop’ – either it’s locked, or it isn’t. As far as I know, it uses some sort of vacuum system and teflon rollers, but I haven’t needed (or wanted) to take it apart.

_DL5T_L1000523 copy

I can’t help but wonder if a V-Lux 3 with it’s excellent 24-600mm lens and a much lighter tripod would have been a better way to go – perhaps something to experiment with in future. All cameras are more than capable of deliverin the required results at base ISO and shooting RAW, anyway.

One final note about processing: to maintain optimum quality throughout the tonal range, I shot at base (160) ISO and did something I rarely do and used a two-stop HDR on the night shots – there’s simply too much difference between the spotlit parts of the building and the deep shadows – easily four or five stops. There are right and wrong ways to use HDR, and that’s a discussion I’ll save for a future article. MT

This post was brought to you by Ming Thein’s Email School of Photography – learn exactly what you want to learn, when you want to learn it. Don’t forget to like us on Facebook!

Photoessay: Bruno Menard at Forlino

I was in Singapore recently to run a few food photography 101 sessions under Leica at the World Gourmet Summit. One of the perks of the job was getting to enjoy the samples. In this case, by 3* Michelin chef Bruno Menard, who formerly ran L’Osier in Tokyo – widely thought to be the best restaurant in Japan at the time. I ran a very basic setup for the participants with a couple of small LED video lights, a Leica D-Lux 5 compact and some modified settings (optimized for food work); I shot tethered and showed the results instantly on a HDTV via HDMI out. There was a little PS work done to the images afterwards (i.e. for this set) but for the most part, the D-Lux 5 makes a surprisingly excellent little food camera – especially when there’s enough light around. MT

Images shot with a Leica D-Lux 5.

_DL5T_L1000636 copy

_DL5T_L1000651 copy

_DL5T_L1000646 copy

_DL5T_L1000655 copy

_DL5T_L1000648 copy

_DL5T_L1000654 copy

_DL5T_L1000644 copy

_DL5T_L1000660 copy