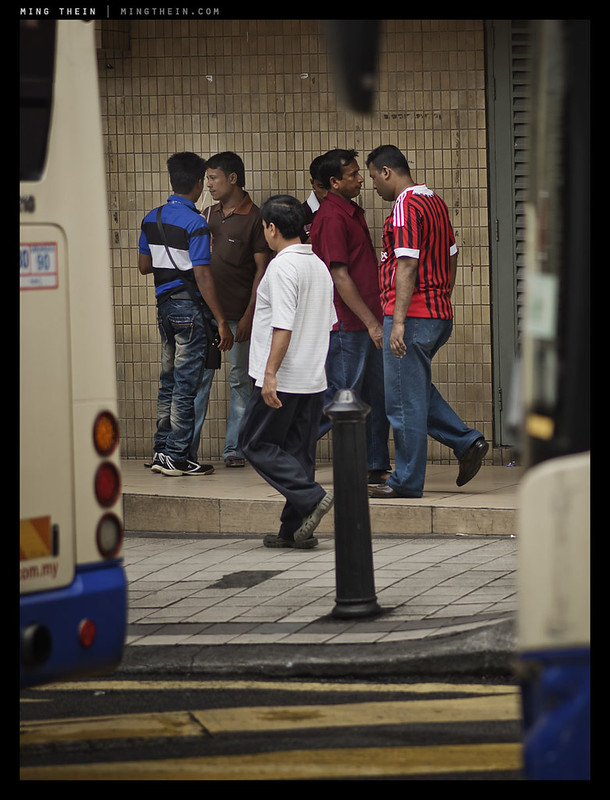
Just one week to go…

…for entry submission into the inaugural (July 2012) Mingthein.com photography contest!

40+ entries so far and some great images. I’m seeing some great stuff in the reader flickr pool that would qualify, but hasn’t been entered! There are no restrictions on date shot, location, geography or equipment – so long as the theme is maintained.

Remember, the prize pool grows in proportion to the number of entries, so the more participants, the better! Share the contest with your friends. And good luck to all the current entrants! MT

Full details on how to enter here.

Depth of field and the importance of achieving critical focus

_7053043 copy
Reference polar bear and Noctilux. Nikon D700, AFS 60/2.8 G Micro

Your plane of focus determines more than just what’s sharp and what isn’t: it directs the eye of the viewer to the subject, too. The shallower your depth of field, the more exaggerated this becomes – to the point that with a very shallow DOF lens, a close subject and far background, you really won’t be able to identify what the background actually is.

_M8_L1012158bw copy
Jazz time. Leica M8, 35/2 ASPH

All the more important that you choose the right plane of focus, then.

From a compositional point of view, the obvious thing would be to ensure all of your subject in focus – or is it? Not necessarily – sometimes you need just enough of it to be identifiable, and the rest can be merely a suggested impression. Take the eyes in a portrait, for instance. You don’t need to have the ears and hair in perfect focus, too. Less obvious is the need for context: today’s photographers seem to be fixated on achieving ever shallower depth of field, not knowing that in the past, achieving sufficient depth of field was a huge struggle that required the use of camera movements, long exposures, enormous lights and tiny apertures (I don’t know if any readers remember or have heard of Ansel Adams’ f.64 club – so much for ‘f8 and be there’). Part of the problem was the insufficient image quality of smaller media; the other part of the problem was the psychological conditioning of observers and viewers: before photography there was drawing and painting, and neither of those had any such thing as bokeh.

_M9P1_L1000019 copy
Rain and traffic. Leica M9-P, 50/0.95 ASPH

I used to be one of those chasing ever faster lenses – for the simple reason that earlier digital cameras were frankly pretty crap when it started to get dark – higher ISOs were all but unusable. If you couldn’t use an tripod (reportage work, for instance) then you had no choice but to accept grain (compromising image quality), use a flash (compromising ambience and context) or use a faster lens.

Fortunately, we now have sensors good enough that we don’t always have to shoot at f1.4 the minute it gets dark; we can do so because we like the look, but not because we have to – and that’s important, because it means we can choose just how much context* to include in the shot. Moral of the story: think very carefully about how much of the image needs to be in focus to tell the story effectively: too little, and you lose context because the subject has no stage; too much, and you lose focus and isolation, because the subject may not longer be as separated from it environment.

*By ‘context’, I mean background that isn’t subject. If your entire shot is subject, then there’s no context, of course.

_7015246bw copy
At the crossing. Nikon D700, AFS 85/1.4 G

This brings me to the second portion of this article: focus. It might sound obvious, but ensure your subject is in focus. The non-obvious bit is that there’s in focus, and in focus. The difference is obvious at the pixel level: are you seeing single-pixel detail (or near enough, to the resolving limits of your lens/ sensor combination)? If you’re not, go back and try again.

It matters for two reasons: there’s nothing more annoying than looking at a slightly OOF image, and you yourself will probably look at the photo later and think ‘if only…’; and then there’s the ever-increasing pixel density that makes it more and more difficult to achieve critical sharpness at the pixel level. The higher the resolving power of a camera, the more finely geared the focus mechanism has to be in order to achieve critical focus. In the film days, this wasn’t so much of an issue because the ‘sensor’ had some thickness to it – the emulsion was of a fixed depth – however, with digital sensors, this ‘depth’ is all but nonexistent – so an image tends to snap in and out of focus fairly abruptly, with very little acceptable transition zone – a zone that gets increasingly narrow as your depth of field decreases.

_M9P1_L1011571 copy
Just enough context. Leica M9-P, 35/1.4 ASPH FLE

The reality is that with modern lens and camera designs, camera shake aside, your ability to focus has by far the greatest impact on the resolution and perceived sharpness of an image. It’s actually much more difficult to achieve critical focus with a fast wide lens than a fast long one – reason being that the transition zone between in and out of focus is far more gentle; an increasing reliance on contrast detect AF rather than phase detect AF does’t help, either.

Fortunately, there are many things you can do to maximize your chances of getting a positive hit. I’ll go through them for each of the common camera types.

_M9P1_L1001181 copy
Afternoon cigar. Leica M9-P, 50/0.95 ASPH

Compacts

1. Half press to focus, and gently release. You’d be surprised how many people just jab at the shutter button and wonder a) why their camera is slow and b) why images are blurry. The former is because the camera will take some time to find focus; the latter is because either it didn’t find focus properly (the electronics told it to trip the shutter when focus was acceptable or because of the jerk caused by the finger-jabbing motion and recoil.
2. Pick a high contrast subject. All compacts (except the Nikon 1 and some Ricohs, but those are all hybrid systems anyway) use contrast detection to determine when the image is in focus or not. The lens is racked back and forth until the portion of the image under the selected AF box reaches maximum contrast; this may or may not correspond to what you’ve selected. So, to be safe, select a subject with good contrast.
3. If in doubt, stop down a little – but not too much. Stopping down gives you more depth of field to cover focusing errors; on a compact with very short real focal lengths, you’ll find that f4 (or f5.6 at maximum for larger sensored cameras or longer focal lengths) is probably enough to ensure everything is in focus; any more than that and you’ll be seeing a reduction in sharpness due to diffraction.
4. Turn off that AF assist light. Not only is it hugely annoying and conspicuous at night, I find that it also tends to give a lot of false positives.
5. For moving subjects, continuous AF is nearly useless. The only way to reliably hit a moving subject is either to rely on your extended DOF and hope single AF is quick enough to nail it, or use trap focus by pre focusing on a certain point, and waiting for your subject to arrive.

_3100_DSC0957 copy
Crossing. Nikon D3100, AFS 85/1.4 G

DSLRs

1. I repeat again: half press to focus, and gently release. The same applies for DSLRs and compacts.
2. And again: pick a high contrast subject. Phase detect AF sensors also like high contrast subjects – preferably something with either horizontal or vertical lines, depending on the orientation of your AF sensors.
3. Don’t let the camera do the choosing. Pick your AF boxes manually. If you don’t, you have no idea what the camera will focus on – it’s generally the closest thing in the frame, but that might not be what you want it to do. Especially if you’re shooting with a very shallow DOF lens.
4. Use continuous AF mode. Again, especially for shallow DOF lenses, a few millimeters of subject movement or photographer movement to or from the subject can affect sharpness greatly – to avoid this problem, use continuous AF mode and only lock focus if you’re absolutely certain you’ve got what you want. (A popular alternative is to put AF-ON on a separate button. I personally use that button to lock focus, because generally it’s easier to use one finger to activate AF and shoot off the shutter button alone, rather than two) And without saying, you HAVE to use continuous AF on moving subjects; make sure the focus box always tracks the subject.
5. Check your focus calibration. Set up the camera on a tripod, with an angled static target (I recommend the LensAlign) that lets you see if you’re focusing on your intended point or not. Adjust your AF Fine Tune settings if you have them, until you can reliably achieve critical focus. Do this for every lens you’ve got.
6. Get your mirror aligned. If you’re manual focusing a lot, you’ll want to get your mirror aligned so that what you see in the finder is the same as what the sensor sees – what this effectively does is adjust the rest position of the mirror so that the distance from mount to sensor is exactly the same as mount to focusing screen, over the whole frame.
7. Use a split prism or micro prism screen. Remember the half-circles in the middle of manual focus film SLR viewfinders? Those were focusing aids called split prisms, which let you see very quickly if something was in focus or not – all you had to do was turn the focusing ring until the verticals aligned. Why they’re no longer standard equipment on DSLRs these days is beyond me. Why they’re no longer available even as accessories, except for some third party companies, is even more mind boggling. The standard screens have a very narrow scatter angle, which means that there isn’t much difference in brightness between slow and fast lenses – great for kit zooms, but not so great for determining critical focus with very fast lenses; they lack the required snap. If you don’t believe me, try using the DOF preview button at f1.4, f2 and f2.8 – you’ll probably see no difference in the viewfinder.
8. Don’t trust the focus confirmation aids. The dot (Nikon) or beep (Canon) is somewhat misleading because there’s a range to ‘acceptably in focus’ – and the extremes of that range are pretty wide. It’s a guide only, not an absolute.
9. Use magnified live view and a tripod for absolutely critical images.

_7025654 copy
Untitled. Nikon D700, AFS 28-300/3.5-5.6 VR

Rangefinders

1. The most critical portion of the focusing system is the rangefinder. It is impossible to emphasize how important a perfectly aligned rangefinder is – especially when using fast lenses. Remember also that you have no way to visualize the focus plane. So: make sure your rangefinder is properly calibrated for the lenses you use – each lens will be slightly different because of cam wear, alignment and a whole load of other factors. Do not attempt to do this yourself, because there are four adjustment points – one each for near and far limits, one for travel, and one for vertical alignment. Not knowing which one does what can result in a bit of a disaster. Since there’s a feeler cam that always interacts with the focusing cam on the lens, the calibration can, and does, drift after a while, so check it annually or so if you use the camera frequently.
2. Clean the RF and VF windows! Dirt + smudges + oil = low contrast = difficulty in focusing.
3. Use a magnifier over the viewfinder if you’re using longer lenses. This helps by enlarging the central portion of the frame that contains the RF patch (at the expense of the outer portions) – you’ll find that since the RF patch occupies a large portion of the frame, it’s difficult to see exactly what’s in focus and what isn’t without the magnifier.

_7037622bw copy
Waving to the stars. Nikon D700, AFS 85/1.4 G

Finally, remember the higher the resolution camera you’re using, the more critical focusing becomes – don’t go out for an upgrade of either camera or lenses until you’re sure that you’re getting all you can out of your current one. MT

For readers in Kuala Lumpur (and Singapore, when I’m there), I offer a Rangefinder Calibration Service for Leica M cameras.

____________

The inaugural mingthein.com photography contest closes 31 July 2012 – the more people entering, the larger the cash prize! Enter here

If you enjoyed this post, please consider supporting the site via Paypal ([email protected]) or via Ming Thein’s Email School of Photography – learn exactly what you want to learn, when you want to learn it. You can also get your gear from Amazon.com via this referral link.  Prices are the same as normal, however a small portion of your purchase value is referred back to me. Thanks!

Don’t forget to like us on Facebook!

Review: The Olympus ZD 75/1.8 for Micro Four Thirds

_7065273 copy

One of the more eagerly awaited lenses for compact system users, the Olympus Zuiko Digital 75/1.8 ED MSC (hereafter just referred to as the 75) is one of the final confirmations that Micro Four Thirds has finally come of age. We now have all of the popular lenses we need – including a fast 24-70/2.8 equivalent, fast primes at 24, 35, 50 (multiple choices) and 90mm equivalents; the very fast portrait tele like a 150/1.8 (for example, the subject of this review) or 200/2 is now here to round out the lineup. Curious, there’s no fast 50 from Olympus, and no fast AF 35 from any of the manufacturers; that Schneider-Kruzenach 14/2 looks extremely interesting indeed.

But we’re not here to talk about that.

_7065297 copy
Compared to the 12/2.

I picked up a final production sample 75 from Olympus Malaysia a couple of weeks ago, having handled a much earlier prototype; honestly, the only thing that seems to have changed is the lens’ finish color (a light champagne color over bare metal) now matches that of the 12/2 perfectly. Unfortunately, during my free days, the weather has not been as conducive for shooting as I would have liked; I look forward to updating the review again once I’ve had a chance to use the lens for a longer period of time.

_7065290 copy

The 75 is a superbly well built lens; it’s solid, but not unexpectedly heavy, say in the same way as a brass Leica lens. However, the only plastic to be found anywhere on the lens is the cap – I’m guessing the rest of it is aluminum, including the optional hood. It sits at the top of Olympus’ lens pyramid for M4/3, together with the 12/2 – and presumably other lenses too, at some point. Curiously, for a lens of this build quality and price (RRP around RM3,200 give or take; availability at retail end-July or early August) there is no weather sealing – unlike the much cheaper (and honestly, cheap feeling too) 12-50 EZ. So, don’t get this one wet – even if your OM-D can take it. The focusing ring is well damped and smooth to rotate, with about the right amount of resistance. Sadly though, it’s once again a fly-by-wire design, like every other M4/3 lens except the 12/2. A nice touch is that all markings on the lens are engraved deeply and painted in relief – including ‘Made in Japan’ on the bottom.

_7065294 copy
With hood.

I was also given the (optional) hood; it nearly doubles the perceived size of the lens, and is thoroughly enormous. It secures with a thumb screw (why no bayonet, Olympus?) and provides good shading of the front element. I’m told that it will ship with another cap that clips on to the end of the hood; this is absolutely required as there’s no way you can get your fingers in to remove the originally supplied cap once the hood is in place. It also reverses for storage. Again, given the price of the lens…not including a hood seems a little, well, cheap.

_5006054 copy
A Bollywood still. Olympus OM-D, 75/1.8
All images in this review may be clicked on for larger versions (and click through the Flickr landing page again).

That’s about all of the improvement points i’ve got, though. There’s a lot to like about the 75, and I’ll start with focusing speed. The 75 is a fast, silent, and most importantly, accurately focusing lens. Unless there are huge changes in subject distance, the lens snaps into focus with the same speed as the 45/1.8. I’m told this is due to the design philosophy employed; there’s only one element that moves to achieve focus, and it runs along a track/ rail. The first part of this means that a) the focusing assembly is light and therefore requires little energy to move quickly or change direction; b) the focusing action can be entirely internal. The latter portion contributes to speed – most lenses contain focusing elements that are attached to a rotating helicoid assembly; a linear motor rotates this entire assembly in either direction to move it back and forth by means of a static cam and follower. However, using a linear motor or magnets (I haven’t been able to find out which), movement of the focusing element along a track/ rail can be accomplished much, much more quickly – and without the grinding sound of rotating parts. Bottom line: don’t question it too much, it just works.

_5006010 copy
Two old men. Olympus OM-D, 75/1.8

On the subject of focusing, the 75 gets much closer than most 150/200mm equivalent lenses: the near focus limit is just 0.8m, which is even a little shorter than most standard 85mms. This makes for some impressively tight frames; just remember that your depth of field is also very shallow (though of course not as shallow as a true 150/1.8), and slight movement in either the camera or the subject will result in front or back focus.

_5005840 copy
Delivery man. Olympus OM-D, 75/1.8

You’ll notice that up til this point, I haven’t said much about the optics of the lens. We are now fortunate enough to live in a time when there are very few truly bad lenses, plenty of excellent ones, and a few really exceptional ones -but the difference between excellent and really exceptional is so small, that it takes near perfect conditions to see it. I think the 75 is one of those that manages to cross the excellent threshold into exceptional – at least in my mind. It delivers absolutely stunning resolution and sharpness across the frame, even from maximum aperture at f1.8; stopping it down increases your depth of field, but doesn’t really make much difference to sharpness. In fact, it’s one of the sharpest lenses I’ve ever used for Micro 4/3. There is a tiny improvement in microcontrast visible between f1.8 and around f2.8; things are pretty static from there on down, until you hit the diffraction limit somewhere between f8 and f11 (on the OM-D).

_5005912 copy
Mirrored thought. Olympus OM-D, 75/1.8

Resolution isn’t everything, of course – if the lens had an ugly bokeh signature, a horrible transition zone, odd color transmission, or worse, massive lateral/ longitudinal CA – then we might well write it off completely for any one of those flaws alone. Except…the 75 doesn’t suffer from any of those maladies; it’s one of those very rare things: a transparent lens. It delivers a neutral, accurate rendition of the subject with very little of its own ‘personality’ (read: charmingly artistic optical flaws) impinging on your vision. The only flaw I could find was a trace of spherochromatism (color fringes on bokeh) on very strongly backlit subjects; regular lateral chromatic aberration is completely absent, and there are no odd corner gremlins to be wary of, either. Place your subject wherever you wish, with confidence.

_5005848 copy
Searching for value. Olympus OM-D, 75/1.8

I think resisting the temptation to go to f1.4 or faster has paid off here – slower lenses of course being easier to make optically perfect than fast ones. Compared to the already excellent 45/1.8, there’s no contest – the 75 outperforms it in every way; it’s just that bit crisper, that bit clearer, that bit more vivd, and that bit more transparent. (Sadly, it’s also more than just a bit more expensive).

Overall, there are very few lenses I would place in the company of the 75 – the Nikon 85/2.8 PCE, perhaps; the Nikon 200/2 VR, definitely; the Leica 35/1.4 ASPH FLE; and I would go so far as to say it has that same level of clarity I’ve seen only so far in the Leica 50/2 APO ASPH. (Who knows if the 75’s ultimate resolution is as high as the 50/2 AA; it doesn’t matter, because it wasn’t designed to cover more than 17x13mm anyway.)

_5005905 copy
Yet another stop. Olympus OM-D, 75/1.8

The question is, though, what would you use this lens for? I think it’s actually a bit long to serve as the second lens in a two-lens kit; I’d still pick the 12 and 45mms for versatility, perhaps adding the 75mm if I feel I’m going to be shooting in a larger space. I suppose it would be good for portraiture if you have enough space to make it work – remember, we’re talking 150mm FOV equivalent here; alternatively there’s indoor sport (once we have a CSC that has decent continuous AF capabilities) or perhaps landscape work (though I’d go with the 100-300 and a tripod for more flexibility, since speed isn’t required).

_5005796 copy
Suspicious lunch. Olympus OM-D, 75/1.8

It’s good for generating very cinematic images; this is a lens that will only deliver one type of look, and you must both like and know how to use it – it’s not a flaw of the lens, but more a consequence of the angle of view. No doubt street photographers will find it extremely handy to get closer to or isolate their subjects, because its relatively small and unintimidating physical size is out of proportion to its magnification. Put the 75 on an OM-D body without hood or grip, and you’ve got a package that’s still smaller than the entry-level DSLR and kit lens most people are toting around these days. After a week with it, I feel that the lens is one which you will just find a use for – solely because the way it renders images is rather addictive. It was a sad day when I had to hand mine back (even sadder, because one normally doesn’t give things away on their birthday.)

_5005781 copy
Rainy traffic jam. Olympus OM-D, 75/1.8

I can’t help but think that to round out the lineup, Olympus needs a lens like this in 17/1.4, 25/1.4 and 300/4 flavors. MT

You can order the 75/1.8 here from B&H or Amazon.

____________

Visit our Teaching Store to up your photographic game – including Photoshop Workflow DVDs and customized Email School of Photography; or go mobile with the Photography Compendium for iPad. You can also get your gear from B&H and Amazon. Prices are the same as normal, however a small portion of your purchase value is referred back to me. Thanks!

Don’t forget to like us on Facebook and join the reader Flickr group!

appstorebadge

Images and content copyright Ming Thein | mingthein.com 2012 onwards. All rights reserved

_5006031 copy
Lego city. Olympus OM-D, 75/1.8

_5006059 copy
A hand in an inappropriate place. Olympus OM-D, 75/1.8

_5005983 copy
Diner and watcher. Olympus OM-D, 75/1.8

_5006024 copy
Between destinations. Olympus OM-D, 75/1.8

_5005973 copy
The older you are, the less you care about the rules. Olympus OM-D, 75/1.8

_5005779 copy
Veiled (but empty) garden of pleasures. Olympus OM-D, 75/1.8

Street photography – the ethics of photographing random strangers

_M8_L1025697bw copy
Paris, Leica M8, 21/1.4

Street photography is a genre that every photographer will try at least once in their career. Its broad appeal stems from the fact that you can do it anywhere; there’s a human element to the images that captivate the viewer, and if done well, can make for some extremely arresting images. However, it also requires balls. You have to get close enough to your subjects; and with people, invading personal space is uncomfortable (and possibly hazardous to health) for both photographer and subject. There’s a slight snobbishness about shooting with a longer lens, too – it isn’t seen as being hard core enough. In fact, these days, it seems if you’re not at f8, hyperfocal distance and sticking your camera and flash right up to somebody’s nose, then you’re not really doing street photography.

_N8_L1001710bw copy
London, Leica M8, Zeiss 21/2.8

There’s another approach, though. I think it’s much, much harder to shoot wide open with a relatively wide lens – say nothing longer than 35mm – and shoot without your subject knowing you’re there. This is what I like to call the stealth method – you don’t want to draw attention to yourself, and better yet, shoot without even bringing the camera to your eye. It takes a huge amount of skill and practice to nail shots this way, because you must be able to both guess focus correctly (if manually focusing) or know where your AF box is going to go – and at the same time know your lens well enough to visualize the field of view. You also have to be incredibly fast about it, because moments are fleeting and not repeatable. I’m not going to name names, but there are a number of popular ‘street photographers’ who don’t and can’t do this because it’s extremely difficult to do, and the yield rate is quite low for ‘perfect’ shots.

_N8_L1001358bw copy
London, Leica M8, Zeiss 21/2.8

*Shameless self plug: all of the images in this post, and all of my street photography, is done using the stealth method. When I was in practice and shooting hundreds of frames daily, I could zone focus accurately with my M8 and 21/1.4 at f2. Not anymore, sadly.

_M8_L1024264bw copy
Oxford, Leica M8, 21/1.4

However, the biggest benefit to this approach is the fact that you don’t intimidate or scare your subjects. If you don’t make somebody angry, they’re far less likely to be unhappy or actively object to you taking a photograph. And if people do notice, don’t stare back or give a stern look – though it’s usually human nature – wave and smile, and you’ll be surprised how many people wave and smile back at you. They may even strike up a conversation and let you get a few more interesting images.

_M8_L1026034bw copy
Paris, Leica M8, 21/1.4

There’s also the more subtle issue of quantum mechanics**. Basically, you as the observer won’t interfere with the scene – if you become a participant in the image, then the reaction you provoke from your subjects will necessarily disrupt whatever it was you initially wanted to capture. Bottom line: be anonymous, unmemorable, and blend in. If you’re in a touristy area, this might mean pretending to take random photos of everything and anything, whilst actually being very specific about what you’re looking for. Or it may mean using a compact and holding it in your hand, always being aware, and getting a grab frame in whenever you can. It means having to be both anticipative and reactive; you’ve got to be a bit of a psychologist to figure out who’s going to do what when, so you can visualize the scene in advance and be ready to capture it.

_M9P1_L1006592bw copy
Prague, Leica M9-P, 50/1.4 ASPH

**I deal extensively with the Schrodinger paradox and its application to photography here.

This brings me to the real meat of this article: what are the rights and wrongs of street photography? A comment by one of my readers on another post inspired the post; yes, I do shoot a lot of random strangers, especially when traveling, and there are often shots I see but may not take for various reasons. I don’t think it’s so much lack of chutzpah as the feeling that it may not be socially acceptable or ethically appropriate in various situations; photographing beggars and cripples is one of those things. Using people to portray contrasts or as anonymous human-scale elements in a frame is fine, but the one golden rule I stick to is that I’ll never take a shot that’s demeaning or potentially defamatory. You wouldn’t want the somebody to do the same to you, would you?

_M9P1_L1007473bw copy
Prague, Leica M9-P, 28/2.8 ASPH

Then there’s the issue of where and when – in most countries, you’re allowed to photograph in public effectively without restriction. There may be certain rules on tripod use because of obstruction or perceived ‘commerciality’ of the images, but that varies from place to place; in any case, most of the time I don’t use a tripod because of the weight and inconvenience. However, private property is exactly that: private. So if you’re told not to photograph, then you probably shouldn’t. And never use images for commercial or stock use if you don’t have the agreement of any identifiable individuals in the image. (Editorial use is different; you don’t need releases for people in news stories, but you also can’t really sell the images for anything else other than news.) Finally, I would be careful in politically sensitive countries or around police or other law enforcement agencies – they may have good reason for you not to photograph something, and ignorance isn’t a defense in court.

_M9P1_L1001602bw copy
Kuala Lumpur, Leica M9-P, 50/0.95

Finally, remember that in an increasingly connected world, we aren’t anonymous. It’s entirely possible for somebody to see themselves on another site somewhere; in fact, it’s happened to me a few times. It may be because I just look at more images than the average person and thus have a higher chance of seeing myself somewhere, but I’ve also had people message or email and say they were the person in the shot. I usually just send the person a copy of the image by way of thank you; in any case, you can’t do anything commercially with it, so there’s no harm in releasing a copy.

_M9P1_L1007421bw copy
Prague, Leica M9-P, 28/2.8 ASPH

I think if you stick to what your gut tells you about common sense and public etiquette, then you should be safe. Unless you’re a photojournalist, it isn’t worth getting the shot and then getting in trouble for it – there are exceptions, but they’re far and few between. Practice being fast and stealthy, but also courteous and friendly; and you’ll find that street photography isn’t so difficult after all. MT

____________

Visit our Teaching Store to up your photographic game – including Photoshop Workflow DVDs and customized Email School of Photography; or go mobile with the Photography Compendium for iPad. You can also get your gear from B&H and Amazon. Prices are the same as normal, however a small portion of your purchase value is referred back to me. Thanks!

Don’t forget to like us on Facebook and join the reader Flickr group!

appstorebadge

Images and content copyright Ming Thein | mingthein.com 2012 onwards. All rights reserved

Don’t forget to like us on Facebook!

_M8_L1025077bw copy
London, Leica M8, 21/1.4 ASPH

Inspirations from older cameras: the Nikon D2H, part 2

The second part of the inspirations series in tribute to the Nikon D2H…part one was here. MT

_MT70034bw copy.jpg
The ballet

_MT87548 copy.jpg
Out of place and time

_M103023 copy.jpg
Snowy echoes

_MT52800bw copy.jpg
Column wheel chronograph

_M101532bw copy.jpg
Fur

_MT76744 copy.jpg
Cattle egret

_MT25431bw copy.jpg
Something’s going on in the square

_MT98674bw copy.jpg
Wondering where to put it

_MT87306 copy.jpg
Temple spires

_MT90350 copy.jpg
A bird portrait

_MT68786 copy.jpg
Dragonflies

_MT51257bw copy.jpg
London through the gap

____________

The inaugural mingthein.com photography contest closes 31 July 2012 – the more people entering, the larger the cash prize! Enter here

If you enjoyed this post, please consider supporting the site via Paypal ([email protected]) or via Ming Thein’s Email School of Photography – learn exactly what you want to learn, when you want to learn it. You can also get your gear from Amazon.com via this referral link.  Prices are the same as normal, however a small portion of your purchase value is referred back to me. Thanks!

Don’t forget to like us on Facebook!

Long term review: The Carl Zeiss ZF.2 2/28 Distagon T*

_5100_DSC1460 copy
A cinematic lens needs a cinematic product shot.

I’ve been lucky enough to own and use a lot of lenses in my time. And some of them pretty exceptional – off the top of my head, there’s the Nikon 200/2; the Leica 50/0.95 Noctilux-M ASPH; the Leica 21/1.4 Summilux-M ASPH; the Leica 35/1.4 ASPH FLE (you can probably see where this is going); the Leica 50/2 APO; the Nikon 85/1.4 G; the Zeiss ZF 2/100 Makro Planar; the Nikon 85/2.8 PCE…suffice to say, it would be difficult to pick one as an outright favorite. But I think if there ever was a contender, then it’d be the Zeiss ZF.2 2/28 Distagon T*.

_5100_DSC1424bw copy

Firstly, it’s not a technically perfect lens by any stretch of the imagination. In fact, it tends to score quite lowly on common testing metrics – especially in the corners – because its defining signature is highly pronounced field curvature. Imagine a ball around the camera; the plane of focus for this lens follows the surface of that sphere. It lends a very unique rendition to subjects shot with it because it has the property of emphasizing the out of focus areas by making them effectively further away from the camera. This, in turn, results in greater separation between the subject and background – it’s not always obvious, but if you shoot the same scene with a relatively flat-field lens like the Nikon 24/1.4, you can instantly see the difference.

_5100_DSC1558 copy
Proper DOF scales, but they’re too short.

This property makes for great bokeh and a very cinematic rendering. In fact, the earlier Contax/ Yashica mount version of the lens is known as the ‘Hollywood Distagon’ for its huge popularity amongst filmmakers for use in indoor scenes; I wouldn’t be surprised if the majority of these lenses landed up being converted to some cinema mount. As far as I can tell from their block diagrams, the ZF and ZF.2 versions are almost (if not exactly) identical optically, with some minor updates to coatings and the like – as well as a different mount, of course.

_7022462 copy
Dessert. Nikon D700, ZF2 2/28

On axis, there’s plenty of sharpness at every aperture. You cannot focus and recompose with this lens; use either live view or AF assist to focus edge subjects, else they will be out of focus. f4 seems to be the optimal aperture, but frankly there’s not a lot of difference from wide open. However, you’ll need at least f5.6 on full frame before your depth of field covers the effects of field curvature completely. Similarly, the lens vignettes noticeably at f2 – perhaps 1-1.5 stops in the corners – which almost disappears by f5.6. All of this adds to the flavor.

_7013522 copy
Fire. Nikon D700, ZF2 2/28

The one optical quality that isn’t so hot is a propensity for purple fringing on bright contrast edges, especially noticeable around in-focus backlit subjects; it goes away with stopping down. It doesn’t look like CA, which makes me suspect that it’s an odd interaction of the older lens design with digital sensors. For most subjects, it’s fairly easy to correct by masking out the affected area and desaturating the magenta channel. There is some slight CA in the corners, but it’s almost completely gone by f4. Thanks to the excellent coating, flare is almost entirely absent – point the lens into any light source you wish, just watch your eyes. It’s a great lens for shooting contra-jour; what little flare does show (if the angle is just right) is mild and cinematic.

_7023450 copy
That’s the most flare I’ve ever been able to get out of this lens. Nikon D700, ZF2 2/28

The ZF 28 has a rounded-polygon aperture with 9 blades; it isn’t perfectly circular, but I can’t complain about the bokeh – it’s absolutely beautiful, and renders even complex backgrounds in a pleasingly melted fashion. There are very slight highlight fringes on out of focus point sources, but the transition is fairly gentle so it’s not at all distracting.

_7004487 copy
All about the bokeh. Nikon D700, ZF2 2/28

I find that the Zeiss ZF lenses seem to fall into two camps – there’s those with a very ‘crisp’ rendition, like the 2.8/21 Distagon, the 2/50 Makro-Planar and the 2/100 Makro-Planar, and those with a softer rendition, like the 1.4/50 Planar and 1.5/85 Planar. The 2/28 seems to straddle those two camps – it has higher contrast than the latter group, but not quite as much punch as the former. I personally find it very pleasing.

_7004875bw copy
Waiting. The 28 Distagon’s excellent tonal separation makes for great B&W conversions, too. Nikon D700, ZF2 2/28

Like all Zeiss lenses, microcontrast is excellent thanks to the T* coating. Speaking of coatings, the first few elements of the lens actually seem to disappear when you look into the front – this speaks volumes about little light loss there is going on inside the optics. This translates into excellent light transmission – T2.1, in fact. (It’s the same lens optically as the Zeiss CP.2 T2.1/28, but with different focus gearing and a much smaller price tag.)

_7021599 copy
Kitchen portrait. Nikon D700, ZF2 2/28

Being a manual focus lens, you’re probably wondering how practical it is for regular photography – the answer is that it’s not too bad, but you’ll definitely see the benefit in having a split prism or similar screen installed. All modern DSLRs have focusing screens with a narrow scatter angle that are optimized for brightness with slow zooms rather than focusing snap; in fact, it’s a slow change that’s been ongoing since the beginnings of autofocus.

_3100_DSC0067 copy
Untitled, Nikon D3100, ZF2 2/28

You’ll probably find it nearly impossible to focus with an entry level APS-C DSLR; their focusing screens don’t have anywhere near enough magnification or ‘snap’ to make life easy. Although you can use the focusing aids – the green dot and arrows for Nikon users, or the beep for Canon shooters – depth of field with the 28 Distagon is shallow enough that you need to take care, because there’s a bit of range in the focus ring position for which the dot will stay lit or the beep will sound. And the extreme ends of that range will be clearly out of focus if the lens is shot wide open. You could stop down and use the DOF scales, of course, but the focus ring throw is a bit too short and the DOF scales too incomplete for that.

_7022547 copy
Coffee time. Nikon D700, ZF2 2/28

One nice feature is that the lens focuses very close indeed – 25cm from the sensor plane – for some interesting closeup angles. Optical performance remains consistently excellent even at this focusing distance.

You’ll notice I haven’t said much about construction – that’s a good thing. Use any of the ZF or ZE lenses (optics are of course the same) and you’re in for a treat. They’re solid, fully metal (anodized aluminum barrels, I believe) with chromed brass mounts and buttery smooth focus throws; just enough resistance not to move or be nudged, but with a really nice tactile feel that reminds me of a well-damped heavy piston moving through oil, or something similar. For want of a better analogy, the lenses feel like scientific instruments. On the ZF.2 versions, there’s an aperture ring that locks at f22 for electronic control on modern Nikons. The ZF version has ‘rabbit ears’ for coupling with earlier cameras’ metering pins. And the ZE version is fully electronic with no aperture ring at all.

_7024569 copy
Stair #173. Nikon D700, Zeiss ZF2 2/28

There are a few areas for improvement, though – while the hood bayonet mechanism is beautifully made and locks with a nice positive detent, the hood itself is easily dinged and scratched on the rim if bumped into something. A rubber lip would be nice. And the velvet flocking on the inside of the hood might be great at preventing stray light and flare, but it’s also very good at picking up dirt (especially light-colored dirt) and seems to peel off the metal quite easily. To be honest, I land up not using mine a lot of they time because I’m particular enough to like to keep my equipment pristine. Finally, the lens caps need help – there’s not enough thread on the edges to keep them securely gripping the filter ring; the springs aren’t strong enough to keep the caps from moving if bumped; and they’re impossible to remove if the hood is attached. I’ve replaced all of my Zeiss caps with Nikon ones.

_7013841 copy
Mt. Yotei wears a hat. Nikon D700, ZF2 2/28

If you think I’m gushing about this lens, it’s solely because of the pictorial results I get from it justify it. To my eyes, they have a special quality that I rarely see, and just makes images that pop – with saturated, slightly warm colors, great microcontrast separation, and a very three-dimensional rendering. And the enjoyable tactility of the thing as an object doesn’t do any harm, either. Frankly, if they did an M-mount version with thes same optical formula – size be damned – this would be permanently welded to my M9-P.

_7008766 copy
Perbadanan Putrajaya. (Vignetting added). Nikon D700, ZF2 2/28

How does it compare to the other 28s or 28 equivalents I’ve used? This is an interesting question, because the new Nikon AFS 28/1.8 G (which I recently reviewed here) seems to actually have a lot of the same optical properties as the Zeiss – field curvature, great central sharpness, smooth bokeh, high transmission – and most usefully, autofocus. Honestly, I think the Nikon comes very close; however, the one missing ingredient is microcontrast – it just doesn’t pop in the same way as the Zeiss. Color saturation is a little lower, too. I’ve come to the conclusion that if I’m running and gunning, I’ll take the Nikon, but if I’ve got time to craft the image, then it’s the Zeiss all the way. I don’t think any of the other Nikon mount 28s are in the running, even the legendary f1.4; admittedly, it’s been a long time since I’ve used one. Both lenses have some distortion, which would probably render them unsuitable for architectural work without correction; I think they make much better contextual documentary lenses anyway.

_7012699 copy
Train driver. Nikon D700, ZF2 2/28

I admit I’m a bit of a 28mm FOV junkie, so I’ve tried many lenses on different mounts and formats; in my mind, the two interesting competitors are the Leica 21/1.4 Summilux-M ASPH and Zeiss ZM 2.8/21 Biogon, both on the 1.3x crop Leica M8 rangefinder. The former is the only wide I’ve ever used that gives the same sort of subject separation as a telephoto; the latter has similar 3D qualities to the ZF 2/28, and in fact reminds me quite a bit of the ZF 2.8/21 Distagon, too. Unfortunately, I haven’t had a chance to evaluate the Leica 28/2 Summilux ASPH in any great detail, and the Leica 28/2.8 ASPH is very sharp, but a little characterless. The ZM 2.8/28 is a very competent lens, but missing that little something I can’t quite put my finger on.

_7009842 copy
Riding the big yellow snake. Nikon D700, ZF2 2/28

I don’t say this lightly, but despite its optical imperfections, the ZF.2 2/28 Distagon joins my personal pantheon of great lenses – if you’re a fan of cinematic rendering and the 28mm FOV, then this is the lens for you. It positively shines on full frame, but will do well on APS-C cameras too – if you can focus it reliably. Now, if only they’d make an autofocus version…MT

Note: some of you may be wondering why none of the images from this review were shot with the D800E; the honest answer is because I haven’t had a chance yet. However, my initial testing shows that the lens continues to perform as expected and without issue on the higher-resolution sensor.

Addendum: If you’re a Canon shooter, I actually recommend buying the Nikon (ZF/ZF.2) versions if you have a mirrorless cameras as well – you can then use this lens on the CSC with an adaptor, and retain full aperture control. This isn’t possible with the Canon version as the diaphragm is activated electronically.

Both versions of the lens are available here from B&H or Amazon.

____________

Visit our Teaching Store to up your photographic game – including Photoshop Workflow DVDs and customized Email School of Photography; or go mobile with the Photography Compendium for iPad. You can also get your gear from B&H and Amazon. Prices are the same as normal, however a small portion of your purchase value is referred back to me. Thanks!

Don’t forget to like us on Facebook and join the reader Flickr group!

appstorebadge

Images and content copyright Ming Thein | mingthein.com 2012 onwards. All rights reserved

_7004405bw copy

Roots. Nikon D700, ZF2 2/28

Inspirations from older cameras: the Nikon D2H, part 1

Possibly one of the most unpopular Nikons ever, and certainly the most derided professional DSLR – the D2H had a mere 4.2MP (the 0.2 mattered, when you only had 4.2 in total) when launched in 2004; its direct competition, the Canon 1D Mark II, had double that at 8MP. Worse still, Nikon’s much feted low noise JFET LBCAST sensor was in fact extremely noisy and pretty much unusable at ISO 1600 and above; an updated version – the D2Hs – actually had very good high ISO performance, but by then, the damage was done.

What the camera did do well was be insanely responsive – from the lighting-fast AF system, to 40ms shutter lag and hair trigger buttons, to 8fps shooting, it just felt alive. It was also a great teaching tool, precisely because it was so unforgiving of exposure or WB errors that you just had to learn to get it right, or not get a useable shot at all. When you did get it right, the D2H punched way above its pixel class – it resolved about the same amount of detail as my 6MP D70, and had very clean, high-acuity pixels; the unique sensor architecture also made for a beautiful tonal response, which doesn’t seem to exist in any camera today – the closest we get is the Leica M8 and M9.

I shot nearly two hundred thousand frames with this camera – picking the best few is going to be tough, so we’ll do this in a few parts. Part one is here, and part two follows. Enjoy! MT

_M102965 copy.jpg
Blue mountains

_MT52393 copy.jpg
Early watch work

_MT84782 copy.jpg
Scarlet ibis

_MT40136 copy.jpg
I wish it were real

_MT87546 copy.jpg
Umbrellas in Bangkok

_MT18359bw copy.jpg
Rush hour in London

_MT42076bw copy.jpg
It’s suspicious because the book is upside down

_MT98459 copy.jpg
Swords

_MT15600 copy.jpg
Inside the Arc de Triomphe

_MT77109 copy.jpg
Crowned pigeon

____________

The inaugural mingthein.com photography contest closes 31 July 2012 – the more people entering, the larger the cash prize! Enter here

If you enjoyed this post, please consider supporting the site via Paypal ([email protected]) or via Ming Thein’s Email School of Photography – learn exactly what you want to learn, when you want to learn it. You can also get your gear from Amazon.com via this referral link.  Prices are the same as normal, however a small portion of your purchase value is referred back to me. Thanks!

Don’t forget to like us on Facebook!

Just two more weeks for entries…

…for the inaugural Mingthein.com photography contest! Remember, the more entries we get, the bigger the prize pot – and it’s 100% meritocratic, open to anybody, anywhere, and you retain all rights to your images.

Full details and how to enter, here. MT

It’s my birthday – so I’m giving you all a present

_8014866 copy
Sharing is caring. Nikon D800E, Zeiss ZF.2 1.4/85 Planar

Product of the labors of the last few weeks, the observant of you will notice that there’s now a new tab on the second line called CAMERAPEDIA! It’s a 22,000+ word monster that contains a concise opinion on every piece of equipment I’ve ever used (and can remember) – that’s a lot of gear, folks. I figure instead of asking me if X or Y is any good, I might as well put all of the info in one easy to access place. It also links to my detailed reviews, where I have one. It’s a live document, which will be updated as I use more stuff. The best way to use it is use your browser’s built in search function – either command-F or ctrl-F – and type in the name of whatever it is you’re looking for. For lenses, just the focal length should be enough. Everything is in alphanumeric order.

It can be found here, and also accessed via the CAMERAPEDIA! button next to ‘Contact/ Ask a question’.

Enjoy! MT


Quick update – the competition is coming along nicely; we’ve got 20+ great entries so far, but come on folks, I see plenty of great images in the newly-minted Flickr pool that would qualify and do well – but no corresponding entries! Remember, the more people entering, the larger the cash prize. Entry details can be found here.

____________

Visit our Teaching Store to up your photographic game – including Photoshop Workflow DVDs and customized Email School of Photography; or go mobile with the Photography Compendium for iPad. You can also get your gear from B&H and Amazon. Prices are the same as normal, however a small portion of your purchase value is referred back to me. Thanks!

Don’t forget to like us on Facebook and join the reader Flickr group!

appstorebadge

Images and content copyright Ming Thein | mingthein.com 2012 onwards. All rights reserved

Clients from hell (or, some light partial humor)

I think a lot of working pros will be able to relate to this list, see the satire in it, and then commiserate with me that I was only partially joking…

Without further ado, in no particular order:

– Those who ask for endless retouching revisions, all of which creep increasingly outside scope – masking out figures to place from a location shot to garnish a text page in a brochure

– Those who haggle price with you til the last cent, then pay late (big companies are notorious for this; it’s as though there’s an internal KPI for creditor days – the higher the better)

– Those who haggle price with you til the last cent, and don’t pay at all

– Those who haggle price with you til the last cent, agree, then question every item on the bill again at payment date whilst of course contesting half of them

– Those who after agreeing price and scope, sneak something in under the pretense of ‘oh, can you also help me out with something small?’ (which is of course neither small nor easy)

– Those who pay for a fixed number of shots but ask for all of the raw files or expect at least 50% more final delivery shots, knowing you’ll produce far more than agreed to ensure the scope is completely met

– Those who ask for uncompressed maximum resolution 16bit CMYK TIFF files, then complain they can’t open them because their computers have ‘insufficient system resources’

– Those who don’t actually pay your work more than a cursory glance before finding one shot they didn’t like in the 200 you delivered, then demanding a discount even though they loved everything else

– Those who specifically look for one image they don’t like, so they can complain to you non-stop about it afterwards so they can get a discount

– Those who think their problems with other unrelated contractors are your fault, and either use that as an excuse as to why they can’t pay, or why they expect more from you

– Those who ask for your style, then hand you a book/ magazine/ menu and say ‘copy this’

– Those who approve every single shot on the camera review screen, then complain that you didn’t give them what they asked for afterwards

– Those who don’t supply any of the agreed props or items

– Those who supply you with objects or food to be photographed that are obviously unpresentable – they may be scratched, dented, cracked, partially eaten, or generally used

– Those who complain that your make the food look overcooked, when in fact that was the way it came out of the kitchen – identifiable by the fact that only the roast looks too dark, but every other object on the plate looks fine

– Those who don’t supply any of the agreed equipment/ props/ garnishes/ sauces/ spare parts

– Those who aren’t on time, and worse still, don’t tell you that they’re running late

– Those who want fully processed and retouched images the day after the shoot

– Those who expect you to reschedule all of your other shoots to accommodate them

– Those who leave all decisions to their creative agency, whose vision is substantially different to their own…you can imagine what happens after that

I’ve just realized that this list isn’t that funny after all, I’ve had some clients who qualify for almost every single item…MT

____________

Visit our Teaching Store to up your photographic game – including Photoshop Workflow DVDs and customized Email School of Photography; or go mobile with the Photography Compendium for iPad. You can also get your gear from B&H and Amazon. Prices are the same as normal, however a small portion of your purchase value is referred back to me. Thanks!

Don’t forget to like us on Facebook and join the reader Flickr group!

appstorebadge

Images and content copyright Ming Thein | mingthein.com 2012 onwards. All rights reserved