Lens review: The Olympus ZD 45/1.8

_PM05660 copy
Prague sunset by the river. Olympus E-PM1 Pen Mini, ZD 45/1.8

_8012322 copy

Last year’s lens surprise of the year was the Olympus M.Zuiko Digital ZD 45mm f1.8 MSC – it’s a lens that was announced with the E-P3, E-PL3 and E-PM1, seems fairly ordinary and innocuous on spec, but yet delivers in boatloads. It’s both cheap and expensive at the same time; let me explain why. Most conventional SLR mount 50/1.8 lenses go for $100-150 or thereabouts. This lens is closer to $300, and it’s all silver-painted plastic except for the mount – to be honest, it feels kinda cheap. That’s expensive. But, it doesn’t use a conventional double-Gauss optical design:


Image from Olympus. Purple bits are E-HR lenses, whatever that means. I suspect it’s ED glass or something similar. I certainly don’t see any purple elements inside my lens 😛

Whoa, what’s this? 9 elements in 8 groups? Not so simple. I suspect the reason Olympus chose this optical design was primarily due to the very short back flange distance of Micro Four Thirds; double Gauss designs work well if the back focus distance is close to the focal length, which it is for most SLRs. Changing the optical design to keep the lens compact introduces all sorts of other issues on its own, including corrections for the various complex optical aberrations that occur once a lens design becomes asymmetric.
_PM05089 copy
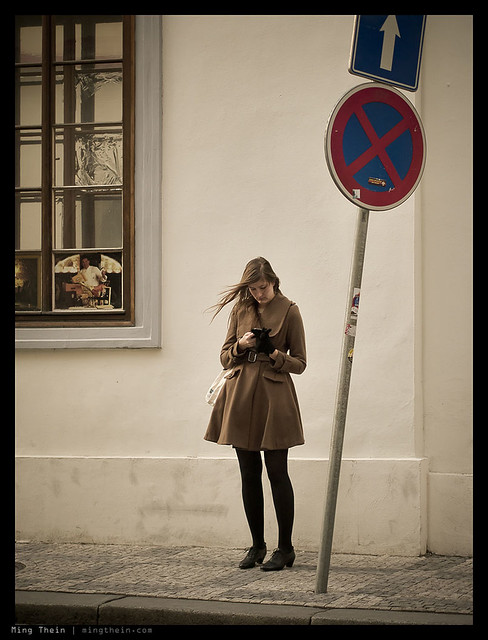
Waiting for that text. Olympus E-PM1 Pen Mini, ZD 45/1.8

Secondly, it has a very fast coreless focusing motor – Olympus brands these lenses as ‘MSC’, which means you won’t hear the focusing motor working while recording videos – a nice touch. It’s also blazingly fast, at least with the current generation of Olympus M4/3 bodies. Sadly, like all of the other M4/3 lenses (except the 12/2), there’s no full time focus override; it’s fly-by-wire only and you have to put the camera into MF mode on the body before the ring does anything. Still, it’s nicely damped if a little dead-feeling.

_PM05240 copy
Night in the Malastranska, Prague. Olympus E-PM1 Pen Mini, ZD 45/1.8

But never mind all that, how does it perform? In a word, brilliantly. It’s one of my favorite lenses for Micro Four Thirds. If I had to describe it in a word, it would be ‘transparent’. That’s probably a good thing for an optical device; however, what I mean is that the lens itself doesn’t impose any of its own optical quirks or peccadilloes on the image; it does its job moving light from the subject to the sensor, and then gets out of the way. It delivers sharpness across the entire frame wide open at f1.8; there is some slight improvement at 2.8, but it isn’t really necessary to stop down – perhaps this may be different on the higher density 16MP sensor of the OM-D, however.

_PM02054bw copy
All about the hair. Olympus E-PM1 Pen Mini, ZD 45/1.8

Fringing is almost entirely absent, as is longitudinal chromatic aberration; a sign that the optical designers have done their job very well indeed, and the lens is working well with the sensor. (In case you’re wondering about in-camera CA removal, I’m not shooting JPEG and the RAW files are run through ACR like the rest of my workflow – there’s no special treatment unless Olympus is doing something with the RAW files.)

_PM00679 copy
Echoes of red. Olympus E-PM1 Pen Mini, ZD 45/1.8

The lens is contrasty, but not that contrasty; it strikes a nice balance between sufficient global contrast and maintaining the microcontrast that is so important to preserving fine detail structures. In fact, I prefer lenses with lower macro contrast for digital use as they help to maximize preservation of dynamic range; this is especially important with smaller sensors that have lower dynamic range, like those used in M4/3 cameras.

_PM00576 copy
Ninja demolition. Olympus E-PM1 Pen Mini, ZD 45/1.8

Color reproduction is on the warmish side of neutral. No yellow casts like I see with Sigma and Tamron lenses, but a pleasing warm hue shift. Bokeh is also neutral to good; there are times when separation between subject and background is a little harsh – typically when the subject is fairly close to the background – but it’s also pretty darn good under ideal conditions.

_PM00530 copy
Mirrors. Olympus E-PM1 Pen Mini, ZD 45/1.8

Although it ‘only’ focuses down to 0.5m, it’s worth remembering that on Micro Four Thirds, 45mm is really a 90mm FOV, and there no non-macro lenses for full frame cameras that focus this close – it’s 0.8m if you’re lucky, or 1m if you’re using a rangefinder. The lens can be used handheld at arms’ length – i.e. live view style – and that’s how I’ve been using it so far; however, you’ll need to keep your shutter speeds up, because frankly the in-body stabilization isn’t that effective. I suppose if you were using this on the OM-D it’d be a different story as the built in EVF would let you get a bit more stability by bracing the camera against your eye.

_PM02093 copy
Dusk and the sign. Olympus E-PM1 Pen Mini, ZD 45/1.8

The 45/1.8 makes up part of my M4/3 ‘trinity’ – the 12/2 and 20/1.7 being the other two, though I might replace both with the new Voigtlander 17.5/0.95 (35mm equivalent, fast and versatile – though I prefer 28, and sadly there are very few fast 28mms). It forms a great lightweight travel kit which is still capable of delivering outstanding optical quality. It also works very well as a secondary camera in conjunction with something else; at the end of last year, I shot in Europe with a Leica M9-P, 28 and 50mm lenses as my primary body, with the Pen Mini and 45/1.8 in a coat pocket for those times I needed a little extra reach – made a great compliment to the rangefinder.

_PM01974 copy
Graffiti. Olympus E-PM1 Pen Mini, ZD 45/1.8

Even on the slightly higher density OM-D sensor, this lens is a gem; sharpness doesn’t seem to be compromised anywhere, but there is a very slight veiling flare that goes away about half a stop in. It has a lightness and transparency (lower macro contrast, but higher micro contrast perhaps?) that I don’t see with the 12/2 or 20/1.7, and it’s something that makes the way it renders very natural and appealing.

_5001020bw copy
A classical portrait, second version. OM-D, 45/1.8. The first version is here

Are there any negatives? Well, yes. At the price, you can’t expect fantastic build quality. Frankly, it feels about on par with the kit lens; Olympus chose to put all of the production money into optics rather than cosmetics, which is a decision I can agree with. However, the leaves the lens feeling just a tiny bit fragile; the plastics don’t feel that thick or robust, and that little blanking ring on the front (ostensibly to cover the hood mount threads) doesn’t really stay in place securely, and isn’t that well made, either.

Still, all that aside, this is a highly recommended lens for Micro Four Thirds users. It isn’t good enough that I’d go out and buy a Micro Four Thirds camera just for this lens alone, but then again the thought of having a fast portrait 90mm equivalent in a pocket is quite appealing, and the cost of a Pen Mini plus this lens is much cheaper than many full frame lens options on their own. Of course, you do get the DOF profile of a 45mm lens, not an 85 or 90mm lens, so don’t expect crazy thin DOF. There’s adequate separation, but true bokeh enthusiasts will probably have to wait for the upcoming ZD 75/1.8 – a lens which I’m pretty excited about, actually. MT

_PM01718 copy
Sunset in the city. Olympus E-PM1 Pen Mini, ZD 45/1.8

Get the Olympus ZD 45/1.8 here from B&H or Amazon.

____________

Visit our Teaching Store to up your photographic game – including Photoshop Workflow DVDs and customized Email School of Photography; or go mobile with the Photography Compendium for iPad. You can also get your gear from B&H and Amazon. Prices are the same as normal, however a small portion of your purchase value is referred back to me. Thanks!

Don’t forget to like us on Facebook and join the reader Flickr group!

appstorebadge

Images and content copyright Ming Thein | mingthein.com 2012 onwards. All rights reserved

POTD: Urban geometry

_DL5T_L1000615 copy
Outtake from a recent architectural assignment. Look out for a future On Assignment post about shooting buildings. Leica D-Lux 5.

Although most architectural images are shown with nothing but the building, in a vaguely abstracted product-shot-kind-of-way, I personally find the images I like best are the ones which have some human scale or context included; it’s otherwise tough to gauge scale of the building, how it fits into its environment, and more importantly, how does the end user perceive it? Do they use the intended main entrances and traffic routes, or like water, do people find a path of lower resistance? Are there flow routes that the designers didn’t envision, i.e. connections between two back streets? Does the vehicular circulation work? How does the facade look from a human perspective? Once again, it comes back down to understanding something about your subject before you shoot it. MT

Photoessay: The Speake-Marin Immortal Dragon

One of the more unusual watches I’ve photographed, the Immortal Dragon is both immaculately finished on the dial and the movement – the watch has both serious horological pedigree (being from the atelier of highly respected independent watchmaker Peter Speake-Marin and some pretty unique aesthetics. The dial was hand-engraved in relief by master engraver Kees Engelberts, and the watch is a piece unique destined for the Asian market in honor of the current lunar year of the dragon. MT

This series shot with a Nikon D700, AFS 60/2.8 G Micro, and Zeiss ZM 2.8/28 Biogon with Leica M-F adaptor and multiple speedlights.

_7055995 copy

_7055968 copy

_7055992 copy

_7055950 copy

_7055834 copy

_7055766 copy

_7055925 copy

October 2012 Tokyo Workshop

_3030515 copy
Fear of straying off the beaten path. Nikon D3, 24-70/2.8

I’m in the early planning stages of a small (3-5 participant) private workshop in Tokyo this October (2012). Dates aren’t fixed yet, that’ll depend on the participants’ schedules. Details as follows:

– 3 days, based in Tokyo (but I’m not ruling out quick side trips to appreciate the autumn foliage)
– Two days of shooting – covering whatever specific topics the participants would like to learn, but I have some ideas (travel, landscape, photojournalism and making sequences of images into stories, learning composition fundamentals with compacts, night photography etc.)
– One day of editing/ selecting images and photoshop post-processing

Depending on the number of participants, costs will range from US$1,300 to US$2,200; this is for tuition only and assumes you live in Tokyo, or can easily get there. Would be ideal for Asian residents, as it’s just a short commute.

Please drop me an email or leave a comment below if you’re interested.

Thanks! MT

Balancing content and technical perfection

_M224835 copy.jpg
Base jumping off the KL Tower. There are no do-overs for either the shot or the participants. Nikon D200, AI-P 500/4

Suppose you had one opportunity to get the shot: what do you do? The obvious answer is go for broke; who cares if it’s slightly overexposed, out of focus or the framing is a little off. Maradona is probably only going to use the ‘hand of god’ once; the millennium is only going to roll around once in your lifetime. Bigfoot will probably only appear once, and only in out of focus or foggy areas*.

That’s one end of the spectrum: it’s all about the content rather than the execution.

_7045452 copy
Benzinger Skeleton. Full control of everything, full repeatability. The second, third, fourth and fifth shots would look exactly the same.

The opposite end would be fine art still life: any one of the aforementioned photographic sloppinesses would probably get you thrown out of the gallery, unless perhaps you were very, very good at explaining why out of focus images represent the current zeitgeist of society, how rushing around and achieving complete form and ‘just getting it done’ rather than doing it well – quantity over quality – are also paradigms of modern corporate living.

_MT98674bw copy.jpg
What’s this? A situation in the middle: you can anticipate what’s going to happen and be prepared, but you don’t get a do-over. You should be able to get a perfect result with practice.

Enough sarcasm. Basically, if you’re going to create a still life, you’d better damn well be in control of the elements, or it just makes you look sloppy and incompetent as a photographer. There’s no way you can excuse compositional errors, slanted horizons, overexposure or things intruding into the edges of the frame. Studio commercial photography also falls into this category; it’s 100% controlled, and if you can’t get your image right when there isn’t anything left to chance – and the shot is repeatable – then you should probably hang up your camera.

_M9P1_L1003919bw copy
It wouldn’t have worked without the man. Schonbrunn Palace, Vienna. Leica M9-P, 28/2.8 ASPH

And that’s where the dilemma comes in: for photography that isn’t clearly at one end of the spectrum or the other, where do you draw the line of acceptability? If there is no expectation to create perfection, is there any necessity? In fact, if the expectation is of something slightly imperfect – to capture the chaos of reality – then perhaps perfection would actually weaken the impact of the overall image.

_M9P1_L1005830bw copy
I like the lyricism and movement in this image; in fact, nothing is perfect. It was underexposed because the meter gets fooled by backlit situations so I went manual and got the exposure slightly wrong; then the limitations of my equipment meant motion blur in the subject was a certainty, so I decided to work with it; finally, none of the verticals are straight – it bothers the perfectionist in me, but I bet you it wasn’t the first thing you noticed about the image. Malastranska, Prague. Leica M9-P, 28/2.8 ASPH

That last point isn’t immediately obvious. In fact, it’s quite counterintuitive; I was only made aware of it because I personally tend to drift towards the technical perfection end of the spectrum, and various clients have commented that my images look a little too perfect in some ways, especially for photojournalistic work. For studio photography, on the other hand, my clients love the attention to detail.

_7008086 copy
If This Looks Too Perfect, That’s Because It Was Staged. Artfully constructed scene for a promotional video. Nikon D700, Zeiss ZF 1.4/85 Planar

A year or two ago, I would have thought that the ideal combination would be to nail content, composition and the technical aspects of the exposure to produce a perfect image; however, this is not only nearly impossible to do, but somehow also results in slightly lifeless images. The soul is missing – or perhaps it’s not so much soul per se as humanity represented by the slight imperfections which impart the character of the photographer onto his or her image.

_M9P1_L1005824bw copy
More lyricism. Malastranska, Prague. Leica M9-P, 28/2.8 ASPH

Perhaps I’m just confusing myself with the philosophy now, because this is my current photographic worldview:
1. We strive for perfect images.
2. Technical perfection isn’t perfection per se, because that slight bit of imperfection humanizes an image and gives it personality.
3. This means that we must have skill and ability to achieve technical and compositional perfection, even under spontaneous circumstances.
4. However, we need to have even more control than that, because we need to have the ability to add imperfection at will.
5. Go out and create, with this brief of perfect imperfection in mind.

_PM04193 copy
Just your average slice of life. Olympus E-PM1 Pen Mini, Panasonic 20/1.7 G

I hear questions from the back of the room. Does this apply to every situation? More importantly, how much imperfection should we apply?

The answer to the first is obviously not; if you can do this in a situation where you have little or no control over the subject – think war zone photojournalism, for instance – that probably makes you one step removed from God, and a clear notch above the great PJs like Capa, HC-B et. al. Remember from the Magnum Contact Sheets book, even they had to work the scene a bit to get the final composition they wanted.

_8001696bw copy
The foot. The one aberration in this abstract urbanscape is actually to me what makes the image. Nikon D800, AFS 24/1.4 G

The answer to the second is nowhere near as clear cut. And frankly, I have no idea how much is too little, how much is enough, and how much is too much. The only way to determine the answer to this conclusively is to experiment, and get your work out there and opined-upon. Modern Japanese photographers tend to be at the very haphazard end of the spectrum – some of their work seems almost random, albeit very carefully constructed random – and the other end I suppose are the environmental portraitists who bring lights and modifiers and everything else with them even into the middle of conflict areas.

_7060984 copy
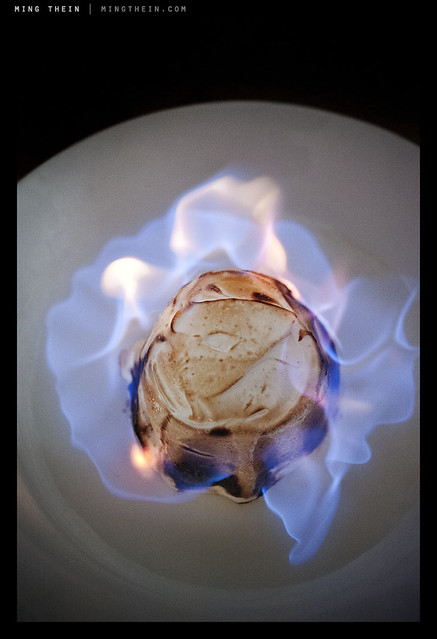
Flambe. Repeatable, but not controllable. You can set up the shot and do it again, but you can’t control what the flames are going to do. And this is the interesting thing that gives a little variation and makes each shot different. Seascapes are another good example. Nikon D700, AFS 60/2.8 G Micro

Personally, I’m going for something in the middle; but before I even get there, I need to shoot more – to have full intuitive control over my camera so that whatever adjustments I make come to me as second nature. And at this point something has to be said about good cameras, bad cameras, and too many cameras; good cameras are intuitive to use and require little training or practice to master. They do what you want them to, nothing more and nothing less. Bad cameras are ones that you never feel fully in control of, no matter how much practice you have. And too many cameras is just that: if you have too many cameras, you’re bound to eventually forget which button does what. And that could cost you at the most critical moment. This is why I’ll continue to use my D700 for reportage assignments until I’m fully comfortable with the D800; I know exactly habit will do under every situation, born of seventy thousand frames of experimentation – not counting the fifty thousand I shot with the D3, which is pretty much the same camera. MT

*Did anybody get the Futurama reference?

_7058402 copy
Would the burger be as appetizing without that juicy pickled onion marmalade peeking out? Probably not. Nikon D700, AFS 60/2.8 G Micro

____________

Visit our Teaching Store to up your photographic game – including Photoshop Workflow DVDs and customized Email School of Photography; or go mobile with the Photography Compendium for iPad. You can also get your gear from B&H and Amazon. Prices are the same as normal, however a small portion of your purchase value is referred back to me. Thanks!

Don’t forget to like us on Facebook and join the reader Flickr group!

appstorebadge

Images and content copyright Ming Thein | mingthein.com 2012 onwards. All rights reserved

POTD: A classical portrait

_5001019 copy
Nadiah. Olympus OM-D, 45/1.8

Sometimes, everything just comes together serendipitously. In this case, my wife (and muse, but that’s to be the subject of a future post) and I were attending a small function at a rather quirkily-decorated space in downtown Kuala Lumpur. I was going light, so I just carried the OM-D and two lenses; the 45/1.8 and 20/1.7. Just off the space, there was this small room separated by a partition; not only were there some nice details – like the Adams-family-esque hand – but the light was also beautifully directional yet soft. It just happened to be overcast outside, and with the sun at a low angle so the light went all the way into the room; see why I keep saying 99% of photography is light and timing? I grabbed my wife and shot a few frames to create what I think is one of the most satisfying portraits I’ve ever shot. MT

More B&W sample images from the Leica X2

Today’s post is a quasi-photoessay. I’ve decided to share some more black and white samples from the Leica X2; my full review of that camera is here.

Actually, I’m being a little bit contrarian: it’s a camera that does outstanding color reproduction, but my choice of black and white is a deliberate one; not because I want to follow the popular monochrome theme going at the moment thanks to the M-Monochrom, but because one of the things I test when shooting with a new camera is the quality of its files on conversion; it tells me a lot about the tonal response curve of the sensor, which is useful information for both monochrome work and color work.

The X2’s CMOS has a very linear response, similar to the Nikon D7000; in fact, my conversion workflow for these two cameras turned out to be extremely similar. What does this mean? Great overall contrast, but perhaps a bit too much; there doesn’t seem to be that nice gentle highlight rolloff that’s the M8/M9/S2’s trademark. Dynamic range is high, but a lot of it is bunched in the shadows and requires some work to recover.

Many of you have asked about my B&W workflow – there’s an upcoming article on conversion options, and their differences, which I think you will all find useful. I’m also trying to figure out the best way to present a short walkthrough on how I personally do my conversions, which should help demystify the notion that you have to use filters or scanned film to get the look you want.

Oh, and that tilting EVF is extremely handy when you’re trying to be frame-fillingly stealthy with a 35mm lens. MT

Images shot around downtown Kuala Lumpur with a final production Leica X2.

_X21_L1020171bw copy

_X21_L1020163bw copy

_X21_L1020165bw copy

_X21_L1020096bw copy

_X21_L1020094bw copy

_X21_L1020091 copy

_x21_l1020069bw copy

_X21_L1020034bw copy

_X21_L1020039bw copy

_X21_L1020036bw copy

_X21_L1020044bw copy

____________

Visit our Teaching Store to up your photographic game – including Photoshop Workflow DVDs and customized Email School of Photography; or go mobile with the Photography Compendium for iPad. You can also get your gear from B&H and Amazon. Prices are the same as normal, however a small portion of your purchase value is referred back to me. Thanks!

Don’t forget to like us on Facebook and join the reader Flickr group!

appstorebadge

Images and content copyright Ming Thein | mingthein.com 2012 onwards. All rights reserved

Defining style, and finding your own

Introduction: This has been one of, if perhaps not the most difficult essay to write so far: it concerns a topic that’s fundamentally important for all serious photographers, yet is extremely difficult to define in a strict technical sense due to its very nature. It’s the only essay I’ve had to stop and start writing several times because I penned myself into a corner. What you read is the culmination of many sessions and days of work. I hope you find it useful.

What is style? Dictionary.com gives a lot of options – 16 to be exact – but I think perhaps the most appropriate definition of style from a photography perspective is best described as:

A particular, distinctive characteristic mode or form of execution, construction, appearance of a visual work which can be associate with a particular person or group of people.

Let’s think about this for a moment. It probably isn’t an exhaustive definition, however, it captures the essence: style is distinctive. It’s individual, or belonging to a group of individuals, associated with them because they created it or they promote and propagate its use. What are the distinctive visual elements or combinations of visual elements that define a style, specific to photography?

1. Color (or lack of it)
2. Tonality
3. Perspective
4. Lighting
5. Focal point/ depth of field
6. Fidelity
7. Quirks, the personality of the photographer, or perhaps the X factor

Let’s examine each one individually.

Color
This one is fairly simple: is there color or not? Is it black and white? Is the color saturated, bright and punchy (think happy commercial product shot) or is it monochrome and gritty (think classical photojournalism and war photography)? Consistent use of color is one of the fundamental things that defines a style – but it isn’t exhaustive on its own. Similarly, consistent use of filters or digital gradients to apply a consistent hue shift to a set of images can also define a style; for example, I personally associate that warm, golden light with California; I have no idea why, perhaps it’s the pollution of LA or a fetish of the Hollywood directors.

Tonality
This splits out into a few options: neutral, high key, low key, low contrast and high contrast. The former three options can be combined with the latter two options; you can have something that’s neutrally biased but high contrast, or neutrally biased but low contrast. In digital terms, think of the former as where the majority of the histogram is bunched: neutral would be evenly spread, high key would be towards the highlight end, and low key towards the shadows. Contrast then becomes the bunching: if you’ve got strong gradients in the histogram at any particular point, that’s high contrast. Low contrast images don’t show this. A good example of distinctive tonality would be the works of Sebastiao Salgado: you always know it’s a Salgado because of the tonality of the image, before you even see the subject. It’s a distinctive signature that’s there in his corporate work covering the Channel Tunnel and his humanitarian work in Africa.

Perspective
This one is a highly technical characteristic, and linked to the focal length of the lens used – only. If a set is shot predominantly with a wide angle lens – modern photojournalism tends to do this a lot, with the subject placed center or near-center foreground and the environment in the background around it to give context – then that’s gives a distinct exaggerated perspective. Similarly, sport and wildlife almost always employ compressed (telephoto) perspectives due to inability to get close to the subject.

Ligthing
Lighting is linked to tonality and contrast: direct lighting produces harsh shadows and flat images for subjects in the frame that are perpendicular to the camera; diffuse lighting produces nice textures and gentle gradients. If you’re not shooting with studio lights, you might not always be able to control this; but you do have control over when and where you shoot, which of course affects the quality of the lighting. Some photographers are nocturnal, for instance. Others choose to always use direct flash in daylight – Bruce Gilden, for example.

Focal point/ depth of field
How much of the image is in focus? Granted, sometimes this is linked to the perspective because of optical limitations, but there are ways around that – fast ultrawides for DSLRs give a telephoto-like separation of subject from background, but with exaggerated perspective; similarly, small sensor super zoom cameras will let you achieve compression but also short hyperfocal distances.

Fidelity
This is a tricky one to define: how close is the image to reality? Is it a feasible scene, which you could happen upon with your naked eyes, or is it something that’s been so heavily photoshopped that you can’t tell between what was shot with a camera or created with a Wacom tablet? I’d put HDR imaging somewhere on this spectrum, too. It isn’t reality, but HDR can be used properly to actually create more natural looking results (to be the subject of a future article).

Quirks
We end with the broadest possibility of all: anything open to the creativity of the photographer. Some photographers leave a little in-joke in frame; others have a particularly distinctive way of retouching; others may only shoot one particular subject. I deliberately haven’t put subject in as a component of style, because it’s possible to shoot the same subject in many different styles – and this wouldn’t be consistent.

Now that we have some idea of how to define style, how do you define your own? Firstly, it must be consistent: you need to be shooting and finishing images in this style consistently, without having to think about it. There may be more than one style you do routinely; I have three which I’m aware of. Using my work as an example, I do three things:

_7037081bw copy
Classical Photojournalist.

1. Classical photojournalist. High contrast black and white, with almost everything in focus, finessed tonal transitions in the subject – I expose and process for the the subject and let everything else fall wherever on the tonal scale it may – and mostly wide angle, mostly 28mm but with some ventures as wide as 24mm or as long as 50mm, but no longer. I’d describe it as as mix of Salgado and HC-B.

_7034062 copy
Cinematic.

2. Cinematic. This is perhaps the style that defines me the most: shallow depth of field, mostly long perspectives (85mm) with some wide, dramatic shots; strongly dynamic lighting, with heavy manipulation of color and tonality to affect atmosphere. (Color will be the subject of several future article). Heavy focus on the subject and just enough background to give context, but no more.

_7050700 copy
Commercial.

3. Commercial. Although there are elements of the previous two styles in here, I prefer to think of this as the clean, perfectly-lit product shot: it’s what I do with the majority of my watch photography.

At this point, I should take a step back: how do you even find your style, before you define it? Simple: look at what’s out there, and experiment. For the first few years – hell, it might be a lot of years – you will probably be following other people’s work. You might not even be able to consistently reproduce a style that isn’t your own. Don’t worry – that’s not the point. Your own style should evolve naturally after sufficient experimentation. I know that I didn’t really have a distinct style until 2009 – though I dabbled in many up to that point – which was the classical photojournalist. Cinematic developed at the end of 2010. Commercial has been continuously in refinement as I improve my lighting skills. Other than proving I’m nothing if not a schizophrenic photographer, it shows that even if you can define your style, you may not necessarily have found the one that works best for you: I can shoot in any one of these three, and often have trouble deciding which one would look best.

_0012575 copy
Natural.

And you know what? I’d be very disappointed if I stopped developing here. I think there’s a midpoint between all of these three styles – something I’ll tentatively call ‘natural’ – which seems to be the direction in which my work is going now, be it available light or studio. The characteristic of this style seems to be perfect color, with a little cinematic hue shift where required; a mix between dynamic and natural lighting, with an emphasis on the subject; and an overall natural perspective to the images – as though you could have seen them with your own eyes, without much artificial intervention (think monochrome, or long exposure, etc.). I’m looking forward to seeing where this goes in the future. MT

____________

Visit our Teaching Store to up your photographic game – including Photoshop Workflow DVDs and customized Email School of Photography; or go mobile with the Photography Compendium for iPad. You can also get your gear from B&H and Amazon. Prices are the same as normal, however a small portion of your purchase value is referred back to me. Thanks!

Don’t forget to like us on Facebook and join the reader Flickr group!

appstorebadge

Images and content copyright Ming Thein | mingthein.com 2012 onwards. All rights reserved

POTD: A vaguely religious notion

_X21_L1020059bw copy
I don’t know why, but there’s something oddly religious suggested to me by this composition. Can’t put my finger on it, though. Leica X2.

A gentle reminder: the print offer ends next week!

_M9P1_L1014802 copy
Seeing the wood from the trees. Leica M9-P, 21/3.4 Super Elmar ASPH

Both of the prints you see in this post will be up for as a limited run. (These things help me keep the site running – creating content takes time I can’t use for anything else, and I really want to keep the site ad-free to maintain the picture viewing experience; also, it helps you decorate your walls 🙂

The print offer will be limited to 20 copies of each image, at 16×24″ (A2) printed on 20×30″ paper. Here’s the kicker: the prints will be done on 380gsm matte fine art paper, printed with 200 year archival grade pigment ink on a HP production class machine. The look of the black on the paper is indescribable – I’ve never seen anything like it before, and I knew I had to make some prints with this. There are no reflections anywhere, which means the image is so much more viewable. The blacks are dense and chalk-pastel like, with fine tonal transitions. All prints will be numbered and signed. (And no, there will be no black borders around the images in the final print).

_M9P1_L1003919bw copy
Schonbrunn Fog, Vienna. Leica M9-P, 28/2.8 ASPH

The price for either print is US$550 net to me for the 16×24″, or US$300 for the 12×18″ size – including shipping worldwide via courier in a sturdy tube. To keep things simple, payment can be made via Paypal to [email protected], which means you can either use your Paypal balance or a credit card.

Please include in the message field which image you’d like, plus your shipping address, contact email address and telephone number. I’ll email a confirmation as soon as I a payment from you. If you’d like multiple copies or multiple images, that’s great too – you just make one payment.

I’ll be closing the print offer in one week at the end of May, and shipping shortly thereafter. First come first served! Remember, these images will not be offered for sale again at this size. Thanks for your support everybody! MT