Review: The Olympus ZD 60mm f2.8 Macro and FL-600R wireless flash system

_5009896 copy

Although ‘development announced’ (i.e. officially leaked) several months ago together with the 75/1.8, Olympus’ newest macro lens – the M.Zuiko Digital 60mm f2.8 (hereafter known as the ZD60) was formerly announced at Photokina 2012, and should be available sometime in October 2012 at a price of around RM2,000. It’s also only the second macro lens available natively with a Micro Four Thirds mount (and autofocus), the other one being the Panasonic-Leica 45/2.8 Macro-Elmarit, which I reviewed earlier here. Being an OM-D shooter, and heavily product-photography oriented, I was invited by Olympus Malaysia to review the ZD60 together with the new PEN Lite E-PL5 (review coming in the next week or so). The macro work I do almost always involves flash, so I had them loan me a set of their most recent flashes – the FL-600R. This review will therefore be approached from the point of view I’m most familiar with: photographing watches with speedlights, in a pretty much identical manner to how I do it with my main Nikon system. There will be comparative notes throughout, and no pictures of flowers, cats, eyes, coins, trinkets or other typical macro subjects. Let us begin.

_5009907 copy

All images in this review were shot with an Olympus OM-D and FL-600R wireless flashes; the images are all from the ZD60, except the images of the ZD60, which were shot with the PL 45/2.8.

Let’s talk about the lens first: it offers 1:1 reproduction ratio at a minimum distance of 19cm from the sensor plane, which translates into a healthy 7-8cm of working distance at maximum magnification. This is great news for people who want tight frame coverage; by comparison, if I try to get the same subject coverage (i.e. 2:1 on full frame) with my D800E and Nikon 60 macro, I’m down to around 4 of working distance, which makes even lighting control much more difficult. The optical design has 13 elements in 10 groups, with one ED element, two HR elements and one E-HR element (I presume these are different types of optical glass).

Optical design and MTF chart. From Olympus Malaysia

Three of the groups float and perform focusing functions. This is not a simple optical design! There are traces of a double-Gauss base design in there, but it looks as though heavy modifications and extra elements were added to optimize resolution and close range performance. By comparison, the excellent Nikon AFS 60/2.8 G Micro – which has been my mainstay lens up til now – has one less element and one less group.

_5009904 copy

Size-wise, it’s similar to the 12-50 kit lens for the OM-D; build quality is definitely better, but still plastic and nowhere near as nice as the 12/2 and 75/1.8 lenses. The plastic used is matte, feels reasonably robust, but curiously has visible moulding lines in several places – I’ve not noticed this on any of the polycarbonate-shelled Nikon or Canon lenses before, but it may be because those tend to have a spatter-finish paint that hides the seams better. It’s also weather sealed, with ‘SPLASH PROOF’ in big letters on the bottom of the lens barrel. The lens is made in China.

_5009558 copy

Omega Speedmaster 9300.

_5009558 crop
100% crop of the above.

Two small points of interest on the ergonomics of the lens itself – firstly, although the (optional, shame on you, Olympus) hood is a bayonet fit, it telescopes in and out; neat, but I found it annoying after a while as if you support the lens by the hood and put too much pressure on it, the hood will easily shift or start to collapse back in. Second is the little rotary knob to control the focus range, accompanied by a pointer scale showing the subject distance and corresponding magnification level. The switch has several settings – full range, 0.4m to infinity, 0.19m to 0.4m, and a sprung detent to take the lens to 1:1. It sounds clunky but is actually very practical in use – selecting the right range keeps focusing fast and positive, and the 1:1 position is very helpful in traversing the focusing range when you don’t have a full-time mechanically coupled focusing ring. Overall, ergonomics are excellent.

_5009726 copy

_5009726 crop
100% crop of the above.

Once in a while, (though increasingly frequently with today’s computer-designed optics) you come across a lens that is truly outstanding – the last two that come to mind were the Olympus ZD 75/1.8 and Leica 50/2 APO-Summicron-M ASPH. I’ve used a number of competent, but imperfect, lenses in the meantime, none of which were that memorable for their optics. Fortunately, the ZD60 is another one of those lenses that falls into the ‘truly outstanding’ category – I’ve tried hard under many varied test conditions to find fault with the optics, and come up with an extremely short list. If you want the short answer, you can skip the next few paragraphs: this lens offers excellent optical performance at every aperture and focus distance.

_5009610 copy

The lens has an even more impressive MTF chart than its highly-regarded predecessor, the ZD 50/2 macro for Four Thirds; granted, both designs only have to cover the small Four Thirds frame, and they used a lot of elements to do it, but still: it clearly outresolves the OM-D’s sensor, even wide open. On my copy, I simply didn’t see any improvement in stopping down – you get increased depth of field, and sharpness stays constant (i.e. outstanding) at every part of the frame. There’s diffraction beyond f8, and that’s about it. The plane of focus is also flat, as far as I can make out, and there’s almost zero distortion present. Let’s just say that the ZD60’s resolving power is not going to be the reason for any soft images. Like most of the extremely sharp lenses, the ZD60 also has very high microcontrast – these characteristics are related because high resolving power is required to differentiate between subtle tonal differences in the subject. In fact, it’s amongst the best lenses I’ve ever seen; deserving of the superlative classification (for lenses, at any rate) – of transparent.

_5009812 copy

For reference, the screws on the right are about 1.5mm across.

Although overall resolution would support a much higher-density sensor, it wouldn’t be practical in use: on the OM-D’s 16MP sensor, you already have minor diffraction from f8, and visible diffraction at f11 and up (even though the lens can stop down to f22, I really wouldn’t recommend it; you might as well use a pinhole at that point). I suppose it would have been nice if it had tilt control too, but I think given the target market for Micro Four Thirds, that option might be a long time coming. I believe Novoflex has a T/S bellows system, which might be worthy of investigation at some point in the future.

_5009392 copy

Jaeger-LeCoultre Reverso Latitude.

As for the other optical qualities of the lens – bokeh, chromatic aberration, color rendition and transmission – there are very few flaws. The only one I could find was some slight texture in the bokeh, and even then only in a couple of frames with circular out of focus highlights at a certain brightness level – one of the signatures of a moulded hybrid aspherical element somewhere in the construction. To keep things in perspective, even the Panasonic Leica 45/2.8 Macro exhibits this trait, and more obviously. Aside from that, bokeh is smooth and pleasant, with very minimal bright edges on defocused highlights. Chromatic aberration was nonexistent laterally, and more commendably, almost completely absent longitudinally, too, even wide open. I have not seen this level of CA performance in any macro lens I’ve used to date, even the Leica 120/2.5 APO-Summarit-S. Color rendition is neutral and pleasingly saturated, and taken in tandem actually quite reminiscent of the Zeiss lenses. Olympus uses their new ZERO coating on the lens, which keeps transmission high – I would estimate the lens to be around T3.0.

The ZD60 uses Olympus’ MSC system, which has the elements moving linearly on a rail; it’s not as fast as the 12/2 or 45/1.8, but with the limiter in the 0.4m-infinity position, it’s similar in speed to the 75/1.8, and definitely faster than the Panasonic-Leica 45/2.8.

_5010037 copy

FL-600R compared to the Nikon SB900. One would fit in your pocket; pocket the other and you’d probably be arrested on a public indecency charge.

Next up, we have the FL-600R flash; it has a guide number of 50m at ISO 200, or 36m at ISO 100, running off four AA batteries, with a wide panel and zoom head covering from 16 to 85mm. Full-power cycle time is claimed to be 2.0s with NiMH batteries; it didn’t feel any slower than my Nikon SB900s or SB700s, which I find to be pretty fast. In addition to the usual TTL and manual modes, the flash can also act as both wireless commander and slave using Olympus RC system. It’s also got a bright single LED in the base portion – ostensibly for video use, but I actually found it to be a useful modelling light for macro work, making focusing and composition quite a bit easier. If only it was in the head itself and even brighter…

_5009382 copy

In use, the flashes are fairly simple to operate, though the very low number of external controls means that a lot of button presses are required, and you have to remember what does what – I much prefer the softkey and physical switches approach of the SB900 and SB700. That said, the units are physically much smaller than even the SB700 and SB600, and positively dwarfed by the SB900 – this leaves very little real estate on the back for the LCD and controls.

_5009485 copy

Overall, I found TTL flash exposure to be mostly good; wireless TTL on the other hand, was a bit hit and miss. There were certain situations – specifically when one flash was firing at the background, and the other at the subject – where the subject exposure was a bit inconsistent. Not much of an issue, I just dialled in manual power. The limited external controls and display space also mean that adjusting settings for remote flashes with the FL-600R as master isn’t so easy, and requires far more button presses than I would like. Fortunately, even with the FL-600R on the hotshoe, the camera itself can be used to set the remotes; the hot shoe contacts then transmit the data to the flash. Coupled with the OM-D’s touchscreen, it’s a fast and easy experience – in this respect, better than the Nikon system. And you can control all three groups of flashes from the camera, regardless of which flash is attached to the hotshoe – which is one more than the Nikon system. There are also three available channels so other users’ flashes aren’t triggered by yours and vice-versa if there are a few of you. I can see this being useful if you shoot Nikon or Canon, but to be honest, I’ve never encountered an Olympus flash shooter…

_5009342 copy

The only major issue I have with the wireless flash system is triggering – the sensor on the flash unit itself seems to be very small, aimed forwards and somewhat recessed – this makes no sense whatsoever, seeing as the flash is likely to be facing the subject, which means that the sensor will be away from the camera. Even the Nikons – with side and front mounted sensors – still have problems picking up the optical trigger signal at times. With the FL-600Rs in orientations where the sensor wasn’t almost facing the camera directly, triggering was somewhat hit and miss, especially with the small flash supplied with the OM-D. Use of one of the FL-600R units as a master improved this somewhat, but camera companies really need to start making flashes with multiple optical sensors, or better yet, built in radio triggers for both camera and flash. I know some of you might suggest external radio triggers, but has anybody tried looking for a TTL PocketWizard for Olympus lately? It just doesn’t exist.

_5009513 copy

To date, when using the OM-D for macro work, I’ve either been using my large LED panels (and hence continuous lighting) or the SU-4 optical slave mode on my SB900s and the supplied small flash set to 1/64 power, which works well, but lacks the convenience of being able to set the power output from the flashes either via TTL metering or directly from the camera, let alone both. This can be inconvenient at the best of times – worse still if your flashes aren’t easily accessible. I’ve wanted to try the Olympus wireless flashes for some time now; my thoughts are that so long as you can spare one unit to use as a master trigger, they’re a viable alternative to the Nikon system; the problem is that I’d have to buy another five flashes to get the same flexibility as I have now, which seems somewhat silly.

_5009319 copy

That said, the Olympus system – and Micro Four Thirds – for macro work has a lot going for it; firstly, a truly outstanding lens which is almost completely CA-free; flashes that aren’t that expensive, and very, very small – like the rest of the system. I could fit an equivalent system to what I use now in a bag half the size. Although on the face of things, the Nikon system has a huge resolution advantage – you lose something in diffraction (despite the D800E not having an AA filter), and the OM-D files are clean enough to upsize well to 25MP or so. The difference is much less than you might think. I think I’d have a very difficult time deciding what to buy if I was starting over again with the same objectives. As it is, I won’t be returning the ZD60 to Olympus; it’s unquestionably earned a place in my arsenal, edging out the 45/2.8 (it’s also nice that I no longer have a focal length overlap with the faster 45/1.8). As far as I’m concerned, this is the new reference lens for Micro Four Thirds. It’s that good. MT

The Olympus M.Zuiko Digital 60/2.8 Macro is available here from B&H and Amazon.

The FL600R flash is also available here from B&H and Amazon.

Come back again tomorrow for part two: a four way shootout between the M.Zuiko Digital 60/2.8 macro, Panasonic Leica 45/2.8 Macro-Elmarit, Zeiss ZF.2 2/50 Makro-Planar and Nikon AFS 60/2.8 G Micro!

____________

Visit our Teaching Store to up your photographic game – including Photoshop Workflow DVDs and customized Email School of Photography; or go mobile with the Photography Compendium for iPad. You can also get your gear from B&H and Amazon. Prices are the same as normal, however a small portion of your purchase value is referred back to me. Thanks!

Don’t forget to like us on Facebook and join the reader Flickr group!

appstorebadge

Images and content copyright Ming Thein | mingthein.com 2012 onwards. All rights reserved

_5009375 crop
Parting shot – another 100% crop.

Review: The Panasonic 100-300/4-5.6 Lumix G Vario for Micro Four Thirds

_8015713 copy

Micro Four Thirds users have a lot of consumer-grade choices when it comes to telephoto lenses. Unfortunately, the same can’t be said of any serious lenses – fast aperture, fast focusing, or even prime. Thanks to the 2x crop factor, this is one of the places where M43 actually offers a substantial advantage over larger formats. It’s just a shame that there aren’t any telephoto lenses of serious optical quality to make the most of this. Wildlife photographers and sports shooters still favor DX crop bodies when there’s enough light – the increased pixel density and extra 1.5x reach can’t be ignored. I was still birding during Nikon’s transition to FX with the D3; I remember being frustrated at the quality of the sensor, but the lack of reach. There are some species that simply will not allow you to approach close – I frequently used a 500mm with 1.4x TC on a DX body, for a total of 1,050mm f5.6 equivalent. To reach 1,000mm on FX, you’d be a stop down in brightness and having to deal with the associated optical quality limitations of a 2x teleconverter.

_8015705 copy
Collapsed at 100mm.

_8015720 copy
Fully extended. This is not a short or discrete lens, and I haven’t even added the hood yet.

The current crop of M4/3 lenses stops at 300mm. This gets you to 600mm equivalent; the Olympus 75-300/4.8-6.7 (150-600mm equivalent) and Panasonic 100-300/4-5.6 (200-600mm equivalent) are your only two options. (A 300/4 or 400/5.6 with Olympus’ MSC-grade fast AF would be wonderful, but sadly not to be – at least not yet). The Olympus is the more compact of the two (and by all reports, slightly sharper too), but also quite a bit more expensive than the Panasonic – US$899 vs US$599-699 or so. The bigger issue is that you’re down half a stop on the Panasonic; with complex multi-element zooms, this difference in physical aperture translates into more when it comes to light transmission. The Panasonic is probably closer to T7-T8; the Olympus may well be at T9-11. More worrying is that with both lenses you’re going to be right up against the diffractions limits of the higher density M4/3 sensors, such as the OM-D and GX1, even when shooting wide open. To be useable at 300mm, this lens has to perform optically – we’ll address this later.

_5005488 copy
Untitled. OM-D, 100-300

The 100-300 is a moderately-sized lens, weighing in at about 500g and similar in heft to consumer DSLR 70-300 lenses. Despite only having to cover the M4/3 image circle, it isn’t any smaller; size advantages are more apparent in wideangle lenses due to the short back focus distance of mirrorless cameras not requiring a rear telephoto group*. The lens has a 67mm front thread, metal rear mount and front plastic bayonet hood; this is included with the lens. (Olympus, I’m looking at you: not including lens hoods is just penny pinching.) The zoom ring is a broad, rubber affair that should be easy to operate, but is actually very difficult to set precisely in practice because of friction between the plastic surfaces inside the lens; it tends to bind and move in jumps. There is an ample focus ring up front, narrower than the zoom ring and distinguishable by touch, but it runs fly-by-wire and obviously has no hard stops at either end of the range. With telephoto lenses, it’s nice to have the ability to place the focus range by feel, or at least kick it over in either direction closer to the subject distance to avoid hunting – especially important with the CDAF systems used in mirrorless cameras. Overall, build quality is acceptable at this price point, but nothing to write home about. The plastics feel a little brittle and thin, I’m generally fairly careful when handling this lens.

_5005403 copy
Caught in the act. OM-D, 100-300

*The rear telephoto group on a lens is used to straighten out the image-forming rays so they fall perpendicular to the sensor, and extend the image plane further than the natural distance associated with the focal length – in order to clear SLR mirrors. This distance is proportional to the focal length of the lens. Rangefinders and mirrorless cameras can use symmetric retrofocal lenses whose rear elements can be positioned very close to the sensor, making the lenses physically much smaller. Lenses with a focal length longer than the flange distance do not require the rear telephoto group to project the image plane out to clear the mirror, which is what removes the size advantage between DSLRs and mirrorless cameras for lenses over 50mm or so.

_5005388 copy
Reminds me of Gibraltar for some reason. OM-D, 100-300

However, by far the biggest gotcha of the whole setup is that the lens is physically large and not well balanced at all, especially on the smaller M4/3 bodies; even the OM-D requires a grip for optimal handling. Given this, the omission of a tripod collar is unforgiveable; you simply can’t mount it on the body’s tripod socket because it not only places a large amount of stress on the mount, but it’s also impossible to frame precisely especially at 300mm, because the image frame droops perceptibly through the viewfinder. This means you’ve got to shoot it handheld; here, the relatively light weight of the whole system works against you, because there isn’t enough mass to damp the vibration. And forget about using it at arms’ length without an EVF. The good news though is that the OM-D’s EVF and IBIS system are excellent, and allow you to brace the entire setup against your forehead. Being a Panasonic optic, the lens has moving-element OIS built in; and it’s pretty effective, too. Although it’s very difficult to scientifically test, I feel that perhaps the IBIS in the OM-D is very slightly more effective than OIS built into the lens – but it could go either way, really. Both systems allow consistent critically-sharp-at-100% handheld shots at 1/100s and 300mm, which is about 2.5 stops. You could probably push it a stop further, but then your hit rate will fall considerably.

_5005529 copy
Painterly. OM-D, 100-300

Let’s talk a bit about optical performance. The lens is a 17/12 design with one ED lens and several aspherical elements; no fancy coatings, but a decent specification that should yield decent optical results. Like most of these consumer telephoto designs, performance is surprisingly good below 200mm; 200-300mm is so-so, with weakest performance at 300mm. Stopping down by one stop below 200mm improves clarity a hair, but anything more starts to reduce resolving power due to diffraction. At 300mm, f8 is slightly better than f5.6 because there’s less chromatic aberration and improved contrast, however, the resolution gains are once again offset by diffraction losses. There isn’t any point in going beyond f11, even though the minimum possible aperture is f22.

_5005433 copy
Surprisingly decent bokeh. OM-D, 100-300

The lens never gives you the impression of clarity or transparency as the best lenses do; there’s always a layer of something between you and the image, which can be somewhat ameliorated through good postprocesing. No amount of postprocessing can put back the missing microcontrast, however. Part of the problem is there’s chromatic aberration visible at all focal lengths; this causes the image to separate out slightly, reducing resolving power. It’s especially obvious in the corners and at high contrast edges at the 300mm end of the zoom range; a good 2-3 pixels’ worth at times. There is some vignetting, but it’s very, very minor and easily correctable. Finally, bokeh is surprisingly smooth, though large out-of-focus highlights have the telltale texture that signifies the use of moulded hybrid glass-plastic aspherical elements.

_5005497 copy
Lily pads. OM-D, 100-300

All of this said, the 100-300 is still a cut above most of the consumer-grade offerings; I haven’t used the Olympus 75-300, though. I certainly don’t think the Nikon 70-300VR had this level of resolution – on the lower pixel density D700 and D7000 bodies, the 70-300VR’s resolution above 200mm left much to be desired.

_5004762bw copy
Contemplation. OM-D, 100-300

So what’s the 100-300 useful for? To be honest, I bought it out of curiosity and the lack of a telephoto solution for any of my other systems. It’s actually a pretty good option for reach in a pinch, especially when you’re not sure you’re going to need it – and don’t want to carry around a large 300, 400 or 500mm supertelephoto. The combination of lens and OM-D doesn’t occupy much space in the bag at all. Aside from slightly reduced optical quality and a slower aperture, the biggest limitation is continuous AF performance. It’s already a problem for the M4/3 system since all focus systems are contrast detect; it’s even worse with the 100-300 because the focus motor itself is slow, the required amount of physical movement of the lens elements between the infinity and the 1.5m near limit is large, and the lens is one of the earlier generation of designs that doesn’t have the benefit of the technology used in Panasonic’s current lenses. It isn’t slow per se, but it definitely isn’t up to the latest Olympus primes in speed. Note that I’ve had a couple of experiences where the camera/lens confirmed focus, but it turned out that things weren’t quite perfect. Very shallow critical depth of field (especially at closer distances) is nothing new with telephotos, but it’s not easy to tell without magnification exactly which small bit of the frame is in critical focus with current EVF/ LCD technology.

_5004774bw copy
Crowded. OM-D, 100-300

Given those limitations, I think its strength is probably in situations where you need reach or perspective but your subject isn’t moving much, if at all; some forms of wildlife, landscapes and perhaps even architecture or abstracts; I tried using it for street work, but it just felt far too conspicuous. It’s also surprisingly difficult to frame a 600mm FOV shot when there are a lot of people about – the foreground takes forever to clear, and by the time it does, your primary subject has probably moved on. That said, I used it without issue at a recent concert I was covering – in that case, it’s all about timing and making sure that your subject hasn’t moved out of the depth of field of the lens, which is actually a bit more than you’d expect. It’s also worth noting that whilst AF is fast and positive up to about 200mm, beyond that if the new subject is far outside the previous subject distance, or contrast is only moderate, you’re going to see situations where the combination hunts and sometimes even fails to find focus.

_5004770bw copy
Smoke break. OM-D, 100-300

I think the best litmus test for any lens is the question of ‘given a chance, would you buy it again?’ I didn’t pay very much for mine on the secondary market – mint, boxed, pretty much as new ran all of $400 – so yes, I definitely would. It’s not a staple lens for me, but it is fun, does offer something that none of my other lenses can, and the optics are good enough. Overall – recommended, but with caveats. MT

The Panasonic 100-300/4-5.6 is available here from B&H and Amazon.

____________

Visit our Teaching Store to up your photographic game – including Photoshop Workflow DVDs and customized Email School of Photography; or go mobile with the Photography Compendium for iPad. You can also get your gear from B&H and Amazon. Prices are the same as normal, however a small portion of your purchase value is referred back to me. Thanks!

Don’t forget to like us on Facebook and join the reader Flickr group!

appstorebadge

Images and content copyright Ming Thein | mingthein.com 2012 onwards. All rights reserved

_5004758bw copy
On the lookout. OM-D, 100-300

Poll: 2013 workshop locations

I’ve been getting increasing numbers of emails asking me to do workshops in various places next year – to gauge interest in the various options, I’ve decided to open it out to the floor. To make a workshop viable, I need at least four photographers, but a maximum of six; I don’t do large groups because you simply can’t get as much out of it as a participant. (Not to mention that some things like travel and street photography simply do NOT work in herds).

A typical workshop schedule runs for three days and goes as follows:

Day 1: Portfolio review and group discussion of images in the morning; some creative back-and-forth between participants as to which of the others’ images work and which don’t; if there are any particular topics or locations that they would like to cover. Afternoon, evening – shooting. Continuous feedback throughout – the joys of digital make teaching and learning much easier. Late night debrief on the day’s images, and shooting the breeze about photography, usually over drinks or a cigar.

Day 2: More shooting; usually a mini-assignment for each participant to help them focus on their opportunities identified during the first day. Sometimes, an excursion. Late night debrief as usual.

Day 3: Review and critiques in the morning; the process of editing; how to know which images are the ones to work on. Late morning: intro to Photoshop and a walkthrough of my workflow with live demos on the images I shot during Day 1 and Day 2. Afternoon: individual Photoshop help as participants work through their own images. A mini processing-challenge: everybody gets the same file, but what will you do with it? There is no absolute right or wrong answer, and it’s always good to see different creative interpretations. Day 3 usually runs late into the night.

Optional: Depending on the location, I may stay a bit longer to shoot personal creative assignments or stock images; I’ll usually take one, or at most two, participants to shadow me. There is much less teaching here, but this is also reflected in the fees.

Please vote for one of the choices below only if you’d like to attend one of my workshops. Multiple answers are allowed (no reason why you can’t come to more than one!) No need to answer if you’re happy with the internet only 🙂

Thanks! MT

Photoessay: Papan, part two

The conclusion of this two-part photoessay. Part one can be found here.

This series shot with a Sony RX100. Thank you to one of my Email School of Photography students, John Chang, for taking me here. EXIF data is intact, click through the images to view larger versions and EXIF data on Flickr.

_RX100_DSC0817b copy

_RX100_DSC0801b copy

_RX100_DSC0798b copy

_RX100_DSC0736b copy

_RX100_DSC0878b copy

_RX100_DSC0775b copy

_RX100_DSC0763b copy

_RX100_DSC0821b copy

_RX100_DSC0770bw copy

_RX100_DSC0759bw copy

_RX100_DSC0754bw copy

_RX100_DSC0740b copy

____________

If you enjoyed this post, please consider supporting the site via Paypal ([email protected]); Ming Thein’s Email School of Photography – learn exactly what you want to learn, when you want to learn it or learn how to achieve a similar look with our Photoshop workflow DVDs. You can also get your gear from Amazon.com via this referral link. Prices are the same as normal, however a small portion of your purchase value is referred back to me. Thanks!

Don’t forget to like us on Facebook and join the Flickr group!

Images and content copyright Ming Thein | mingthein.com 2012 onwards. All rights reserved

Points of sufficiency: do you really know how much is enough?

The never-ending photographic arms race got me thinking recently about sufficiency: how many pixels, fps, AF points, ISO settings, etc. are enough? The troubling thing is that I thought I used to know the answer: I’m no longer sure it’s quite as clear cut. See, the thing is that if you’re viewing images online, in theory, anything close to your screen resolution (leaving space for UI elements, text, menus etc.) should be sufficient – 1000px wide is more than enough for most purposes. The images on this site are mostly 800px wide, for reference. In theory, that should mean an iPhone is overkill. Yes and no; just because resolution sufficient, it doesn’t mean that we’re going to have enough dynamic range, or color depth (or accuracy).

This raises a hypothetical question: suppose we could have say a ‘perfect’ 3MP – in a compact camera, with a reasonably good zoom lens; if we put those 3MP into a 2/3″ or 1/1.7″ sized sensor, we could probably get a fast-sh 24-120mm f2-4 equivalent into something that would be reasonably pocketable. The relatively low pixel density would mean several things – good acuity, low noise, good color accuracy, and much higher forgiveness of the lens quality. With today’s technology, I don’t see why you couldn’t get a clean ISO 6400 and useable ISO 12800. Even with a lens of moderate speed, that’s a more than sufficient shooting envelope for most photographic purposes. Add a good optical stabilizer, fast AF, 14 bit RAW, responsive buffering and controls, and most people would be set. And with raw files that small, you could probably get 10,000 of them onto a 32GB card.

But, nobody would buy it and it would be a commercial failure. Only 3MP? Really?

That’s the kicker. If you’ve ever had a really high quality, but small-ish file, then you’ll know that you can actually do quite a lot with it; I remember seeing some images from the 2005 Wildlife Photographer of the Year competition – prints, at 40×60″ or so – which were shot with a Nikon D1H: that’s right, all of 2.7MP. Did they sing? You bet. Did they look grainy, or pixellated? Not especially so, but I’m sure you’d see the difference if you shot the exact same scene with a D800E. The shot that won would no doubt still be a great capture even twenty years from now. A hundred years from now. Does the equipment matter? Insofar as it didn’t get in the way of the capture, no.

In a more realistic scenario, a proper 300dpi print (actual pixels, not printer ink dots) looks extremely sharp. 200dpi is still acceptable; do you know what most computer screens are? Closer to 110. Sharp images still look sharp, don’t they? And the reason things appear pixellated is because the pixel mask of the screen gives each pixel a hard edge. If the edges of each dot were just a tiny bit fuzzy and overlapped the next dot, like in a print, then things would look just fine. The reality is that short of sticking yourself a few inches away from the display, you’re not really going to see the individual pixels. I have to be honest; the Macbook Pro’s 220dpi ‘retina’ display doesn’t look all that different to my 15″ non-retina from healthy viewing distances. But it requires four times the amount of graphics power to run, because guess what: every graphical element requires four times the pixels.

Most people print no larger than 6×4″, or perhaps out to 8×12″ for special images; survey a group of enthusiasts on the largest print they’ve made, and you’ll probably find 13×19″ a good end point. There are two reasons why: cost, and lack of display space. Enormous prints are great, but you’d also better have enormous walls to hold them.

So what does a 1500×2000 pixel, 3MP file get you? At 110dpi, 13.6×18.2″ – lo and behold, that’s pretty darn close to 13×19″! The one problem with this scenario is that it assumes that all photographers using the ‘sufficient’ camera have the shot discipline to get things perfect at the pixel level, and that they’re really getting the full resolution of the sensor. Sigma/ Foveon shooters will know what I mean by this – the files may be small, but the real resolving power is pretty darned high. Higher than the sensor’s pixel count would lead you to believe (but not as high as Sigma’s marketing department would like you to believe).

Even for use on a next generation ‘retina’ display, you could still get a 7×9″ image out – comfortably fitting the display size. You could probably interpolate it a little too, and not see too much degradation in quality.

Let’s put this all into context. The recently-released Sony RX100 (reviewed here) has 20MP effective – that’s a whopping 5500×3600 or so pixels, or enough for a 50×33″ print – I don’t have enough space in my house to hang more than one or two of those, and at that size, I’d struggle to think what image I wouldn’t mind looking at for hours on end. Yet there are still people crying ‘not enough resolution!’. At that sensor size, pixel density is so high that critical focusing and shooting discipline become very important; I notice that the stabilizer seems a lot less effective than lower-pixel count cameras, but I’m now starting to suspect it’s because it’s got to work quite a lot harder to maintain perfection at the pixel level.

Take the argument a notch further: okay, so there are still reasons to have something with interchangeable lenses. And those things always come with bigger sensors (okay, so not the Nikon 1 cameras, but they haven’t exactly been a commercial success – expensive, small sensor, low pixel count; even if the pixel quality is reasonably high and the cameras are extremely responsive). Bigger sensors mean more expected resolution. I’m going to bypass M4/3 and APS-C for the time being, because they all top out at reasonably similar resolutions; there isn’t that much difference between 16 and 24MP – remember, area scales with the square of length. Let’s go to full frame DSLRs – one of the most common questions I’ve received via email in the last few months is ‘I have a D700. Should I upgrade to the D800/ D800E?’ The fact that that question is even being asked signals that the marketing department has done a good job. They’ve sold you on the lure of the enormous number of pixels; you haven’t bothered to do a bit more reading to find out that a) you’re going to need much better lenses; b) shot discipline once again becomes critical; c) stability is a hot topic; d) your AF system might not be quite as accurate as you thought – especially if you’re using auto-area and letting the camera do the thinking for you.

The answer to this question is simple: how big do you print, and do you need video? If the answer to the latter is yes, go ahead and buy it; video isn’t something the D700 can do. The former is a bit more subtle: if you can’t get a good 45×30″ or so print out of the D700, then your shooting technique needs work. I’ve had images shot under ideal conditions printed to 40×60″ for exhibitions – they still looked great. Granted, the subjects weren’t crammed with fine detail like leaves and grass, but they weren’t high-bokeh content portraits, either. So, if you’re not making say 20×30″ landscapes on a regular basis – do you really need the heartache that comes from having to revaluate all of your lenses, and shunt around 50MB RAW files? Probably not. But, the bragging rights are a different matter altogether.

One of the reasons why the photographic industry is still growing despite passing saturation point some time ago is because of the photographers themselves: they don’t know when to stop. Canon will happily sell you a 50/1.2 for three or four times the price of the 50/1.4, which itself is three times the price of the 50/1.8 – simply because there are people who will pay for that extra half a stop. (And it may be an extra half a stop of aperture, but it’s almost certainly less than half a stop of transmission.) Let’s be realistic: the camera’s metering doesn’t gauge scenes that accurately; I routinely make adjustments of +/- 1 stop, and that’s with Nikon’s super-accurate matrix meter in the D700 or Olympus OM-D (I consider both to be more reliable than the D800, which has a tendency to put too much weight to the active focus area). The Sony RX100 is out by so much that I have to constantly use exposure compensation or risk an unsalvageable image. With the degree of adjustment latitude our modern sensors give us, whole stops changes are what you have to be making before you see any appreciable differences in image quality.

Here’s another curious thing: equipment with more conservative specifications often performs better than more extreme gear, even though the extreme gear frequently costs several times more. This is because we’re dealing with known technology, with greater tolerance for error: this is why there are many superb 50/2s or 50/2.8s that perform excellently wide open, but few 50/1.4s and faster that do. It’s also why lenses with higher resolving power – take the macros for instance – have modest apertures. It’s easier to correct for smaller apertures. Same thing with sensors – it’s easier to get good dynamic range and a high signal-to-noise ratio out of a sensor with a larger pixel pitch; the supporting electronics for each photosite has to be of a certain size, and if there isn’t much area to go around in the first place, that circuitry starts to make a significant and noticeable difference to the light-collecting ability of the sensor.

The bottom line is very Socratic: Know thyself. Specifically, think carefully about which pictorial limitations are due to the photographer, and which are because of the camera. Low light performance? It’s probably your gear. Poor composition? More pixels isn’t going to help you. Blurry images? More pixels definitely aren’t going to help you; examine your technique first.

The recent series on inspirations from older cameras was posted specifically to illustrate this point: just because a camera is old, it doesn’t mean that it’s no longer capable of producing good images. If somebody could use it to get the shot when they had no other choice, it means that you can still do that. The important thing to remember is that most of the time, the limitation is in the user, not the equipment. So next time, before buying more gear, think about spending money on improving your skill level first. I guarantee that you’ll see a much bigger improvement in your images. MT

____________

Visit our Teaching Store to up your photographic game – including Photoshop Workflow DVDs and customized Email School of Photography; or go mobile with the Photography Compendium for iPad. You can also get your gear from B&H and Amazon. Prices are the same as normal, however a small portion of your purchase value is referred back to me. Thanks!

Don’t forget to like us on Facebook and join the reader Flickr group!

appstorebadge

Images and content copyright Ming Thein | mingthein.com 2012 onwards. All rights reserved

Gentle reminder: two weeks left to the Making and Finding Light workshop!

MTxKD-v1-small

Two weeks left to register!

I’m pleased to present both my first workshop and first collaboration, in Kuala Lumpur – I know I live here, but I’ve not actually done anything here yet either…

There will be two sessions with noted studio photographer Kristian Dowling from Australia, on the 28th and 30th of September 2012. Each session is limited to 12 participants, and is priced at RM600 per person per session, or RM1,000 for both sessions.

Profoto will be sponsoring lighting equipment for the studio session.

28 September 2012: Studio (Victor Studio, Shriro Building, Lot 22&24 Jalan 225, Petaling Jaya)
The morning session will begin with something simple, yet fundamental: how to evaluate an image, and understand what works and what doesn’t. I’ll then continue with color theory, compositional balance and a bit about the psychology of how viewers react to an image. Kristian will finish off with a session on studio lighting; bring your laptops, lights, tripods and everything you’d normally use on a studio shoot.

30 September 2012: Street (Starts at Pavilion Kuala Lumpur and keeps going on foot)
Kristian is a street photographer. In a previous life, I was a photojournalist. We both have different approaches to reportage – this session will be split into two halves; one group will go with myself, the other with Kristian and we’ll swap after lunch. Small groups mean that it’s easy to move around and not attract attention. This session will teach you three important skills:
1. How to anticipate and see a shot; what our thinking process is before raising camera to eye. A lot of composition is done even before looking through the viewfinder.
2. How to be ready and respond quickly
3. How to see the light and get the shot.

Please email either me – [email protected], or Kristian – [email protected] to book or for more information. MT


On Assignment: A small matter of retouching…

_8018477-80-2 copy
Finished shot. Nikon D800E, Zeiss ZF.2 2.8/21 Distagon – composite of three images

This post is for those of you who are curious about how much work exactly goes on during an architectural/ interior shoot. (And yes, the company whose boutique is featured here is one of my clients, as is their parent company.) It’s not quite as simple as it looks. First, let’s look at the original, unedited shot again – this is what you get out of camera with the raw file converted straight to a JPEG, all ACR adjustments zeroed out. This is about as good as you’re going to get straight out of the camera. Light was available ambient, and I used the excellent Gitzo GT5562LTS 6x Systematic carbon tripod for support.

_8018480 copy
The same shot, straight out of camera, NEF>JPEG via ACR with all adjustments set at neutral.

Can’t see any issues with this image? Let me point them out to you.

  • There’s a bit of sombrero distortion in the horizontal lines; this is a lens issue. Minor, but obvious when you’ve got this many parallel lines.
  • The horizontals run to the right slightly; it’s almost impossible to get this perfect in camera, even using the built-in level guide – as with the in-focus indicator, there’s a bit of ‘dead space’ around the null position where the camera might report perfect levelling even though things are a degree or so off.
  • The highlights are gone. All gone.
  • The shadows are also all gone…oh dear, this is turning into a tonal nightmare: very dark wood on the storefront, extremely brightly-lit illuminated displays…
  • Very distracting reflections from the store and the boutique across the hallway – we couldn’t get them to turn off their storefront lights (obviously) – so there was no choice but to retouch them out.

Now you know what I’m up against, let me explain how the issues were solved. Distortion is taken care of using ACR’s built-in profile for the lens; note how everything is straight again in the finished image below. Slight issues with levelling are taken care of using Photoshop’s distort tool – select all, then Edit>Transform>Distort. Use guides to help you line up your horizontals and verticals, and then pull the corners a little bit to make everything line up.

Dynamic range is a bit more of a challenge. Although the rough image above has had zero highlight and shadow recovery done and perhaps represents about 8 bits of tonal information, I wouldn’t want to push this image too far in post. The extreme highlights will posterize slightly and the shadows will get noisy, though I might be able to recover 13-14 stops this way. The image above was actually exposed for the midtones. The shadows and highlights had separate images three stops apart. I overlaid one on the other, and erased out the bits I didn’t want – so that would be putting the darkest image on top, then erasing around the highlights to reveal the images below. This is the correct way to do HDR – and perhaps the subject of a future article. The tonal transition between layers was made smooth by feathering the opacity and hardness of the eraser brush, as well as using curves on the individual layers afterwards.

Two more steps – dodge and burn of the flattened image to give it local pop; and the hardest bit: retouching out the reflections of the opposite boutique. Note that the reflections overlaid some very complex textures and structures in the image; it definitely wasn’t a simple clone or healing brush job. (Originally, the images were done in the morning; the boutique opposite proved to be extremely bright, so I came back at 10pm once most – but sadly not all – of the lights in the neighbouring boutiques had been turned off. ) The solution? Get creative with replacement textures. The left hand window is actually an inverted clone of the right hand window; everything was nearly perfectly square geometrically, so it wasn’t too much of an issue. Small differences in alignment were sorted out using the Distort tool again, matching up the corners. It also helped that the interior of the store itself was mostly symmetric, of course. Some strategic erasing around the left-unique features and some healing brush later, and voila – finished.

As much as I like to get it right straight out of the camera, there are some times when it simply just isn’t possible. MT

_8018477-80-2 copy
Finished shot again.

____________

If you enjoyed this post, please consider supporting the site via Paypal ([email protected]); Ming Thein’s Email School of Photography – learn exactly what you want to learn, when you want to learn it or learn how to achieve a similar look with our Photoshop workflow DVDs.  You can also get your gear from Amazon.com via this referral link.  Prices are the same as normal, however a small portion of your purchase value is referred back to me. Thanks!

Don’t forget to like us on Facebook and join the Flickr group!

Images and content copyright Ming Thein | mingthein.com 2012 onwards. All rights reserved

Hands-on-preview: Sony A99, NEX-6, NEX-5R

_RX100_DSC1277b copy

I was invited by Sony Malaysia to have a hands-on session with some of the new products announced yesterday; the full-fram Alpha SLT-A99 and grip, NEX-5R, NEX-6 and 16-50 pancake zoom were all present – though unfortunately not the RX1, which is said to be in final beta at the moment. All products were still non-final in firmware and image quality, so I wasn’t allowed to keep any of the files. But what I can do is offer some subjective assessments and opinions on usability, handling and perceived file quality (off the LCD, at least).

_RX100_DSC1279b copy

The Sony Alpha A99
Highlights:

  • 24MP full frame CMOS, full HD video, 6fps, 14 bit RAW files
  • 2.7MP OLED VF
  • Translucent mirror; pentaprism phase detect AF with 19 points (11 cross type), sensor contrast detect AF with 102 points
  • Tilting 3″, 1.2-million dot LCD
  • Sensor shift stabilizer
  • Built-in GPS
  • New ISO-standard hotshoe
  • Dual SD slots

_RX100_DSC1290b copy

First impressions are of a solid but relatively lightweight camera; subjectively it’s in the Nikon D800E weight category – noticeably lighter than the D700, 5DIII and A900, but not as light as the APS-C cameras. The body is a matte-finish magnesium alloy with a nicely sculpted and very ergonomic grip; there’s only one workable hand position because of the finger detents, but it’s a comfortable one. Major buttons all fall to hand easily, which is good, because there are lots of them – a number of which are customizable through the menus. One thing I do like with all of the new Sony cameras (including the NEX-6, NEX-5R and A99) is the fact that the power switch is around the shutter button – easy to turn on and shoot, and equally easy to turn off in between to prolong your battery life.

_RX100_DSC1299b copy

For a non-Sony shooter, the learning curve was fairly steep, but the majority of camera functions were easy to figure out. I’m told that the A99 is aimed at the professional end of the market, and features a 200k shutter life along with environmental sealing. For the most part, it seems that the external control compliment was well chosen, but for the life of me, I couldn’t find any way to change metering other than via the menu. The focus points were also all clustered around the center of the frame in a square – odd, considering the camera also uses the imaging sensor to focus (and there should be no restrictions with live view CDAF). I suspect it has something to do with the phase detect cell in the ‘pentaprism’ (the A99, like all translucent-mirror Sonys does not have a pentaprism but rather an EVF) and correlating results with contrast detect AF. I didn’t see any AF fine tune adjustments (what if the PDAF sensor is misaligned?) but then again I also didn’t have time to go through the menus in great detail.

Overall though, while the camera felt a bit too menu-centric in operation, responsiveness, speed and general usability felt top-notch. Focusing is as fast as any of the traditional DSLRs I’ve used, though I didn’t have an opportunity to try tracking focus. The focus range limiter works well, though requires a bit of practice to become intuitive in use. The EVF felt a notch above that used in the NEX-7 (and NEX-6) – there just seems to be less tearing and an even finer pixel mask than the already excellent units used in those two cameras. Other than the dynamic range and generous information overlay, it’s not immediately obvious that you’re looking through an EVF based solely on resolution alone.

_RX100_DSC1297b copy

On image quality – not knowing how final the image processing in the camera is, and not being able to view files on a computer – i.e. judging off the LCD only, for JPEGs, with whatever processing the camera has chosen to apply – the files look pretty clean. Very subjectively, on a pixel level, I think they’d probably be on par with the Nikon D700, and possibly close to the D3s. It seems that after a generation of evolution in sensor technology, pixels have been allowed to shrink again without too much detrimental effect on noise performance. Side by side with the RX100 I was also carrying (which has the same LCD, and a similar processing engine to the A99) – the A99 appeared a full 2-2.5 stops cleaner, with ISO 12,800 looking quite similar to ISO 3200. This of course bodes well for other cameras that may use the same sensor as a base – the RX1 and newly announced Nikon D600 come to mind. I don’t know if I’ll get around to doing a full review of this camera – it may be meaningless as I don’t have the lenses to use it in my normal course of work, and probably not enough time either – but I definitely think it bears further investigation.

_RX100_DSC1267b copy

The Sony NEX-6
Highlights:

  • 16MP APS-C CMOS, full HD video, 10fps, 14 bit RAW files
  • 2.4MP OLED VF
  • Hybrid contrast and phase-detect AF (99 sites)
  • Tilting 3″, 921k-dot LCD
  • New ISO-standard hotshoe

_RX100_DSC1271b copy

The NEX-6 feels much like a NEX-7 light – I was told that the market liked the NEX-7, but didn’t like the price point; so Sony went out and filled the gap between. It’s very much a mix of the two cameras on either side of it – it has the same 16MP sensor as the NEX-5R, complete with phase detect points for faster AF, and the body style and EVF of the NEX-7. It’s also a bit thinner than the NEX-7, and has an ISo-standard hotshoe. This new hotshoe – shared with the A99 – has the usual trigger pin in the center, but its electronic communication contacts are in the front portion of the shoe; let’s hope the design of the corresponding accessory shoes on the flashes etc is sufficiently robust, because some of those pins looked rather small and delicate.

This camera actually has two control dials – there’s another one concentrically nestled under the base of the mode dial, along with the familiar one on the back – not the three of the NEX-7. One again, the softkeys are programmable, along with the function button next to the shutter. Overall, the shooting experience was much like the NEX-7, but with the simplicity of the NEX-5 – I actually like this camera better than the other two because it doesn’t feel like it’s trying to do too much. (Curiously the scalloping on the top plate before the mode dial and grip shape remind me very much of the Sony V3 prosumer camera from around 2005 or so, which I also owned.)

The one thing you’re all probably wondering about is AF speed, especially with those extra phase-detect photosites on the sensor. Subjectively, it’s pretty quick under moderately low light (indoor) conditions; there’s no hunting, but perhaps the lens could be driven a bit faster. Maybe the newer lenses will allow this – the only functional lens we had was the 16/2.8. I’d say it felt about the same as the Olympus OM-D and 12/2 under similar conditions.

Not much to say about perceived image quality for this one – the files definitely didn’t look as clean on the LCD as those from the A99; I’d say it’s probably on par with existing cameras that use the predecessor to this sensor (D7000, NEX-5N etc).

_RX100_DSC1265b copy

The final camera I’ll quickly mention is the NEX-5R – it shares the same new 16MP sensor with phase detect points with the NEX-6; performance felt almost identical in terms of AF speed, and one presumes image quality would be similar, too. It does gain a touch screen which flips through 180 degrees for the narcissistic photographer. Effectively, it’s the same camera as the NEX-6 minus one the EVF and mode dial. Also present was the new 16-50 pancake zoom, but I didn’t have a chance to shoot with it because it was a non-functional prototype. The size is a little thicker than the 16/2.8 (but not much) – similar to the Panasonic 14-42 X – and like that lens, it uses a rocker switch on the side to zoom. I’m told it will also be available as a kit lens to go with the NEX-6.

_RX100_DSC1254b copy

Now that Photokina is officially just around the corner, not only are the announcements coming thick and fast, but the rumor mill is going into overdrive. Many of the big boys in the industry – notably Canon, Leica, Zeiss, Hasselblad and Olympus – have yet to make their announcements; I’m anticipating a busy month ahead. And lets just say there are some very interesting products in the pipeline which will come from far left field. As usual, I’ll be reviewing products of interest to me professionally first, but if something else catches my eye, I’ll do what I can to squeeze it in. MT

A big thank you to Sony Malaysia for the invitation.

____________

Visit our Teaching Store to up your photographic game – including Photoshop Workflow DVDs and customized Email School of Photography; or go mobile with the Photography Compendium for iPad. You can also get your gear from B&H and Amazon. Prices are the same as normal, however a small portion of your purchase value is referred back to me. Thanks!

Don’t forget to like us on Facebook and join the reader Flickr group!

appstorebadge

Images and content copyright Ming Thein | mingthein.com 2012 onwards. All rights reserved

Photoessay: Papan, part one

Papan is a small, semi-abandoned town in rural Perak, Malaysia; it’s just outside Ipoh. I suspect that even during boom time, there couldn’t have been more than 300 inhabitants. The remaining residents are elderly, and I suspect have nowhere else to go, or stay out of inertia. For every lived-in building there is an abandoned one; sometimes even the upper stories of occupied buildings are derelict, with caved in roofs and empty windows. Leave anything for long enough, and nature will take its course to reclaim the land. It’s often said that the more advanced a society, the less will be left behind – and the sooner it will all decay. Clearly, not that many years have passed since Papan’s heyday, yet the place is practically a ghost town. However, it’s also a medley of interesting textures and pastel colours; an excellent place for an hour or two of photography. MT

This series shot with a Sony RX100. Thank you to one of my Email School of Photography students, John Chang, for taking me here. EXIF data is intact, click through the images to view larger versions and EXIF data on Flickr.

_RX100_DSC0873b copy

_RX100_DSC0833b copy

_RX100_DSC0860b copy

_RX100_DSC0840b copy

_RX100_DSC0830b copy

_RX100_DSC0811b copy

_RX100_DSC0852b copy

_RX100_DSC0824b copy

_RX100_DSC0852b copy

_RX100_DSC0851b copy

_RX100_DSC0818b copy

_RX100_DSC0780b copy

____________

Visit our Teaching Store to up your photographic game – including Photoshop Workflow DVDs and customized Email School of Photography; or go mobile with the Photography Compendium for iPad. You can also get your gear from B&H and Amazon. Prices are the same as normal, however a small portion of your purchase value is referred back to me. Thanks!

Don’t forget to like us on Facebook and join the reader Flickr group!

appstorebadge

Images and content copyright Ming Thein | mingthein.com 2012 onwards. All rights reserved

Review: The Carl Zeiss ZF.2 2.8/21 Distagon T*

_8015935 copy

One of the legendary wideangles for SLR users, the Carl Zeiss ZF.2 2.8/21 Distagon T* (referred to simply as the ’21’ after this) is a fairly complex – by Zeiss standards, anyway – telecentric design with 16 elements in 13 groups and a floating rear group for close range correction. As with most of the modern Zeiss lenses, it’s based on a derivative of the older Contax/ Yashica 2.8/21 Distagon (however, that was a 15/13 design). It’s currently available in Canon (ZE, fully electronic) and Nikon (ZF and ZF.2, the latter of which is fully electronic) mounts.

_8015829 copy

Like all Zeiss lenses, this is a piece of glass that is extremely solid, moderately heavy (~620g) and very well built all-round – it’s like an old-fashioned scientific instrument, in a good way. There is no plastic on this lens; except perhaps some of the baffling at the front and rear. The barrel is black-anodized aluminium, with chrome front bayonet for the hood, and chromed brass rear mount. My two minor complaints about build quality relate to the hood lining and mount – like all Zeiss lenses, the mount seems to wear very quickly, showing brassing after just a dozen or so lens changes. The hood is metal, solid, and locks into place on the front bayonet thread with a reassuring click – and doesn’t move thereafter. However, it also has very crisp edges that are prone to denting, and the felt lining can easily start peeling around the front edge if you get it caught on something. A thin rubber bumper lip around the front edge would solve both problems handily (and if I’m not mistaken, the hoods for some of the Sony Alpha Zeiss lenses have this).

_8015938 copy

One curious design quirk is the front portion – it reminds me very much of a martini glass. Although the glass itself appears to be able to fit within a similarly-sized housing as the 2/28 Distagon, the front filter thread is a whopping 82mm. I presume this is so one can stack filters without worry for vignetting, but it could also be because some parts such as the hood and bayonet are shared with the similarly martini-like 4/18 Distagon. Unfortuantely, this makes the lens rather cumbersome to pack as it occupies virtually cube-like dimensions.

_8013437 copy
Boats, stored. Le Sentier, Switzerland. Nikon D800E, Zeiss ZF.2 2.8/21 Distagon

This is, of course, a manual focus lens – apparently the tale goes that all of the autofocus patents are held by the Japanese, except for Hasselblad, who bought technology from Minolta. Needless to say, these patents are being kept very closely guarded; I honestly can’t think of a reason to buy a large portion of Nikon and Canon’s lenses if I could get autofocus with Zeiss. Industry politics aside, the manual focus ring is perfect – spinning freely enough to change focus distance quickly, but not so loose that you can’t set the distance precisely. The amount of damping is perfect. Why Zeiss can’t make all of its other lenses feel like this is beyond me – they’re mostly a bit too heavy in feel for my tastes, especially in a fast moving reportage scenario.

_8017807 copy
Spiral. Sasana Kijang, Kuala Lumpur. Nikon D800E, Zeiss ZF.2 2.8/21 Distagon

The near focus limit is just 22cm, which makes for some very dramatic closeups indeed; however don’t be expecting fantastic magnification because it is, after all, a 21mm lens – which means you’re looking at 1:5 or so. More importantly, however, is that optical performance across the frame is maintained even at this focusing distance; undoubtedly thanks to the floating rear group that compensates for near aberrations. I personally can’t think why I’d use it at this range, though it might make an interesting lens for food photography on the OM-D – being a 42mm equivalent.

_8018467-8 copy
Boutique interior. Nikon D800E, Zeiss ZF.2 2.8/21 Distagon

Sharpness and resolving power are excellent; this is one of the few wides that really does the D800E sensor justice – even into the edges. The center is already extremely sharp from wide open, and the extreme corners catch up at around f5.6 or so. There are very mild traces of lateral CA wide open in the corners with high contrast subjects and the D800E; they’re not visible at all on the D700 and DX bodies. And there’s no odd color smearing, either – everything resolves in the same spatial location, which can’t always be said of wide angles (the Sigma and Voigtlander 20mms come to mind). Interestingly, this lens has an extremely impressive MTF chart* – almost flat by f5.6 – made even more impressive by the fact that Zeiss MTF charts are measured averages not theoretical maximums.

*The interpretation of which will be the subject of a future article.

_8014874 copy
Dreaming of the high seas. Nikon D800E, Zeiss ZF.2 2.8/21 Distagon

What of the other optical properties? Well, there’s some vignetting; around 1-1.5 stops in the corners at f2.8, but it’s almost entirely gone by f4. There’s distortion, too; up to 2% taking an odd moustache or sombrero-shaped pattern that isn’t so easy to correct manually, but can be taken care of easily by ACR’s built in profile for the lens. Bokeh is neutral and pleasant, with no hard edges; that is, when you can get enough subject separation to see any bokeh in the first place. You’re pretty much going to be at hyperfocal from 2m if you set f5.6.

_8017918 copy
Gallery. Nikon D800E, Zeiss ZF.2 2.8/21 Distagon

Finally, a quick word on that famous Zeiss microcontrast – it’s present as expected. Microcontrast is the visible result of several optical properties: high resolution; even and high spectral transmission, and as little chromatic aberration as possible. The 21 has all of these things. Resolution and chromatic aberration are functions of the optical design; transmission dependant on the glass types and coatings used. As with all Zeiss lenses, the transmission of this lens is very high thanks to the excellent coatings – note how in the images above, the front few elements mostly disappear; this is due to the surface coatings not allowing reflected light. It’s especially important for maintaining contrast; good coatings manifest themselves in a deep, saturated look that I like to think of as ‘tonal richness’. But I digress: the T stop of the 21 is 2.9, which is just 0.1 stop down from the physical aperture of 2.8. It means that you’re pretty much going to get as much light as you can out of the optical design.

_8013417 copy
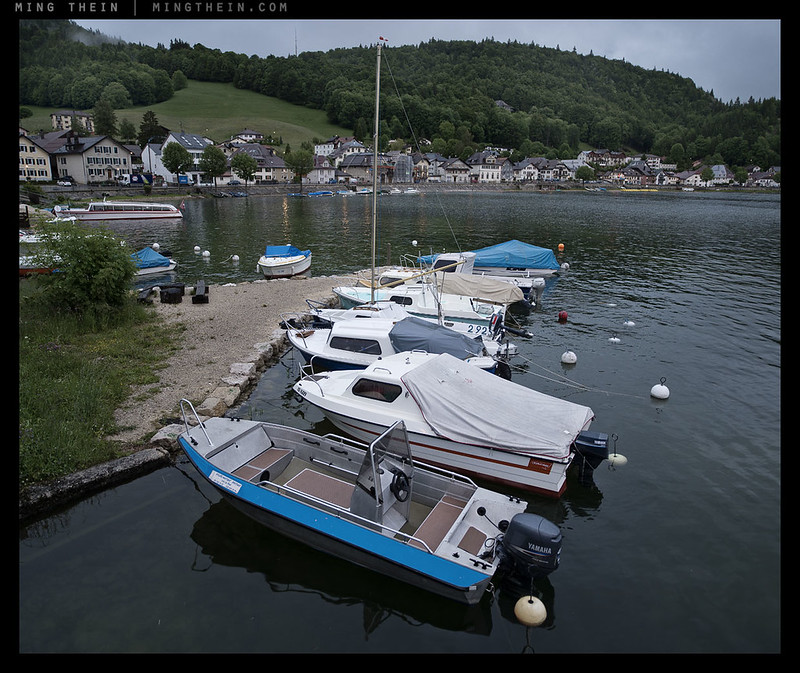
Boats, in use. Lac de Joux, Switzerland. Nikon D800E, Zeiss ZF.2 2.8/21 Distagon

All of these technical qualities are useless if the lens doesn’t produce great images; it does. The 21 somehow manages to be an excellent balance of technical competence and personality; it’s not entirely a transparent lens, but its personality definitely lends a positive influence to any images shot with it. And despite the distortion, you can use it for architectural work uncorrected if you don’t put any straight edges too close to the frame border – in practice, it’s not that noticeable; far more obvious will be whether your camera is level or not. For critical applications, correct the distortion with ACR/ Photoshop. The drawing style of the 21 falls somewhere between the 2/28 Distagon and the 2/50 Makro-Planar; both resolve at very high levels, have excellent microcontrast and transmission, but the difference in ‘personality’ here seems to be related to the amount of field curvature and distortion; the 21 is not perfectly flat field, but it’s pretty close – which is a surprise for an ultrawide.

_8018601 copy
MRI machine. Nikon D800E, Zeiss ZF.2 2.8/21 Distagon with flash

One of the things I like very much about the way this lens renders – and perhaps more generally about the 21mm field of view – is that it’s about as wide as one can go without the perspective starting to render subjects unnaturally, so long as you carefully place the foreground in your images. It’s wide enough to convey space – especially in tight interior quarters – but not so wide as to appear unnatural, which is a problem I’ve always found with ultrawides. It’s simply impossible to achieve anything approaching a natural-looking perspective with anything wider because of the configuration of our own eyes: 21mm is roughly equivalent to your peripheral vision. Psychologically, our brains just aren’t conditioned to interpreting anything wider on a regular basis.

_8017924 copy
Solidity and transparency. Sometimes perspective distortion is actually useful to add a bit of abstraction to an image. Sasana Kijang. Nikon D800E, Zeiss ZF.2 2.8/21 Distagon.

I want to add a quick note on compatibility: thanks to it being a telecentric design, the lens actually works very well on smaller formats – Micro Four Thirds, for instance. Carrying say a Nikon FX body, a M4/3 body and the 21 and 100mm lenses gives you an optically excellent and reasonably light landscape kit covering 21, 42, 100 and 200mm – a nice spacing of perspectives. I did this for several early-morning walks in Switzerland whilst on my last assignment, except I had the 1.4/85 Planar instead of the 2/100 Makro-Planar.

_5003575 copy
One of those falling trees in the forest that nobody ever hears about. Olympus OM-D, Zeiss ZF.2 2.8/21 Distagon

Up until fairly recently, I’d done my wide architectural work with either a Voigtlander 20/3.5, whose low contrast and lack of bite I didn’t like very much; or the Nikon AFS 24/1.4G, which didn’t have the same microcontrast as the Zeiss. All I can say is that I have no idea why I didn’t get the 21 sooner; it’s another one of those truly outstanding lenses that is a must if you’re a wideangle shooter. It isn’t the most discreet lens for documentary work, but the pictorial results are excellent; but it is an absolute no-brainer if you’re an architectural or landscape photographer. Highly recommended! MT

Get your Zeiss 2.8/21 Distagon is available here from B&H and Amazon

____________

Visit our Teaching Store to up your photographic game – including Photoshop Workflow DVDs and customized Email School of Photography; or go mobile with the Photography Compendium for iPad. You can also get your gear from B&H and Amazon. Prices are the same as normal, however a small portion of your purchase value is referred back to me. Thanks!

Don’t forget to like us on Facebook and join the reader Flickr group!

appstorebadge

Images and content copyright Ming Thein | mingthein.com 2012 onwards. All rights reserved

_5003560 copy
Old factory reflections. Olympus OM-D, Zeiss ZF.2 2.8/21 Distagon