10×10: 100 ways to improve your photography

This article was originally posted in a series of 10 mini-exerpts back in the very early days of the site; Google Analytics tells me that it was hardly viewed, which is probably a shame – so I’ve re-packaged, updated and re-presented it again here as a monster all-in-one reference. Enjoy. MT

Disclaimer: I’m assuming you already know the basics.

Part one: Compact cameras

Pretty much everybody has a compact, even if it’s only the one built into your phone. It’s no good for serious photography. Or is it? You might find yourself using it more if you try some of these ideas…

10: Carry spare batteries. One in the camera, one in your pocket or one charging. This lets you keep going – especially important since compact battery life is often terrible.

_0011755bw copy

Crossing thoughts. Ricoh GRDIII

9: Use the hand strap. It seems obvious, doesn’t it? But you’d be surprised how many people don’t, and then land up having to buy new cameras.

IMG_1330b copy

Car reflection. Ricoh GRDIII

8: Shoot bursts, if you have a useable buffer. Without the buffer, you’ll just have to rely on timing and counting shots – think of it as a revolver rather than a machine gun. The same rules about the middle shot being stable and sharp in a burst also apply to compacts.

_0011033bw copy

Zoom. Ricoh GRDIII

7: Keep ISO as low as possible, and make use of the stabilizer. Most good compacts have stabilizers; this is because even with the 1/focal length rule, there’ll be enough camera shake to blur things – you’re holding a light object at arms’ length and trying to keep it still. Granted, there’s no mirror slap, but there’s also nothing to brace against, either. Keeping the ISO as low as possible lets you maximize image quality. There’s usually a big difference between even base ISO and one stop up; know the limits of usability and don’t exceed them.

_0011069bw copy
Crossing, London. Ricoh GRDIII

6: Look at the whole frame. I’m not sure how to say this more succinctly: there are things compacts can do that larger sensor cameras can’t – think of telephoto/ compressed perspective shots where everything is in focus, for example – and vice versa (shallow depth of field, wide FoV). Look at the whole scene, and see how you can use these strengths to your advantage. Images shot with compacts that work actually force you to have a much stronger composition, because you cannot rely on the crutch of bokeh or let the lens do the talking.

_0011492 copy
On set in the afternoon. Ricoh GRDIII

5: Spot meter. Dynamic range on all compacts is limited because the pixels are small. This means losing the shadows or the highlights is inevitable under most situations; you need to decide which one is important. The spot meter (and a half press to lock exposure) helps you to do that. High key = keep the shadows and lose the highlights; low key = keep the highlights and lose the shadows; most important however is making sure the subject is properly exposed – use the spot meter over faces, for instance. The other alternative is to use the spot meter on highlights and add a stop of exposure compensation – the meter will try to average a middle gray exposure out of whatever you place the box over; you know the camera has a little more tonal range in it if the highlights are at middle gray, so you can safely add some positive exposure compensation. This generally makes the rest of the image a little dark – especially under harsh light – but it also has the side benefit of making the colors richer.

_0012133 copy
The fountain of capitalism. Ricoh GRDIII

4: Use P mode. I’d say leave it in full auto, except most of the time that doesn’t let you control exposure compensation and metering – those are important. Why not use aperture priority, as I’d recommend with a larger sensor camera? Simple: there’s no point. The real focal length is so wide and the lenses usually so slow that DoF is enormous, and changing the aperture isn’t going to do anything other than reduce the amount of light reaching the sensor. Great if it’s bright, but if you stop down too much, you’re going to to induce diffraction and just land up with soft images.

_0011105bw copy
Affection waiting for the bus. Ricoh GRDIII

3: Keep the lens clean. I’m constantly surprised by how many people have dirty lenses on their cameras and then complain that the images aren’t sharp, or that they can’t see anything in the finder – but there’s fingerprints all over it. It’s especially important on a compact as the small sensor and high pixel density are very demanding of lenses; the more aberrations you have on yours, the lower resolving power is going to be.

_780_IMG_1719bw copy
After prayers. Canon SD780IS

2: Prefocus. Although focusing speeds have improved dramatically, what’s really nice about most point and shoots is the half press to full press lag is actually quite low – but you need to be prefocused first. In any case, the huge DoF will cover any minor focus errors. Most fleeing moments can be captured with a compact and a little anticipation.

_0011588 copy
Break. Ricoh GRDIII

1: Set up your camera to either shoot raw, or output as neutral a jpeg as possible. If you can’t get a raw file, there’s still a lot that can be done with a good jpeg – what I usually do is reduce contrast to minimum to preserve the highlights and shadows; turn saturation down, and lower (but not zero) sharpening. Reason being that if you zero sharpening, you do generally lose some detail on compacts as this step is applied to the raw data in the imaging engine before being saved as a jpeg. You’ll be surprised how much you can do with one of these files afterwards in photoshop. Similarly, avoid those fake HDR or extended dynamic range modes; they might appear to help but what they actually do is make highlights look very unnatural because the tonal values overlap with other parts of the luminance range.

IMG_0861b copy
Vehicular architecture. Apple iPhone 4

See more of my small-sensor compact camera work here on flickr: click here

Part two: DSLRs

Disclaimer: I’m assuming you know the basics already, but want to get serious.

10: Control your view. Use the viewfinder when you can; there’s less lag, you can brace the camera against your face to increase stability, the dynamic range and resolution are higher, it’s a more direct connection to your subject and it saves power to boot. But why not use live view if you’ve got it, especially coupled with a swiveling screen? For critical focus, odd angles, and video, it’s actually pretty handy. Though I personally avoid it like the plague unless i have no choice.

_X1_L1001362 copy
The big brass band. Not strictly an SLR shot, but live view did help me to get this angle without sticking my face on the floor. Leica X1

9: Shutter button technique matters. You’d be surprised how many people just jab the button and wonder why the camera isn’t responding. Firstly, don’t jab. Roll your finger gently to reduce camera shake. Secondly, prefocus; the shutter button has two stages – the first activating autofocus, the second, shutter release. If you have focus already going, then your lag is going to be much, much shorter than if the camera has to do all the work when you press the button – even on the fastest cameras. Finally, you’d be surprised how many people use the horizontal release in portrait orientation even if they have a vertical one – don’t. It’s less stable, and frankly you just look silly.

_7033388 copy
Night party. It looks bright, but the EXIF will tell you otherwise. I needed every single trick in the book to get this shot: stratospheric ISOs, low shutter speeds, and a fast f1.4 lens wide open. Nikon D700, 24/1.4.

8: Turn the in-camera sharpening and contrast up to maximum. What? Why? There’ll be haloes! I can hear the cries of incomprehension and derision already. First caveat: you must shoot raw. Second caveat: use a raw processor that ignores the camera’s proprietary processing tags, e.g. Adobe Camera Raw. The reason why you want to crank both of these things up is that the camera’s preview engine generates a jpeg based on these settings; if your exposure is okay with the contrast at maximum, then you know you’ll have more shadow and highlight latitude. And high sharpening accentuates the differences between in focus and out of focus.And it also accentuates noise; basically, the combination of these settings makes it easier for you to tell if you’ve nailed it or not.

_3035242 copy
Work that perspective. Nikon D3, 70-300VR

7: Don’t let zoom lenses make you lazy. Select a focal length based on perspective, not angle of view: in other words, don’t use a wide lens because you want to get more of the scenery in, or a telephoto because you want to get closer. Instead, wide is for accentuating perspective, telephoto is for compressing it.

_7021180 copy
Action. An interpretation of the famous first series of motor drive images that showed a galloping horse’s legs do in fact leave the ground simultaneously. Nikon D700, 28-300VR

6: Shoot in bursts. Events evolve. The first shot may not be the best, or you or your subject may move. A burst is insurance, and if they’re all perfectly focused and exposed, then it lets you select the best image – say for minor variations in facial expression of a portrait. Note that I don’t mean machine gunning the shutter until your buffer is full; three or four shots is usually plenty.

_3100_DSC2015 copy
Fire. The balloon was firing on and off unpredictably. It would be a lot more difficult to get this shot without auto ISO. Nikon D3100, 85/1.4 G

5: Use auto-ISO, but only if it’s configurable. If the minimum shutter speed is not configurable, you don’t know at what shutter speed the camera is going to start bumping the sensitivity; if it’s too early, your images will be grainer than they need to be. If it’s too late, then you may not have enough shutter speed for a sharp shot.

_7026879 copy
Cheers. Tough lighting; how do you know what your camera is going to expose for if you haven’t tried it out? Nikon D700, 85/1.4 G

4: Know what your camera is doing: AF, metering, auto-ISO. This is actually very, very important. If you don’t know how your camera responds under a given situation, how do you know if you can get the image or not? There’s no shortcut to this other than a lot of practice and experimentation.

_3033422 copy
Alien. I prefocused on the spot where the man would be when the light was exactly behind and over him, then waited. Nikon D3, 24-70/2.8 G

3: Have some way to control your AF: either use AF-ON or AF-L, together with continuous focusing. Autofocus is an aid, not a crutch. Auto-select point systems will seldom select the point you want; they’re useful, but only in an environment where you have a lot of randomly moving subjects and need to pick the closest one. When you have something a bit more sedate, tell the camera what to focus on. Use continuous autofocus, because everything moves, if only slightly; the larger your aperture, the more this will matter because depth of field is shallower and probably won’t be sufficient to cover subject movement. I prefer to have AF activation on the shutter button and an AF-Lock button configured under my right thumb – this is so I know I can just press one button and have a high chance of getting the shot – but I also know of plenty (most sports shooters?) who configure AF-ON under the thumb, and the shutter button to capture the image only. AF Lock for that configuration is of course done by releasing the AF-ON button. Try both and see which works for you.

_7025384 copy
This was actually shot in a well lit carpark, but with a stopped down lens and fast shutter speed to eliminate ambient and have nearly 100% of the exposure provided by the flash. If I’d shot aperture priority, I’d still be able to see the surroundings. Nikon D700, 28-300VR and three SB900s.

2: Shoot aperture priority, except for flash. This is the easiest way to maximize control of your camera: aperture priority to control depth of field, manual mode if you need to balance flash and ambient lighting.
_7030982 copy
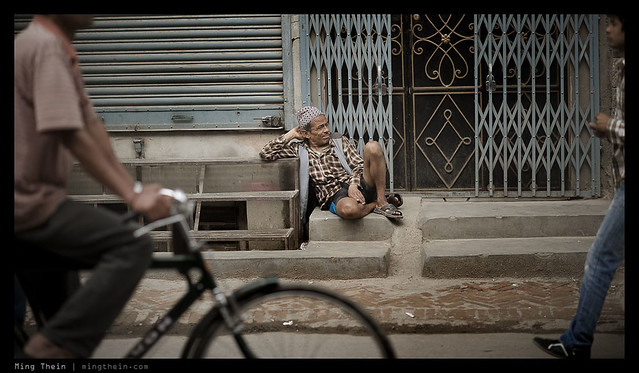
Watching the world pass by. Imagine this frame without the edge intrusions: it’d feel pretty different, wouldn’t it? Nikon D700, 85/1.4 G

1: Watch the edges of your frame. I’ll say it time and again: what usually makes or breaks a photo, or the difference between an excellent image and an outstanding one, is how well the subject stands out. This is both a function of subject lighting, positioning and focus, as well as the inverse: what other things are there in the frame that take attention away from the subject? Intrusions into edges are one of the main ones. Conversely, there are also compositions where edge intrusions are welcome, or even make the image: they suggest things that might not be there, or leave things to the imagination of the reader. Use with care!

Part three: Mirrorless cameras

Mirrorless: the middle child? Maybe. But even a diehard sceptic like me has discovered that these things have their uses –just be clear about your expectations.

10: Spare batteries are an absolute must. Due to the large sensor, LCD and high demands from lens focusing motors, stabilizers and the like, mirrorless cameras have the highest power draw of any type of camera (other than medium format digital, it seems). Make sure you have at least two to get you through a day, maybe with an additional spare.

_PM05280 copy
Moon over Prague Castle tower. Olympus E-PM1, 45/1.8

9: When selecting a camera, look at two things: useability (including lens choices) and raw sensor quality. I’ve tried the Panasonics, Sonys, Fuji and Olympus systems; of all of these, only the Olympus E-PM1 Pen Mini stayed more than a month. Why? Because it’s the most responsive and configurable of them all. The Panasonics are very configurable but not very user friendly. The Fuji X100 has the best image quality, but the firmware is a disaster and it’s slow as molasses. The Sony is reasonably responsive, but not so easily configurable and the lens choices are pretty limited. And the NEX-5 I owned had a strange color palette. And don’t pick one so big that you might as well take your DSLR.

_PM03783 copy
Lange Datograph. Olympus E-PM1, Panasonic 20/1.7

8: Use a hand strap instead of a neck strap. If it’s in your hand, you’ll be ready faster. And more likely to use it. And the weight/ size aren’t so bad you need to hang it around your neck or shoulder for relief. It also takes up less space in your bag when you have to store it.

_PM00545 copy
Reflections. Olympus E-PM1, 14-42 kit lens

7: Adaptors are useless. Although they seem like a good idea, mirrorless systems are optimized for telecentric lenses with very short back flange distances; conventional SLR or RF lenses aren’t designed like this and thus don’t work well on mirrorless cameras. It’s quite well known that RF wides have numerous issues like cyan/magenta shifted corners, increased CA and vignetting. Adapted lenses are also bulky and lacking in automation – no AF, no aperture control, no stabilizer. And accurately manually focusing something held at arms’ length is near impossible.

_PM03612 copy
Burlesque. Olympus E-PM1, Panasonic 20/1.7

6: Remember the lag. Even though release lag may be in the 30-40ms range, you’re going to have another lag induced by the LCD itself – the best models refresh at 60hz, which means you’re looking at least another 15-20ms (or more) of additional lag as the screen refreshes to show the current scene. Practice to get a feel for the rhythm of the camera.

_DSF1891bw copy
Garage classic. Fuji X100

5: Avoid continuous AF. Contrast detect AF systems still aren’t good enough to track moving subjects – with the exception of the hybrid system in the Nikon V1 that also has phase detect photosites built into the sensor – so either prefocus and anticipate, or cover with DOF.

_DSF1421 copy
After school in Kathmandu. Fuji X100

4: Carry it everywhere. No point sacrificing image quality if you’re going to leave it at home like the full size camera. This is also why I’m drawn to the smaller, more pocketable mirrorless cameras like the Olympus Pen Mini. I’ve put it on a hand strap and use a pancake lens most of the time; it’s not a lot bigger than a compact but produces vastly better image quality.

_N5_DSC0100 copy
Mosque architecture. Sony NEX-5, 18-55 kit lens.

3: Use the EVF if you’ve got one. Like any optical finder, bracing the camera against your face helps stability immensely. I’m not recommending going out and buying an add-on finder; these are usually flimsy, unwieldy and dramatically increase the size of the camera – defeating the point of mirrorless in the first place.

_N5_DSC0111 copy
Before prayers. Sony NEX-5, 18-55 kit lens.

2: 1/focal length rule doesn’t apply anymore. Why not, aside from crop factor? Because most of the time you’ll be using live view and holding the camera at arms’ length – this means increased propensity towards camera shake. Double, or even triple that for critical shots or action. Or use a flash. And while stabilizers help, they probably bring the safe speed into the 1/fl rule or maybe very slightly better.

_N5_DSC1260 copy
Arch. Sony NEX-5, 18-55 kit lens.

1: Compose like an SLR, shoot like a compact. They’re hybrids, right? Treat them as such. You get the DOF of an SLR – which means you have to watch your focus point, and take care in choosing perspectives. But you also have the limitations of a compact – so remember to watch your exposure/ highlights/ shadows; prefocus; don’t expect it to be able to track moving objects. Remember the limitations of both, and that should give you a good idea of how to get the most out of your mirrorless camera.

_PM04986 copy
Hitchcock scene, Vienna. Olympus E-PM1, 45/1.8

See more of my work from the various large-sensor mirrorless cameras here on flickr: Olympus Pen Mini E-PM1; Sony NEX-5; Fuji X100; Leica X1

Part four: Rangefinders

10: Timing, timing, timing: shoot lots and get to know the lag rhythm of your camera. It might feel instant, but it isn’t. That split second can make or break the difference in a critical shot, especially during a fast-paced situation – that fleeting expression, or arrangement of people.

_M9P1_L1011219 copy
Entranced. Leica M9-P, 35/1.4 ASPH FLE

9: Get to know your lenses: There is no such thing as the perfect lens. All of them have idiosyncrasies, be it focus breathing, focus shift, curved focus planes, flare under certain conditions, or maybe the ability to produce brilliant 14-pointed stars from point light sources at f16. (Don’t laugh, the Leica 21 Summilux ASPH does this.) The better you know your lenses and the way they draw, the more you can exploit their properties to help your pictorial rendition of a given situation. It’s also why I’ve got eight ways to get to 28mm – there’s a huge difference between the Zeiss ZF.2 2/28 ‘Hollywood’ Distagon and the Ricoh GR-Digital III, for instance.

_M9P1_L1003203 copy
Gluhwein time, Vienna. Leica M9-P, 50/1.4 ASPH

8: Use a soft release and thumb grip (and maybe front grip). Anything that can make your grip more secure or comfortable, and your shutter release action more gentle, is your friend. I like the Thumbs Up, personally.

_M9P1_L1014802 copy
Seeing the wood from the trees. Leica M9-P, 21/3.4 Super Elmar ASPH

7: Don’t limit your subjects to the center focus point. You can focus and then recompose. But remember that most lenses aren’t flat field (especially rangefinder designs, which are usually non-retrofocus and spherical) so a little tweak to the focus ring is required for edge subjects – usually to make the focus point slightly closer, as the focal plane will be curved slightly around you. Experience is required to determine exactly how much and when to shift – this is why I also highly recommend using fewer lenses but knowing them well.

_M9P1_L1003347 copy
Morning mass, Stefansdom. Leica M9-P, 28/2.8 ASPH

6: Use the DoF scales to prefocus. Especially useful with wide lenses, whose large DoF means that you might even be able to shoot hyper focal and not have to focus at all: especially great for being fast and reducing time between seeing the shot and capturing it. Very important skill for street photography and photojournalism. You can practice this by estimating distances and setting your lens with the camera at waist level, then checking in the finder.

_M92_L9998120bw copy
Self portraits. Leica M9, 35/1.4 ASPH FLE

5: Pay attention to the edges. The frame lines are a suggestion: there will be more included. With experience, you can push the composition a bit and still get everything in.

_M9P1_L1015932 copy
Color wall. Leica M9-P, 50/2 APO

4: Shoot with both eyes open. The nice, bright, high-magnification finders are great for letting you a) see what’s outside your frame and might make composition better or worse if included or excluded; and b) you can keep both eyes open to enhance your peripheral vision. It’ll also stop you from getting run over.

_M9P1_L1003513bw copy
Tea time. Leica M9-P, 28/2.8 ASPH

3: Know the limitations of the system. By their nature, your finder will probably only cover 28-135, and not be very accurate for 90 and 135. So really, the strengths of the system lie in the 28-75mm range; don’t try and do birding with one of these things and wonder why your results aren’t up to par. (Note: I do use my M9-P for macro work, but that’s a different story entirely.)

_M9P1_L1013066 copy
Bangkok. Leica M9-P, 35/1.4 ASPH FLE

2: Less is more. Rangefinders are small and light: why burden yourself and turn photography into endurance sherpa-ing? Try reducing your regular kit to two, or better yet, one lens. Either something which provides to distinctly different perspectives, or perhaps something in-between. I choose 28/50, after a long time trying to make the single 35 work for me. It just didn’t agree with the way my eyes worked, which is a shame because the 35/1.4 ASPH FLE I had was easily one of the best lenses I’d ever used, period.

_M9P1_L1007298 copy
As above, so below. Leica M9-P, 28/2.8 ASPH

1: Check your rangefinder calibration. There’s nothing worse than shooting an entire series at f1.4 and thinking you nailed focus – or at least remembered doing so in the finder while shooting – then being horrified as you open up the set only to find your subjects’ noses in focus and their eyes a distant plane away. If you know how to calibrate your rangefinder, great; if not, it might be the subject of a future post here (but I take no responsibility if you damage something or void your warranty). If you don’t dare, send it in to your dealer. The best thing you can do is have your body calibrated to match all of your lenses – so send them all in at the same time. The next best thing is to have it calibrated for the lens with the shallowest DoF; the one exception is if the lens suffers from focus shift. Then you’ve got no choice but to calibrate for your most frequently used lens and remember which direction to adjust for later. Check calibration often and if you get a new, shallower DoF lens. One last related point: make sure all of your viewfinder windows (VF, RF patch, frame lines, front VF) are clean – you’ll be surprised how much easier it is to focus!

Bonus for Leica M8/9 users: The meter is center weighted and very heavily biased towards protecting highlights. So, for backlit subjects there are a few ways of compensating. a) Lock exposure with the camera aimed at something of roughly equal luminance but not backlit; this works on the shutter half-press position (with a little dot displayed at the top between the leftmost digits in the finder) if you’ve got the release mode set to standard. b) For M9 users, use the rear dial to activate exposure compensation. I personally don’t like this, because I have no idea if I have it set or not, and if so, how much. c) If you’re shooting with fixed and not auto-ISO, then note the shutter reading in the finder, and move the shutter dial to something appropriate. I use a slightly more complicated method, with auto-ISO: if the shutter speed displayed is over the minimum you set, then you know the camera is in base ISO. I just manually set it to something lower; the camera can’t lower the ISO any more, so it overexposes as desired. If the situation is dark and you’re above base ISO, this doesn’t work. In very dark situations, I usually just leave the camera at ISO 1250 and go manual with the exposure. 

See more of my work with the Leica M9-P here on Flickr: click here And for earlier work with the M8, click here

Part five: Photojournalism and street

Photojournalism (hereafter PJ) and street photography go hand in hand: they’re about capturing a moment of life. PJ goes a bit further by adding a story to that moment; street can just be an aesthetically pleasing moment in and of itself. Both though require the photographer to be observant and ready. This is what works for me.

_M9P1_L1004918bw copy
Protest Kabila, Prague. Leica M9-P, 28/2.8 ASPH

10: Watch your shutter speeds. You’re going to need more than 1/focal length – maybe 1/2x to be safe, or even 1/3x if you’re running and gunning. You’re moving, your subject is moving, and nothing is steady. Remember also that the higher the resolution your camera, the less forgiving it is of focus errors and camera shake.

_0010613bw copy
Rain, London. Ricoh GRDIII

9: Small, nondescript cameras are best. They don’t draw attention to you – especially in the current day and age of everybody carrying a camera, nobody is going to take you seriously if you have a small black compact. You’d be surprised how much I get away with using the iPhone or Ricoh GR-Digital III. People simply don’t perceive it as threatening in the same way a pro DSLR and 70-200 might be. Compacts also give you more depth of field for a given aperture.

_0010654bw copy
Morning paper, London. Ricoh GRDIII

8: Shoot wide and close. The perspective produces a stronger image; wide lenses are also more forgiving to focus errors and camera shake. And as a bonus, you get context in the frame as par for the course.

_M8_L1024678bw copy
Learning English. London. Leica M8, 21/1.4

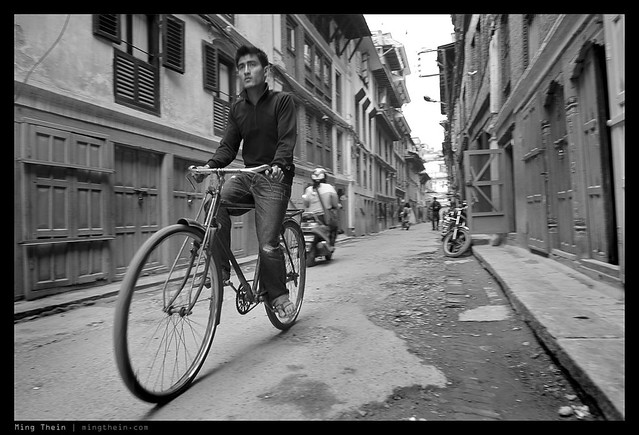
7: Anticipate and observe. To quote the Cartier-Bresson: pick the decisive moment. To do so, you need to be aware of everything around you; really look. Pay attention to the details. People are fairly predictable; it should be easy to spot if something out of the ordinary is about to happen. Anticipation of the action gives you a vital few seconds more to prepare and be in position, or have the camera out.
_7032151bw copy
Bicycle, Kathmandu. Nikon D700, 24/1.4

6: Blend in. Act like you belong, dress nondescript, and nobody will pay you a second glance. It will make your job a lot easier. If you draw attention to yourself – be it by being uncertain or provocative – then people of course notice.

_220_IMG_0251bw copy
Oblivious. I was standing 3 feet in front of them. Canon IXUS 220HS

5: Always have the camera to hand. How are you going to get a quick shot off if the camera is in your bag? You should be able to get a shot in less than 5 seconds – sometimes your window is even shorter than that.

_7030375bw copy
Trekking office, Kathmandu. Nikon D700, 85/1.4 G

4: In a real emergency, help. Yes, our duty as a PJ is to record, document, communicate and raise awareness about the events around you; you help by telling a story. But you don’t have to shoot all the time. Get your shot and then help out the people. Remember that at the end of the day, we’re all human.

_7026532 copy
Street party. They would need help the following morning. I didn’t stay that long. Nikon D700, 85/1.4 G

3: Practice, practice, practice. Use your camera until you’re fast and proficient; you should be able to visualize the frame and field of view without having to raise the camera to your eye. You should be able to set things by muscle memory and have a group of settings (if your camera supports this) that configures the camera to be ready to go.

_X1_L1000191bw copy
Reflections. Leica X1

2: If spotted, acknowledge your subject. A friendly smile, a sincere nod – all of these things make people feel comfortable with your presence and make your life easy. You don’t have to stop and talk or explain what you’re doing if nobody is asking. Smile and move on. Done.

_PM01880bw copy
Smoking break. Olympus E-PM1, 45/1.8

1: Be confident. It is better to say sorry rather than ask permission and miss the shot. With that, go out and be productive.

_7036946 copy
Martial law, Kathmandu. Nikon D700, 24/1.4

See more of my photojournalism work here on flickr: click here

Part six: Lighting

This post deals with the light you create. You can’t always find what you need, so it’s important to know the dos and don’ts of off camera lighting. My tips apply to speedlight users; I’ve never been a huge fan of monoblocks, nor have I used them very much since Nikon launched their CLS system. Sure, sometimes you wish for more power, but then again you remember that you can go for hundreds, if not nearly thousands, of shots on a set or two of AAs – instead of carrying a 50kg lead acid lump around. Read on.

10: Always shoot in manual mode with flash. Otherwise, there’s no way you can balance your flash and ambient exposure; if you want all flash, then you can dial in the highest sync speed possible – this will help you avoid camera shake. If you let the camera decide, it will usually only get it right for the center portion of the frame when the flash exposure is much greater than the ambient exposure. This is to say, most camera systems are useless at daylight fill, especially under very bright conditions.

_3009512bw copy
Inspector. Note how inside/ outside luminance is balanced. Nikon D3, 24-70, one SB900 in a soft box.

9: Imperfect diffusers and softboxes add character to portraits, but not product shots. Uneven lighting for most product shots just makes the object look odd. For people, it can be strangely flattering. Consider making some shoddy homemade internal baffles for your portrait soft boxes.

_M220416bw copy.jpg
Shoddy baffling adds character! D200, 17-55/2.8, 2xSB600s in homemade soft boxes.

8: If you’re controlling lighting, you shouldn’t have blown highlights or blocked up shadows – unless you want them. Self-explanatory. Your lighting isn’t balanced properly. Try again.

_3007528bw copy
Intentional outline. Nikon D3, 105VR, one SB900 off camera.

7: Those clip on diffusers are pointless. A small light source can never replicate a big light source unless you expand (and diffuse) it – be it bouncing off the ceiling, or a softbox. A little clip on diffuser is just going to make a small, diffuse source – which at any distance, looks like a small intense source except weaker. You’ll get the same reflections and general lighting feel. All you’ll have done is a) look stupid b) wasted your money and c) lost at least two stops of light. I’ve never even used the diffuser domes supplied with any of my flashes; they’re still in the plastic bags they came in.

_7049184 copy
Unrelated shot. Speake-Marin perpetual calendar. Nikon D700, 60/2.8 G, one SB900 and diffuser.

6: Duct tape is your friend. Use it to tape flashes in odd positions to whatever supports might be handy; sometimes you just can’t erect a flash stand in the place you want it. But you could tape the flash to the ceiling. I’ve done it before.

_3009669bw copy
The Hollywood shot. Flashes duct taped to curtain poles. Seriously. D3, 24-70/2.8 and three SB900s

5: More flashes are better. I’ve got four; two primary units, one spare, and one more unit to use as a commander on cameras without a built in (Leica M9-P, I’m looking at you). Legend has it that Joe McNally travels with an entire suitcase of SB800s. I dread to think how many batteries he goes through every year.

_7047913 copy
Alfabeti. Nikon D700, 60/2.8 G 2xSB900s

4: If you’re short of lights, consider a reflector. Positioning one light directly opposite the reflector gives you another pseudo-light – depending on the reflector, it could be as little as 1 stop light loss – think of a mirror, for instance. A more diffuse reflector can provide gentle fill.

_X1_L1001004bw copy
Leaf shutter benefits. Leica X1, SB900, 1/2000s.

3: Higher sync speeds are better. Pro DSLRs top out at 1/250s for full power, or less power and faster – but these are not true ‘flash speeds’, because the flash has to fire for longer but at reduced power – note how the flash no longer freezes motion at 1/8000s as much as it did at 1/250s. Leaf shutter compacts like the Ricoh GRDIII and Leica X1 both sync to 1/2000s; they’re great for capturing motion or providing balanced daylight fill, where your ambient shutter speed might be very high. You won’t lose the highlights, and you also won’t lose the shadows – thanks to your high sync speed.

_7022462 copy
Dessert. Balanced with ambient daylight in restaurant. Nikon D700, Zeiss 2/28 Distagon, 2xSB900

2: Remember the eyes. For living subjects, a little catch light reflected in the eye can make all the difference between a flat, boring shot and a portrait that looks alive. Use a reflector, or if you’re using Nikon CLS, the trigger flash on your camera works fine too.

_X1_L1000981bw copy
Note the eyes. Leica X1, SB900.

1: Spare batteries are important. Never get caught short. I avoid NiMH as they tend to exhibit the memory effect, especially if not used frequently – as would be typical for your second or third spare set. The Sanyo Eneloop batteries are fantastic – they really do hold charge like alkalines, but have the reuseability and current draw properties of NiMH. I’ve got eight sets of these for my flashes, and only charge them when depleted.

_7040287 copy
Macro lighting is quite a different game entirely. There isn’t a lot of working distance, and you need a lot of diffusion to create the same apparent perceived light source size.

Part seven: Postproduction and editing

Photoshop is a fix all for everything, right? It’s also come to represent a dirty word; when something has been ‘Photoshopped’ it’s no longer authentic or original, and the skill of the photographer has been severely diminished. Wrong, think again. Photoshop is the equivalent of the darkroom from the film days: sure, you can add things to the scene, but they look odd and unnatural. The main thing you did in the darkroom was finalize the exposure: adjust the density and brightness, and fiddle with the contrast. Maybe some dodge and burn. How? Chemical mixes, timing and cutout masks. We do the same now – except the chemicals are your raw converter and curves layer, the fixer is your save button, and dodge and burn is a brush tool.

So what is editing exactly? The process of removing unwanted material – in this case photographs – to leave a more coherent story or narrative; being selective about what you show is just as important as having something to show in the first place. There’s no point in having technically brilliant but boring images – but you can make a story out of perfectly timed moments, even if they’re a little noisy or blurred.

_7051046 copy
The flying Vianney Halter for Goldpfeil. Nikon D700, 60/2.8 G

10: Keep all of your raw files. You never know when somebody might ask for a color version of a B&W image; don’t lose that sale because you were trying to be cheap on storage. Storage IS cheap.

_M9P1_L1005824bw copy
Sinister chitty chitty bang bang. Leica M9-P, 28/2.8 ASPH

9: Sharpening should be the last step. If you sharpen too early on, you’re to end up with extra noise and less tonal information, especially for images with a lot of fine detail. Why? Because of the way sharpening works. It increases apparent acuity between adjacent areas of different luminance by increasing the difference in luminosity between them. Making something brighter or darker – with images containing a lot of fine detail, this means a change to a large area of the image – will inevitably destroy some tonal information, especially at the extreme ends of the tonal range.

_7046623b copy
If the G-P F1-047 was titanium and on a blue strap…it’s really aluminum and on a tan strap. Nikon D700, 60/2.8 G

8: Let your images mature before deleting. Look at your images immediately after a shoot and pick out your favorites. Then do this exercise again two weeks later. You’ll probably find that there’s been a big change. Why? Immediately after the shoot, you remember how difficult it was to get one shot; that effort put in affects your artistic judgment. Two weeks later, you’ll probably not remember as clearly, and you’re more likely to go with your first instincts. Go with the latter selection.

_m9p1_l1007784 copy

_m9p1_l1007781 copy

A tale of two frames. I initially preferred the first frame; but a month later, I think there’s more of a story and more contrasts in the second one. M9-P, 28/2.8 ASPH

7: Calibrate your monitor. Whether you use one of the Spyders or the built in utility in OS X, it’s important to adjust your monitor to produce as accurate color as possible – this is important for both print and screen; you want to make sure that other people see the same thing you put in so much effort to create. For print, you can attach the color profile to the file; a good printer will be able to match the print to what you see on screen. It’s also important to know the gamut of your monitor; I’ll never do any serious editing on my 11” MacBook Air because the screen has terrible color. On the other hand, the 27” iMac/ Cinema Displays are fantastic, as are the 15” and 17” MacBook Pros.

_M8_L1023901 copy
Intentional color. Leica M8, 21/1.4 ASPH

6: Do most of your adjustments in the raw converter. This is important, because the data is in its highest bitrate form – which means making large changes to the file at this stage has the least impact on image quality. If you do highlight recovery on a 16 bit raw file, you’ll probably have a decent stop or two (assuming a good sensor) before you get posterization or false color. Now try doing the same to a jpeg and you’ll see what I mean. By the same token, keep your files in the highest bitrate form until you’re absolutely sure you’re not going to change anything again – and that might be a Photoshop file in 16 bit with all layers, or it might be a quality 12 jpeg. I generally don’t edit again, so I save my finished files as a maximum quality jpeg. Remember that print doesn’t have as much dynamic range as a computer screen, so if it looks fine on a calibrated monitor, it’ll probably look fine in print.

_D90_DSC5601 copy
Sunset shadow. Nikon D90, 18-200VR.

5: Buy a good tablet. I like the Wacom Intuos 4. It will help you immensely to lay precise masks and control your dodge and burn; the tip is pressure and tilt sensitive to control brush size and density. It’s much faster than doing things with the mouse, too – once you get used to how the entire tablet area maps to your screen. Get one that suits your screen size. The medium 6×9” is perfect for my 15” MacBook Pro.

_M8_L1017183 copy
The Beach. Leica M8, 50/1.4 ASPH

4: Don’t overdo anything. Turning it up to 11 works for some shots, but not most. Too much sharpening leaves haloes. Too much contrast loses tonal detail. Too much saturation makes it feel unnatural and cartoonish. Etc. And don’t even get me started on overuse of HDR; overlapping tonal values are jarring to the eyes.

_D90_DSC2987 copy
Turning it up to 11. Nikon D90, 105VR

3: Always have backups of your backups. I’ve had a situation where a new OS caused some serious issues with my primary computer; the upshot was that none of the files were readable. My primary backup drive – a Maxtor; I’ll never buy one of those again, just too many have failed – started making the click of death when I connected it, and I was able to get most of my data off in time before the drive crashed and died. Good thing there was one more backup copy. My current management strategy is to keep all finished jpegs on my editing computer; there are two duplicate backups with all the raw files (in the same file structure) on external drives, one of which lives in my bag and goes with me everywhere; I also time machine the primary drive whenever I do a backup to the externals. Generally I’ll do a backup once I finish editing a batch, which might be 50 or 100 images or thereabouts. Storage is cheap. Lost files are priceless.

_3029853 copy
Blue water. Nikon D3, 24-70/2.8 G

2: Integrity matters, especially for photojournalists. Whilst I’ll have no compulsion removing dust from a watch product shot or litter from fine art street photography, I absolutely will NOT touch the content of the image for photojournalism. This is because once you do, and if you get caught, your credibility is instantly nonexistent.

_7047519 copy
Panerai Mare Nostrum, on a GuB Marine Chronometer. Clean well, because even at this relatively low magnification, it’s very visible. Nikon D700, 60/2.8 G

1: You can’t polish a turd. Don’t think that you can rescue a compositionally weak image ‘in Photoshop’. You can’t. You can’t change the lighting. If you didn’t get it mostly right in-camera, you’re not going to be able to fix it in Photoshop. You can fix exposure, color, contrast and the way the image appears; you can’t change the content. If an image is good, however, you can make it extraordinary.

_7049521 copy
Color palette and tonality hugely affects the feel of an image. But the content must be there to tone in the first place. Nikon D700, 28-300VR


Part Eight: General tips for all photographers

Here are some suggestions that apply to everybody, regardless of what or how you shoot.

_M9P1_L1007399 copy
Prague. Leica M9-P, 28/2.8 ASPH

10: Shoot raw and expose a little bit hot. There’s always a bit of potential to recover highlights in your raw files; some cameras more than others. Know how much yours can tolerate before blowing highlights completely. It’s not just a way to expand dynamic range; exposing hot and bringing down the exposure later actually reduces shadow noise, too. For those of you using a third party RAW converter that doesn’t read proprietary image settings, crank your sharpening in camera up to maximum – it won’t affect the raw file (only the jpeg preview), but you will be able to more easily see if things are in focus or not when using the image review screen.

_M8_L1017249 copy
But we all have favorites. Billingham Hadley Pro. Leica M8, 50/1.4 ASPH

9: There is no perfect bag. Just accept it, and move on. Buy a new one if it takes your fancy but don’t expect it to solve all of your problems. Most of the time I only use a bag if I have other non-photographic items to transport. If it’s camera-only then it just goes over my shoulder.

_M9P1_L1004990bw copy
At the station. Note clean edges and overall feel of the image. Leica M9-P, 28/2.8 ASPH

8: Watch the edges of your frame. Your subject is identified by a) light; b) position in the composition; c) context. The edges add or remove context – and with it, distractions. Use them carefully.

_PM03439 copy
Spotlight. I’d have missed this if I was fiddling with my settings. Olympus E-PM1, Panasonic 20/1.7

7: Learn your equipment. You should be able to operate your cameras like it’s second nature. Muscle memory is your friend, and can make the difference between responding instinctively and getting the shot, or missing it altogether. Practice is the only way to do this.

_PM03858 copy
The ephemeral sushi. Nothing is in focus, the saturation is all over the place, there are hot spots, the color isn’t accurate…but somehow, it works. Olympus E-PM1, Panasonic 20/1.7

6: Look at lots of images. Famous works. Not so famous works. Flickr. It’s a good source of both inspiration and way of helping you to hone your sense of composition.

_D90_DSC0431bw copy
But surely it will make me a better photographer!

5: Don’t buy new gear unless you’re sure you’re not the limitation. Make sure you know exactly what it is that your current gear isn’t doing for you and how the new gear will solve it.

_PM05623 copy
Homage a Rene Magritte. Prague. Olympus E-PM1, 45/1.8

4: Look at other mediums of art for inspiration. It could be painting, design, architecture; for instance I love the way Magritte renders clouds, and I look for that kind of light when shooting skies.

_M9P1_L1005830bw copy
Gorilla in the shadows, Prague. Leica M9-P, 28/2.8 ASPH

3: Look for interesting light, not just interesting subjects. But of course it’s best to have both. The best photos present an unusual subject in an extraordinary way.

_7036002 copy
Precision. I waited for both the sun and the bird. Nikon D700, 24/1.4

2: Be very, very selective with your keepers. Keep only the best. I throw away 99% of what I shoot. Not because it’s bad, but because if you shoot good pictures, then keeping only excellent will make you excellent after a while; if you shoot excellent on average and keep only outstanding, then you’ll be outstanding. And so on. Continually push and challenge yourself – set assignments, practice, tasks. Go outside of your comfort zone, and the persistence will yield results.

_0012621 copy
Serendipity. Interesting things happen when you stick a compact inside a marine chronometer then do wide-angle macrophotography with it; this was my first time trying it. Ricoh GR-Digital III

1: Shoot lots. Practice, practice, practice. Experiment. If it doesn’t work, at least you’ve learned not to do it. If it does, great – another technique to add to the arsenal. I always get asked ‘how do I pick it up? How did you pick it up?’ and my answer is the same: I experimented and shot a lot. But I also made sure I made a note of what I did, so I learned something from the experience. When I started, I was probably doing a thousand frames a day – 99.9% were crap, of course – but slowly that ratio swung. Always carry a camera – even if it’s just your phone – and don’t be afraid to use it.

Part nine: Birding and wildlife

The focus of this post is on birding and wildlife: it’s something that every aspiring serious amateur photographer will probably try at least once, usually right after they purchase an enormous telephoto lens. Bragging rights are only good if you have the images to go along with the lens.

_3022426 copy

Cattle egret. Nikon D3, 400/2.8 VRII

10: Dress right, bring mosquito/ insect repellant, and carry a bottle of water and a hat. The environment where some animals live can be harsh and remote. You’re not going to be concentrating on the photography if you’re not comfortable.

_3020442 copy

Scarlet ibises. Nikon D3, 70-300VR

9: Pay attention to the time of day. There’s no wrong or right time to shoot, but there is good light and bad light. Bad light is flat and uninteresting, and doesn’t flatter your subject. Good light is always tangential and thus creates contrasts; better still, it can isolate your subject from the background. And if there’s plenty of it, that’s a bonus because you can use a higher shutter speed.

_D3T1396 copy.jpg

Eagle. Nikon D3, 300/2.8 VR + 1.4x

8: A sharp but noisy image is better than a noise-free but blur one. Unless your intention is to be artistic or atmospheric, it’s better to have grain than none but also no idea what the subject actually is. This goes for all subjects, and types of photography: if your subject and composition are strong enough, nobody is going to care that the shot is grainy – look at Robert Capa’s Normandy Beach landing photos.

_D3T1215 copy.jpg

Albino peacock. Nikon D3, 300/2.8 VR + 1.4x TC

7: Use single point continuous AF. Avoid the temptation to let the camera decide the AF point; it will almost never focus on the eyes, and certainly won’t be able to recognize animal faces (except perhaps some chimpanzees.) Continuous AF is necessary because your depth of field is razor thin; a little movement to and fro either by you or your subject can move focus dramatically.

_N212242bw copy.jpg

A thoughtful scratch. Nikon D200, 300/2.8 VR + 1.4x TC

6: Shoot in bursts. Two reasons for this: action usually unfolds in a sequence, and the first image may not be the most interesting; secondly, if you’re using a borderline shutter speed, then the burst helps to negate the effects of your finger pushing the shutter (and also camera). The first and last shots will usually be blur, but the middle group will be sharp because you didn’t have to move your finger in between.

_N210426 copy.jpg

Stealth duck. Nikon D200, 300/2.8 VR + 1.4x TC

5: Focus on the eyes. With all living things, the eyes are the key to the soul. I can’t explain why, but everybody knows that a portrait with the subject looking at the camera is a lot more powerful than one where you just see the back of the person’s head. The same goes for wildlife. Better yet if you can get a catchlight in the pupil, be it the sun or a very small fill flash.

_N208281 copy.jpg

Caught in the act of lunch. Nikon D200, AI 500/4 P

4: Have support. I don’t mean a sherpa team or an agony aunt. The longer the lens, the more support you’re going to need. A 0.1 degree camera movement with a wide lens covering 100 degrees horizontally is going to produce 0.1% blur, which you can probably get away with on a small print; but an 0.1 degree camera movement with a 5 degree field of view – corresponding to a 500mm lens – is equivalent to a whopping 2% blur. That shot will be so bad it might as well be completely out of focus. A gimbal head and solid tripod legs are great, but not very mobile. What I prefer to do is use a stout carbon-fiber monopod and rest my arm on the top of the lens to tension the system; if I’ve got something convenient to lean on, then I’ll use a bean bag to support the lens. This gets worse as your lenses get longer – I normally used an old manual focus 500/4 with 1.4x converter on DX, meaning 1,050mm equivalent. Handheld, this is an impossible combination to aim and hold, let alone get a steady shot with. With the monopod technique, 1/50s was routinely possible.

_7030609 copy.jpg

Angry cassowary. Olympus E-410, Nikon AI 500/4 P + 1.4x TC

3: Know our subject. Do your research, learn behavioral patterns, feeding patterns and anything else such as favorite watering spots or trees; the more you know about your subject, the easier it will be to find it and go unnoticed. Also, identify rare or unusual behavior – further adding something unique to your image.

_1D31619 copy.jpg

The bird with the sun hat. Canon 1D Mark III, 500/4 L IS

2: Patience, patience, patience. The rarer your subject, the longer it’s going to take for you to a) find it and b) get into a position where you can shoot it, or where it stays still for long enough for you to get a good image. Give up and call it a day only when you absolutely can’t stand waiting any longer; some of the most stunning wildlife images – think of the BBC Planet Earth series – were only captured after years of waiting.

_MT70034bw copy.jpg

Dancing flamingoes. Nikon D2H, 55-200/4-5.6 DX

1: Be ready and stay alert. Usually most interesting action happens in a split second; if you’re not ready with your settings fixed and your finger on the shutter, you’re going to miss it. This one seems to conflict with #2, but it really doesn’t; it’s what makes wildlife photography so difficult. Endless waiting, but the need to be vigilant. In the end though, the results pay off.

More of my nature and wildlife work can be seen here on flickr

Part 10: Macrophotography

_7051614 copy
Lange Datograph. Nikon D700, 60/2.8 G

10: Watch your reflections! Every time I shoot something polished and reflective, I keep thinking of this viral internet meme called reflectoporn. Don’t google it. You have been warned.

_7053570bw copy
Jaeger Le-Coultre Gyrotourbillon 2 tourbillon. Nikon D700, 60/2.8 G with 72mm extension.

9: Use bellows or extension tubes to get more magnification. I’ve got both; remember you need to compensate exposure for light loss as your magnification increases. The Nikons do this automatically, but most other cameras don’t. Macro lenses and extension tubes/ bellows work great; make sure they’re high quality items because cheap ones will have non-planar mounts, and result in odd distortion. Note that some lenses won’t work with bellows or tubes because they either bring the focal point inside the rear element of the lens, or the lens design isn’t compatible because the focusing elements are internal.

_3024681 copy
There’s no way you’re getting the entire dragonfly in focus without focus stacking. And they don’t stay still for that long. Nikon D3, 105/2.8 VR + 1.4x TC

8: Diffraction vs. DoF: a tradeoff. Pick one. As you stop down more, your DoF increases; but go too far and you also start to lose resolution because of diffraction. Exactly when this kicks in depends on your focal length and the pixel pitch of your camera; on the D700 with a 60mm lens, it starts around f22 and becomes very noticeable by f32. There are a couple of solutions: use a shorter focal length – the 35 ASPH FLE gives me more DoF by f16; or use a tilt shift lens.

_N201289 copy.jpg
Ants are skittish. Don’t get too close. I’ve had bugs jump on my lens before. Nikon D200, 105/2.8 VR

7: Working distance is your friend. There’s more room for lighting, and less chance of disturbing the subject (especially for those of you who shoot small bugs or insects). For product shoots, since you’re further away, reflections are smaller – and thus require less retouching.

_7055968 copy
Speake-Marin Immortal Dragon. Nikon D700, Zeiss ZM 2.8/28 Biogon

6: Macro lenses are used for macro work for a reason. That’s because they’re optimized for near subject distances; the plane of focus is flat and they have correction for common aberrations (spherical, lateral CA, LoCA) especially close up. With a normal lens, as you get closer, the aberrations and distortions get more and more obvious – which is why you don’t want to use a normal lens and extension tubes. There are two exceptions: when you have no choice, and when using certain particular lenses. A good example is the Leica 35/1.4 Summilux-M ASPH FLE; who’d have thought a documentary/ reportage lens with a 70cm near focus limit performs spectacularly on a D700 with extension tubes?

_7057011 copy
Jaeger Le-Coultre Gyrotourbillon I. Nikon D700, Leica 35/1.4 Summilux-M ASPH FLE

5: Continuous light sources are good. Not for primary lighting, but for helping focus and composition. Better yet if you mirror your lighting position with the secondary lights. I use a pair of 120 LED video light panels.

_7051800 copy
Critical focus plane. Roger Dubuis MuchMore. Nikon D700, 60/2.8 G + 36mm extension tube.

4: Use DOF preview to check your composition. DOF preview? Composition? How are there related? Simple: as you stop down, your composition changes again. And there’s a big difference between f2.8 and f22 at macro distances.

_7003522 copy
Sinn 556. This looked very different in the finder because almost nothing was in the plane of focus. Nikon D700, 60/2.8 G

3: Clean your subject well! The better the lighting, the more uniform the subject texture, and the higher the magnification, the more dust you’re going to see. It’s much easier to clean the real object than try to do it in photoshop.

_7052413-33 copy
Lange Datograph. Nikon D700, 60/2.8 G. Focus stack of 20 images with bellows and extension tubes. Magnification set, then camera moved on a rail. If I didn’t, the images wouldn’t align properly because they’d all be at different magnifications. The blue screws at left are about 0.5mm across.

2: Set magnification, not focus. What’s the difference? Each lens gives a certain magnification ratio for a particular focus distance; if you focus first (or only focus) then you’ll find the composition changing – especially at the borders – as the image snaps into focus. I decide how much of the subject I want to cover, and then move the camera to focus. This is especially important at high magnifications – I work all the way up to 6:1.

_7044210 copy
Speake-Marin SM2. A short exposure time stops the balance dead – and this thing rotates through 270 degrees eight times per second. Nikon D700, 60/2.8 G + 72mm of extension tubes.

1: Keep your exposure times short. You’re going to be wondering how. I use a flash and the highest sync speed the camera supports; because you’re stopped down and at base ISO, 99.9% or more of the light comes from the flash. And flash times – even at maximum power – are less than 1/1000s usually. Lower power ratings are even faster – this is more than enough to stop camera shake even at very high magnifications. The upshot? I don’t use tripods; they’ve been relegated to holding my flashes! I value the freedom of composition given by handholding the rig. The one exception to this rule is when I need to do focus stacking.

_7046623b copy
Be creative. Girard Perregaux F1-047. Nikon D700, 60/2.8 G

More of my watch work can be seen here on flickr

____________

Visit our Teaching Store to up your photographic game – including Photoshop Workflow DVDs and customized Email School of Photography; or go mobile with the Photography Compendium for iPad. You can also get your gear from B&H and Amazon. Prices are the same as normal, however a small portion of your purchase value is referred back to me. Thanks!

Don’t forget to like us on Facebook and join the reader Flickr group!

appstorebadge

Images and content copyright Ming Thein | mingthein.com 2012 onwards. All rights reserved

Understanding lens-related descriptive terms

I realize that in almost all of my past lens reviews, I use terms whose meanings may not be immediately obvious to everybody – allow me firstly to apologize for that, and remedy the situation by explaining some of the more comment terms I use. Note: This is not a technical lexicon (that’s in the works) but rather an attempt to help readers get an understanding of what I mean by ‘luminous transparency’, for instance. I know a lot of you are going to ask for images; I’ll add them in the future once I can find suitable examples. In the meantime, read the text and see if you can spot what I’m seeing in review images, or alternatively, make a small donation via Paypal to contribute towards a straightjacket if you think I’ve gone completely insane. MT

Aberration
Any sort of limitation in the optics that causes distortions in the final image, i.e. straight lines not rendered straight, curved planes of focus, incomplete spectra resulting in inaccurate colors etc – it’s a catchall term for imperfections.

Astigmatism
An effect where the left and right sides of the lens do not render symmetrically, e.g. left edge softer than right edge. Usually the product of misaligned elements. Note that most lenses are capable of theoretically much better results than in reality; the limitation is due to manufacturing tolerances and the impossibility of aligning everything perfectly. Such optical limitations are far more obvious on high resolution sensors, which means that you should really test the specific lens sample you’re going to buy before you actually pay for it…
Note that astigmatism can also be a design flaw where sagittal and tangential rays come into focus at different planes; it looks quite similar to coma. (Thank you Oskar O for pointing this out.)

Bokeh
A general reference to the out of focus areas in an image. Smooth bokeh has no uneven luminance values across the out of focus areas, or hard/ sharp edges, and renders even complex out-of-focus subjects in a uniformly blurred manner. Nervous bokeh is mostly smooth, but can be provoked into double images with the wrong kind of out of focus subject. Bad bokeh is full of oddities like double images, hard edges, artificial highlights, texture in blur areas etc – in other words, it distracts the eye from the primary subject and outweighs it visually. Swirly bokeh is where the background areas are rendered in a spiral pattern as though rotated; this is a trait of many fast lenses – especially the Leica 50/1 Noctilux.

Chromatic aberration
Light is made up of different wavelengths; uncorrected, these focus at different distances away from the lens, resulting in a lateral spread of color across the focal plane. Well corrected lenses use pairs of chromatic doublet elements that bend all of the wavelengths of light by the same amount at every doublet; this ensures that all wavelengths of light focuses in the same plane. Chromatic aberration, or CA, manifests as red-blue fringing on high contrast areas – this is the image separating out into its constituent spectra. Red and blue are usually the most obvious because they have the greatest difference in wavelengths – between 450 and 750nm or thereabouts.

Cinematic
This is one of the tougher properties to describe, and very personal. For me, a lens is cinematic if it has a few properties – smooth background bokeh, and transparency in foreground bokeh; slightly biased but accurate color transmission – usually warm; minimal to zero chromatic aberration; gentle flare; a well-defined plane of focus. These properties usually require at least a short telephoto to achieve, but there are some shorter lenses that do admirably well – the Zeiss ZF 21/2.8, ZF 28/2, Nikon AFS 24/1.4, Leica 35/1.4 ASPH FLE, 50/1.4 ASPH and 50/0.95 ASPH come to mind.

Cold
A lens whose color transmission is biased in favor of the shorter wavelengths, i.e. blues; it attenuates reds.

Coma
The spreading of point light sources; usually at the edge of the frame. Points will not be rendered as points, but instead somewhat egg shaped – a corona of white with a bright ‘yolk’ at the center.

Contrast
The way a lens renders luminance differences in a scene – high contrast means that these are exaggerated; low contrast means that they are minimized. Low contrast lenses are good for high-contrast scenes, because they help to limit the dynamic range of the transmitted image – and thus leave it within the sensor’s capabilities.

Dark
A lens with high saturation and very low flare or internal reflection; ‘darkness’ in a lens mean that colors are rendered in a rich, saturated manner; low flare and internal reflection reduces the overall key of the image and eliminates bright but low-contrast areas.

Distortion
A flaw in the image where straight lines in the subject are not rendered as such. Perspective distortion is when verticals or horizontals that are not perfectly parallel to the imaging plane converge or diverge; lens-induced distortion (barrel or pincushion) is when straight lines are rendered as curving.

Field curvature
An ideal lens projects a flat subject plane onto a flat image plane; most lenses suffer from a mild degree of curvature in both, which is to say that the projected surfaces of subject and image are the opposite sides of a sphere – curving away from the sensor plane and towards the optical center of the lens at the edges. In real terms, this means that the plane of focus in the subject isn’t always the same distance away from the camera.

Flare
A bright spot in an image caused by internal reflections off surfaces within a lens; usually caused by stray non-image forming light coming in at an oblique angle and reflecting off elements; this kind of flare is well-defined and usually lens-shaped. Flare can also take the form of a general lowering of contrast that appears as a white haziness across the image; this is caused by light scattered off the internal surfaces within a lens assembly – including but not limited to edges of individual elements, helicoids, etc.

Flat field
A lens that does not have perceptible field curvature. Most macro lenses and super telephotos are flat field.

Gentle
A rather abstract concept that is used to describe tonal gradations and contrast; shallow output gradation for a given input gradation would be shallow; the opposite would be strong.

Latitudinal chromatic aberration
Colored fringes (multiple images) on a solid edge caused by different wavelengths of light not focusing in the same place.

Longitudinal chromatic aberration
Colored fringing in the foreground and background areas outside the plane of focus, caused by prismatic separation of different wavelengths of light by the lens elements.

Luminosity
Another useful but slightly vague term; my idea of a luminous lens is one which has some minor degree of flare and moderate to low contrast, resulting in a bright or high-key image. Blacks are not always rendered as true black, and images shot with the lens at the correct exposure turn out somewhat brighter than expected. Not necessarily representative of low microcontrast.

Macrocontrast
The projected difference in tonality in the image, relative to the perceived difference between bright and dark areas of substantial actual luminosity differences in a subject. In short: how black are the blacks, and how white are the whites?

Microcontrast
Not quite the opposite of macro contrast – microcontrast is the lens’ ability to maintain small luminance differences in a subject and transfer them to the imaging plane. Note that lenses which have low CA are typically high microcontrast, as there is little ‘averaging out’ of fine detail structures when all of the light from the subject lands up at the same spot.

Neutral
A neutral lens is one without tonal or hue biases in any direction (warm or cold, light or dark). It reproduces exactly what it sees.

Purple fringing
Any portion of the image, usually high contrast, that has a purple glow around it; this is often confused with a lens effect but is actually a sensor effect; it’s due to minor internal reflections off the coatings of the microlens array covering the individual photosites. The color is uniform around the high contrast area, and does not shift left-right as chromatic aberrations would.

Resolution/ resolving power
The ability of a lens to reproduce fine detail structures. Related very intimately to microcontrast – a lens that can resolve high amounts of detail must necessarily be able to resolve small luminosity differences in adjacent areas.

Sharpness
A perceptual effect rather than an actual, measurable property; not to be confused with resolution. Something can be sharp with little resolution – i.e. able to project large differences in macro contrast with little chromatic aberration, creating a sharp edge; but have poor microcontrast resulting in low resolution, but high perceived sharpness. Rather, sharpness is a subjective measure for how much difference we perceive between adjacent areas of different tonal values.

Spherochromatism
The presence of chromatic aberration in bokeh – out of focus highlights separating into distinct red-green portions.

Tonality
The lens’ ability to reproduce luminance and color differences in a scene, and the nature of how it renders these differences in the image.

Transition zone
The plane represented by the distance from the camera where things just start to lose critical focus; a bit in front of and a bit behind the actual focal plane.

Transmission
The lens’ ability to capture light and transfer it to the image plane, limited only by the physical aperture/ iris of the lens. Applies to both the overall amount of light – T stop vs f stop – and the spectral transmission of the lens,i.e. which light spectra the actual types of glass allow through. See also this article on T stops and F stops

Transparency
The ability of a lens not to impart any of its own distinguishing characteristics on the image; it renders the scene as-seen, without any distracting properties or aberrations. My idea of a transparent lens is one with high microcontrast, moderate macrocontrast, natural spectral transmission with good saturation, and a T stop that’s close to its F stop. Bokeh is simply blurred and does not exhibit nervousness or swirliness; foregrounds and backgrounds are equally smooth. Such a beast is a rare piece of optics indeed.

Warm
A lens whose color transmission is biased in favor of the longer wavelengths, i.e. reds; it attenuates blues.

____________

Enter the August 2012 competition: Compact Challenge – here!

If you enjoyed this post, please consider supporting the site via Paypal ([email protected]); Ming Thein’s Email School of Photography – learn exactly what you want to learn, when you want to learn it or our Photoshop workflow DVDs.  You can also get your gear from Amazon.com via this referral link.  Prices are the same as normal, however a small portion of your purchase value is referred back to me. Thanks!

Don’t forget to like us on Facebook and join the Flickr group!

Thoughts on copyright, intellectual property, images and Section 114A

Here’s a question of moral fiber for you: if you were moderately hungry, for a let’s say a piece of fruit; you happened to walk past an apple on a table. Would you take it, if:
a) A sign said ‘please help yourself’
b) There was no sign, and no obvious owner
c) There was a tag on the apple saying ‘this belongs to’
d) The table with the apple on it was in a grocery store.

Most people would take it in situation a); some might take it in situation b); and almost nobody in c) and d) because it would be outright theft. Simple, right?

Let’s look at this situation again. Suppose you needed an image of an object. You find one on the internet that suits your purposes. Would you download and use it, without asking, if:
a) The image was under a creative commons license
b) The image was a sample for royalty-free or licensed stock
c) The image was on somebody else’s gallery site, say Flickr
d) The image was on somebody else’s site with a watermark and ‘all rights reserved’ in the fine print.

Not such a straightforward answer now, is it? For one, people tend to behave with much less regard and decency in the anonymity of the internet than in the real world. Images are intellectual property. This has monetary value, especially if you are a photographer; taking them without permission if you are not allowed to do so is plainly theft. The answer to the above dilemma is that only in situation a) would you be able to use the image without obtaining the image owner’s permission. b), c) and d) are all theft. However, most of the time asking nicely and offering credit is usually enough for the image owner to agree. After all, everybody knows that anything and everything put on the internet is fair game for viewing and public consumption.

Returning to the fruit analogy, the problem comes when there’s nobody doing any policing; how many of you would still follow the law to the letter if you were almost certain you’d never get caught? The reality is that it’s impossible for a photographer to police their own IP on the internet; there’s simply no way to prove that an image hasn’t been used other than by seeing every single image on the web and coming to the conclusion that none of those images are yours.

It gets even more complicated: although use of an image for any sort of use other than the license granted – and creative commons is the only license that lets you use an image without attribution (usually) for non-commercial purposes – is theoretically theft, there’s no point in following legal recourse if there’s no value to be gained. In such situations, the only people who win are the lawyers. Thus we are left with a perceptive difference – even amongst photographers – that ripping an image that’s not yours for editorial or blogging purposes isn’t as ‘bad’ as commercial use.

True, but theft is theft – would it matter if somebody stole the apple to eat themselves or to sell on to somebody else? No.

It doesn’t help that the majority of photographers are completely unaware of their own rights, and don’t bother issuing licenses or clear terms of engagement and usage conditions to clients or recipients of images; the problem here is that there’s now no way of proving whether the user of the image is a rightful licensee or not – such claims will be extremely weak in a court of law, because of the precedent that the photographer himself/ herself does not value their own images or intellectual property.

There’s an obvious cascade here: If the photographer isn’t aware of their rights, and doesn’t stand up for them, how can they communicate that to clients or persons infringing? The answer is, they can’t. And you can be sure that nobody else is going to, because it simply isn’t in their best interests to do so. This results in a wide base of consumers of media who simply expect it to be free, and pout and lose their temper when they’re told it isn’t.

I’ve recently had several cases of unauthorized image use – some on blogs, some editorial, and some commercial – not one single person bothered to have the simple courtesy to ask if they could use the images in question. I would have given permission for editorial use with attribution; for commercial use with licensing (if you’re using it to make money, it’s only fair that I should receive a license fee for helping you to do so). The most ignoble part of it was that in all cases, images were stripped from the server or screen capped, most of the time with the watermarks cropped out, and in some cases, manipulated to form horrible collages or crops – with the watermarks in. There’s another obvious problem with this: not only does it clearly demonstrate that all of the offenders knew what they were doing, but they also didn’t care. Do you think they would feel happy if somebody did the same to their content? Would they sit back and do nothing? I don’t think so, somehow. I put a lot of time and effort into creating content for this site – images, text, graphics etc – and it angers me when I see somebody else profiting off it without even the courtesy to ask permission. Only one apologized when confronted. The rest didn’t even respond, and will be the recipients of legal documents in short order.

It gets worse: what if one of the images used without permission is used in a defamatory or negative way? Or even displayed badly, but with the photographer’s watermark in place? The reputation of the photographer is on the line here – both professionally (what if influential people/ potential clients see the poor crops or presentations and make conclusions unfairly, leading to loss of business?) and legally – if used for defamatory purposes, the photographer can be liable – the onus of proof is on them to demonstrate that that was not the intention, and use was without permission. As with all demonstrations of negative proof, it’s extremely difficult to do and highly time consuming. You as a photographer have a responsibility to your own work and image to ensure that they are not used in a negative manner.

This problem isn’t just limited to images – music, articles, writing, artwork – anything creative that can be easily replicated and distributed – is also fair game. The more effort required to produce something, the more likely the creator is to defend their rights – you can bet your bottom dollar that there will be almost no court cases involving camera phone images, but no end of those for piracy of big-budget movies. Simple rule: the more effort you have to put into creating something, the more value it should have – else economics simply don’t make sense.

Speaking of economics, there’s a concerning trend here, too: free markets are dictated by willing buyer/ willing seller; prices fluctuate proportional to demand. If there are no or few willing payers for photography in today’s marketplace, what does that mean for the industry as a whole? Aside from the big budget productions that still require commissions, you can be sure that will translate not only into falling photographer rates, but also increasing image theft or copyright infringement. It’s happening already, and looking rather grim.

So as a photographer, what can you do to prevent this? What can you do to safeguard your rights and preserve the value of your images? Several very simple things:
1. Do not use anybody else’s images without permission, except if the images are available under a creative commons license, and even then, only for non-commercial use. If you have used images in the past or are still using them, either remove them or seek permission from the owner of the image. Don’t forget to give credits.
2. Issue licenses to all users of your own images, that clearly state the parameters of use (consideration, applicable images/ file names, date and region of validity, permitted media) and some form of signed agreement.
3. If you see images being used which clearly do not belong to the photographer, please make the photographer aware if you can – often this is the only way we will find out (and thank you to those readers who’ve drawn such situations to my attention in the past)
4. Support photographers who are exercising their rights. If there is enough social pressure not to do something, it will reduce in prevalence and hopefully eventually cease.

I want to finish this article by talking about a new act that’s coming into force affecting all Malaysians: Section 114A of the Evidence Act 1950, amendment passed April 2012. It’s the complete opposite of intellectual property rights: the implication is that we are now legally liable for every single distributed piece of information via whatever networked means we are deemed to control or have administration rights over, whether we posted it or not. If somebody hacks your site and posts a defamatory, libelious comment or something similar, you are responsible. If somebody leaks confidential information, you are responsible. If somebody uses your site, your devices, or even your internet connection, you are responsible – regardless of whether you did it or not, or whether you were a willing participant or not. Yes, that means if your laptop was stolen at gunpoint, then used to rob a bank, you are legally liable to be prosecuted for the bank robbery. The onus of negative proof is now on you, the site owner – and every good scientist will tell you, that’s impossible to do. Notably, the act does not cover copyright infringement – so that means you have no additional legal recourse if somebody decided to steal one of your images.

If this seems a bit stupid, it is. At the moment it is unclear how the act will be enforced, but you can be sure that if it’s anything like ISA, it probably won’t be fairly applied. The troubling thing is just how much power this gives to criminals and would-be hackers – if you’re webmaster of a popular site, it’s probably time to change your passwords and increase the security around your servers. Sad to say this, but between poor recognition of legitimate intellectual property rights and enforcement of liability against something you didn’t do, Malaysia has taken one enormous step backwards for creativity and e-commerce. I’m not shutting down this site yet, but I’m also not ruling it out if enforcement of the law becomes unreasonable. For more information or to support the opposition to 114A, visit www.Stop114A.wordpress.com

Apologies for the very serious, heavy article, but I feel that I must use my little soapbox as well as I can to raise awareness and defend the fort for all fellow photographers. Let’s keep this business viable for all of us. MT

____________

Visit our Teaching Store to up your photographic game – including Photoshop Workflow DVDs and customized Email School of Photography; or go mobile with the Photography Compendium for iPad. You can also get your gear from B&H and Amazon. Prices are the same as normal, however a small portion of your purchase value is referred back to me. Thanks!

Don’t forget to like us on Facebook and join the reader Flickr group!

appstorebadge

Images and content copyright Ming Thein | mingthein.com 2012 onwards. All rights reserved

What it means to be a professional

Ostensibly, professional photographers are people who make their living – or the majority of it – from photography or related activities. A profession is a vocation: you take pride in your work, and don’t dabble. Clients rely on you to deliver what was agreed in the contract or letter of engagement, and there is always a letter of engagement with clear terms. Bottom line: money changes hands for services rendered.

You’ll notice that I haven’t mentioned anything about skill. This isn’t to say that there is no skill required to be a good professional photographer, but rather than it really doesn’t seem to be the determining factor in whether one gets the job or not – I’ve been learning this the hard way over the last few months. An event photographer who just randomly aims his camera at groups of people and blasts them with flash can be a professional if all he does is that, and pays his rent with the proceeds. Similarly, perhaps one of the members of Magnum might be an investment magnate on the side; clearly he doesn’t need the photojournalism income, and this doesn’t make him a professional.

Do you see something wrong with those sweeping statements? I certainly do. Yet this is the perception of the industry, and the public at large – and most importantly, that of the majority of clients, too. I’ve always thought of honesty as the best policy – there’s no point in pretending you’re a pro if you’re not. I’ve always told my clients (at least until March this year) that I’m not a full time photographer, but I do deliver professional results.

What does this mean? One thing above all else: consistency. Anybody who takes enough photographs can pull together a portfolio of 10 decent ones; or even 10 excellent ones; however, that may be all they’ve gotten out of say 100 or 200 tries*. On the other hand, if you see similar quality across the board, in every shoot, and the portfolio just happens to be full of slightly better images than the rest – you’ve found a true professional. It doesn’t matter what the subject is, or who the client is, or what conditions they’re working under, they deliver the goods every time. This is particularly important for photojournalists, who must be conditioned to react instantly or miss the shot. And the gear doesn’t matter: a pro will use the right tool for the job, but you could give him a box brownie and the image wouldn’t be that fundamentally different: composition, lighting etc should not change. (Image quality is a different matter altogether, of course).

In every every other industry, being a professional implies that there is a minimum standard that you can expect – a professional dentist or doctor would have a degree, and some years of housemanship, for instance; a professional electrician would be able to wire something without electrocuting themselves (or you); a professional accountant would be able to file your taxes without landing you in trouble with the authorities**. I say ‘implies’, because like with all things, there are varying standards of service. But for the most part, the vast majority of people charging money for that service do know what they’re doing.

*One try would be one event, one wedding, one set of watch images, etc. – with several dozen, if not several hundred images per try.
**Taxation is perhaps the only branch of accountancy where creativity is not only encouraged, but rewarded.

The creative sector is a bit more of a minefield, because everything is subjective. Value is relative – if what you want is a reproduction, then shallow depth of field and soft focus isn’t going to cut it for you – similarly, portraits don’t generally flatter if they’re shot so as to optimize for resolution. Although there are general rules as to what constitutes a good image, and what constitutes a bad one, one can push the envelopes so far that there no longer becomes any clear lines – ultimately, it’s up to whoever is paying the bills. And this is the second thing that differentiates a true professional from an amateur: they deliver what the client wants. This implies a few things: they have the technical ability to execute; they may or may not require the creative ability to translate the client’s vision into a frame, and endow with with their own touch; or they may be required to create an execute the entire concept and shoot. I’ve had the whole spectrum; we must be prepared to wear many hats. Even if the client’s idea may not be the best possible solution you can see for that particular problem (e.g. the lighting is boring, or the framing or angle is too conventional) – we still execute as best we can, and try to tweak it to put our mark of individuality on it – after all, the work will eventually become an advertisement for ourselves, so we must put some pride into it. And it’s also for this reason that inevitably professionals will also try a few creative variations that aren’t on the shot list, in the hope that the client goes for them over or in addition to the original images.

The next distinction is choice: for most working professionals, there is no choice: we take all the jobs we can, partially because volume correlates directly to our income, and partially because you never know what contacts or leads an assignment now may open up in the future. In an increasingly tough photographic market, the reality is that most pros cannot afford to turn down jobs; for every well-paying assignment with a good amount of creative freedom, there are plenty of run-of-the-mill ‘shot factory’ type jobs; though we try, standard pack-shot images from these shoots will never be portfolio-grade material; these clients will probably never make our CV or be publicized; but as much as we don’t like these jobs, we still accept them because they pay the bills, and keep us afloat until the next dream assignment comes along. We know how to price jobs to take into account contingencies, equipment, bad weather, things we need to hire for the job. We understand licensing, intellectual property, and how to protect our image rights***. People who do not make their living from photography do not need to do this, and have the luxury to shoot only the subjects that interest them – consequently, this gives risen to a lot of highly skilled amateurs, and a lot of jaded, creatively-stagnated professionals. However, put the amateur outside his comfort zone, and the results will be decidedly mixed. The pro will soldier on and deliver the expected level of quality, but there’s a good chance that he won’t produce anything exceptional, either.

***Using images without permission is theft, people. A jeweler makes rings for a living – you wouldn’t take one without paying for it. A photographer makes photographs for a living – yet plenty of people either expect images for free, or just help themselves…this is not cool.

And that brings me to the final easily quantifiable distinction: being prepared. Even if something outside the normal course of work happens, the pro is prepared and ready to continue; an example could be as simple as having a spare body, extra lighting equipment if the client changes their mind and wants an outdoor shoot, or even being ready to work under pressure with an audience.

So where is the happy medium? If you can make some of your living from photographic assignments, and some of it elsewhere, perhaps. I don’t know because I’m still trying to figure out what the balance is; the months where I’ve got plenty of commercial work tends to end with a very drained, tired, uninspired feeling; but the months where I’ve got time to be creative also tend to be financial black holes.

Above all, though, I believe that ‘being professional’ should mean something beyond just making your living off it – it should be an embodiment of the term when taken out of context, as in “he acted professionally in that situation”. In summary, here’s my opinion of what makes a true professional photographer (and you’re welcome to differ):
– Doesn’t have any other occupations to distract his/her commitment.
– Consistently delivers the same quality shown in his/her portfolio, i.e. the portfolio is representative of the person, not an exceptional set of outliers.
– Accepts assignments out of financial necessity, but gives them 100% effort and commitment regardless of whether they are interesting or not.
– Continually seeks to improve their personal development and skill level
– Is always prepared for any conceivable eventuality, and has the experience to deal with it and still fulfill the contract.
– Should always act with the client’s best interests in mind, in a fair, ethical an honorable manner. What does this mean? Price equally, don’t discriminate. If you make a mistake, fix it. You’ll be surprised how many photographers don’t do this****.

Now to work on increasing the income bit. MT

****The infamous wedding photography fiasco that’s been making the rounds across the Singaporean forums over the last month or so, for instance.

____________

Enter the August 2012 competition: Compact Challenge – here!

If you enjoyed this post, please consider supporting the site via Paypal ([email protected]); Ming Thein’s Email School of Photography – learn exactly what you want to learn, when you want to learn it or our Photoshop workflow DVDs.  You can also get your gear from Amazon.com via this referral link.  Prices are the same as normal, however a small portion of your purchase value is referred back to me. Thanks!

Don’t forget to like us on Facebook and join the Flickr group!

Observations and commentary on the state of the photographic industry

The photography industry as we know it is changing. In this article, I want to examine some of the dynamics of the ‘old’ industry, and the ‘new’ industry – and how we as photographers can survive commercially. In some ways, this is the state of how I perceive the actual roles of the various job titles in the past, and how they’ve now evolved to fit the new ecosystem.

In the pre-digital era, and up to the transition point – oh, I suppose 2004 or so, when DSLRs became accessible to the mainstream:

Camera companies – Made cameras and lenses only. Made money from both of these; product generations were long (10+ years!).

Camera shops – Made money from selling photographic equipment to individual consumers.

Film companies – Made film for those cameras, and sometimes cameras and lenses too. Made money from this.

Amateur photographers – Bought mid-level cameras and film, used services of labs, publishers, photo schools etc.

Professional photographers – Bought cameras and film, especially the aspirational products; used services of labs, publishers, galleries, taught at photo schools. Made money by charging for images and prints.

Stock agencies – Held large collections of high-grade images for licensing; made money through royalties. License fees in the same order of magnitude of cost as hiring a professional for the job (usually).

Printing companies/ labs/ developers – Processed film, made prints, made money from this.

Publishers – Produced books, magazines, etc; made money through advertising and sales.

Galleries – Exhibited and sold prints.

Photo schools – Made money through selling courses to amateurs.

Today, the landscape looks very different (old guard remains in bold):

Camera companies – Made cameras and lenses only. Some now make sensors and electronics, too; have begun a battle of attrition killing each other on price in the hopes of increasing market share. We’re in the odd position of having CSCs that cost less than some compacts, and CSCs that cost more than some DSLRs. Money is made on the lenses and accessories, rarely on the camera bodies, and almost never on the compacts. The smaller players who can’t compete on price or incredibly short-lived generations have and will die or merge (e.g. Ricoh Pentax, Sigma).

Camera shops – A lot of the larger brick and mortar chains have gone; sunk by huge overheads that can no longer be sustained by narrow margins or price wars with online companies. In developed markets, people go to fondle, but not to buy – the prices are poor, and the service is abysmal – usually, nobody has any clue what they’re selling. In developing countries – like Malaysia, for example – only the large volume dealers survive; again, it’s a price thing; we are an even more price-sensitive environment than the US. RM50 ($15) can often make the difference between selling an M9, or not. Even the rich here – perhaps especially the rich – are very, very price sensitive. To make things worse, the local distributors give bonus payouts if a certain volume threshold is met; in order to meet the volume, you have to lower prices…you can see where this destructive spiral goes. It’s possible that these places may form small chains, but unlikely because it doesn’t make sense to have multiple physical locations if you can serve a lot of customers via the internet. Basically: the days of your corner pro shop are long gone. Interestingly, the lack of availability for niche models means that even more attention is paid to what’s written on the internet by pros and so-called ‘experts’.

Film companies – Kodak has gone under, and sold off the digital business – need I say any more? Although it seems that film is making something of a revival in amateur circles, I don’t see the businesses supporting it – there are only two proper pro labs left in Kuala Lumpur that can handle slide film well; even finding a minicab that can handle normal color negs is becoming challenging. The reality of professional work these days means that it is not a viable option because of falling rates and increasingly demanding throughput and deadlines.

Amateur photographers – Now represent more sales of ‘pro grade’ equipment than professionals; photography has become in vogue again. Consumers of content, makers of content, some excellent, some utter rubbish; supporters of the voracious demand for teaching and new product. Often swayed by marketing gimmicks – first it was more pixels, now it’s higher ISO numbers and ‘art filters’ or ‘scene modes’. This market is by far what keeps the camera companies in business.

Professional photographers – There are many breeds of pros these days – assuming the definition of pro is ‘makes all or most of their living from photography or related activities’. There are those who work for studios, or as press photographers – i.e. drawing a salary. There are those who shoot weddings and events; in this part of the world, they are mostly amateurs who charge for their work, but do not deliver consistency of quality or reliability. Unfortunately these people are the group the public interact with the most, and frankly, give the true pros a bad name – even those in the same industry. There is a small group who shoot for stock, or international agencies. Finally, there are the commercial photographers and studio owners, whose jobs are increasingly being supplanted by the huge quantity of stock out there, or worse, being taken by the amateurs who vastly undercharge, do a poor job, and generally threaten the sustainability and image of the industry. The reality is that the jobs that pay well – commercial work, advertising – are both shrinking and being heavily guarded by the established photographers; and the portion of the work that’s evergreen is becoming commercially unviable – there are event photographers in Malaysia who charge about RM50 an hour (that’s US$15) including processing (assuming they do any at all) for a huge number of images. In this price sensitive environment, that’s death. Needless to say, at those rates, it takes you 20 hours of work to pay off a D3200 kit; you’re not going to be having backup bodies in case things fail, nor are you going to be able to produce anything indoors except with direct flash.

The upshot of all of this is that the smart pros are doing many other related things – notice the increasing number of workshops and seminars offered; product endorsements; sponsored or ad-driven blogs; etc. You can’t just produce photos for money anymore. About a third of my income is from teaching; I’m staying away from advertising because it affects my credibility; but I will use other unique tools like the Email School of Photography, paid competitions and Amazon referral links.

Stock agencies – The old guard of stock agencies is still charging an arm and a leg, for (admittedly) higher quality images; however, they’re also giving the photographers a rather lousy deal. Getty takes between 60 and 80% of the royalties for each of my images it sells; ouch! The alternative is no money, or micro stock – where you get 20-30 cents, and hope like hell you sell a lot of images. The question is, would you rather have nothing, a bit of a lot, or next to nothing?

Printing companies/ labs/ developers – Almost dead, at least in this part of the world; the labs that survive are focused on digital printing; there are good ones, and bad ones, and few who really understood the transition well enough to be considered master printmakers. I’m lucky to have one here in Kuala Lumpur who takes care of my printing and is also a HP Master Printer. (Wesley Wong @ Giclee Art). Online print-on-demand bookmakers like Blurb are doing very well – there have been more and more of these emerging, though quality is somewhat hit and miss – even with Blurb, who appear to subcontract the actual print work to many different vendors. Getting replacements usually isn’t too difficult, though. And you can now print small runs instead of hundreds, as was the norm for offset printing.

Publishers – While amateur photography magazines have proliferated with the increase in interest in the hobby, they’ve also suffered stiff competition from websites, who can put out more content in a more timely manner – and offer things like full size files to play with – that the magazines simply can’t compete with. The magazines are trying to maintain their edge based on content quality, but I feel even that’s eroding. (I used to be Editor of a photography magazine here; finding people to produce quality content was so difficult that in the end I was writing and shooting nearly 90% of the magazine myself.)

Galleries – I can’t speak for overseas, but there just isn’t a market for photographic prints in Asia. While there seem to be a lot of galleries in Europe (at least there were on my last trip there) – I don’t know how they make money; it isn’t from print or ticket sales. I suspect that most are sponsored by camera makers or wealthy patrons.

Photo schools – Nothing much has changed here, but there are now more of them – though a lot of the ‘photo schools’ in Asia are just one-man shows who hire some seminaked models, set up some lights, and charge for entry. Needless to say, you’ll learn nothing. On the other hand, there are a number of very good pro shooters who’ve now turned to teaching to supplant their dwindling professional income; I’m one of them. You have the opportunity to learn from people who perhaps five or ten years ago, would have jealously guarded their secrets and techniques. Choose wisely, is all I can advise – looking at the quality of the person’s portfolio is an excellent way of doing this.

Photography blogs and news sites (like this one) – The majority of sites exist to satisfy the desire for content – reviews, validations of personal equipment choices, or information on whether one should buy camera X or camera Y. Preferably yesterday. Traffic spikes are huge when exclusives are in play (from experience, here) – and advertisers and referral fees are how these sites are supported. Some of us try to be a bit more esoteric in our choice of topics and deal with other photography-related things beyond equipment, but that’s not always the case. And it’s clear that while a lot of these sites still respect IP – I’m fine with people syndicating my articles/ posts with proper credit, and it does happen – but there are an equal number who frankly just don’t give a shit about IP, image rights or NDA agreements.

Rumor sites – They exist only because human nature wants the latest and greatest. I’ve been asked on more than one occasion to break NDA and reveal what I know; I can’t think why anybody would violate their position of trust for…well, precisely nothing. No money, (obviously) no credit, and nothing else whatsoever. I can’t help but wonder if some of the camera companies are leaking things directly to stir up interest in advance of product launches, though. They support themselves with referral links, of course.

Image sharing/ hosting sites – While most are free in some form – basic services of Flickr, Picasa, etc – the premium services for serious photographers are charged. Though how Flickr makes any money off me is baffling; I more than get my annual subscription worth through hosting and server bandwidth alone. I suppose there must be others who don’t have 14,000 uploads, though. Notably some have folded, though – Kodak’s PictureGallery, for instance.

Computer companies, software companies (e.g. Apple, Adobe) – I’m sure part of Apple’s meteoric success in the last few years is due to digital photography and the support/ processing requirements – actually, I’m surprised that there isn’t an Apple camera yet. Without the support ecosystem – photoshop, a decent machine to run it on – digital is pretty worthless, because I still haven’t seen a single out of camera jpeg that I’d be happy to present to a client. I don’t know how many iPads were sold for use solely as portfolio devices, but I’m sure it’s a lot; if I hadn’t won one in a contest, I’d probably buy it solely for that purpose. Beats carrying around a print portfolio, and it’s cheaper, too.

Mobile phone companies – The fact that we’re seeing innovation in this space – the Nokia 808 PureView comes to mind – says that photography is being taken seriously even by non-camera makers. Coupled with internet connectivity and social media, picture sharing has skyrocketed – however, it’s unclear who on the hosting end is making money out of this. I’m sure Facebook will eventually find a way to charge us for sharing our images using its platform – never mind that it’s one of the worst image sharing platforms ever, between compression, sRGB color spaces and horrible interfaces – but we still use it anyway, because it’s the easiest way to ensure that all your friends see something.

Microstock agencies – Microstock only works with volume – high numbers of purchases for newly-minted content and websites; and high numbers of eager photographers to make some money out of their images, even if it’s only cents. Without that huge amount of content to trade in, the micro stock model just doesn’t work. I don’t know how sustainable this is in the long term, either.

Accessory companies – The burgeoning increase in amateurs also means a bigger market for what would formerly have been very niche accessories – there are businesses making nothing but stick-on grips, or replacement rubbers, for instance. I welcome diversity, cottage industries and craftsmen in general – I hope these are sustainable, and honestly, given current camera sales volumes, see no reason why they wouldn’t be.

Self-proclaimed ‘experts’ – People with no clients, a crap (or worse, nonexistent) portfolio of work, no credentials but very, very loud voices have come out of the woodwork in recent years; the problem is that the louder the voice, the more they get heard – especially on the internet. Controversy is seen as a good thing, even if there’s no substance behind it – because it gets traffic, and traffic is directly proportional to advertising revenue. The problem is not that they exist, but that they’re assigned far too much weight by both consumers and camera companies alike. I would be very, very weary of any opinions by ‘experts’ who obviously are incapable of taking a halfway decent photograph. This of course assumes one can tell the difference at all; perhaps a better litmus test is to look at the proportion of disparaging or negative comments received: in over 700,000 views, I’ve had no more than 5 negative emails/ comments. I know you can’t please everybody, but I try hard to have the bases covered.

Online retailers – Almost all of today’s successful brick-and-mortar retailers also have an online presence; not necessarily the opposite. And the unsuccessful brick-and-mortar retailers simply don’t exist in cyberspace. Correlation? I think so; the online portion of a physical retailer’s business gives them enough volume to be competitive on price regardless of the sales channel; this is self-reinforcing in that you’re more likely to buy from say, the B&H Superstore in NYC if you’re there, since you know the prices are the same as on their website. But if your local camera shop is more expensive or can’t afford to keep the inventory range in stock because of lack of volume, the chances of you making a purchase there decrease dramatically. And there may be a store on the other side of the country (or even in another country) that does mail order – but if you don’t know about it, how are you going to make a purchase at all?

Online bulk retailers (e.g. Amazon) – Photographic equipment is a natural progression for existing retailers of electronics and other consumer goods – the one thing you have to be careful of is that descriptions are accurate, and goods are in stock. What we consider to be important differences – kit lens types, for instance – probably get overlooked by the clerk doing the data entry into the system. And not always having a number to call to confirm (or having the number, but a person who obviously can’t remember the details of the hundreds of thousands of products they sell) can sometimes make things risky. The flip side, of course, is that the enormous volumes and lack of sales tax can make these a very attractive option price-wise. They’re also often the first to receive new product in any significant quantity, simply because initial order volumes are so huge that manufacturers allocate priority stocks to them.

So what does this all mean? When the dust settles, we’re going to see a lot of consolidation in some areas – manufacturers, retailers – and a lot of proliferation in others – blogs, self-proclaimed ‘experts’, workshops, etc. I think we’re not quite done with the change yet; the shift to digital has killed or nearly killed a lot of industries, but at the same time opened up entirely new sectors to the enterprising individual or company. If you’d asked me even five years ago whether I thought there was any other way to make a photography-related living than from selling images or perhaps sales referrals through blogging, I would have said no. But here we are today – who knows where my income in another five years will originate. All I do know is that as photographers, we’ve got a whole load of new tools at our disposal to master, but once we do, we can always improve the quality of our images and broaden the shooting envelope. I may not be making most of my living from my commercial clients in future, but I do know that I’m going to continue using everything available to up the standard of my work, and help those who are interested to do the same. MT

____________

Visit our Teaching Store to up your photographic game – including Photoshop Workflow DVDs and customized Email School of Photography; or go mobile with the Photography Compendium for iPad. You can also get your gear from B&H and Amazon. Prices are the same as normal, however a small portion of your purchase value is referred back to me. Thanks!

Don’t forget to like us on Facebook and join the reader Flickr group!

appstorebadge

Images and content copyright Ming Thein | mingthein.com 2012 onwards. All rights reserved

Aspect ratios and compositional theory

_DL5T_L1000072 copy
Round plate in a square frame. The composition is ostensibly balanced, but a little randomization is created by the uneven lighting. Leica D-Lux 5

Aspect ratio: image width/ image height, with the long dimension first.

There are six common aspect ratios for cameras today (and as many as you like if you use the crop tool, but that’s another subject for another day):

1:1 – Square format, traditionally the realm of 6x6cm Hasselblads, and now popularized by various mobile apps.

5:4 – Large format and sheet film cameras, mainly 8×10″.

4:3 – Broadcast television and video used this aspect ratio, originally in 640×480 pixel resolution; small sensor cameras and compacts (which inherited early video CCD architecture) have been using this aspect ratio ever since. Four Thirds and Micro Four thirds are the larger consumer formats to use it; in medium format there’s also 645 which has the same aspect ratio for both film and digital.

3:2 – Double a movie frame; famously invented when Oscar Barnack rotated the film through 90 degrees and doubled the width of the frame to create the 24x36mm ‘full frame’ 35mm camera format. Almost all larger sensored DSLRs use this today.

16:9 – HDTV format; not a native aspect ratio for digital still cameras, but useful to provide a more cinematic feel to an image.

2.35/2.40:1 – Motion picture widescreen for feature films; very rarely used for still photography, and there are certainly no dedicated digital still cameras that offer exclusively this format. Not only is it extremely wide, if you’re cropping down from a 4:3 sensor you’re throwing away more than half of your image.

_7058625 copy
16:9 and cinematic. Note how the whole subject isn’t necessary for you to identify it. Nikon D700, AFS 85/1.4 G

Most modern cameras offer different image sizes in-camera, though all they really do is crop the top and bottom or sides. There are a few digital cameras that have sensors bigger than the lens’ image circle, which allow the diagonal angle of view for a given focal length to be maintained when changing crop; the main one of these is the Panasonic LX series of cameras. Put one of these on a tripod, slide the aspect ratio switch on the lens barrel and you’ll notice that the horizontal field of view gets wider than the 4:3 option, even though this is the native aspect ratio of the sensor. (It also means that you don’t suffer as much of a resolution decrease as you’d expect when changing aspect ratios). There is no point in shooting in another aspect ratio if all the camera does is throw away the extra pixels; you’re better off capturing as much information as you can at the time of shooting and then deciding later what crop would work best (assuming, of course, that you didn’t compose correctly at the time.)

_PM05696 copy
Filling the frame – native 4:3 of the Olympus E-PM1 Pen Mini, uncropped. 45/1.8

Now that’s out of the way, the aim of this article is to focus on understanding the compositional impact of different aspect ratios, and more importantly, how to pick the right aspect ratio for a given subject.

There are two ways to go about this – either you shoot only one aspect ratio (for instance 3:2 because you have a digital SLR) and arrange the contents of your frame around it, or you keep an open mind and match the aspect ratio to respect the subject and the dynamic of your composition. For instance, you might use a 1:1 square for a round object if you want a balanced frame, or you might use 16:9 and just focus on one curve if you want to highlight a particular detail in a cinematic manner – you never see movie shots showing the whole of Earth, for instance; it’s always a hemisphere with the sun rising in just the right place. This is not a coincidence!

_M9P1_L1002726 copy
(Nearly) symmetric, but visually balanced. The two are not the same thing. Leica M9-P

Most people will stick to the aspect ratio that is native to the camera, and either do nothing else, or crop to fit later. This is compositionally very, very sloppy – not only do you not get the best frame for the shape of your subject, there’s a very good chance that you probably won’t be able to fill the frame properly, either; 3:2 is a bit of a compromise aspect ratio that lacks the organic intimacy of 5:4 or 4:3 for portraits, or the drama of 16:9 for more expansive scenes.

_7051800 copy
Symmetry. Nikon D700, AFS 60/2.8 G

If you crop to fit the subject exactly, then chances are you’ll probably also land up with a very boring frame – this time, because the composition is too balanced. It seems counterintuitive, but the reality is that such compositions tend to use the space around the subject as a frame, and nothing else; there is no context, secondary subjects or points of interest added.

_7051447bw copy
Balanced, but not at all symmetric.

Don’t despair too much if this situation seems a bit damned if you do, damned if you don’t. The good news is that the one obvious remaining strategy usually works the best if done correctly: learn to fill your frame. For the most part, this is how I operate unless I know the final output (usually client work) is going to be of an certain aspect ratio, or if the scene itself just cries out for a certain shape.

What does filling the frame entail? Well, for one, you should be able to identify your subject – that’s composition 101. The remaining space should be filled with elements that either echo your subject, strengthen the story, or give the subject context. But in no way should they distract the eye from the primary subject. And each smaller element should be placed in the remaining space in a balanced manner.

_M9P1_L1006748 2 copy
The leading space of anticipation. Depth of field control and lighting make it clear what’s part of the foreground/ subject, and what’s part of the background and is context.

Here’s a visual example, using dots to represent compositional elements. The big red circle is the subject. The lighter color/ lower saturation dots are the secondary, tertiary and other filler.

First we place the main subject; where exactly in the frame is up to you, but in general, you leave leading space in front of the subject’s orientation if you want to create expectation (i.e. if a person is in profile, then put most of the space in front of their nose); trailing space if you want to create urgency or drama; or alternatively, let the supporting background elements dictate where to put the primary subject. For this example, let’s just pick an arbitrary starting location – all dots look pretty much the same. I’m going to pick 3:2 as our example aspect ratio.

3-2 composition example primary

Now the secondaries – put them in the white space, with balanced space around them to create both an isolating/ highlighting frame, and a buffer zone between them and the main subject so they don’t get confused or overlapped:

3-2 composition example secondary

And the same for the tertiaries.

3-2 composition example tertiary

The other filler rests wherever it rests, but just make sure that distracting elements – say a huge point highlight like the sun, in this case, the blue dot – don’t go in distracting places.

3-2 composition example fluff

There – a balanced composition. There isn’t any odd empty space that doesn’t have an equivalent mirror along a given horizontal or vertical (or for that matter, any other orientation) axis. Let’s try this again for 1:1 and the same size original subject:

1-1 compositional example complete

And finally, 16:9:

16-9 compositional example complete

Notice how for the 16:9 example I didn’t show the whole subject; you don’t always need to. Just so long as you can identify what the subject is, you’ll be fine. In fact, it’s quite easy to imagine this particular frame as say a sunrise over the edge of earth (using our previous example) with a fleet of spaceships in the foreground…
(Oops, I’m getting carried away. Perhaps I should take up modern art, or perhaps designing colorblindness tests.)

More seriously there’s a secondary subject intersecting the main subject – does it matter? Only if the intersection causes some perceived division of either, e.g. a horizontal line running through somebody’s head would tend to suggest decapitation to a view, and consequently looks rather odd for a portrait. However, there are also examples where such intersections or juxtapositions can create interesting images in their own right.

Notice how each composition is balanced, but you still instantly know what the main subject is.

Want to make this exercise more realistic? Okay, let’s go back to 3:2 and do one for wide angle, with emphasized perspectives and huge relative size differences in dots:

3-2 wideangle

And another one for telephoto, with the foreground and background dots blurred to replicate shallow depth of field:

3-2 telephoto

Once again, notice how your eye is still drawn to the main subject in each composition. Of course, real life isn’t quite this easy; subjects aren’t dots, the white spaces aren’t always uniformly white, and most of all, you almost never have any control over where to put anything else except your main subject; most of the time it’s about waiting for the secondaries to move, or you moving (for immobile subjects) to get the vantage point that works. The only time you have full control is when you’re shooting still life in a studio.

_7026879 copy
Note how the empty space serves to highlight the (highlighted) subject. Nikon D700, AFS 85/1.4 G

One interesting thing I’d like to bring up at this point is our very restricted use of verticals – almost always, verticals are in more square aspect ratios; 3:2 is about the slimmest vertical aspect ratio you see. You almost never see 16:9 or anything wider; my theory is that it’s both to do with how our eyes natively see, and how content is presented. Since human eyes are horizontally tandem, we tend to see in a wider horizontal field than vertical; a tall image forces our eyes to scan up and down its length, which means that such images are difficult to compose because they must be broken into zones with complimentary transitions for the composition to work. (The same is not true for horizontals, because we can take in the image at a glance and instantly recognize the surrounding areas as context.)

_7021180 copy
The secondary subject reinforcing the primary, empty space creates anticipation. Nikon D700, AFS 28-300VR

Making things worse, almost all displays are geared towards this ergonomic trend – as makes sense – when was the last time you saw a vertical monitor? Furthermore, we get subconscious reinforcement through other means that horizontal is the way to go: most cameras only have one grip, and even those that have two make shooting landscapes much easier than portraits; even after we shoot, when we view the images on a monitor, the verticals take up about a third of the space, but the horizontals nearly the entire area – obviously, the larger ones look better, so we tend not to be as influenced by the vertical images…

_7007311 copy
We needed to have at least one vertical in here. Nikon D700, Zeiss ZF 85/1.4 Planar

However, with practice, you’ll learn to see this way – and with more practice, you’ll learn to see this in the instant you identify what you want to have as your main subject; along with lighting, focus, exposure etc. Fortunately, visual pattern recognition is something that human brains are very good at, even for things that have zero fixed quantitative parameters. For example, we know something is a dog even if it’s in a different orientation, different size, a line drawing or a photograph, or a stylized graphic silhouette. Try programming a computer to do this, and you’ll soon realize both how impossible a task quantifying the distinguishing parameters of a dog is, and what an amazing piece of hardware our brains are. (If you disagree, what marks the difference between a wolf and a dog? Or a dog and a cat? Or a dog and a cow? They’re all four-legged with tails and pointy ears.)

Once again, it comes down to practice. The more you shoot and the more images your brain sees, the faster it becomes at picking out compositions in a live scene that work against ones that don’t. I know that isn’t a concrete answer, but shouldn’t you be out shooting now? 🙂 MT

____________

Visit our Teaching Store to up your photographic game – including Photoshop Workflow DVDs and customized Email School of Photography; or go mobile with the Photography Compendium for iPad. You can also get your gear from B&H and Amazon. Prices are the same as normal, however a small portion of your purchase value is referred back to me. Thanks!

Don’t forget to like us on Facebook and join the reader Flickr group!

appstorebadge

Images and content copyright Ming Thein | mingthein.com 2012 onwards. All rights reserved

A few tales of customer service and “professional” support in the world of photography

I’m not going to name names because anonymous allusions can’t be legally construed as libel, but I think it’s important that an open letter goes out to the brands/ distributors/ dealers – in a previous corporate life, we were always taught to treat a customer complainant as a gift: it’s an opportunity for you to interact with the customer, build a relationship and find out what aspects of your business’ operations require improvement. It’s also a way for you to distinguish yourself from the competition – recently, there was a scandal locally with KFC staff attacking customers who got angry after being informed that a particular offer had expired…that attack was videoed and on youtube fairly soon afterwards. Needless to say, that was not a good day for the company’s PR department.

Sadly though, in Asia, the majority of companies tend to treat customers largely with indifference – the attitude seems to be ‘you buy from me good, you don’t buy from me I don’t care’ – not the best way to do business. Especially with complex, expensive product which makes the relationship part of the business increasingly important.

For professionals, it’s even more important to have good backup – if you don’t, and something goes wrong on a job, or before a job, then you’re up the proverbial river of brown without an outboard. I make system selection based just as much on the level of support I’m going to get from the company as the capabilities of the gear. It’s one of the reasons I stuck to Nikon even in the days when Canon had clearly superior sensors.

So, I’m going to tell you a few stories – good and bad.

1. Quality control, part one

Several years ago, I bought a lens that I thought was possibly the best lens I’d ever used. It wasn’t cheap, but then again it really delivered the goods: I could see precisely why you were paying that much. A friend wanted one urgently for an assignment; I sold it to him knowing that the dealer had a second one in stock. Big mistake: the second one was a disaster; it was soft until f8, didn’t focus smoothly, and worst of all, after just two days, one of the aperture blades detached and jammed the entire iris assembly at at f2 (let’s just say I wasn’t paying for an f2 lens).

No problem, these things happen – the dealer didn’t have any more, so he referred me to the distributor, who should be able to do a swap without issue – after all, the lens was effectively brand new. A call to my contact at the distributor – with them knowing full well I was editor of a photo magazine at the time – told me that I’d have to send the lens back to the manufacturer for repair, with them flat out refusing an exchange and actually accusing me of damaging it myself. They were totally unhelpful in resolving the problem at all. Excuse me? I want the lens because I need to make pictures with it, not a broken object so it can give me a headache.

Long story short: in the end, I never resolved the problem. I landed up complaining to the manufacturer about their distributor’s treatment of customers (more than the lens problem); I had to threaten to write a nasty column in the magazine detailing my experiences before I got any hint of an apology. In the end it came personally from the distributor’s international CEO, and I got so fed up that I took a refund from the dealer instead. I have still not found another good copy of that lens, incidentally – it seems that the first one was exceptional, and my friend is a lucky b******. I eventually sold my entire system and dissuaded other interested parties from investing in it.

2. Quality control, part two

Earlier in the year, I took delivery of a new camera from the first batch. It had asymmetric focusing issues. (I’m sure mention of that is enough for you to know exactly who I’m talking about now). The manufacturer’s local professional support arm was both responsive, and concerned: I told to bring it in straight away so they could do some testing, and so I could pick up a replacement. (The latter was especially impressive knowing that the cameras were in extremely short supply worldwide.) Two days later, I did – and the replacement unit, as well as the loan units, and demo units, all displayed the same problem. No problem – I was then given a loaner camera, which was the previous flagship – for as long as I needed. A month later, I was told a new batch arrived – but opted to upgraded to a slightly improved model, instead. This was a bit better, but still not perfect. I was eventually called and informed that a fix had been found, and I should bring the camera in. I was lent a new flagship for all too short a day before collecting my camera the following day, repaired and functioning as expected.

3. Quality control, part three

Very recently, I received a lens whose price was high, and performance not even close to a much cheaper competitor. Worse still, it wasn’t even as good as the previous copy I’d had (and no, it’s not the same lens from story #1) – it was only sharp in the exact center, very soft off-axis, and worse still, asymmetrically so. The concerned distributor apologized and swapped it out, with their division head personally delivering the replacement – now that’s service. Unfortunately, the second one also seemed rather off – it was consistently sharp across the frame, but there was heavy ghosting and double imaging. I landed up going to the warehouse and testing every single copy of the lens they had in stock – it seemed that batch had either one or the other problem (ghosting/ softness/ asymmetry). At this point, the distributor was both mortified and hugely embarrassed, promising to send the entire batch back to the factory and demand an explanation – it’s good to know that he wouldn’t sell them to other customers who might perhaps not be as picky about their optics as me. I was given a much more expensive lens of similar focal length in exchange, no questions asked. And allowed to pick the actual unit, too – let’s just say I’m convinced the one I’ve now got is exceptionally good. Outcome: one very happy customer.

4. Software hiccups

On a previous assignment, one of the cameras I was using developed a software fault of some kind that caused it to lock up – that’s not good, but not so bad because every locked up camera I’ve had has always been rectified by pulling the battery. Most of the time, images aren’t lost, either. No harm, no foul. However, this particular incident resulted in the entire card being getting so corrupted that it would crash any Mac that tried to mount it – needless to say, image recovery software wasn’t an option. Worse still, all the images from one particular job were on that card – I was in the middle of the job. (In the end, I landed up submitting a mix of recovered images through forensic recovery, some reshot images and backup images from the B-roll. The client wasn’t happy because we didn’t have the first and best take; it was a large commission for an important client, whom I landed up losing because of this.) In these situations, a backup camera wouldn’t have helped because you can’t backtrack your steps and shoot everything again. Parallel writing might have helped, but the chances are that mirroring would probably have resulted in both cards being corrupted.

I understand that you can be extremely unlucky and have these things happen. But what I couldn’t deal with afterwards was the extreme arrogance of the manufacturer: whilst their employees were most helpful and apologetic, their MD flat out accused me of user error, and kept trying to change the subject. I offered to work with a software team to determine what the problem was so a firmware fix could solve it, but the offer was rebutted with the effective message of ‘we don’t need you.’

How on earth it is possible to create a card that has physically damaged sectors (but a perfect physical appearance) with a camera is beyond me. If I could fake something like that, I’d be a programmer, not a photographer.

In the end, I managed to get a replacement camera to reshoot the job which did have parallel writing and dual card slots, but that didn’t work properly either – it didn’t seem to be able to parallel write, and if you change the ISO immediately after taking a shot while the camera is writing to the card, then subsequent files wouldn’t save at all. You’d think this would be a fairly common operation, but I guess not.

Needless to say I do not use or recommend this camera brand for professional use, or any use where actually having images is important, period.

5. My bad

Pro DSLRs are mostly weather sealed. Mine was; I shot in monsoon rains without a hiccup. The problem came when I arrived back in my air conditioned apartment, and pulled the battery out to put in a fresh one – uh oh. A popping sound ensued, and some smoke came out. The charge indicator went from full to flat in a second. Turns out that the temperature differential created condensation inside the battery compartment, and that shorted out the camera. Still, after putting a third battery in (letting the camera dry out first, of course) everything seemed to work fine, except it wouldn’t save a file. I thought it might be the card interface.

I took it in to the manufacturer’s service department, where they accepted my credentials and issued me with a loan body. Three days later, they issued me with a quote – it seems they couldn’t find anything physically wrong with it, but the only way they could guarantee its continued future operation would be to replace pretty much everything but the outer shell, mount, prism and mirror assembly. This would of course cost more than a new camera! I elected not to have the work done, and wait for the camera’s successor instead (a matter of months). I was allowed to keep the loan body until that time – not at all expected or obligated, but a very thoughtful touch indeed.

6. I believe they call that dictation, not collaboration

I was asked to do a live watch photography demonstration recently; I would have to use a certain brand of watch, camera etc – which is fine – so long as I have the lighting equipment and diffusers I need. They expected me to produce live images like what you see in my portfolio – except I was told that I had to do it so a) the audience could see, and b) no Photoshop was allowed. I don’t know what they were smoking, but there’s no way you can produce a perfect commercial grade image without retouching; worse still, how would the audience see if all the action happens inside a light tent? I suggested streaming video from a GoPro positioned inside the tent (to minimize reflections) but they insisted it wasn’t possible because it was a competitor’s product. I was told to do it without the light tent, and far away enough from the watch that the audience could also see the watch.

Anybody who’s attempted microphotography of any kind will realize this is impossible: you now have zero lighting control, plenty of unwanted reflections, and worse still, what macro lens gives you 2:1 magnification and 50cm of free working distance in front of the lens?

I told the client it wasn’t technically possible; they threatened to use somebody else. I wished them luck. These are the kinds of clients that I try to avoid, because if you can’t pull it off, you’ll just land up making everybody look bad, including yourself.

7. A complete 180 turn

Many years ago, I reviewed a camera as part of my editorial duties at the magazine. It was a final production prototype, so the company was understandably a bit nervous about us publishing images – in fact, they wanted us to do a review with product images only, and no samples. That would obviously defeat the point of a camera review! I suggested that we would let them approve any images we chose to publish beforehand; they very reluctantly agreed.

Fast forward two weeks – on returning the camera and submitting images for them to okay, not only were they thrilled with what I did with the camera, but they also wanted to use the images for their promotional materials. Happy to do so – let’s talk licensing. Oh, sorry, they said, we’re not paying for images because it’s our camera. Um…does that mean a chef doesn’t get paid because it isn’t his kitchen? They replied that the PR value of being associated with our brand would be compensation enough. Okay, so would I get image credits? No. Could I at least get tear sheets to put in the portfolio? No. Could I list them as a client? No. Then how the hell would I get anything out of this at all?

In the end, I chose the worst images I could find from that set to publish in the magazine; I was told by several dealers that it was never a popular model (despite actually being a pretty good camera). I nearly switched systems to this after using it – but changed my mind completely after dealing with the company’s local management.

8. Take it first, pay me later, if you don’t like it, bring it back.

I have a trusted dealer here that knows I go through equipment faster than an alcoholic through a bottle of gin; I’m given trial periods, loans, agreed buyback amounts, no questions asked replacements for faulty gear, out of warranty service costs absorbed by them, preferential delivery for new stuff, freebies, and above all, excellent prices. This is unheard of in Southeast Asia, where the retailer is king, not the consumer. Needless to say, I’ve spent a small fortune here, and refer everybody who asks me where they should buy equipment. I’d buy from here on the basis of price alone, but my relationship with the owner and most of his staff means that it’s like visiting friends rather than doing business.

Moral of the story: be careful how you treat your customers, because you don’t know if the guy is going to be your next biggest customer, may not buy much but give you huge referrals, or even worse, run a moderately popular blog 🙂 MT

____________

The inaugural mingthein.com photography contest closes 31 July 2012 – the more people entering, the larger the cash prize! Enter here

If you enjoyed this post, please consider supporting the site via Paypal ([email protected]) or via Ming Thein’s Email School of Photography – learn exactly what you want to learn, when you want to learn it. You can also get your gear from Amazon.com via this referral link.  Prices are the same as normal, however a small portion of your purchase value is referred back to me. Thanks!

Don’t forget to like us on Facebook!

Depth of field and the importance of achieving critical focus

_7053043 copy
Reference polar bear and Noctilux. Nikon D700, AFS 60/2.8 G Micro

Your plane of focus determines more than just what’s sharp and what isn’t: it directs the eye of the viewer to the subject, too. The shallower your depth of field, the more exaggerated this becomes – to the point that with a very shallow DOF lens, a close subject and far background, you really won’t be able to identify what the background actually is.

_M8_L1012158bw copy
Jazz time. Leica M8, 35/2 ASPH

All the more important that you choose the right plane of focus, then.

From a compositional point of view, the obvious thing would be to ensure all of your subject in focus – or is it? Not necessarily – sometimes you need just enough of it to be identifiable, and the rest can be merely a suggested impression. Take the eyes in a portrait, for instance. You don’t need to have the ears and hair in perfect focus, too. Less obvious is the need for context: today’s photographers seem to be fixated on achieving ever shallower depth of field, not knowing that in the past, achieving sufficient depth of field was a huge struggle that required the use of camera movements, long exposures, enormous lights and tiny apertures (I don’t know if any readers remember or have heard of Ansel Adams’ f.64 club – so much for ‘f8 and be there’). Part of the problem was the insufficient image quality of smaller media; the other part of the problem was the psychological conditioning of observers and viewers: before photography there was drawing and painting, and neither of those had any such thing as bokeh.

_M9P1_L1000019 copy
Rain and traffic. Leica M9-P, 50/0.95 ASPH

I used to be one of those chasing ever faster lenses – for the simple reason that earlier digital cameras were frankly pretty crap when it started to get dark – higher ISOs were all but unusable. If you couldn’t use an tripod (reportage work, for instance) then you had no choice but to accept grain (compromising image quality), use a flash (compromising ambience and context) or use a faster lens.

Fortunately, we now have sensors good enough that we don’t always have to shoot at f1.4 the minute it gets dark; we can do so because we like the look, but not because we have to – and that’s important, because it means we can choose just how much context* to include in the shot. Moral of the story: think very carefully about how much of the image needs to be in focus to tell the story effectively: too little, and you lose context because the subject has no stage; too much, and you lose focus and isolation, because the subject may not longer be as separated from it environment.

*By ‘context’, I mean background that isn’t subject. If your entire shot is subject, then there’s no context, of course.

_7015246bw copy
At the crossing. Nikon D700, AFS 85/1.4 G

This brings me to the second portion of this article: focus. It might sound obvious, but ensure your subject is in focus. The non-obvious bit is that there’s in focus, and in focus. The difference is obvious at the pixel level: are you seeing single-pixel detail (or near enough, to the resolving limits of your lens/ sensor combination)? If you’re not, go back and try again.

It matters for two reasons: there’s nothing more annoying than looking at a slightly OOF image, and you yourself will probably look at the photo later and think ‘if only…’; and then there’s the ever-increasing pixel density that makes it more and more difficult to achieve critical sharpness at the pixel level. The higher the resolving power of a camera, the more finely geared the focus mechanism has to be in order to achieve critical focus. In the film days, this wasn’t so much of an issue because the ‘sensor’ had some thickness to it – the emulsion was of a fixed depth – however, with digital sensors, this ‘depth’ is all but nonexistent – so an image tends to snap in and out of focus fairly abruptly, with very little acceptable transition zone – a zone that gets increasingly narrow as your depth of field decreases.

_M9P1_L1011571 copy
Just enough context. Leica M9-P, 35/1.4 ASPH FLE

The reality is that with modern lens and camera designs, camera shake aside, your ability to focus has by far the greatest impact on the resolution and perceived sharpness of an image. It’s actually much more difficult to achieve critical focus with a fast wide lens than a fast long one – reason being that the transition zone between in and out of focus is far more gentle; an increasing reliance on contrast detect AF rather than phase detect AF does’t help, either.

Fortunately, there are many things you can do to maximize your chances of getting a positive hit. I’ll go through them for each of the common camera types.

_M9P1_L1001181 copy
Afternoon cigar. Leica M9-P, 50/0.95 ASPH

Compacts

1. Half press to focus, and gently release. You’d be surprised how many people just jab at the shutter button and wonder a) why their camera is slow and b) why images are blurry. The former is because the camera will take some time to find focus; the latter is because either it didn’t find focus properly (the electronics told it to trip the shutter when focus was acceptable or because of the jerk caused by the finger-jabbing motion and recoil.
2. Pick a high contrast subject. All compacts (except the Nikon 1 and some Ricohs, but those are all hybrid systems anyway) use contrast detection to determine when the image is in focus or not. The lens is racked back and forth until the portion of the image under the selected AF box reaches maximum contrast; this may or may not correspond to what you’ve selected. So, to be safe, select a subject with good contrast.
3. If in doubt, stop down a little – but not too much. Stopping down gives you more depth of field to cover focusing errors; on a compact with very short real focal lengths, you’ll find that f4 (or f5.6 at maximum for larger sensored cameras or longer focal lengths) is probably enough to ensure everything is in focus; any more than that and you’ll be seeing a reduction in sharpness due to diffraction.
4. Turn off that AF assist light. Not only is it hugely annoying and conspicuous at night, I find that it also tends to give a lot of false positives.
5. For moving subjects, continuous AF is nearly useless. The only way to reliably hit a moving subject is either to rely on your extended DOF and hope single AF is quick enough to nail it, or use trap focus by pre focusing on a certain point, and waiting for your subject to arrive.

_3100_DSC0957 copy
Crossing. Nikon D3100, AFS 85/1.4 G

DSLRs

1. I repeat again: half press to focus, and gently release. The same applies for DSLRs and compacts.
2. And again: pick a high contrast subject. Phase detect AF sensors also like high contrast subjects – preferably something with either horizontal or vertical lines, depending on the orientation of your AF sensors.
3. Don’t let the camera do the choosing. Pick your AF boxes manually. If you don’t, you have no idea what the camera will focus on – it’s generally the closest thing in the frame, but that might not be what you want it to do. Especially if you’re shooting with a very shallow DOF lens.
4. Use continuous AF mode. Again, especially for shallow DOF lenses, a few millimeters of subject movement or photographer movement to or from the subject can affect sharpness greatly – to avoid this problem, use continuous AF mode and only lock focus if you’re absolutely certain you’ve got what you want. (A popular alternative is to put AF-ON on a separate button. I personally use that button to lock focus, because generally it’s easier to use one finger to activate AF and shoot off the shutter button alone, rather than two) And without saying, you HAVE to use continuous AF on moving subjects; make sure the focus box always tracks the subject.
5. Check your focus calibration. Set up the camera on a tripod, with an angled static target (I recommend the LensAlign) that lets you see if you’re focusing on your intended point or not. Adjust your AF Fine Tune settings if you have them, until you can reliably achieve critical focus. Do this for every lens you’ve got.
6. Get your mirror aligned. If you’re manual focusing a lot, you’ll want to get your mirror aligned so that what you see in the finder is the same as what the sensor sees – what this effectively does is adjust the rest position of the mirror so that the distance from mount to sensor is exactly the same as mount to focusing screen, over the whole frame.
7. Use a split prism or micro prism screen. Remember the half-circles in the middle of manual focus film SLR viewfinders? Those were focusing aids called split prisms, which let you see very quickly if something was in focus or not – all you had to do was turn the focusing ring until the verticals aligned. Why they’re no longer standard equipment on DSLRs these days is beyond me. Why they’re no longer available even as accessories, except for some third party companies, is even more mind boggling. The standard screens have a very narrow scatter angle, which means that there isn’t much difference in brightness between slow and fast lenses – great for kit zooms, but not so great for determining critical focus with very fast lenses; they lack the required snap. If you don’t believe me, try using the DOF preview button at f1.4, f2 and f2.8 – you’ll probably see no difference in the viewfinder.
8. Don’t trust the focus confirmation aids. The dot (Nikon) or beep (Canon) is somewhat misleading because there’s a range to ‘acceptably in focus’ – and the extremes of that range are pretty wide. It’s a guide only, not an absolute.
9. Use magnified live view and a tripod for absolutely critical images.

_7025654 copy
Untitled. Nikon D700, AFS 28-300/3.5-5.6 VR

Rangefinders

1. The most critical portion of the focusing system is the rangefinder. It is impossible to emphasize how important a perfectly aligned rangefinder is – especially when using fast lenses. Remember also that you have no way to visualize the focus plane. So: make sure your rangefinder is properly calibrated for the lenses you use – each lens will be slightly different because of cam wear, alignment and a whole load of other factors. Do not attempt to do this yourself, because there are four adjustment points – one each for near and far limits, one for travel, and one for vertical alignment. Not knowing which one does what can result in a bit of a disaster. Since there’s a feeler cam that always interacts with the focusing cam on the lens, the calibration can, and does, drift after a while, so check it annually or so if you use the camera frequently.
2. Clean the RF and VF windows! Dirt + smudges + oil = low contrast = difficulty in focusing.
3. Use a magnifier over the viewfinder if you’re using longer lenses. This helps by enlarging the central portion of the frame that contains the RF patch (at the expense of the outer portions) – you’ll find that since the RF patch occupies a large portion of the frame, it’s difficult to see exactly what’s in focus and what isn’t without the magnifier.

_7037622bw copy
Waving to the stars. Nikon D700, AFS 85/1.4 G

Finally, remember the higher the resolution camera you’re using, the more critical focusing becomes – don’t go out for an upgrade of either camera or lenses until you’re sure that you’re getting all you can out of your current one. MT

For readers in Kuala Lumpur (and Singapore, when I’m there), I offer a Rangefinder Calibration Service for Leica M cameras.

____________

The inaugural mingthein.com photography contest closes 31 July 2012 – the more people entering, the larger the cash prize! Enter here

If you enjoyed this post, please consider supporting the site via Paypal ([email protected]) or via Ming Thein’s Email School of Photography – learn exactly what you want to learn, when you want to learn it. You can also get your gear from Amazon.com via this referral link.  Prices are the same as normal, however a small portion of your purchase value is referred back to me. Thanks!

Don’t forget to like us on Facebook!

Street photography – the ethics of photographing random strangers

_M8_L1025697bw copy
Paris, Leica M8, 21/1.4

Street photography is a genre that every photographer will try at least once in their career. Its broad appeal stems from the fact that you can do it anywhere; there’s a human element to the images that captivate the viewer, and if done well, can make for some extremely arresting images. However, it also requires balls. You have to get close enough to your subjects; and with people, invading personal space is uncomfortable (and possibly hazardous to health) for both photographer and subject. There’s a slight snobbishness about shooting with a longer lens, too – it isn’t seen as being hard core enough. In fact, these days, it seems if you’re not at f8, hyperfocal distance and sticking your camera and flash right up to somebody’s nose, then you’re not really doing street photography.

_N8_L1001710bw copy
London, Leica M8, Zeiss 21/2.8

There’s another approach, though. I think it’s much, much harder to shoot wide open with a relatively wide lens – say nothing longer than 35mm – and shoot without your subject knowing you’re there. This is what I like to call the stealth method – you don’t want to draw attention to yourself, and better yet, shoot without even bringing the camera to your eye. It takes a huge amount of skill and practice to nail shots this way, because you must be able to both guess focus correctly (if manually focusing) or know where your AF box is going to go – and at the same time know your lens well enough to visualize the field of view. You also have to be incredibly fast about it, because moments are fleeting and not repeatable. I’m not going to name names, but there are a number of popular ‘street photographers’ who don’t and can’t do this because it’s extremely difficult to do, and the yield rate is quite low for ‘perfect’ shots.

_N8_L1001358bw copy
London, Leica M8, Zeiss 21/2.8

*Shameless self plug: all of the images in this post, and all of my street photography, is done using the stealth method. When I was in practice and shooting hundreds of frames daily, I could zone focus accurately with my M8 and 21/1.4 at f2. Not anymore, sadly.

_M8_L1024264bw copy
Oxford, Leica M8, 21/1.4

However, the biggest benefit to this approach is the fact that you don’t intimidate or scare your subjects. If you don’t make somebody angry, they’re far less likely to be unhappy or actively object to you taking a photograph. And if people do notice, don’t stare back or give a stern look – though it’s usually human nature – wave and smile, and you’ll be surprised how many people wave and smile back at you. They may even strike up a conversation and let you get a few more interesting images.

_M8_L1026034bw copy
Paris, Leica M8, 21/1.4

There’s also the more subtle issue of quantum mechanics**. Basically, you as the observer won’t interfere with the scene – if you become a participant in the image, then the reaction you provoke from your subjects will necessarily disrupt whatever it was you initially wanted to capture. Bottom line: be anonymous, unmemorable, and blend in. If you’re in a touristy area, this might mean pretending to take random photos of everything and anything, whilst actually being very specific about what you’re looking for. Or it may mean using a compact and holding it in your hand, always being aware, and getting a grab frame in whenever you can. It means having to be both anticipative and reactive; you’ve got to be a bit of a psychologist to figure out who’s going to do what when, so you can visualize the scene in advance and be ready to capture it.

_M9P1_L1006592bw copy
Prague, Leica M9-P, 50/1.4 ASPH

**I deal extensively with the Schrodinger paradox and its application to photography here.

This brings me to the real meat of this article: what are the rights and wrongs of street photography? A comment by one of my readers on another post inspired the post; yes, I do shoot a lot of random strangers, especially when traveling, and there are often shots I see but may not take for various reasons. I don’t think it’s so much lack of chutzpah as the feeling that it may not be socially acceptable or ethically appropriate in various situations; photographing beggars and cripples is one of those things. Using people to portray contrasts or as anonymous human-scale elements in a frame is fine, but the one golden rule I stick to is that I’ll never take a shot that’s demeaning or potentially defamatory. You wouldn’t want the somebody to do the same to you, would you?

_M9P1_L1007473bw copy
Prague, Leica M9-P, 28/2.8 ASPH

Then there’s the issue of where and when – in most countries, you’re allowed to photograph in public effectively without restriction. There may be certain rules on tripod use because of obstruction or perceived ‘commerciality’ of the images, but that varies from place to place; in any case, most of the time I don’t use a tripod because of the weight and inconvenience. However, private property is exactly that: private. So if you’re told not to photograph, then you probably shouldn’t. And never use images for commercial or stock use if you don’t have the agreement of any identifiable individuals in the image. (Editorial use is different; you don’t need releases for people in news stories, but you also can’t really sell the images for anything else other than news.) Finally, I would be careful in politically sensitive countries or around police or other law enforcement agencies – they may have good reason for you not to photograph something, and ignorance isn’t a defense in court.

_M9P1_L1001602bw copy
Kuala Lumpur, Leica M9-P, 50/0.95

Finally, remember that in an increasingly connected world, we aren’t anonymous. It’s entirely possible for somebody to see themselves on another site somewhere; in fact, it’s happened to me a few times. It may be because I just look at more images than the average person and thus have a higher chance of seeing myself somewhere, but I’ve also had people message or email and say they were the person in the shot. I usually just send the person a copy of the image by way of thank you; in any case, you can’t do anything commercially with it, so there’s no harm in releasing a copy.

_M9P1_L1007421bw copy
Prague, Leica M9-P, 28/2.8 ASPH

I think if you stick to what your gut tells you about common sense and public etiquette, then you should be safe. Unless you’re a photojournalist, it isn’t worth getting the shot and then getting in trouble for it – there are exceptions, but they’re far and few between. Practice being fast and stealthy, but also courteous and friendly; and you’ll find that street photography isn’t so difficult after all. MT

____________

Visit our Teaching Store to up your photographic game – including Photoshop Workflow DVDs and customized Email School of Photography; or go mobile with the Photography Compendium for iPad. You can also get your gear from B&H and Amazon. Prices are the same as normal, however a small portion of your purchase value is referred back to me. Thanks!

Don’t forget to like us on Facebook and join the reader Flickr group!

appstorebadge

Images and content copyright Ming Thein | mingthein.com 2012 onwards. All rights reserved

Don’t forget to like us on Facebook!

_M8_L1025077bw copy
London, Leica M8, 21/1.4 ASPH

Clients from hell (or, some light partial humor)

I think a lot of working pros will be able to relate to this list, see the satire in it, and then commiserate with me that I was only partially joking…

Without further ado, in no particular order:

– Those who ask for endless retouching revisions, all of which creep increasingly outside scope – masking out figures to place from a location shot to garnish a text page in a brochure

– Those who haggle price with you til the last cent, then pay late (big companies are notorious for this; it’s as though there’s an internal KPI for creditor days – the higher the better)

– Those who haggle price with you til the last cent, and don’t pay at all

– Those who haggle price with you til the last cent, agree, then question every item on the bill again at payment date whilst of course contesting half of them

– Those who after agreeing price and scope, sneak something in under the pretense of ‘oh, can you also help me out with something small?’ (which is of course neither small nor easy)

– Those who pay for a fixed number of shots but ask for all of the raw files or expect at least 50% more final delivery shots, knowing you’ll produce far more than agreed to ensure the scope is completely met

– Those who ask for uncompressed maximum resolution 16bit CMYK TIFF files, then complain they can’t open them because their computers have ‘insufficient system resources’

– Those who don’t actually pay your work more than a cursory glance before finding one shot they didn’t like in the 200 you delivered, then demanding a discount even though they loved everything else

– Those who specifically look for one image they don’t like, so they can complain to you non-stop about it afterwards so they can get a discount

– Those who think their problems with other unrelated contractors are your fault, and either use that as an excuse as to why they can’t pay, or why they expect more from you

– Those who ask for your style, then hand you a book/ magazine/ menu and say ‘copy this’

– Those who approve every single shot on the camera review screen, then complain that you didn’t give them what they asked for afterwards

– Those who don’t supply any of the agreed props or items

– Those who supply you with objects or food to be photographed that are obviously unpresentable – they may be scratched, dented, cracked, partially eaten, or generally used

– Those who complain that your make the food look overcooked, when in fact that was the way it came out of the kitchen – identifiable by the fact that only the roast looks too dark, but every other object on the plate looks fine

– Those who don’t supply any of the agreed equipment/ props/ garnishes/ sauces/ spare parts

– Those who aren’t on time, and worse still, don’t tell you that they’re running late

– Those who want fully processed and retouched images the day after the shoot

– Those who expect you to reschedule all of your other shoots to accommodate them

– Those who leave all decisions to their creative agency, whose vision is substantially different to their own…you can imagine what happens after that

I’ve just realized that this list isn’t that funny after all, I’ve had some clients who qualify for almost every single item…MT

____________

Visit our Teaching Store to up your photographic game – including Photoshop Workflow DVDs and customized Email School of Photography; or go mobile with the Photography Compendium for iPad. You can also get your gear from B&H and Amazon. Prices are the same as normal, however a small portion of your purchase value is referred back to me. Thanks!

Don’t forget to like us on Facebook and join the reader Flickr group!

appstorebadge

Images and content copyright Ming Thein | mingthein.com 2012 onwards. All rights reserved



