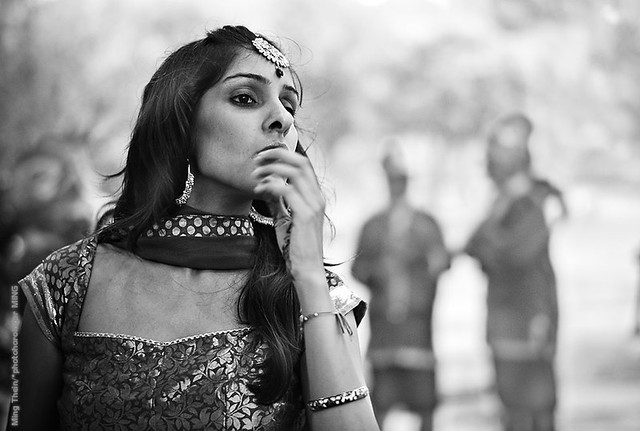
Achieving ultimate image quality*

*Both with what you own, and what you don’t.

This seeds of this article started to plant themselves in my mind during a recent assignment. It dawned on me that my shooing style had been slowly changing over the last few months; from trying to run and gun handheld with speed and (mostly) precision, I was now bolting everything down to a 5-series Gitzo Systematic, hydrostatic ball head and geared head, shooting at base ISO at optimum apertures and compositing my shots. Oh, and bringing in lighting. I can only suppose this represents the next step in my evolution as a photographer, as my work becomes increasingly skewed towards commercial and less documentary/ ad-hoc/ personal. (I, and my bank balance, can only hope that medium format isn’t next!)

That said, there’s a right and a wrong way to go about the technical aspects of shooting. I want to cover tips on how to obtain the maximum image quality from your equipment under three different scenarios: firstly, handheld with the gear you own; without upgrading or buying any more gear, and finally, a hypothetical what-if scenario if the sky was the limit. Shot discipline basically boils down to two things – support/ stability, and optics. The former resolve as camera shake issues; the latter as softness and a general lack of resolution. I’ll address both here.

Handheld and making do
This scenario assumes you don’t have a tripod, and you’re shooting available light.

1. Watch your shutter speed. Make sure you don’t fall below 1/2x 35mm focal length for critical applications, or 1/35mm focal length if you have no choice. If you have IS or VR, you can safely shoot at twice as long a shutter speed as without; just make sure you give the VR or IS system a second or so to lock in first.

2. Use Auto-ISO, if you can control it. Auto-ISO may be derided as being for amateurs, but the reality is that it helps you to maximize image quality by giving you precisely the sensitivity you need and nothing more; if you increase ISO beyond what you need to get a decent hand-holdable shutter speed, you’re going to also incur unnecessary noise. This of course assumes that your camera allows you to set the minimum shutter speed and maximum ISO; not all of them do. The better ones automatically default to 1/focal length.

3. Check focus. This seems obvious, but relying on your camera to decide what should be in focus is a huge mistake. Pick the AF point, make sure you’re using continuous AF in case you or your subject moves – for very fast lenses, less than a centimeter can make a huge difference to the final result. I typically tap the shutter a few times to confirm focus and even defocus a bit manually and reshoot if I’ve got time. Inevitably, there will be variations in sharpness between frames; sometimes due to camera shake, sometimes due to the focusing system. Especially at the edges; not all lenses are flat-field, and some may have field curvature issues to take into account.

4. Use optimal apertures. Spend some time figuring out at what apertures your lenses perform best, and how this changes if you’re focusing at the borders or edges. Very few lenses deliver optimal performance wide open. Some lenses can also move their point of best focus on stopping down (‘focus shift’); this matters because all AF systems focus with the lens wide open. It’s important to know that even if your depth of field at f8 covers focus shift, it might not extend in the direction you were expecting.

5. Control your breathing. Exhale slowly as you release the shutter; the camera is coupled to your body either via your face (viewfinder) or worse, held at arms’ length; if you’re breathing hard when you take the picture, this motion transfers to the camera, which results in shake and softness.

6. Shoot RAW. A no brainer: keep all the image data your camera can produce. Storage is cheap. Near misses are more frustrating than not having the opportunity to shoot something at all.

7. Nail exposure. Getting exposure right, or as close to it as possible in-camera minimizes noise from shadow recovery or posterization and odd colors from highlight recovery afterwards. It gives you the maximum amount of dynamic range to work with. Note that getting it ‘right’ doesn’t mean making it as close to the final desired exposure as possible, it almost always means exposing to the right so that the highlights just clip – this keeps as much of your shadow data out of the lower, noisy, bits of information as possible. You can always reduce the exposure later with no penalty to image quality, but it isn’t the same in reverse.

8. Shoot bursts. Bursts minimize the effects of jerky fingers on the button, as well as giving you a couple of extra shots as insurance. This is especially important under low-light (read: dodgy shutter speed) conditions, as well as fast-moving events where anything could happen.

9. Watch your stabilization system. Stabilizers all involve a moving element of some kind to counter motion – they don’t work well with high frequency motion, simply because there’s a limit to how fast things can reasonably move. If your shutter speed goes above a certain threshold – generally 1/1000s or so – then the moving parts in the camera can create a minor vibration that won’t cause visible shake in the image, but it will trigger the stabilization system to try and compensate for it – and it usually overcompensates, resulting in a double image as it snaps from one place to another. Turn it off if your shutter speed is high enough. At the opposite end of the spectrum, giving the stabilizer a second or two to ‘bed in’ before you shoot can make a huge difference to its effectiveness. Mashing the shutter all the way down simply does not give the stabilizer enough time to lock in.

10. Stand firm. If you can’t bring fixed support, then be your own support. Find something firm to brace the camera on, or at very least, have both feet firmly on the ground. Tiptoeing or holding an awkward angle is almost certainly going to result in camera shake.

11. Don’t jerk around. Be smooth when you release the shutter – roll your finger over it and gently press, don’t stab at it. Use the half press position to lock in or activate focus, then just add a little more pressure to release. You’ll be surprised how much difference this makes to the sharpness of your images.

Under ideal circumstances, but you’re not allowed to buy anything
This is effectively how I approach my current assignments. Note: many of you will be surprised by just how good the image quality from the current generation of compacts can be, if given enough light, careful exposure and used on a tripod. My earlier article on the use of compact cameras for professional work shows some examples of that – and at that point, we didn’t even have such interesting options as the Sony RX100.

1. Support is critical. Although I both of my tripods and heads are rated far beyond the maximum equipment load I have – a light Gitzo 1542 Traveller and a much heavier Gitzo 5562 Systematic, I seem to be using the 5562 all the time. It’s simply as sturdy as a rock: the thinnest leg section is about an inch in diameter, which is much better than metal for damping vibrations. I don’t even use a column; the head – a Manfrotto Hydrostat – is bolted directly to the large platform. This tripod is so sturdy I can sit on it (without the head, of course) and the thing doesn’t move or flex. Simply no comparison to shooting handheld – there’s just no way to obtain this level of stability or precision in framing. I can’t imagine doing commercial work handheld anymore.

2. Use base ISO. Covered above.

3. Use optimum apertures. Covered above. Note that when you’re shooting a high resolution camera on a tripod, diffraction becomes very obvious. Unless you have no choice, don’t stop down farther than you need to – you can actually make the image softer that way.

4. Bracket and composite. For scenes with large dynamic range, or elements so far apart that no depth of field at reasonable apertures will cover them, I find myself using multiple images – one for each distinct exposure or focus zone – and compositing them afterwards in Photoshop. Care has to be taken to make things look natural, too; HDR this is not. And you simply can’t do it without a good tripod.

5. Bring your own light. I’ve always said that without light, there is no photography. With good light, the most banal subject can appear arresting. So why rely on unknown or potentially insufficient or spectrally-odd light? I bring a set of speedlights, umbrellas and softboxes to every job. Not only do I know exactly what I’m getting color- and exposure- wise, bringing your own controllable light also allows you to increase your shutter speeds to further minimize the possibility of camera shake or subject motion. Use the maximum sync speed unless you need to blend in ambient light too.

6. Watch your shutter speeds. There are a few critical threshold levels for shutter speeds – some support systems or cameras have a range in which there are inevitably vibrations, no matter how stable the tripod; you can’t go below about 1/60s for a slowly moving person, or 1/500s for sport; other, faster, subjects may require even more shutter speed. Even if in theory you could get away with 1/500s to freeze motion, you will probably see a significant improvement at say 1/1000s.

7. Use manual white balance. Although modern AWB is pretty good, and current sensors have a large dynamic range, what doesn’t change is the fact that once a channel blows, you can’t recover the information. Most of the time, RAW converters are interpolating data from the photosites of non-blown channels and adjacent areas to guess what the color for the overexposed area should be. Shifting white balance too much can actually cause channels to blow, or require blown channels to be brought back under Level 255. If you get the white balance right out of camera, not only does this save you the hassle of having to do major color corrections later, but it also prevents false color and minimizes noise in individual channels.

8. Use live view to focus. Both the resolution and focusing system problems of the D800 have made it clear that for critical applications, live view focusing is the way to go. You can’t get any more accurate than focusing on the actual imaging plane. This also allows you to check depth of field and preview exposure; finally, no modern DSLR seems to have been designed with critical manual focus through the viewfinder in mind – the focusing screens simply lack ‘snap’ and are optimized to deliver a bright image with slow zooms. I have to admit, I initially didn’t see the point of live view, but on a tripod, for precision work, it makes perfect sense. Especially with a good LCD. Now, if only we could get Retina Displays on our DSLRs…

9. Shoot RAW. Covered above.

10. Nail exposure. Covered above.

11. Use a timer or mirror lockup. No point in having the most sturdy support system in the world, and then inducing vibration by moving the camera yourself when you trip the shutter. Either use the self timer, a remote release or mirror lockup (or preferably, all three) – this truly minimizes the amount of camera shake at the point of release, and allows any residual vibrations caused by the mirror cycling to die down before the shutter opens.

12. Limit the amount of optical intermediaries. Teleconverters, adaptors and extension tubes all introduce another set of mounts into the equation, not to mention possibly degrading image quality if there are optical elements involved. The perfect planarity of each mount surface is required to maximize image quality at the sensor plane – there’s no point in having a perfectly flat-field lens if the mount is at an angle!

13. Turn IS off. You just don’t need it if you’re shooting on a solid tripod and making your own light.

14. Limit the tilting and shifting. Even though tilt-shift lenses are designed with a much larger image circle than the format they’re meant to cover, like every other lens, the edges of this image circle are often far from perfect. Limiting your lens movements helps to avoid these areas.

Sky’s the limit…
Here’s what I would have if money were no object.

1. Full movements. If I could place my depth of field and focal plane precisely where I want it, I wouldn’t need to use large lights or very small apertures; Scheimpflug is your friend.

2. A large format back with enormous pixels. Large format for better DOF control; a single shot back (if anybody makes them that large for non-military use) with big pixels for fantastic dynamic range and color accuracy. Forget JPEG, RAW is all I need. And it should have a nice, high-resolution preview screen for critical focusing, too.

3. High CRI LED panels, and lots of them. Bringing my own light – with low weight, low power consumption, no chance of bulbs going pop, and good spectral transmission. Plus, the ability to preview the outcome of a particular lighting setup lets you work a lot faster.

4. Some serious support. I’m very happy with the Gitzo 5562 I’ve got now, but it seems that the combination is let down by the head. Specifically, not so much the rigidity of the head as the lack of precision in positioning; I think I need an Arca-Swiss Cube or D4.

5. Apochromatic lenses with leaf shutters. No loss in resolution due to CA; great color reproduction, and minimal camera shake thanks to a teeny shutter with very low mass.

5. A packhorse and/or a good chiropractor. Either it carries itself, or my spine is going to go…MT

____________

Visit our Teaching Store to up your photographic game – including Photoshop Workflow DVDs and customized Email School of Photography; or go mobile with the Photography Compendium for iPad. You can also get your gear from B&H and Amazon. Prices are the same as normal, however a small portion of your purchase value is referred back to me. Thanks!

Don’t forget to like us on Facebook and join the reader Flickr group!

appstorebadge

Images and content copyright Ming Thein | mingthein.com 2012 onwards. All rights reserved

Technology, art, and pushing the boundaries

Even from the earliest days of photography, there has been an inextricable link between the medium and the technology used. Classical artists saw it as an abomination: where was the skill required to recreate the form of a subject when the device did everything for you? If anything, the early photographer was more engineer and chemist than artist. Relative unfamiliarity with some properties of the medium – depth of field, perspective, etc. and near complete unpredictability with others – tonal reproduction, exposure, colour, lighting, emulsion quality etc. meant that results were hit and miss, and more often about getting any image at all – rather than one of any longstanding artistic merit*.

*I believe the popular analogy goes ‘what’s amazing is that the horse can talk at all, not so much what it has to say’.

And for this reason, many of the images we see from the early days of the medium – especially portraits – resemble conventional paintings in the posing, light and general composition. Is it any wonder that early photographers weren’t taken seriously by artists? In fact, I think we can argue that photography as an art medium didn’t really come into its own until the second half of the 20th century, coinciding with not one specific event, but a few technological ‘enablers’:

1. Built-in meters.
2. TTL flash.
3. Consistency – both in the cameras themselves, as well as the processing
4. Mass market processing of film.
5. Later on, autofocus.
6. Still later, digital.

Each one of these things has brought its own little impact on the way photographers work; arguably, making executing a technically good photograph a lot easier than it used to be, but also removing the other distractions and freeing the photographer to concentrate solely on the contents of the frame. All things equal, if you don’t have to think too much about exposure, or focusing, or whether you need to remember to adjust the lens a few degrees past the mark to get true infinity, then you should have a bit more spare brain power to spend on composition – which in theory, should make for stronger images.

But on the whole, I’m not sure we’re seeing this. I remember a statistic that said 10% of all images ever taken were shot last year – that’s mind boggling. By simple laws of statistics, more images means more better ones as an absolute number – but perhaps not more as a proportion. I think maybe making things easier has actually resulted in taking a photograph both crossing the threshold of ‘something you do casually without thinking about it’ as well as opening it up to a whole bunch of people who might otherwise have been intimidated by all of those buttons and knobs. Give a random person your Leica M3 to take a photo of you with in the 1950s, and he’d probably do okay. Do the same today, and chances are they’d run off with your camera.

Yet for those of us who are taking the whole photography thing seriously – and I’m not talking about the gearheads and collectors here – it’s a golden era. We photographers have never had such a wide choice of equipment to use; all of which performs well above the sufficiency threshold. Arguably, even the enthusiast compacts of the current era can deliver at a level that was very much cutting edge for anything below medium format not so long ago. Beyond that, the expansion of the overall market has made room for niche equipment makers to survive and thrive; a good example would be a tilt shift bellows for M4/3, made by Novoflex – combine that with the small sensor, and never-ending depth of field, anybody?

And that brings me to the core of this essay: in a creative form that has always been tied to its technological roots, we might as well embrace it and use the technology to open up new creative doors; I think the current generation of photographers is doing that well, but perhaps not taking it as far as they could be. I’m talking about vision, imagination, and the idea; the ability to see in your mind your final frame before you shoot it. And it doesn’t have to come out of the camera that way; there are some things that must be done in post-processing, like compositing or retouching – so what? The only limitation in the results is very much down to how far ahead the photographer can see; how well they can visualize the effect or potential applications of the new tools. At the same time, though, we must be careful not to get caught up in pop culture: a good example would be that not all HDR has to look like a multi-colored psychedelic tone map. What else can we do with HDR that would result in a frame that a) doesn’t look like every other HDR frame, and b) allows you to present a different view on the world? At the same time, it’s important to note that for journalism purposes, a degree of integrity is required in images: changing the tonal presentation is fine, but changing the contents of the image is absolutely not.

I want to talk about some of the emerging and maturing technologies that make me excited because I can see creative applications for them; I’m sure that there are plenty more I’ve not even heard of. So bear with me.

3D/ Lytro.
The presentation aspect of this has some ways to go before it becomes really mainstream; I’m more interested in the ability to fix a ‘near miss’ after capture, or to have perfect focusing all the time, or have control over the depth of field after taking the shot. For this, we wouldn’t need to have an infinite number of light fields to enable focusing at any distance, but just a few before and after the captured focus point to be able to tweak things afterwards. With sufficiently high density sensors, we wouldn’t even have to take much of a hit in resolution – and I’m sure a smart algorithm could make use of the nearby non-image forming pixels to reduce noise or improve dynamic range.

Composite sensors.
It’s a bit surprising that the conventional Bayer array CCD has lasted this long, actually. Although the idea of Foveon – with multiple photosites per pixel – is a good one, there’s no way that vertical stacking is going to be able to deliver the same noise and dynamic range results, because by the time the light hits the lowest layer of the sensor, it’s already been attenuated severely by the filters above it. And if you don’t have much light in the first place, all you get is noise. What would make more sense is some form of pixel binning – especially with the increasingly dense sensors we’re seeing today. The OM-D’s 16MP sensor is a quarter of the size of full frame; that would make a 64MP array at the same pixel density. But what if the pixels were grouped into bunches of four – RGB and luminance – for true color at each photosite? The luminance pixel could be used to further improve dynamic range and noise, too. And I don’t think a real resolution of 16MP is anything to sniff at.

Speed and HDR.
Input dynamic range should not be confused with output or display dynamic range. Even though the display methods we have today are limited to ~8 stops because they can’t all be lightbulbs to replicate the brighter areas – an LCD for instance, or a print – that doesn’t mean we can’t use more input dynamic range. What this lets us do is choose where and how we allocate the output tonal scale, according to our artistic intentions for the scene. The current limitation is that single-capture DR is around 14 stops maximum; whilst this is far ahead of anything we’ve had previously, there are still scenes that exceed this dynamic range, yet remain clearly visible to us in real life without clipping to black or white. At the same time, capture speed is getting faster – why not take two shots very close together with the mirror up, and then merge them in camera to prevent clipping? We’re already nearly there with the back end coding, but the speed (and camera/ subject motion related to it) needs a bit of work. No reason why at say shutter speeds above 1/1000s we couldn’t have a 1/1000s and a 1/2000s exposure…

Extreme perspectives.
Slowly but surely, lenses are getting both wider and longer. They are also quite unwieldy to handle or compose with – how close do you have to be to something with an 8mm lens on FX to make it fill most of the frame? Very, is the answer. But yet there are plenty of creative photographers who are using these tools to create interesting perspectives. On the opposite end, the Phantom HD camera used by the BBC to film Planet Earth comes to mind – it lets us get close, at a surprisingly natural perspective, without having to either endanger the lives of the crew, or scare off whatever it is we’re filming/ photographing. No doubt it’s a bit voyeuristic, but hasn’t that always been the nature of photography?**

**A good example of this is Miroslav Tichy – although pretty much seen as a pervert during his lifetime, he’s now considered an artist. And yes, he made his own cameras out of cardboard and string.

Miniaturisation.
I think it’s impossible to separate perspective from location – getting the camera into places previously impossible, or inaccessible, is also a big part of this. Aside from the obvious aerial rigs to get us remote unsupported shots in the middle of the action (at the Olympics, for example) – there’s also the whole field of miniaturisation. Perhaps the best example of this is what the GoPro camera started: POV filming from absolutely any point of view. What if we could do that to a decent image quality level with still cameras? In my mind…taken to the extreme, I envision sticking the end of an extremely fine endoscope inside a watch movement to photograph it. I’m sure you all can think of other uses.

Endurability/ survivability.
Taking perspectives and location even further – we’re now sending cameras to places where we physically can’t go, like space, or the deep ocean, for instance. The more advanced our technology gets, the more options we have. Just like in the early days of being wowed at capturing any image at all, eventually there might be some thought given to composition, framing and the artistic merits of the photograph – once we’ve sorted out getting the photograph at all.

Increases in sensitivity and color accuracy.
Since the D3 generation of cameras – I feel we have been able to get a useable image under conditions previously unimaginable, or where we’d just say ‘forget it’. But that kind of flexibility ha, if anything, made me even more aware of the other even more difficult shooting conditions under which I can see a shot, but it remains beyond the ability of my camera to capture. Or we can capture it, but it doesn’t quite come out looking as we saw the scene. The ability to really reproduce what your eyes can see, under all conditions, is something where technology has made great strides but still isn’t quite there yet.

Integration with the photographer
Here’s a crazy idea: what if you could just download the image you saw directly from your eye/ optic nerve/ brain? I wouldn’t be surprised if some research lab somewhere is working on it. We’ve already seen integration of CCDs with the optic nerve to be able to restore sight to some degree, so why not the other way around?

It’s definitely an exciting time to be a photographer. At the end of the day though, it’s important to remember that all of the technology is but an enabler: it’s up to us to push our own creativity to come up with something different, and create your own vision. And although that will always remain the biggest challenge, there will be also always be some people who conquer it and move the medium forward as a whole. MT

____________

Visit our Teaching Store to up your photographic game – including Photoshop Workflow DVDs and customized Email School of Photography; or go mobile with the Photography Compendium for iPad. You can also get your gear from B&H and Amazon. Prices are the same as normal, however a small portion of your purchase value is referred back to me. Thanks!

Don’t forget to like us on Facebook and join the reader Flickr group!

appstorebadge

Images and content copyright Ming Thein | mingthein.com 2012 onwards. All rights reserved

Turning pro: Six months in

Well, give or take a week or so, at any rate. As those of you who’ve been reading this site from the beginning know, I’d made the decision to be a full time photography/ creative professional sometime back in 2005; I subsequently spent the next seven years building up the courage to do it. In addition to sharing my knowledge, creating something a serious thinking photographer might like to read, and connecting with the global photographic community in general, a good portion of the objective of this site was to chronicle my journey as a photographer for others thinking of following the same path, or those who might like to live a little vicariously. This is where things like the On Assignment series of posts come into play.

It was pretty clear to me that to make things work – i.e. be able to pay the bills – I’d have to spread myself around a bit, and work on the logic of ‘a bit from many places’. Despite what it might appear, this site has not been my primary focus, and can never be; it’s simply impossible for me to write from the perspective I do if I’m not a photographer first and a blogger second. This means that whilst I’ll try to accommodate requests for gear reviews, particular topics etc – it might be a while before they hit the internet because I have to find time to do them, and find a slot in the posting schedule to put them up. Reviews of equipment are limited to what I can get loaned to me (if I think it’s worthwhile evaluating, i.e. I may consider buying it because as a tool, it does something my current gear does not) or what I buy in the course of my work. I’m not going to start reviewing Canon gear, for instance, because it simply does not make sense from a workflow point of view. By the time I get up to speed with it, I’ll have invested a huge amount of time, effort and money, and still not be as good as the established users out there.

I also don’t write daily, though thanks to the wonders of scheduled posting, you do get new content every day. That’s because I don’t have a fixed chunk of time every day, and writing – like any other creative pursuit – comes in fits and starts. I might do six articles in one particularly productive day, then nothing for a week. And yes, like a magazine, I have an editorial schedule and I also make sure I don’t repeat myself or cover something from the same angle somebody else has already done. (When you actually read this, I’ll be in Japan doing the pre-workshop reccie before I start teaching tomorrow.)

On the whole though, it’s been pretty exciting. And time has flown by. Yes, there have been boring moments, slightly bleak moments where the pipeline looks empty and the crystal ball cloudy – I’ve since come to realize that’s normal for every creative – on the whole, I’ve had a ball of a time. Even the people around me say I’m much smilier than when I worked for the man. Right now I’m just grateful that I can wake up in the morning, do something I enjoy, and make a living in the process. I don’t know how long this will continue, given the current state of the creative industry – especially in Malaysia – but I suppose it makes one appreciate it all the more.

I also want to say a big thank you to my supporters and readers; without you, I wouldn’t have written, or continue to write, and in the process push my thinking, understanding and experimentation even further; so in a way, giving back has helped me to grow creatively. Thank you also to my students of the Email School, workshop participants, DVD supporters and downloaders – what you contribute in reality isn’t money, but the freedom of time to enable me to create.

In true post-consulting style, I’ve also prepared a little dissection and analysis. MT

Things that worked out like I planned

  • Commercial work around my areas of specialization – watches, food, architecture.
  • Teaching and teaching-related activities have formed a nontrivial chunk of my income.
  • People like to read gear reviews.
  • I’m happier.
  • …and that’s about it.

Things that didn’t

  • The local market here for photography is tough: both very price sensitive, and quality-indifferent.
  • I’m not doing as much architecture, food and watch work as I thought; the commercial-type stuff has been getting more and more prevalent.
  • Payment collection is absolutely terrible, and difficult. The larger the company, the slower and more difficult.
  • I miss photojournalism.
  • The traffic volumes I have now. That said, I think I’ve reached a natural barrier: my audience is pretty specific, and definitely your more serious sort of photographer; I don’t know how many of them are out there worldwide, speak English, and would be interested in reading what I’ve written.
  • A lot of the smaller companies in the US and Europe who make interesting specialist gear have no interest in having their stuff reviewed, even if you are pushing a serious amount of traffic through their target markets (about 60% of my readers). I didn’t even get a reply from a lot of the companies I emailed – this is both rather disappointing and shortsighted on their part.

Things I completely didn’t expect

  • The friendliness, openness and civility of the international photo community. I’ve made a lot of great friends in the course of both working professionally and running the site, and it’s completely different to what the DPReview forums might have you expecting.
  • I’m working far longer hours than when I had an office – and I thought that was bad. These days, 14-16 hour days are normal. 7 days a week. But you know what, it doesn’t feel like work half the time.
  • Sometimes saying no to a bad client is the right thing to do. It feels odd at first to walk away from a job you have the capacity to do, but avoiding pain and having that veto power and control was one of the things I wanted over corporate. So I’d better learnt to make the most of it, I suppose. Happiness is now achievable.
  • Shooting full time for work doesn’t make you more creative. When there are clients on the line, unless they’re very, very good clients, you tend to be more conservative, if anything. This tends to limit the quality of your output somewhat. It’s tough to be creative on demand. And to make things worse, you don’t always feel like going out to do your own personal work afterwards – I almost have to force myself on some days. It’s not always easy to find inspiration for articles, or material for reviews. I think I’ve exhausted all of the places to shoot in Kuala Lumpur.
  • I didn’t think there’d be that many people interested in my Photoshop workflow…

Where to next?

  • I think the biggest change will be for me professionally: I need to differentiate myself from other offerings by going beyond photography into other creative spaces like video, design, copywriting, branding, layout etc – these are things I already do, but not in a widely publicized way. And I think having a consistent feel to all of your creative work is definitely a big value add for any potential client. Plus, it of course diversifies my income streams.
  • There’s an iPad app in the works. Not only will it feature some brand new content specific to the platform, but it will also let you read your favorite blog daily and search the archives in a much more meaningful way. And to go with it, there will be small video tutorial segments along with ‘request an answer’ type functionality – no more waiting for DVDs in the mail!
  • At the first year anniversary of this site, I plan to collate and publish the more interesting and time-independent posts into an ebook. I notice that a lot of questions asked have already been answered in detail in other posts, which says to me either people are lazy, or my indexing is rubbish – probably the latter. Plus it’s a shame to go to all that effort and just have things lost in the ether. According to WordPress, there’s over 400 posts and 600,000 words of content on the site – that’s the equivalent of three or four thick paperback books. I might even print a few if the demand is there.
  • I will continue to remain brand agnostic – using the best tool for the job – but in the interests of full disclosure, I have and will continue to work with Leica, Olympus, Shriro (Carl Zeiss, Profoto and Gitzo) and several other local partners.
  • Trying to figure out a better search/ indexing feature for the site.
  • More workshops! This time, I’ll go where you want me to, not where I think might be interesting. Big difference.

____________

Visit our Teaching Store to up your photographic game – including Photoshop Workflow DVDs and customized Email School of Photography; or go mobile with the Photography Compendium for iPad. You can also get your gear from B&H and Amazon. Prices are the same as normal, however a small portion of your purchase value is referred back to me. Thanks!

Don’t forget to like us on Facebook and join the reader Flickr group!

appstorebadge

Images and content copyright Ming Thein | mingthein.com 2012 onwards. All rights reserved

What makes an outstanding image? (part 2)

Continued from part one.

_D90_DSC7759 copy
Cinematic light. Nikon D90, 18-200VR

3.5 Context
Context is the way the viewer of the image creates the story of the primary subject, using the secondary elements in the frame as mental markers. The secondary elements help to place the subject in terms of time, location, culture, era, mood, as well as giving countless other psychological clues such as wealth, poverty, uncertainty, danger, unasked questions, etc. A subject in isolation is fine for a commercial product shoot, but it lacks the emotion and narrative richness that well-framed surroundings can add. The photographer also has to ensure that the elements in the frame have the correct relative prominence, which is to say the framing should direct the eye of the viewer to the primary subject first, and then the secondary subjects in order of importance. If this is not the case, then the message of the photograph can land up being quite different to the intention of the photographer at the time of capture. Properties of a subject that affect relative prominence include size, position in the frame, relative brightness, and contrast/ color vis-a-vis the background.

_M9P1_L1011571 copy
The importance of context. Leica M9-P, 35/1.4 ASPH FLE

Perhaps the concept of context is best illustrated by an example: let’s take the classic photojournalism shot. Wide angle, strongly directional lighting, some atmospheric haze, angry person waving a gun front and centre standing in a shaft of sunlight, close to the camera. The background scene contains other people grimacing (we think – they’re too small and far from the camera to tell) and greatly reduced in prominence to the primary subject, some destroyed/ burned objects, and a fire, all set to an destroyed building in the background. First thing we think when we see an image like this: war. But what if the angry person wasn’t highlighted in a shaft of sunlight, the camera was closer to the other people, who now turn out to be laughing, and we see that the destroyed background building is actually abandoned and the only one in a relatively prosperous-appearing urban area? Would these two images not have a very different story?

_M8_L1015994bw copy
The price of progress. Leica M8, 35/2 ASPH

4. Cultural background and history
There are some images which will never mean anything to any observers outside a closed group of people; this is because the compositional elements and subjects make reference to things that are culturally unique or specific to a historical time period. The trick to making images like this work is that they must have enough context for the viewer to be able to make a reasonably accurate guess at the context, even if they have no idea of the specific references invoked. Good examples would include any sort of cultural or religious ceremonies; historical events that were not publicised outside a particular country; or ethnic differences between different racial groups. (I doubt most viewers would be able to tell the difference between Dinka and Masaai tribespeople, for instance. But there would be enough visual cues in the frame to correctly think ‘Africa’.)

_M8_L1025280bw copy
It just has to be Paris. Leica M8, 21/1.4 ASPH

I’d probably widen this to include any technical sort of photography where a good portion of the visual impact comes from the subject – fully conscious of the fact that this also covers a good portion of my own work. I could take images with identical lighting and camera/ subject positioning of say a Lange Datograph and a Lange Double Split, but only the horological afficionados are going to display any meaningful difference in excitement for one image over the other.

_M8_L1024678bw copy
Seeking understanding. Leica M8, 21/1.4 ASPH

5. Human psychology
Something related to cultural background – think of it as a collective culture for the human race. There are things that universally invoke a reaction amongst the vast majority of people; for subject matter, this includes anything taboo such as death; anything universally celebrated such as birth or marriage, smiles, tears, tension, anger and anything other strong emotional cues (feel free to add to the comments if I’ve missed anything). The ability to include such cues in a very obvious way in an image further increases the overall impact of the shot – seasoned photojournalists such as those who produce reportage for National Geographic, Time, Life etc are very good at this.

_7034839 copy
Does this scene make you feel warm? Why? Nikon D700, 85/1.4 G

There’s also a second set of elements related to the human psyche that can form useful toolkit – these include use of color (or B&W); directionality of lighting, and particular hues or shades to provoke a reaction. It can be as simple an image of a place with predominantly warm hues (reds, yellows) feels cosy and inviting; the same place with shifted white balance or cooler lighting resulting in blues and whites can be made to feel clinical and sterile. Part of our response to color is down to conditioning imposed by lifestyle – incandescent light, hearth fires, sci-fi culture, medical clinics etc.# – and part of it is probably a physiological thing from our time in the jungle. It’s well known that in the natural world, brightly colored animals and plants are either that way to attract the attention of mates or other members of their species, or to warn potential predators of toxicity.

_7021860 copy
No missing the subject here. Nikon D700, 60/2.8G

#I’m sure you all had an image in your mind at every single one of these examples – now think, what was the predominant tone, color or white balance in each of those images? This article goes into the psychology of color in more detail, and this one deals with how to achieve control over color.

Finally, there are compositional rules that most people react to, to varying degrees. These include a preference for balance and symmetry; responding to leading lines, and singling out things inside natural frames. There’s also the expectation of the top of the frame being lighter than the bottom; I’m not sure where this emerges from, but I’m fairly confident it has something to do with the sky being brighter than the ground in real life.

_M8_L1023455bw copy
This shot probably means more to me than it does to you, because I’m married to the subject. Leica M8, 35/2 ASPH

6. The personal connection
The one element that the photographer has almost no control over for the majority of his audience – assuming that the image is to be viewed by more than those who commissioned it or who have direct involvement in it – is to do with the personal response of the viewer. A good example would be pictures of a wedding – they’d mean something to me if it was my wedding, and I might even be able to overlook compositional shortcomings because of the moment they capture (though I suspect my wife might disagree) – but to somebody with a detached and critical eye, the images may hold very little merit. Or perhaps a well-executed still life of bananas; I might love fruit and therefore be more inclined to like the image over somebody who’s allergic to them, or perhaps suffered from one too many banana peel pranks as a kid – they, on the other hand, might be made very uncomfortable by the image indeed – and possibly not even know why.

Moral of the story: take some time to understand your audience, and you’ll be surprised at the difference in the response. It’s one of the first questions I always ask a client: is it for you, or your customers? And what would your customers want to see?

_7037081bw copy
Blink and you’ll wonder if you really saw it. Nepal, Nikon D700, 24/1.4G

7. Timing.
This concept is best encapsulated in HC-B’s decisive moment philosophy: unlike with a video, you’ve only got one frame to tell the entire story. This means that everything that has happened, is happening, and will happen in the future must be captured in that one frame; it’s the relationship between the events clearly occurring in the frame, and the cues given from which the viewer’s mind interpolates what’s on both sides of the timeline. Although each of the other factors almost always have multiple possibilities that ‘work’ as an image (albeit with different stories) – there is only ever one decisive moment for each message or story. If you miss it, there are other moments, but they each have a different story. Time is a continuum and an artificial human construct, but at the same time the flow of causality is one-way. (This is getting a bit more metaphysical than intended; for more have a look at this article on the relationship between quantum mechanics and photography.)

_M8_L1022658bw copy
City Hall, London. Leica M8, Voigtlander 50/1.1

8. The X factor.
Truly outstanding images have something that goes beyond items 1-6; it’s an unquantifiable something that is perhaps almost born out of luck and chance, and never to be repeated. You have to have the right subject, at the right moment, in the right light, with just enough context to tell the story but not so much as to overwhelm, and some sort of personal or emotional connection created with the viewer. (And if you’re a commercial photographer, you’ll have to create all of this from scratch on demand on a repeatable basis.) I actually think the final part of what makes an image work is a degree of controlled imperfection; this appeals at a subconscious level to the humanity of the viewer; it’s almost as though it says ‘what I saw affected me as much as it should affect you’. (Of course, there is a time and place for this, and in commercial shoots, camera shake is just sloppy.) Finally, never underestimate the importance of luck: being in exactly the right place, at the right time.

_M9P1_L1003919bw copy
Sometimes, the patient are rewarded. Schonbrunn, Vienna. Leica M9-P, 28/2.8 ASPH

9. Conclusion
I want to finish on a high note. Even though there are a lot of elements that one has to manipulate – and a couple that you can’t control – to make an outstanding image, it’s clearly possible, because outstanding images happen all the time. And probably more frequently than we think, too – not all of them are shared with the world; Vivian Maier’s work is a great example of that. The single most important element of all isn’t covered in any of the sections above, and that’s practice and preparation. It’s also the best advice I can give to any photographer at any skill level. No matter how deep one’s understanding of the concepts is, if you don’t have a camera with you, or can’t figure out how to get the effect you want, or find the spot metering button, or accidentally shoot in a thumbnail-sized jpeg or something similar, you’re going to miss the shot. If your eye isn’t trained to passively seek out compositions all the time, then you’re going to miss something. The best thing, however, is that the element of preparedness is 100% under the control of the photographer. MT

____________

Visit our Teaching Store to up your photographic game – including Photoshop Workflow DVDs and customized Email School of Photography; or go mobile with the Photography Compendium for iPad. You can also get your gear from B&H and Amazon. Prices are the same as normal, however a small portion of your purchase value is referred back to me. Thanks!

Don’t forget to like us on Facebook and join the reader Flickr group!

appstorebadge

Images and content copyright Ming Thein | mingthein.com 2012 onwards. All rights reserved

What makes an outstanding image? (part 1)

_8016610 copy
Apples. Nikon D800E, Zeiss ZF.2 2/100 Makro-Planar

Of the 400 or so posts I’ve published up to this point, I recently realized that the one enormously gaping hole I haven’t yet covered deals with the one of the major fundamentals: how do you actually determine if an image ‘works’ or not? What makes it good? What makes it outstanding? I think it was both a discussion on composition in our reader pool forum on Flickr, as well as the strongly mixed reactions to this photoessay post that did it – context, even a mini-article, sometimes simply isn’t enough if you’re missing a cultural familiarity, or local view. This is obviously not a simple question to answer; despite an extensive search online, I haven’t been able to find any good articles that provided any sort of conclusion. (Clearly, I must be a bit of a masochist in deciding to write this article.) Perhaps it’s because it’s an extremely subjective question to begin with; or perhaps it’s because to come up with an answer that makes sense requires a thoroughly multidisciplinary approach: strong images resonate technical, compositional, cultural, psychological and personal chords. And the final two are of course highly observer-dependant.

_5006010 copy
Two old men. Olympus OM-D, 75/1.8

In fact, it’s a wonder that we have any images at all that are globally recognized and appreciated. Rather than analyze specific images, I’m going to spend some time looking into some of the more abstract characteristics and their implications for one’s photography. I’d recommend finding a comfortable chair and grabbing a drink because this is a pretty heavy article. So heavy, in fact, I’ve decided to split it into two parts. It’s also turned out to be one of the most difficult articles to write, occupying a good couple of days thanks to the extremely vague and ill-defined nature of the subject matter. Finding the right photos to illustrate the article was just as tough; excuse me if there are some repeats of previously-posted images here.

_M9P2_L1000224 copy
The diving board, Hong Kong. Leica M9-P, Zeiss ZM 2.8/28

One of the most important things for a photographer to know is specifically why one of their images works, and why another one doesn’t. I was going through my contacts’ uploads on Flickr the other day and noticing that there were three types of photographers:
a) upload everything, no QC or editing whatsoever, mostly poor images;
b) upload most things, has one or two really good images, mostly mediocre;
c) only uploads good stuff, and shows a consistent level of quality.

Type a almost certainly has no idea of what makes a good image, or perhaps they don’t really care; we must remember that social media is also used for indiscriminate sharing. Type b appears to be a more serious amateur, and wants to make good images, and probably knows a good image when they see one, but is unable to deconstruct their successful images into a series of things that they can replicate. The final type, c, knows what works, and either doesn’t bother shooting the rest, or hits the delete key pretty fast when something isn’t quite right. I want to get us all to type c.

*Note that this article contains a lot more links than anything before – it’s because I’ve previously explored a lot of these individual concepts in some depth, but never unified them in a single article – this one.

_8019332 copy
Omega Speedmaster 9300. Nikon D800E, 85/2.8 PCE

Let’s begin.

1. Subject
There is simply no point to a photograph or image if there is no subject. An image is a representation of something: if there’s nothing to represent, or it isn’t clear what the representation is trying to be, then why bother at all? This doesn’t mean to say that abstract images don’t work; in such cases, the abstraction and entire frame are the subjects themselves. But in the broadest possible sense, if you look at an image and it isn’t fairly obvious what the image is about, then it fails. A photograph without a subject is like a meal with no main course, or a story without a plot – it can fill an immediate transient need, but it will not have any lasting consequence or memorability.

_RX100_DSC1102bw copy
The cloud. Sony RX100

The sole implication for the photographer is that you need to know what the subject of your image is going to be before you take the shot, and how the other elements in the frame relate to it and tell the story. Or maybe they don’t relate to it and create an inverse story of juxtaposition and contrast; it all depends on what you’re trying to say with the image. The subject also needs to stand out and be visually obvious, it should be the (metaphorical and optical) focal point of your image. We’ll deal with that in section three. Bottom line: you need to have a clear picture in your own mind about what the image is about; invariably not everything is executable, so this picture gets increasingly blurred as it comes closer to physical execution – hence ensuring that you start off with as strong an idea as possible is paramount.

_8016759 copy
Hommage a Claude Monet. Nikon D800E, Zeiss ZF.2 2/100 Makro-Planar

2. Execution and technicalities
Next comes the simplest of the ‘secondary’ criteria. Even this is relative, however. Generally speaking, a good image is properly exposed for the subject, is in focus, and doesn’t take processing to the extremes. The executional characteristics of the image should not be the first thing you notice when you look at the photograph: you can overdo it**. They should support the compositions, but not detract or outweigh it. This is one of the things I don’t like about overdone HDR, Instagram and other photo apps – the processing is so overdone to the point that fundamental compositional structure is overshadowed, and any flaws hidden. You only see the processing, and not the subject.

_M9P1_L1014802 copy
Seeing the wood from the trees. Leica M9-P, 21/3.4 ASPH

However, there are always exceptions to every rule. And in the case of the technical qualities of an image, if you have an exceedingly strong subject or composition, then no matter how poor your execution, the subject is what you’re going to see first. Nobody remembers Robert Capa’s iconic Normandy landing shots for their technical perfection, but rather the subject matter and how he managed to convey the chaotic, haunting, gritty sensation of actually being there.

_RX100_DSC0664b copy
Service – with just the right amount of motion blur. Sony RX100

I include processing under technical execution. The biggest fundamental choice you have here is whether to work in color or black and white; some subjects are particularly suited to one or the other; some could go either way. Whether you should use one or the other depends mostly on whether your subject is best isolated by luminance/ brightness or by contrast in color. (This topic is subject to an entirely separate article here.)

**I cover processing workflow in general here, and here for B&W.

_5000552bw copy
After work. Olympus OM-D, 45/1.8

3. Composition
In its simplest definition, composition is how the various elements of an image are located relative to one another, and how this spatial relationship tells the story of the main subject or conveys the desired message. However, there are some restrictions – firstly, we are representing a three-dimensional space in two dimensions, and secondly, there are perspectives imposed by the field of view we choose to employ. The reduction to two dimensions has both strengths and weaknesses: you cannot rely on depth perception to create perspective; instead, we have to artificially impose it through our choice of focal length. However, its removal also means that we can do things that aren’t possible via native human vision, such as have everything in the frame simultaneously in focus. Mastery of composition is knowing when to use the right tool to enhance the presentation of the subject.

_7060499 copy

_7060503 copy
Dessert, before and after being enjoyed. Nikon D700, 60/2.8G

That said, for any given subject and situation, there is no one perfect composition – rather, there are probably any number of compositions that can work. However, the big difference is that they will not all tell the same story. Again, there is no right or wrong here: the best story for a given situation will depend very much on what the end objective is for the image.

This article and this article both enter into more detail on compositional theory.

_M8_L1025292bw copy
Vanishing point. Leica M8, 21/1.4 ASPH

3.1 Isolation/ separation/ focus
This concept lacks a single defining word – I suppose ‘focus’ would be closest, but the problem is that tends to induce confusion between the subject distance and the concentration around the idea or subject of the image. The ideal qualitative effect is that the eye of the viewer must go straight to the primary subject of the photograph, and then only on to the context that surrounds it, in the order that the photographer desires. This can be accomplished through the use of a number of different tools – leading lines, natural frames, negative space, bokeh etc. The subject itself must stand out from the background or surroundings; in that sense, some sort of natural frame is always required to provide the necessary isolation – it could be a doorway, or a plain color background of a different color to the subject, or a contrast in texture. The sole exception is a whole-frame abstract, where the entire image is the subject. Note that lighting is the other major source of subject separation. (And yes, there is such a thing as too much bokeh.)

_7008297bw copy
Before the take. Nikon D700, Zeiss ZF 1.4/85

3.2 Perspective
There is no right or wrong perspective for any given subject. The sole aim of perspective is to either emphasize or de-emphasize the foreground relative to the background. Does the subject need to be larger than life, or minimized? Does the image require context to understand properly, and how prominent should these contextual elements be relative to the primary focus of the image?

_0011006bw copy
Trees. Ricoh GRDIII

In general, wide-angle perspectives need a clear subject placed in the foreground. This need for a defined foreground decreases as the focal length increases, to a point where it could really go either way at roughly 50mm and above (35 equivalent). Above that, the foreground and background are of similar prominence, and subject separation is no longer achieved through perspective, insofar as depth of field is a consequence of a particular focal length and perspective. Images shot with a wide lens that lack a clear foreground can work, but only under specific circumstances which almost always involve leading lines, or large amounts of context and unusually good subject separation. Similarly, one must also take care with the use of telephotos – you can focus on the subject to the point of exclusion of all context, which can actually weaken an image.

_7014252 copy
Mt. Yotei. Nikon D700, Zeiss ZF.2 2/100 Makro-Planar

3.3 Balance
I’ve always found this to be one of the more difficult things to define. Instinctively, you know whether something is balanced or not on looking at it – but what it is specifically that creates, or destroys, that sense of balance is much more difficult to quantify. The eye of the viewer needs to linger for about the same amount of time in every portion of the frame; if you have half of the frame that takes a split second to understand but produces no context, against the complex opposite half of the frame where there’s a lot going on and a few moments of deciphering are required, then you generally might as well not bother with the quicker part.

_7057468 copy
Breguet Tradition. Balanced, but not perfectly symmetric. Nikon D700, 60/2.8G

Doesn’t make sense? Boil it down to opposites. Balance is like symmetry, but not quite; the mirror images do not have to be identical, nor do they have to be symmetric around the dead center of the frame. If the left half of your frame has something in it, then the right half must too, of roughly the same size and level of detail. This is independent of the subject. Now quarters: you can do opposite top-left and bottom-right and leave the other two corners empty, but if you do three corners and omit one, the eye is going to go straight to the empty corner because it’s the odd one out. You might actually want to do that, but make sure it’s a conscious choice. You can keep subdividing your frame and finding opposing points around the middle to balance out, but generally once something gets to be say less than 10% of the frame size in any linear dimension (1% area) then it’s usually inconsequential enough to ignore – so long as it doesn’t intrude into your subject.

This of course also applies to your subject too: don’t make it too small, otherwise no matter how balanced your frame, it won’t stand out!

_8016861 copy
There are always exceptions to every rule. Nikon D800E, Zeiss ZF.2 2/100 Makro-Planar

3.4 Lighting
I just completed a whole series on lighting here – intro to equipment, part 1, part 2, part 3, part 4, and tips and tricks.

With no light, there can be no photography. The direct meaning of ‘photography’ is ‘writing with light’. Light identifies and isolates your subject; the softness or hardness or uniformity of it determines the amount of definition and contrast, as well as the tonality; the color and hue determine the feeling of the scene. And the absolute amount of it has an impact on the technical quality of the image, too. It’s inescapable that every good image must have good light – you can make an ordinary subject into an arresting photograph if it’s properly lit, but no amount of photoshop or the most unusual object is going to surmount flat or uninteresting light.

_PM05660 copy
Prague. This would not be interesting on a flat, gray day at noon. Olympus E-PM1 Pen Mini, 45/1.8

Photographers must therefore either be able to recognize when the light is right, and seek out subjects to be illuminated by it – or go one step further and learn to control it. In fact, you have to do the former before you can do the latter – understanding the origin of a particular look makes it much, much easier to reverse engineer and replicate. Distilling things further, we’re arrive at the inescapable conclusion that successful lighting hinges on directionality, nothing more and nothing less. The right directionality creates the right kinds of shadows and highlights, which in turn creates contrast, texture and subject definition. And the less common the direction (light), the better – why do you think psychologically, we don’t find images shot in noon sunlight or under common indoor artificial light to be particularly arresting? It’s because that’s what we are conditioned to seeing most of the time. However, golden hours or special lighting effects are much less common. But I’m starting to digress into psychology, which I’ll leave for section 5.

Come back tomorrow for the conclusion in part two.

____________

Visit our Teaching Store to up your photographic game – including Photoshop Workflow DVDs and customized Email School of Photography; or go mobile with the Photography Compendium for iPad. You can also get your gear from B&H and Amazon. Prices are the same as normal, however a small portion of your purchase value is referred back to me. Thanks!

Don’t forget to like us on Facebook and join the reader Flickr group!

appstorebadge

Images and content copyright Ming Thein | mingthein.com 2012 onwards. All rights reserved

Points of sufficiency: do you really know how much is enough?

The never-ending photographic arms race got me thinking recently about sufficiency: how many pixels, fps, AF points, ISO settings, etc. are enough? The troubling thing is that I thought I used to know the answer: I’m no longer sure it’s quite as clear cut. See, the thing is that if you’re viewing images online, in theory, anything close to your screen resolution (leaving space for UI elements, text, menus etc.) should be sufficient – 1000px wide is more than enough for most purposes. The images on this site are mostly 800px wide, for reference. In theory, that should mean an iPhone is overkill. Yes and no; just because resolution sufficient, it doesn’t mean that we’re going to have enough dynamic range, or color depth (or accuracy).

This raises a hypothetical question: suppose we could have say a ‘perfect’ 3MP – in a compact camera, with a reasonably good zoom lens; if we put those 3MP into a 2/3″ or 1/1.7″ sized sensor, we could probably get a fast-sh 24-120mm f2-4 equivalent into something that would be reasonably pocketable. The relatively low pixel density would mean several things – good acuity, low noise, good color accuracy, and much higher forgiveness of the lens quality. With today’s technology, I don’t see why you couldn’t get a clean ISO 6400 and useable ISO 12800. Even with a lens of moderate speed, that’s a more than sufficient shooting envelope for most photographic purposes. Add a good optical stabilizer, fast AF, 14 bit RAW, responsive buffering and controls, and most people would be set. And with raw files that small, you could probably get 10,000 of them onto a 32GB card.

But, nobody would buy it and it would be a commercial failure. Only 3MP? Really?

That’s the kicker. If you’ve ever had a really high quality, but small-ish file, then you’ll know that you can actually do quite a lot with it; I remember seeing some images from the 2005 Wildlife Photographer of the Year competition – prints, at 40×60″ or so – which were shot with a Nikon D1H: that’s right, all of 2.7MP. Did they sing? You bet. Did they look grainy, or pixellated? Not especially so, but I’m sure you’d see the difference if you shot the exact same scene with a D800E. The shot that won would no doubt still be a great capture even twenty years from now. A hundred years from now. Does the equipment matter? Insofar as it didn’t get in the way of the capture, no.

In a more realistic scenario, a proper 300dpi print (actual pixels, not printer ink dots) looks extremely sharp. 200dpi is still acceptable; do you know what most computer screens are? Closer to 110. Sharp images still look sharp, don’t they? And the reason things appear pixellated is because the pixel mask of the screen gives each pixel a hard edge. If the edges of each dot were just a tiny bit fuzzy and overlapped the next dot, like in a print, then things would look just fine. The reality is that short of sticking yourself a few inches away from the display, you’re not really going to see the individual pixels. I have to be honest; the Macbook Pro’s 220dpi ‘retina’ display doesn’t look all that different to my 15″ non-retina from healthy viewing distances. But it requires four times the amount of graphics power to run, because guess what: every graphical element requires four times the pixels.

Most people print no larger than 6×4″, or perhaps out to 8×12″ for special images; survey a group of enthusiasts on the largest print they’ve made, and you’ll probably find 13×19″ a good end point. There are two reasons why: cost, and lack of display space. Enormous prints are great, but you’d also better have enormous walls to hold them.

So what does a 1500×2000 pixel, 3MP file get you? At 110dpi, 13.6×18.2″ – lo and behold, that’s pretty darn close to 13×19″! The one problem with this scenario is that it assumes that all photographers using the ‘sufficient’ camera have the shot discipline to get things perfect at the pixel level, and that they’re really getting the full resolution of the sensor. Sigma/ Foveon shooters will know what I mean by this – the files may be small, but the real resolving power is pretty darned high. Higher than the sensor’s pixel count would lead you to believe (but not as high as Sigma’s marketing department would like you to believe).

Even for use on a next generation ‘retina’ display, you could still get a 7×9″ image out – comfortably fitting the display size. You could probably interpolate it a little too, and not see too much degradation in quality.

Let’s put this all into context. The recently-released Sony RX100 (reviewed here) has 20MP effective – that’s a whopping 5500×3600 or so pixels, or enough for a 50×33″ print – I don’t have enough space in my house to hang more than one or two of those, and at that size, I’d struggle to think what image I wouldn’t mind looking at for hours on end. Yet there are still people crying ‘not enough resolution!’. At that sensor size, pixel density is so high that critical focusing and shooting discipline become very important; I notice that the stabilizer seems a lot less effective than lower-pixel count cameras, but I’m now starting to suspect it’s because it’s got to work quite a lot harder to maintain perfection at the pixel level.

Take the argument a notch further: okay, so there are still reasons to have something with interchangeable lenses. And those things always come with bigger sensors (okay, so not the Nikon 1 cameras, but they haven’t exactly been a commercial success – expensive, small sensor, low pixel count; even if the pixel quality is reasonably high and the cameras are extremely responsive). Bigger sensors mean more expected resolution. I’m going to bypass M4/3 and APS-C for the time being, because they all top out at reasonably similar resolutions; there isn’t that much difference between 16 and 24MP – remember, area scales with the square of length. Let’s go to full frame DSLRs – one of the most common questions I’ve received via email in the last few months is ‘I have a D700. Should I upgrade to the D800/ D800E?’ The fact that that question is even being asked signals that the marketing department has done a good job. They’ve sold you on the lure of the enormous number of pixels; you haven’t bothered to do a bit more reading to find out that a) you’re going to need much better lenses; b) shot discipline once again becomes critical; c) stability is a hot topic; d) your AF system might not be quite as accurate as you thought – especially if you’re using auto-area and letting the camera do the thinking for you.

The answer to this question is simple: how big do you print, and do you need video? If the answer to the latter is yes, go ahead and buy it; video isn’t something the D700 can do. The former is a bit more subtle: if you can’t get a good 45×30″ or so print out of the D700, then your shooting technique needs work. I’ve had images shot under ideal conditions printed to 40×60″ for exhibitions – they still looked great. Granted, the subjects weren’t crammed with fine detail like leaves and grass, but they weren’t high-bokeh content portraits, either. So, if you’re not making say 20×30″ landscapes on a regular basis – do you really need the heartache that comes from having to revaluate all of your lenses, and shunt around 50MB RAW files? Probably not. But, the bragging rights are a different matter altogether.

One of the reasons why the photographic industry is still growing despite passing saturation point some time ago is because of the photographers themselves: they don’t know when to stop. Canon will happily sell you a 50/1.2 for three or four times the price of the 50/1.4, which itself is three times the price of the 50/1.8 – simply because there are people who will pay for that extra half a stop. (And it may be an extra half a stop of aperture, but it’s almost certainly less than half a stop of transmission.) Let’s be realistic: the camera’s metering doesn’t gauge scenes that accurately; I routinely make adjustments of +/- 1 stop, and that’s with Nikon’s super-accurate matrix meter in the D700 or Olympus OM-D (I consider both to be more reliable than the D800, which has a tendency to put too much weight to the active focus area). The Sony RX100 is out by so much that I have to constantly use exposure compensation or risk an unsalvageable image. With the degree of adjustment latitude our modern sensors give us, whole stops changes are what you have to be making before you see any appreciable differences in image quality.

Here’s another curious thing: equipment with more conservative specifications often performs better than more extreme gear, even though the extreme gear frequently costs several times more. This is because we’re dealing with known technology, with greater tolerance for error: this is why there are many superb 50/2s or 50/2.8s that perform excellently wide open, but few 50/1.4s and faster that do. It’s also why lenses with higher resolving power – take the macros for instance – have modest apertures. It’s easier to correct for smaller apertures. Same thing with sensors – it’s easier to get good dynamic range and a high signal-to-noise ratio out of a sensor with a larger pixel pitch; the supporting electronics for each photosite has to be of a certain size, and if there isn’t much area to go around in the first place, that circuitry starts to make a significant and noticeable difference to the light-collecting ability of the sensor.

The bottom line is very Socratic: Know thyself. Specifically, think carefully about which pictorial limitations are due to the photographer, and which are because of the camera. Low light performance? It’s probably your gear. Poor composition? More pixels isn’t going to help you. Blurry images? More pixels definitely aren’t going to help you; examine your technique first.

The recent series on inspirations from older cameras was posted specifically to illustrate this point: just because a camera is old, it doesn’t mean that it’s no longer capable of producing good images. If somebody could use it to get the shot when they had no other choice, it means that you can still do that. The important thing to remember is that most of the time, the limitation is in the user, not the equipment. So next time, before buying more gear, think about spending money on improving your skill level first. I guarantee that you’ll see a much bigger improvement in your images. MT

____________

Visit our Teaching Store to up your photographic game – including Photoshop Workflow DVDs and customized Email School of Photography; or go mobile with the Photography Compendium for iPad. You can also get your gear from B&H and Amazon. Prices are the same as normal, however a small portion of your purchase value is referred back to me. Thanks!

Don’t forget to like us on Facebook and join the reader Flickr group!

appstorebadge

Images and content copyright Ming Thein | mingthein.com 2012 onwards. All rights reserved

A concise city travel guide for photographers

I’ve been to a lot of places both in the course of my previous life as a wandering professional, as well as more recently as a photographer and occasionally as a tourist. I’ve visited most as a business traveller first, but with a constantly vigilant eye for photographic opportunities. On the whole, some places are more photo-friendly than others; however, every city has its interesting places. What follows is a very brief photography travel guide to some of the more interesting places I’ve been to. It’s organized by city, in alphabetical order. MT

_N5_DSC1861 copy
Auckland. Sony NEX-5, 18-55 OSS

Auckland, New Zealand
Photo friendliness – 8/10
Photo opportunities – 4/10

Most of the activity in Auckland centers around the waterfront; be it related to boats, life, the harbor, watersports, or the sea itself. Kiwis are extremely friendly people, and generally don’t mind having their photo taken; however, note that everything downtown goes dead after about 6pm as businesses close and people retreat to the suburbs, so there isn’t a lot to photograph. There is some interesting architecture and light provided by lots of modern glass buildings around Quay Street and Queen Street. The North Shore is also an interesting area of pavement/ sidewalk cafe life, as well as being a good place to spend a sunny afternoon. Needless to say, one of the biggest events is when the America’s Cup visits the city; great for photographic opportunities, bad for the wallet.

_M9P1_L1012712 copy
Bangkok. Leica M9-P, 35/1.4 ASPH FLE

Bangkok, Thailand
Photo friendliness – 6/10
Photo opportunities – 8/10

Bangkok is so different to most other places – even within Asia, to some extent – that there’s bound to be something different for the traveller to capture. Within Bangkok there are plenty of districts; avoid the places with multi-lane avenues and low pedestrian-friendliness like Rama V, Sukhumvit and Wireless; it’s difficult to capture anything there. Far more interesting is the temple area by the river, around Wat Arun and Wat Pho; there’s also a warren of small streets and bustling city life around Thanon Yowarat in Chinatown. You could easily spend days walking around there and not manage to see everything. Note that whilst most Thais are friendly, a lot do not like having their photograph taken, so please remember to respect cultural sensitivities. The outskirts of the city are likely to provide more photographic opportunities of the rural sort. Note that Bangkok’s famous floating market is not actually in the city, but around two hours’ drive north.

Barcelona, Spain
Photo friendliness – 8/10
Photo opportunities – 7/10

Architecture, culture and people are the three things that stand out in Barcelona. Visit in spring or summer; winter is depressing and can be cold (I actually got stranded at the top of a hill in a snowstorm once). The Barri Gotic, or Old Quarter, is the best place to go exploring on foot; the seaside promenade near the Hotel Arts is also full of interesting characters and is a great place for street photography. I actually don’t like Parc Guell much; yes, it’s interesting from an art point of view, but for photography the space is too open and full of tourists. You might get some interesting detail shots of Gaudi’s handiwork, but the Sagrada Familia is much, much better for that. There are plenty of tourists roaming the streets, so another photographer mostly goes unnoticed; some Catalonians don’t like being photographed, though. If you have extra time, the monastery of Montserrat is worth visiting for its architecture. Sadly no photography is allowed inside the cathedral, though.

Cambridge, England
Photo friendliness – 8/10
Photo opportunities – 7/10

It’s often said that the difference between Cambridge and Oxford is that the former is a city inside a university, and the latter is a university inside a city – the reason being that Oxford town came before Oxford University, and both came before Cambridge. The difference is felt in size: Cambridge feels much roomier and more spread out than Oxford; a lot of the colleges are far away enough that you need at least a bicycle, and might even want to consider taking the bus. Still, there’s plenty of interesting architecture and mediaeval alleyways to explore, as well as the river Cam; don’t forget to pick up some Fudge at the Fudge Kitchen.

_M8_L1024993bw copy
Canterbury. Leica M8, 21/1.4 ASPH

Canterbury, England
Photo friendliness – 7/10
Photo opportunities – 6/10

Most people visit Canterbury for one reason only: the cathedral. A masterpiece of Gothic engineering, it’ll keep any architectural photography fan engaged. Photography inside is allowed. There’s a small network of old streets around the cathedral that can be an interesting backdrop for street photography, but note that most of the old shops have been replaced by modern chains – though some of the frontages etc remain the same. There are some interesting Roman ruins – the city wall – and a Norman castle, though these do not make for particularly arresting photography, unless you bring your own subject – I suppose one could probably do a fashion shoot there.

_8015154 copy
Geneva. Nikon D800E, 28/1.8

Geneva, Switzerland
Photo friendliness – 5-8/10
Photo opportunities – 5/10

I find the personality of Geneva depends very much on what time of the year you visit: I went once during winter, and it was both miserably weathered and full of surly, unfriendly folk; however, during the summer, everybody seems to be in a good mood the moment the sun shows. The city itself transforms, too; the old quarter, on the opposite side of the lake to the train station and behind the main drag of Rue du Rhone, is full of charming buildings and streets, that create interesting pockets of light as the sun starts to drop. Watch fans will also find the Patek Philippe museum of particular interest. Several years ago, they allowed photography of the exhibits, but I’m not sure if that’s changed in the intervening period. Outside Geneva are plenty of opportunities for landscape photography – the Vallee de Joux and the Alps are obvious choices.

_3011285 copy
Hanoi. Nikon D3, 70-300VR

Hanoi, Vietnam
Photo friendliness – 8/10
Photo opportunities – 9/10

Hanoi’s photographic friendliness is reduced a couple of notches solely because of personal risk: you really need to watch out for the city’s thousands of motorbikes. Chimping while crossing the street is a sure way to get run over. That aside, the city itself has various quarters that each have a distinct feel; post-Soviet communist concrete block, French, and Asian. And in between those, there’s a temple on an island in the middle of the lake. In the Old Quarter, all of those elements come together (though with much less concrete block) to create a very unique atmosphere – think French cafe, but with the chaos of Asian wiring, street stalls, and just a little bit of decay to add texture. It’s a photographers’ paradise – and the Vietnamese don’t mind being in your frame, either. Cheap and good pho noodles and banh mi are icing on the cake.

_5006546 copy
Hong Kong. Olympus OM-D, 45/1.8

Hong Kong, China
Photo friendliness – 6/10
Photo opportunities – 8/10

To me, Hong Kong has always been divided up into districts with distinct photographic personalities: Central, for architecture and some light people-watching; the Peak, for that one evening shot across the harbor; Tsim Tsa Shui for neon, glitz and a little bit of transitional Hong Kong; finally, Mong Kok for absolute chaos and the grittier old city. It’s almost as though things get less developed as you head further north and into China proper. If I’m to be honest, the locals aren’t the most friendly bunch, though this is changing with the younger generation. Be careful where you point your camera. Acting like a tourist will usually let you get away with a sneaked-in street shot. Though I’ve been several times on my own, or with non-residents, the best way to see the hidden parts of the city is definitely with a local – there are some hidden photographic gems to be had.

Kamakura, Japan
Photo friendliness – 10/10
Photo opportunities – 8/10

If you can’t take a photograph in Japan, then the chances are if that same situation arose anywhere else in the world, you probably wouldn’t be able to, either. Kamakura is full of more Japanese tourists trying to find their cultural heritage than international ones; everybody has at least one camera. It’s not a very big town, and there are many cultural heritage things of interest here: the big Buddha statue, or daibutsu, multiple temples, including the famous Tsurugaoka Hachiman-gū and the seaside portion of the town; many of these places are UNESCO World Heritage sites. Come here on any festival day – if you can find a place on the train – and you’re assured of plenty of photojournalism material.

_7030977 copy
Kathmandu. Nikon D700, 85/1.4G

Kathmandu, Nepal
Photo friendliness – 8/10
Photo opportunities – 8/10

It’s clear from the moment you step out of the airport that visiting Nepal is going to be completely unlike anything you’ve ever experienced. Not only is there nothing resembling a highway leading into town, the road itself doesn’t really much resemble a road, either. Thanks to fuel shortages, there are long blackouts during the day (make sure your hotel has a generator, and carry plenty of spare batteries) and few streetlights; I’d say that Kathmandu is very much a daytime photography place. Try not to go during a martial law strike, either; you can’t go out on the streets without a permit, and the place is crawling with heavily armed police. That said, the Nepalis are some of the friendliest people around, even if their country is firmly in the ‘developing’ category; like most photographically interesting cities, it has a characterful old quarter – Thamel and plenty of cultural heritage sites (Bodhanarth, Swayambhunath, Patan Durba, Singa Durba, the Narayanthi Museum etc.). It’s also a very cheap place, which explains its popularity with backpackers. Travel a bit outside the city to Nagarkot, and on a clear day, you’ll be rewarded with a magnificent view of the Himalayas.

_7049507 copy
Kuala Lumpur. Nikon D700, 28-300VR

Kuala Lumpur, Malaysia
Photo friendliness – 8/10?
Photo opportunities – 7/10?

It’s very difficult to be objective about your own home city; I can’t say how inspired a foreigner might find the place because it’s always been familiar territory to me. I know exactly where I’d go to shoot what, what kinds of people probably aren’t a good idea to photograph, and what I can get away with. For a visitor, there are a few things worth seeing – Chinatown/ Petaling Street, before the government tears it down for a mass transit station (ironically, to serve the part of the city which will no longer be there after the station is in place); Bukit Bintang, to shop and people-watch; Brickfields, or little India; the Batu Caves, especially during the Thaipusam Festival in late Jan/ early Feb; Merdeka Square, and some of the more interesting architecture. KLCC and the Petronas Twin Towers. If you’re feeling particularly bored, or want to see a whole load of artificial trees, then there’s i-City in Shah Alam by night. For the most part, the residents are friendly, the food is good, and the beer is cold. Although prices are rising, we’re still not as expensive as say Geneva or Hong Kong (and I really feel it in those cities). What’s not to like?

_M227270bw copy.jpg
Old Kyoto. Nikon D200, 17-55/2.8

Kyoto, Japan
Photo friendliness – 9/10
Photo opportunities – 8/10

If you like temples and architecture, then Kyoto is your city. I couldn’t help feel that the atmosphere was a lot colder and more reserved than Tokyo, however; there are also a lot of broad, featureless expanses of urban sprawl between attractions that are pretty much photographic deserts. There are a few must-see places on the list – the big temples like Kinkaku-ji, Kyomizudera and slightly outside, Fushima-Inarii; Gion, the Geisha District; and the portion of the town down by the river, which I believe is called Ponto-Cho. There’s also the Imperial Palace, but aside from some extremely open gardens, there isn’t a lot of interest here. Curiously, Kyoto station itself is a very interesting piece of abstract modern architecture; in some ways it’s at odds to the rest of the historical city. The best way to get around is either by subway, or the tourist buses that run in loops from outside the station.

_0011022 copy
London. Ricoh GR-Digital III

London, England
Photo friendliness – 5/10
Photo opportunities- 7/10

Thanks to overzealous police, one has to be a bit careful when photographing on the streets of London – sad to say, especially if you look a bit ‘ethnic’. Smaller cameras are definitely the order of the day, and be careful where you choose to set up a tripod. The locals in general aren’t particularly camera-friendly, either. That said, there are a number of good places for people watching – the courtyard of the British Museum is one of my favourites, along with the Piccadilly Circus to St. James and Jermyn Street stretch, Trafalgar Square and the surrounding areas. The City can be interesting but also harried; Canary Wharf was good for some architectural abstracts, though on my last visit security tended to eye every camera with suspicion. The area around City Hall on the south side of London Bridge has a nice open plaza and plenty of human activity, especially if it’s sunny. There are still a number of museums which allow photography inside – this is interesting not so much for the exhibits as the spaces and people – the British Museum is by far the best, though Maritime Greenwich, The Tower of London, the Science Museum’s hangar floor and the Tate Modern are also excellent. Aside from photography, there are plenty of other things to do, so don’t feel as though you have to get postcard shots of all the sights – that’s what postcards are for.

_5006840 copy
Macau. Olympus OM-D, 45/1.8

Macau, China
Photo friendliness – 7/10
Photo opportunities – 9/10

Thanks to a densely-packed warren of streets, Macau seems a lot larger on foot than it does on a map; the area around the ruins of St. Paul’s Cathedral are especially rich with photographic opportunities. And the locals seem so immune to tourists that it’s also a very safe environment to pratice street photography. The casinos are a different story, however – external photography is fine, but I’m pretty sure if you pull out a camera inside, you’ll have a bunch of armed guards on you in no time. Oh, and don’t forget to try the famous egg custard tarts.

_N5_DSC0325 copy
Malacca night market. Sony NEX-5, 18-55 OSS

Malacca, Malaysia
Photo friendliness – 8/10
Photo opportunities – 7/10

There are two areas of interest in Malacca – the stretch leading from St. Paul’s church to the fort ruins on the hill during the day, and the area across the river known as Jonker Street – especially on a Saturday night when the market is in full swing. There are also a number of old clan houses that feature traditional decoration and architecture; some are still inhabited by their respective clans and offer historical tours. Most allow photography. Like the rest of Malaysia, Malacca is fairly photo friendly; unlike the major cities, it’s also fairly pedestrian friendly. Local specialities include the cendol with gula melaka and chicken rice balls; pass on the latter, but the former can be a life saver during a hot afternoon.

_3032195 copy
Nara. Nikon D3, 24-70/2.8

Nara, Japan
Photo friendliness – 10/10
Photo opportunities – 9/10

A bastion of old Japan, and a daytrip out of Kyoto, Nara is home to a large number of temples – in fact, so much so that one wonders where the residents actually live, and perhaps even if there are any permanent residents to the city at all. There are also a surprising number of inquisitive deer, and stalls lining the avenues between temples serving some of the best takoyaki I’ve eaten. It’s one of the few cities in which I felt I could freely photograph everything I wanted, and I did so; however, once you get tired of temples, there’s not much else and it’s time to get back on the train to head back to base.

New York, USA
Photo friendliness – 5/10?
Photo opportunities – 8/10?

I’m guessing somewhat at these numbers, because it’s been a very, very long time since I was last in New York, and that was in the days before I had a camera surgically attached to me. But I definitely felt like it wasn’t a particularly open or friendly place; it probably didn’t help at all that I was there in the middle of winter. However, it is one of the spiritual homes of street photography, and home to numerous galleries and art collections, plus no end of skyscraper architecture. At least if you feel too intimidated to shoot people, there are buildings, or other inspirations to be had from other artists. I really need to get out here again at some point in the near future.

_3029633 copy
Nikko. Nikon D3, 24-70/2.8

Nikko, Japan
Photo friendliness – 10/10
Photo opportunities – 8/10

Nikko is a cultural heritage city much in the same vein as Nara and Kamakura; there are lots of temples, plenty of scenic things buried in dark, damp forests, and curiously little life outside that. And once again, like the other two cities, feel free to shoot away at anything and everything; but you will get bored of temples eventually. Once again, a day trip from Tokyo will suffice for most.

_7013875 copy
Niseko. Nikon D700, Zeiss 2/28 Distagon

Niseko, Japan
Photo friendliness – 10/10
Photo opportunities – 6/10

Niseko is a place for skiiers during the winter and outdoorspeople during the summer; photography is almost entirely of the landscape variety. You’ll probably get bored of views of Mt. Yotei, but there are plenty of other interesting vignettes around – the trouble is, you’ll have to find them, and without a car or bicycle (not recommended because the place is a lot hillier than it looks) it’s difficult because things are fairly spread out. Hokkaido is probably the only place in Japan that actually has space. Personal pick – the onsen at the Hilton Niseko is outdoors and offers a fantastic view of the perfectly-conical Mount Yotei; it’s a great place to relax at the end of the day.

_M8_L1024258bw copy
Oxford. Leica M8, 21/1.4 ASPH

Oxford, England
Photo friendliness – 8/10
Photo opportunities – 7/10

Another one of my familiar hunting grounds (I spent several years here as a student). Curiously, I didn’t shoot that much at the time; mostly to do with the fact that film was expensive, and consumer digital was still some years out. Nevertheless, I returned later on, better armed and photographically somewhat wiser. Much like Cambridge, Oxford is about history, architecture, and drunken students. (I would say learning, but the public really doesn’t see much of that going on; it’s behind closed doors). The city’s main attractions are small; you could get off the bus from London at High Street, walk past the Radcliffe Camera, around Radcliffe Square, through Broad Street, and down towards St. Giles and cover most of the interesting bits. There are a number of good museums – the Pitt Rivers is probably the most interesting of the lot – which allow photography, but they’re rather dark to preserve the artefacts. Good high ISO and fast lenses are a must. Note that most colleges allow entry during the day with a fee, or for free if you have somebody on the inside to take you around. The river Cherwell is worth punting down during summer, but beware drunken students in other punts colliding with yours…

_M8_L1025466 copy
Paris. Leica M8, 21/1.4 ASPH

Paris, France
Photo friendliness – 5/10
Photo opportunities – 8/10

Another spiritual home of street photography, Paris’ grand avenues and boulevards provide a fantastic backdrop to the lives of its inhabitants. Sadly, those inhabitants aren’t usually that friendly, and I’ve received my fair share of abuse and rude gestures when trying to photograph them. (Curiously, I’ve also had a guy on a bicycle yell out ‘Nice Leica!’ from about 30 yards away). Aside from the huge number of museums – it’s a great place to see both traditional art masterpieces, for inspiration – there are also a lot of small galleries and bookstores dotted around the city, many of which specialize in Photography. There’s plenty of old architecture, and a concentration of newer stuff at La Defense; the Ille de la Cite during summertime is a particularly nice place to shoot street, as are the artificial beaches along the Seine (Paris Plage). I’m told there’s also an excellent aviation museum out at Le Bourget, but I’ve never gotten around to visiting it. Particularly interesting districts are the left bank, and Montmartre.

_3013431 copy
Penang. Nikon D3, 24-70

Penang, Malaysia
Photo friendliness – 8/10
Photo opportunities – 5/10

I personally didn’t find that much inspiration in Penang; it’s a pleasant city, but in many ways somewhat provincial and small. There’s some interesting street life – especially along Gurney Drive as the sun sets, near the food stalls – but for the most part, people come here to relax (though curiously not when driving. If you had to choose between Penang and Malacca for a day trip from Kuala Lumpur, there are far more photographic opportunities in the latter city. Penangites are perhaps the most aggressive drivers in the country). There are reasonably nice beaches further north near Batu Ferringhi and beyond. The western side of the island is mostly undeveloped and covered in rainforest. Personal favorite – afternoon tea at the E&O hotel.

_PM05660 copy
Prague. Olympus Pen Mini, 45/1.8

Prague, Czech Republic
Photo friendliness – 7/10
Photo opportunities – 9/10

I came not expecting very much. I left wanting to go back – Prague is perhaps one of the richest cities in Europe for street and urban photography opportunities. The city is divided by the river Vltava; on the western shore, you’ve got the Malostranska, Prague Castle complex, St George’s Basilica and a network of narrow old streets; the other side of the Charles Bridge is the new, commercial center of town, with broad avenues and the old town square, which contains the famous astronomical clock, several churches, a few excellent cafes, the sex machines museum, and a tower which you can climb for excellent sunset views of the city. It’s also one of the cheaper places in Europe to visit; this must have something to do with the fact that the currency isn’t the Euro. In fact, it didn’t feel much more expensive than staying home in Kuala Lumpur. There’s something about the atmosphere here that just makes it an extremely pleasant city to walk around with a camera. We spent four days here, and I feel like I barely scratched the surface. The illuminated buildings and well-lit streets are great for night photography, too.

_7014607bw copy
Sapporo. Nikon D700, Zeiss 2/28 Distagon

Sapporo, Japan
Photo friendliness – 10/10
Photo opportunities – 5/10

Sapporo may be the capital of Hokkaido, but I couldn’t shake the feeling that it felt a lot like midtown New York – with its broad, grid-like streets, modern buildings, and odd combination of density and open green spaces. The issue here is that it just doens’t feel very conducive to photography; the place somehow lacks character. However, the food is especially good because a lot of it is locally grown – seafood and corn come highly recommended. But don’t come expecting it to be like Tokyo; it’s a lot more laid back.

P1020718b copy.jpg
Singapore. Panasonic TZ3

Singapore, Singapore
Photo friendliness – 8/10
Photo opportunities – 7/10

Singapore is another city with distinct districts where one can go to shoot certain things; unlike many places in the world, people don’t mind you taking photographs inside shops; I suppose they’re savvy enough to realize that any offshoot internet publicity is good for free PR. I actually like shooting in Singapore because of the rich variety of modern architecture; there’s a few good pickings around Orchard Road, especially Ion; more downtown near Raffles Quay, and even more at Marina Bay. There’s also the new Botanic Gardens building, which promises to be interesting. On the other hand, more traditional scenes can be found around Chinatown, Club Street and the Mustafa complex; there’s a beach out at Sentosa if you like wildlife. Oh, and the Jurong Bird Park has a large and extremely well-stocked aviary – it’s a good place to practice birding. Much like Malaysia, people here think it’s normal to slip an SLR around your neck before heading out of the house. Snap away.

_3030515 copy
Tokyo. Nikon D3, 24-70

Tokyo, Japan
Photo friendliness – 10/10
Photo opportunities – 10/10

Tokyo remains my number one place for photography. It’s a combination of a few things – the huge cultural differences between Japan and the rest of the world; the sheer size of the city, meaning that there are plenty of districts of distinctly different ages and characters; and the fact that it’s possibly the most photography-friendly city on earth. After all, most of the world’s cameras are designed in Japan…Nikon, Olympus, Ricoh, Canon and Leica all have flagship stores around Ginza, some of the most expensive real estate anywhere. In fact, that portion of Tokyo is so well lit that you can shoot ISO 200 at night and still get enough shutter speed to handhold. Aside from the usual places – Harajuku’s Takeshitadori, the Meiji Shrine, Akihabara, Omotesando, Shinjuku, Shibuya and Tsukiji – there are hidden pockets of photographic opportunity anywhere and everywhere you care to look. And the chances are you’re going to feel more inspired about being here than anywhere else, because everything is so different you feel you have to capture it. The Tokyo Metropolitan Museum of Photography out at Ebisu is worth a visit; they often have great exhibitions on. There are also a large number of small, one-room galleries all over the city which offer a good introduction to local Japanese photography. Totem Pole Gallery is a good example. Note that Kamakura, Nikko, Odawara (castle) and Hakone (Fuji) are all day-trippable from Tokyo thanks to their fast train network – though I happened to be there in December 2008 when a computer glitch somehow brought the whole thing grinding to a halt. Tokyo is one of the few places I can go to now and actually feel like I’m in a completely different world; I’m very much looking forward to going back in a couple of months for the October Workshop. (There’s still one place left, if any readers would like to join).

_DSC8648-2012 copy
Venice. Nikon D70, 24-120/3.5-5.6

Venice, Italy
Photo friendliness – 7/10
Photo opportunities – 9/10

Like Tokyo, Venice is one of the few cities left on earth that’s a true unique place unto itself – this providing a never-ending series of photographic opportunities, though you might get a bit sick of canals and museums after a while. Murano is worth a visit to see the glassmaking factories, and photograph a slower pace of life; though the Campanile is going to be crowded, ascending at sunset is recommended. Don’t go in winter, it floods and the locals are miserable – spring is probably the best time of year to visit; it isn’t oppresively hot, the locals aren’t sick of the tourists, and the place isn’t as crowded as during the peak travel season. Carnivale is of course another great time to go, from a photographic standpoint – but already expensive accommodation and food (everything comes in by boat) gets even more exorbitant.

_M9P1_L1003722 copy
Vienna. Leica M9-P, 28/2.8 ASPH

Vienna, Austria
Photo friendliness – 7/10
Photo opportunities – 7/10

Vienna is a pleasant city. It has its historical landmarks – Stefansdom, for one – and plenty of newer, more modern, post-war concrete blocks. It’s a much smaller city than it appears on the map; everything is walkable. The Stilwerk building (designed by Jean Novel) is quite an interesting piece in its own right, especially the view from the top floor (and its seemingly frameless windows). Vienna’s highlights for the photographer are its museums and galleries: aside from the painters and artists (great permanent collections at the Belvedere and Kunsthaus; Schonnbrunn is worth a visit too), there’s the Westlicht Gallery, which has year-round photographic installations (a Weegee retrospective was on when I was there). It also happens to be neighbours with the Leica Store – the second hand equipment selection there is mind-boggling. Food is also one of Vienna’s strong points: the Nachtmarkt has great fresh produce, and a few simple eateries that make the most of that; there’s also a good selection of high end, with the two-Michelin star Steirereck being one of my favorite restaurants anywhere.

Remember to travel safe – don’t go out of your way to attract attention, and keep copies of important documents back at the hotel. Figure out the bare minimum of equipment and carry no more; the less gear you have, the more you’ll experience the city rather than worry about which lens to use, and in turn, the better images you’ll capture. Oh, and don’t forget a good pair of walking shoes. MT

For travel equipment suggestions for 2012, have a look at this article.

____________

If you enjoyed this post, please consider supporting the site via Paypal ([email protected]); Ming Thein’s Email School of Photography – learn exactly what you want to learn, when you want to learn it or learn how to achieve a similar look with our Photoshop workflow DVDs.  You can also get your gear from Amazon.com via this referral link.  Prices are the same as normal, however a small portion of your purchase value is referred back to me. Thanks!

Don’t forget to like us on Facebook and join the Flickr group!

Thoughts on modern wedding photography: the wrong way, and the right way

_7034062 copy

Disclaimer: I’m not a wedding photography professional, I never have been or claimed to be at any point, nor is it likely that I ever will be in the future. So take this with the intended grain of salt as written from the position of an external observer. The images illustrating this post were shot as a guest at the various weddings I’ve attended in the past.

It seems that in the last twenty or so years – perhaps even less than that – wedding photography has moved from ‘capturing some memories of your (hopefully) once in a lifetime event with family and friends’ to ‘create an overprocessed hollywood epic composed of thousands of pictures with you and your other half in unlikely, impossible and completely out-of-charachter poses in which none of the protagonists at all resemble each other!’. How? When? Why? More importantly, doesn’t anybody who’s actually paying for the images realize that in twenty years, if you look at the images again at all, the first thought entering your mind will probably be ‘ugh, what was I thinking?’

_P8_L1024166 copy
One from my own wedding. I grabbed my friend’s M8.

This opinion piece aims to deconstruct the modern wedding photography genre, and figure out whether there’s still any room for somebody who wants to do it right – the best term I can use is honestly.

I have actually shot my fair share of weddings over the years – once or twice as primary photographer, nowadays under the condition that the couple hires somebody else, I’ll bring a camera along to the events I attend, and I’ll shoot like I normally do. Invariably, their print album and the images they share land up being the ones I shoot, not the ones they paid for. Why is this?

_7018959 copy

Firstly, I make sure I don’t get in the way of the proceedings; in doing so, I’m forced to find unusual angles or work from the point of view of the guest as observer – so the documentary takes place from a slightly different viewpoint. I shoot as a photojournalist, not an event photographer; I look for emotion and context. Finally, I don’t shoot weddings commercially. I recognize that isn’t one of my strengths, and it wouldn’t be fair to any potential clients to do anything less than a perfect job on an occasion which simply isn’t repeatable. (“Excuse me, could you walk down the aisle again please? My flash didn’t fire” doesn’t quite cut it, does it?). I do them for very close friends and family; instead of buying a gift that might well be your fifth toaster, I might as well give you something unique and which actually requires some effort and thought to produce – and I know will be appreciated later. But I digress.

_M8_L1018120bw copy

The reason why I don’t shoot weddings is threefold: one, they scare the crap out of me: I can’t be in twenty places at once, capturing each and every single little emotional moment – there are bound to be many – but at the same time, I can’t hire secondary photographers because I can’t guarantee quality. And having assistants in itself brings up a whole new set of issues, which I’ll get into later. Secondly, the market is dire. Either you compete on price – a thousand shots for just US$200! Or you compete on extravagance – pre-wedding shoots in a hot air balloon at dawn shot from a helicopter over the Himalayas! And neither market is sustainable, for obvious reasons.

_7034644 copy

However, the most important missing element for the hired gun is almost always the emotional connection: as a friend of the couple, or family, you probably know most of the other guests – that being the case, they feel comfortable around you (and know you’re a photographer); this means that what you get to capture are genuine, unguarded emotions. This is the ideal of the serious wedding photographer, and something that almost none of them manage – because they’re looking for the significant action, or the interesting perspective, or some technical showcase, not the emotion. And I know that it’s nearly impossible to do this when you don’t know the guests personally – they just don’t open up to you.

_7035572 copy

I can understand the desire for a couple, and their families, to have the big day properly documented for posterity. I went through the same issue of trying to figure out who would shoot my own wedding several years ago – in the end, a photojournalist friend and my brother did the bulk of the work, and I provided first-person filler thanks to a compact in my suit jacket and a borrowed camera. I edited the 8,000+ raw files down into a storyline of about 150, and did the processing myself. The result was a remarkably consistent look and feel; most of it was processed in a traditional B&W photojournalism style (which I may later come to regret, but at least I have the raw files) which fit the way the images were shot, and the style of the photographers.

_7019130 copy

But it seems that today’s trend is to go for the most over the top production you can find – the output shown (usually on a slideshow at the wedding banquet) is often so ridiculous that if you know the couple, you also realize that the photos are in no way representative of their personality, or even physical appearance, most of the time. Perhaps this is only a trend in Asia; I don’t know. But I’ve seen enough ultra-wide-from-the-tail-of-the-gown-in-forest-ruins-with-studio-strobes shots to suggest that this may be an international thing.

_7014859 copy

I think what bothers me the most is the lack of integrity about it all – I do know that a lot of couples select options like this because it’s either what’s socially acceptable, or because they don’t know any better (and it most certainly isn’t in the interests of the photographers to educate them otherwise). What has become a relatively minor expense in the whole scheme of things has now turned into something that can consume 10% or more of the entire wedding budget. What I don’t know is how many of these couples are actually happy with the output – Asians tend not to complain unless something is vomitoriously bad – but I do know that a lot of the wedding photographers don’t actually care, because repeat customers usually aren’t an issue – there’s always somebody else going to get married.

_7034699 copy

One of the biggest sins that almost all wedding photographers commit is getting in the way. At a recent family wedding I attended, the photographer and his two assistants continuously hovered in front of the couple, machine-gunning away with flashes. The problem here is that a) quarters were pretty tight, as with Asian weddings a portion of the ceremony is traditionally at home, and most homes can’t easily accommodate the hundred or more invited guests; b) as a family member or guest, you can’t see anything. For starters, this pisses off your family; not to mention feeling like you’re being mobbed by paparazzi. As a couple, ask yourself: is this wedding for us, for the family, or for the photographers? Because as an external observer, it sure as hell feels like the latter.

_7034259 copy

And that’s not the only trespass. Over the top airbrushing, or use of hideous filters – think applying the entire Instapop or Hipstagram or whatever repertoire to every image – to hide fundamental compositional sloppiness or focusing errors at critical moments – is de rigeur. In fact, I don’t think I’ve seen a single wedding banquet slideshow which contained anything approaching a natural looking image – and I’ve attended dozens of weddings in the last couple of years. Do you really need thousands of crappy photos instead of perhaps fifty, or a hundred, perfectly-timed, natural, emotional ones?

_M8_L1018253 copy

Of course not! But that’s difficult to produce, and thus makes for a very poor business model, so nobody does it. Which is a shame: the ideal wedding photographer could exist, and with some customer education, do pretty well. What attributes should such a mythical creature have?

1. Don’t get in the way. The wedding is for the couple and the family, not the photographer and his assistants.
2. Don’t miss critical moments – you don’t need twenty cake cutting shots, you just need one or two well-timed ones.
3. Look for emotion, and capture only emotion. Preserve the atmosphere and the feeling. We are human. Your audience is human. Your clients are human. They’ll look at the images and instantly feel that connection to the subject when looking at the images afterwards.
4. Less is more: spend some time curating, and you’ll find that you now have time to process each image individually instead of running them all through the SuperSoft-Crayolamatic-HDR filter.
5. Know who the key players are: you don’t have to get headshots of everybody, but if you miss the tearful mother of the bride hugging her daughter because you thought it was her kindergarten teacher, your clients probably aren’t going to be happy.

_M8_L1018054 copy

6. Be prepared! Don’t miss a shot because something wasn’t set right or malfunctioning or you weren’t paying attention. Get the program beforehand. If in doubt, shadow the bride. Doing otherwise is a cardinal sin.
7. Images don’t take a month to deliver, especially if you’re running them through filters or delivering JPEGs. There is NO EXCUSE! If a guest can find time to process each shot individually and deliver in a couple of days, and it isn’t even his job, then as a ‘professional’, it’s just embarrassing.
8. Break out of your stylistic silo occasionally – there are a lot of big-name society wedding photographers here who have a compositional repertoire that can be counted on less than the fingers of one hand.
9. Don’t overdo the output.
10. Be reasonable about what you charge – this goes in both directions. If you’re good, don’t kill the market for everybody (and yourself) by undercharging. Similarly, if you’re crap, don’t rip clients off. Steer them towards quality instead of quantity and location productions if they can’t afford it – ultimately, they’ll be happier, and it doesn’t take a genius to figure out that this will in turn be good for your business.

_M8_L1018457 copy

Most importantly, as a photographer, make sure you have integrity in what you do. It might just be work to you, but it is a once-in-a-lifetime day for somebody – you’ve been hired to do a job, don’t mess it up. This is the number one reason why I probably won’t ever shoot weddings – playing it safe doesn’t deliver that something extra; but at the same time, taking risks is also a no-no in case you miss the shot. And I wouldn’t want to fall short on either count for the client.

As a consumer, be educated: know what you want in terms of style, deliverable, and how much it should roughly cost – see the work of many people and get quotes before you make a decision. Ask a photographer friend for an opinion if in doubt. The more informed you are, the better a product you’re going to get. Don’t be bridezilla, either. MT

____________

Visit our Teaching Store to up your photographic game – including Photoshop Workflow DVDs and customized Email School of Photography; or go mobile with the Photography Compendium for iPad. You can also get your gear from B&H and Amazon. Prices are the same as normal, however a small portion of your purchase value is referred back to me. Thanks!

Don’t forget to like us on Facebook and join the reader Flickr group!

appstorebadge

Images and content copyright Ming Thein | mingthein.com 2012 onwards. All rights reserved

Street photography in context: diversion, documentary or nuisance?

_M9P1_L1006378 copy
The Police are everywhere. Prague. Leica M9-P, 28/2.8 ASPH

After spending some time thinking about it, I’ve come to the conclusion that street photography – I prefer to think of it as ‘reporting on life – is an increasingly popular genre of photography for several reasons:

1. It’s easy to do, and accessible to all – the barriers to entry are low. Wildlife or say automotive photography, for instance, is not. There isn’t any setup involved beyond remembering to take your camera with you when you leave the house, no matter where you live.
2. The definition of the genre is extremely broad; to the point that you could probably almost say there was no definition at all. This means it’s both open to much creative interpretation, and also an excuse for anybody whose generic images have no specific idea or subject in mind.
3. As humans, we are psychologically drawn to other people: no man is an island. Street photography lets us get our fill of humans without having the tread the social minefield of heaven forbid, actually having to interact with them. (It’s a bit like the internet in this regard.)
4. Everybody likes to play documentary photojournalist once in a while.
5. Building on from #4, some photographers have a burning need to record everything and everybody around them – I’m one of these people – and sometimes we just shoot out of compulsion, because our compositional minds just simply do not turn off. Having trained yourself to see workable frames in the most unlikely of places, it’s difficult to un-learn this skill (or curse, depending on whether you’re the photographer or the one waiting for the photographer to hurry up).

I believe the sum of these things is that street photography falls into one of three categories for the vast majority of photographers and audiences – diversion, documentary, or nuisance.

Diversion
For the unafflicted photographer, it can be a nice genre to experiment with when you have the desire to shoot something, but you have no clear subject in mind. Taking a walk with a camera allows you to go in with a blank but receptive mind, and just wait for an endless parade of subjects to pass you by. They’re all time-sensitive, however; if you don’t react fast enough, they’re gone. This doesn’t matter, however, because there are always more subjects where they came from, and you weren’t going out shooting with something specific in mind anyway. Serendipity is probably the best way to sum up your overall attitude towards it.

Similarly, for casual viewers, street photography can provide an interesting window into the lives of others; an unusual or otherwise missed moment preserved for posterity. You see it, appreciate it for a little longer than the actual fleeting instance of the moment, and move on. It doesn’t really stick in your mind.

Of course, this all depends on the strength of one’s compositions; of chief importance for all images, street or otherwise, is having a prominent subject and a clear idea of what the image is supposed to achieve or say. Purely aesthetic images are fine, too; but the execution must obviously support the idea.

Documentary
Those who take street photography a bit more seriously start to tip over into the documentary category – they view the images they capture as preserving a slice of life, or singling out an interesting instant from the constant flow of life around them. This is of course a continuum; you can be looking for just that little bit more over your normal street photographer, or you could be very, very serious about the decisive moment like HC-B. These photographers don’t always have a clear idea of what they want in an image, but they recognize an interesting scene when it happens and are ready to respond and capture the shot.

I think I fall into this category. Whilst I still make some images that I consider to be aesthetically pleasing rather than saying anything strong or documenting a particular moment of life, I do look for something out of the ordinary in my images; I think it’s probably the natural progression for all street photographers as they eventually land up with far too many ordinary looking images. This leads to seeking the common theme that separates out the strong images from the weak ones – and it always comes back to idea, subject, and execution (which covers framing, light, processing etc.)

To some extent, as a competent photographer, I feel that we have a moral duty to record life for posterity – especially so in fast-changing environments such as developing countries. I’ve lived in the same neighbourhood of downtown Kuala Lumpur for the last seven years; in that time the landscape and flow of people has changed so much that there are things I don’t even remember seeing, much less capturing, in my old images from just a few years ago. If we, the first hand observers, don’t even remember – how are any future generations going to manage? I’ve shown images to fellow residents, and will inevitably be told at least once or twice something along the lines of ‘I’ve never seen that before’, or ‘Where’s this? So nearby, really?’.

The observer must therefore be an impartial one, with an abstract but fixed idea of what is ‘ordinary’ in their minds. This is something that gets harder and harder the longer you live in a place, or the more familiar you get with it; the foreign soon becomes the commonplace and soon you won’t notice anything at all. Observation and recognition of differences is an innate human skill; but continuous observation and attentiveness is very much a trained one.

The nuisance
In trying to be both observers and recorders, we must endeavour not to become public nuisances. In a previous article, I talked about the ethics of street photography and the importance of maintaining basic human standards of politeness and courtesy; something that many modern photographers choose to ignore behind the pretence of anonymity, or simply choose to ignore. It’s true that we feel less inhibited as photographers when we are not in our own comfort zones or cities of residence; at the same time, this is when we are also at our most observant and probably least culturally sensitive state. It’s worth remembering that what we might not find culturally offensive at home could well be the opposite overseas.

Often, the most interesting things happen well within the boundaries of polite personal space; intruding that makes me (personally) feel uncomfortable; it’s important to remember that we as photographers have both our personal and group reputations to maintain – it certainly won’t help anybody if street photographers are eventually perceived as being at the same level as paparazzi.

So where does this all leave us?

My personal opinion – and I stress this is highly subjective – is that those of us who have the ability and inclination, should go beyond the realm of causal snapping and treat street photography as social documentary/ reportage; try to say something with every shot, but at the same time, do this in an ethical way that doesn’t intrude on the privacy, rights or personal space of the subject(s). The overarching goal should be to preserve these little vignettes on present-day life for posterity; this also means making the work accessible and viewable to as great an audience as possible, which is one of the reasons why I use flickr.

I’ve noticed that my personal street photography style has evolved over the years from – get a worthwhile composition, to get people in frame, to get as close as possible, to cinematic style with plenty of OOF areas, to get close but retain context. It seems that today I’m working towards a style that documents man in the context of his environment, natural or built; I don’t specify a man and his individual, personal characteristics as much as use that figure as an abstract for the idea of humans in a particular situation. Where you choose to take it (and if you even bother with street photography or reporting on life) is very much a function of personal style – something you will have to discover and define for yourself, if you haven’t already done so. I just thought it might be interesting to throw another perspective out there. MT

____________

Visit our Teaching Store to up your photographic game – including Photoshop Workflow DVDs and customized Email School of Photography; or go mobile with the Photography Compendium for iPad. You can also get your gear from B&H and Amazon. Prices are the same as normal, however a small portion of your purchase value is referred back to me. Thanks!

Don’t forget to like us on Facebook and join the reader Flickr group!

appstorebadge

Images and content copyright Ming Thein | mingthein.com 2012 onwards. All rights reserved

My thought process when shooting

One of the more common questions I’ve been asked recently (aside from what my Photoshop workflow looks like) is what my thought process is when shooting. This basically breaks down into two streams – am I in control of the situation photographically, or not?

By that I don’t mean whether I’m out of my depth or not; it’s about whether I have the ability to direct exactly the elements in my frame. The order doesn’t mean that one item is hugely prioritized over another; it isn’t. It’s more a case of if I have no choice,then which comes first?

In a controlled setting – studio, tripod, portrait, macro, landscape etc
Lighting
Perspective
Framing/ composition
Subject positioning
Reflections/ specular highlights
Edges
Exposure
Focus

The first things you’ll notice is that the subject doesn’t even enter into the equation – why? Well, it might as well be taken as given the there will be a clear subject to the image if I’m going to bother setting up lights to photograph it! This too, is the main reason why one would work in a controlled setting – the ability to perfectly light your subject, as well as control the composition precisely. You’ve got all the time in the world to perfect focus, and the exposure you select falls out of your lighting choices; this is why some minutae like reflections and subject positioning take precedence: simply because they can.

Perspective comes before framing, because you’re working in a situation where you have the luxury of choosing and fine tuning your perspective for every shot – no matter if that requires a ladder and telephoto. Your subject and light will wait for you.

It’s also worthwhile nothing that the processing I do in Photoshop for controlled images is very different to uncontrolled ones; I don’t have to use gradients to even out light; I don’t have to do shadow/ highlight recovery to control my dynamic range; I don’t have to spend time getting the color balance perfect. It simply isn’t necessary, because if you know what you’re doing, you should have gotten it right in camera in the first place.

In a non-controlled setting – photojournalism, street, travel
Lighting
Subject (interchangeable with lighting)
Framing/ composition/ perspective
Edges
Secondary subject
Exposure
Focus
Shoot a burst
Reset camera settings to a neutral position

Without light, your subject is invisible. And without a subject, framing is pointless; if your composition is poor, then the edges don’t matter; if you don’t have a clearly defined primary subject that’s supported by strong framing and well lit, then secondary subjects are meaningless.

There will be situations in which you’ll see the shot, and have not much time to react; this is where having a strong working process helps. I shoot aperture priority; I’m always adjusting aperture, exposure compensation and focus distance on the fly (if I’m using a manual focus camera) depending on the lighting conditions. When it gets dark, I frequently kick over to manual mode, take the camera out of auto-ISO and rely on my internal light meter. It’s not that difficult to get a consistent exposure when shooting manual; do it enough and you can usually judge the right exposure by eye – more often than not getting within 1/2 stop or so of the ideal exposure, which is well within the post-capture adjustment latitude of digital. This continual ‘fiddling of the dials’ does have the downside of making it look as though I’ve got some sort of obsessive-compulsive disorder, but it does result in my camera always being ready to shoot – and this makes me pretty quick on the draw.

This is why I place the technical execution – exposure and focus – last, because a strong composition will always be a strong composition, regardless of whether it’s tack sharp or somewhat grainy. If you capture something amazing, nobody will care what it was shot with because a) they’ll be too busy looking at the subject, and b) it’ll probably make the rounds via the internet, which as we all know, isn’t exactly a high-fidelity reproduction medium. When photographing under conditions where you are continually responding rather than being proactive, it’s better to get a shot with a strong idea rather than one with strong technical qualities but no idea. Nobody ever criticized Robert Capa for camera shake; but by the same token, I don’t think Annie Leibowitz was ever rushed on a shoot, either.

I want to add a note on the framing/ composition/ perspective portion – I do the majority of my work with just one or two focal lengths – 28/85mm; especially when it comes to travel and reportage. The simple reason is because I’m so familiar with the perspective and field of view of these lenses that I can frame without having to bring the camera to my eye; it’s as though I’m always walking around with the frame lines suspended in my field of vision. Sticking to one or two lenses and training yourself to see this way can also hugely improve your response time – being able to previsualize/ precompose the shot hugely improves your reaction time, and avoids having to waste time in framing. I then usually take a burst of a few images both to alleviate camera shake (the middle one is usually sharp because your shutter finger isn’t moving) and to perfect composition, especially around the edges.

In summary, controlled situations are all about getting the picture perfect – because you have the control and ability to do so. Reactive situations are about being always prepared and ready to get the shot – some things can be done in advance, such as setting exposure and anticipated subject distance, some things can be done in parallel, like looking for light, subject and framing; others you have to adjust for afterwards, for example, uneven exposure across the frame – there are gradients in Photoshop to take care of that.

How you choose to take care of the details is up to you; but the general advice is to make sure you take control of the things which have the biggest impact on the audience of your image first. MT

____________

Enter the August 2012 competition: Compact Challenge – here!

If you enjoyed this post, please consider supporting the site via Paypal ([email protected]); Ming Thein’s Email School of Photography – learn exactly what you want to learn, when you want to learn it or our Photoshop workflow DVDs.  You can also get your gear from Amazon.com via this referral link.  Prices are the same as normal, however a small portion of your purchase value is referred back to me. Thanks!

Don’t forget to like us on Facebook and join the Flickr group!