The never-ending quest for more magnification

The arrival of some new adaptors gave me an idea. Just how much further could I push the limits of macrophotography before I need to buy a microscope?

Quite far, it seems.

_M9P1_L1012055 copy

What you’re looking at in the image above is a mishmash of gear which could mostly be replaced by a single long tube with a mount at either end. From right to left: Zeiss ZM 2/50 Planar (I tried the Leica 35 FLE, but there wasn’t enough working distance) mounted on Leica Bellows II, mounted on Visoflex III, mounted on Leica M to Nikon F adaptor, mounted on 72mm of Nikon-fit extension tubes, mounted on Nikon F to M4/3 adaptor, with an Olympus Pen Mini hanging off the end.

The results? See for yourself below. The full frame is slightly less than 2x3mm in most of the photos with the 50mm, and 1.5x2mm with the 35mm. That’s 6:1 or 9:1 on Micro Four Thirds, but more like 12:1 or 18:1 equivalent on FX. I’ve marked on a larger photo of the watch exactly what you’re looking at, for readers intimately familiar with horological architecture. Note that the angle is slightly different in some of the images.

_7057451b copy

Does it make sense? No, because we’re clearly a) hitting diffraction limits; b) seeing resolution limits on the lenses used; c) seeing CA, distortions and other artifacts introduced by the sapphire crystal we have to shoot through on the watch and d) very low contrast. And for most watches, there won’t be this level of detail to capture in the first place. Curiously, lighting is actually pretty easy with the 50mm because it has a decent amount of working distance. For all practical purposes, I think 5:1 is pretty much the limit for watch photography. MT

_PM07810 copy

Balance rim rate/ inertia adjustment screw

_PM07830 copy

Escape wheel and bearing

_PM07852 copy

Barrel bearing

_PM07839 copy

Hairspring and carrier

_PM07827 copy

Third wheel jewel bearing and bridge end

_PM07814 copy

Balance stud attachment screw

_PM07807 copy

Barrel pivot and jewel bearing

_PM07806 copy

Minute hand tip

POTD: Water, sun and birds

_M9P1_L1007330 copy

Water, sun and birds. Prague. Leica M9-P, 28/2.8 ASPH

Photoessay: Tsukiji Market

Tsukiji Market is the spiritual home of sushi, sashimi and most Japanese cuisines. Every single edible (and sometimes perhaps best not eaten) creature from the deep can be found for sale here; how anybody decides which supplier to go to is baffling, because there are just so many of them. It’s also a chaotic environment where photographers might get taken out by one of those three-wheeler carts if they’re not paying attention. The authorities closed off the early-morning tuna auctions – where fish fetch as much as US$150,000 each – to tourists and photographers because it was distracting business. Having been lucky enough to witness it firsthand, I think it’s safe to say that you wouldn’t have a clue what’s going on there anyway – they don’t even speak to each other in normal Japanese, and bids are conducted by a system of secret handshakes that are hidden behind a glove. One has to be there very early to see any action at all – simply because the food has to reach its destination in time for lunch. And no trip would be complete without a hearty breakfast at one of the many surrounding stalls that support the workers.  Here’s an amuse-bouche for the upcoming Tokyo workshop with Leica. MT

Series shot at various times with the Nikon D3 and D200

_3028080bw copy

_N205834bw copy.jpg

_N205804bw copy.jpg

_N205769bw copy.jpg

_N206051bw copy.jpg

_3028043bw copy

_3028149bw copy

POTD: International Polar Bear day

_M9P1_L1012039 copy

Bob and Nadiah. Leica M9-P, 90/4 Macro-Elmarit M + SB700

Today is international polar bear day. Bundle up and turn down your thermostat a little (or if you live in the tropics like us, reduce your air conditioning power) to try to slow global warming a little. We don’t want all the polar bears to go extinct now, do we? MT

A word (or ten) on bokeh

Bokeh. Possibly one of the most misunderstood, yet most bandied-about terms in the world of photography today – right up there with dynamic range, resolution, A-is-noisier-than-B and other such myths.

The term is a derivative of the Japanese word boke, which doesn’t really have a good translation into English. The closest we can get is ‘the nature/ character of blur’. It’s certainly not quantitative in any way – what constitutes good bokeh and what is bad or ugly bokeh is very much up to the viewer. There are some who like ‘busy’ bokeh where out of focus areas take on double images, swirls or other patterns; some like the pentagons and other shapes on highlights. Yet others prefer a uniform wall of gaussian blur foreground-background.

_7008133bw copy
Cigarette. Nikon D700, Zeiss ZF 85/1.4

What factors affect bokeh? Mechanically, the lens design plays a big part. The nature of the optical formula and placement and design of the diaphragm, specifically. In general, round diaphragms produce the best bokeh; though having said that, the Leica 50/1.4 Summilux-M ASPH has some of the nicest bokeh around, but that has a strange multi-pointed star-shaped diaphragm. Telecentric lens designs generally have better bokeh than conventional spherical designs; this is because you’re less likely to get crossing of rays after and before the nodal point within the lens, causing double images and the like. It’s also why most of the new Nikon f1.4 lens designs have beautiful, non-offensive, smooth bokeh; they’re all telecentric designs and optimized for digital sensors.

One important concept to explain up front is depth of field. For a given aperture and focal length, a certain percentage of the focus distance will be in acceptable focus. This percentage doesn’t change with the focus distance; the difference is the longer the focus distance, the wider the actual, physical range that comes into focus.

_0010497bw copy
The beginnings of snow. Ricoh GR-Digital III – yes, a compact!

The rules of optics also play a big part. The degree of blur is related to:
1. Real focal length (not effective 35mm focal length; longer focal lengths have shallower depths of field and thus more pronounced blur)
2. Aperture (wider apertures have shallower depths of field and thus more pronounced blur)
3. Distance between camera and subject (shorter subject distance means shallower depth of field – remember the percentage explained above).
4. Distance between subject and background (the further away your background from your subject, the more the blur).

_7034062 copy
Indian wedding. Nikon D700, 85/1.4 G

With that, let’s look at two examples.

A. Worst case: subject is far away from the camera and close to the background; very short real focal length and moderate aperture. What will happen? Everything will be in focus. This scenario is precisely why compact cameras are incapable of delivering any noticeable blur under most conditions.

B. Best case: subject is close to the camera, with a distant background; long real focal length and fast aperture. This is your typical telephoto shot: beautiful isolation and no hint of foreground or background. It’s why you can shoot through light foliage or fences with a telephoto and not even notice their presence in the final image.

_M9P1_L1000397 copy
Evening. Leica M9-P, 50/0.95 Noctilux-M ASPH

Good and bad bokeh, generally?

Remembering that it’s down to personal preferences, most individuals prefer:
1. Good gaussian defocus in background areas: uniform blur all over, with no double imaging
2. No color fringing on highlights, either left-right (lateral) or background-foreground (longitudinal).
3. Round highlights with uniform luminance, smooth edges and no internal pattern (those circles you sometimes see in out of focus areas are interference patterns caused by imperfect lens grinding or minute surface imperfections in moulded plastic elements)
4. Similarly smooth uniform blur in foreground out of focus areas. The foreground is something that few people look at or consider when addressing bokeh; it’s important because distracting foreground bokeh means that you can’t shoot through or around things. Nice foreground bokeh dramatically increases your composition options.

_7004487 copy
Flowers. Nikon D700, Zeiss ZF.2 2/28 Distagon

Which lenses do I think deliver good bokeh?

There may be some surprises in this list.
1. Any of the fast-aperture super telephotos.
2. The new Nikon f1.4 AFS lenses; 24, 35, 85.
3. The Nikon 105/2 DC and 135/2 DC.
4. Most of the Leica M ASPH lenses; specifically the 35/1.4 ASPH FLE, 50/1.4 ASPH, 50/0.95 ASPH, 90/2 APO ASPH. I don’t personally like the swirly bokeh of the older f1.0 Noctiluxes – caused by uncorrected spherical aberration.
5. The Zeiss ZF 85/1.4 Planar, ZF 35/2 Distagon.
6. Special mention to the Zeiss ZF 2/28 ‘hollywood’ Distagon – its curved plane of focus increases the apparent bokeh at the border and edge zones because the plane of focus is brought even closer to the camera than the central zone. It’s a pretty unique optical formula, and delivers spectacular results.
7. The Ricoh GR-Digital III – what, a compact? Yes. Used close up and wide open, the bokeh is up there with the best of them.
8. The Canon 85/1.2 L II
9. The Olympus ZD 45/1.8

Parting shot: Light is much more important than bokeh. You can always isolate a subject by the way it’s lit regardless of your lens and camera; you can’t do it if you’re using a telephoto lens as a crutch. What happens when you can’t get far away enough to get the whole subject in the frame? MT

_PM00661 copy
Apple. Olympus E-PM1, ZD 45/1.8

POTD: Bridge shadows

_VL30_L1000159b copy

Bridge shadows, Prague. Leica V-Lux 30

A photograph doesn’t always have to have a point; sometimes the visual interplay of light, shadow, texture and pattern is enough. I shot this with a compact super zoom – the Leica V-Lux 30 (Panasonic TZ20) because my M9-P would not have been able to get the right perspective with ‘only’ a 50mm as my longest lens (this shot required about 105mm or thereabouts). MT

Photoessay: Ginza

This article is the first in a new series of photoessays – a short series of 5-10 images, a small amount of words, and a return to putting the focus on the pictures rather than just the how-tos and equipment masturbations. After all, the final image is what it’s all about.

Ginza, Tokyo is known for two things: being a temple to the height of luxury consumerism, and having the most expensive real estate on earth. Here’s an amuse-bouche for the upcoming Tokyo workshop with Leica. MT

Series shot at various times with the Nikon D3 and D200

_3030515 copy

_3028530 copy

_3026862 copy

_3027344 copy

_N204454bw copy.jpg

_3033519 copy

_3033130bw copy

POTD: Breguet La Tradition, part 2

_M9P1_L1012012 copy

Another take on the same watch shot a few days ago with the Nikon D700. Leica M9-P, Visoflex III, Bellows II, Zeiss ZM 2/50 Planar. And one Nikon SB700, two SB900s.

A very different view to the D700, right? The transparent trapezoid is a pallet jewel, which controls the locking and unlocking (tick and tock) of the escapement, along with transferring rotation impulses to the balance. It’s barely visible to the naked eye, and no more than a millimeter long, which makes the whole frame around 8x12mm, or about 3:1 magnification. Lighting is normally tricky, but I got lucky with this watch – it has a transparent cutout around the back precisely where the pallet fork and jewels are, which allowed me to light it from behind, with just a little fill from the front to provide definition to the gears. MT

The perils of lots of ideas, but not quite enough sleep

I couldn’t sleep last night (again) but as compensation I did wake up with an idea.

Put your favorite lens on your favorite camera.

Why hadn’t I thought of this before?

_VL31_L1000950 copy
Not this, but close. I have thought of this before, but it only works for macro, and not that well.

So I dug out the adaptor rings, to make another sacrilegious unholy matrimony between systems.

This guy (Zeiss ZF.2 2/28 Distagon):
_5100_DSC1424bw copy

Plus this guy (the M9-P. A lens-lens thing goes beyond wrong and into completely impractical territory.):
_7052556 copy

Yee har!

Except, there’s no RF coupling or live view.

Oops. *slaps forehead*

The very limited testing I did do (you didn’t think I’d just mount it and not try to take a picture, did you?) showed the combination definitely has promise. And f2 still requires some finesse to focus accurately on full frame, especially high resolution full frame. But there were no odd artifacts, and the lens is definitely capable of resolving more than the sensor. Curiously, I think it might even perform slightly better on the M9-P’s offset microlens-and-non-telecentric-wideangle-corner-optimized sensor than the D700’s uniform one. Too bad we’ll have to wait until Leica eventually brings live view functionality to an M body to find out.

In the meantime, I’m going to find out if Miyazaki-san of MS Optical (makers of those lens-cap triplet designs and noted lens surgeon) can make an RF-coupling, though I suspect it may be tough because the focusing ring rotates the wrong way, and the focus throw is much shorter than normal Leica M RF lenses. MT

The importance of shot discipline

I’m going to start by defining shot discipline. There are two aspects: timing and technique.

_7035186 copy
Miss it, and the moment is gone. Procession, Nepal. Nikon D700, 24/1.4

Part one: Timing

Imagine having a revolver, and say four enemies that are going to come towards you in a short space of time – too short for you to reload. You’ve got six shots. If you’re good, you’ll only need four; if you miss three times, you’re screwed. How is this relevant to photography? What part of the workflow is limited to just a few shots? Your buffer, especially during fast paced action. (Why do you think pro cameras have huge buffers? Insurance.) Anticipation and waiting for the critical moment – that peak in action when everything comes together – is very important; more so if your camera doesn’t have a motor drive or a huge buffer.

The revolver analogy is a good one. I’d compare a D3/D4 class camera to a machine gun with a telescopic sight: it’s complicated, but you can spray and pray indefinitely and probably get something good – even if you have no skill or experience whatsoever, simply by the sheer weight of statistics. (If you take a thousand photographs, one or two will probably be okay – similarly, aim in the right general direction and you’ll probably hit the target once or twice). In experienced hands, it’s impossible NOT to get the shot.

Honestly, I found shooting with the D3 too easy. Same goes for the D700. The M9-P, on the other hand, is a completely different beast. It’s like a Magnum .44 or a Desert Eagle 50 Cal; utterly useless to a beginner, but a fantastic tool if you know how to use it. But, you pretty much only get six RAW shots when the barrel is hot. See why timing is important while shooting action?

Do I find it limiting? Yes, but only if I’m not paying attention. And guess what: that was the simple part to shot discipline.

_7037390 copy
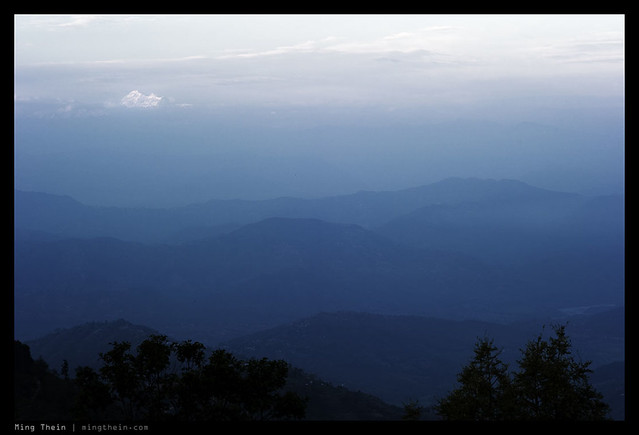
Spot the Himalayas. Would more resolution be better? Actually no, it wouldn’t have made a difference. The scene itself was resolution-limited by atmospheric mist. Nikon D700, 85/1.4 G

Part two: Technique

The higher the pixel density of your camera, the more technique matters. For a fixed sensor size, small movement on a low-resolution camera matters less than on a high resolution one. Let’s say camera A has 4MP, and camera B has 16MP – that’s double the resolution, not quadruple (2x in each linear axis). If you move by a factor of half a pixel on camera A, the image is still pretty much aligned with the original pixel it was focused on; your edges might be a bit blur, but you could probably use unsharp masking to fix the perceived acuity. If you move by the same factor on camera B, you’re going to be out by a whole pixel. And that’s not fixable by unsharp masking. Increase the resolution further, and the effect is compounded. Those original 2.7MP APSC cameras were pretty forgiving, actually. The 24MP APSC ones will not be.

Technique actually covers several things.

1. Stability. This is the biggest one. If you don’t move, then your edges will stay where you focused them on the sensor plane. All will be sharp. So how do we achieve this? Several ways – the easiest is a sturdy tripod. Good shutter tripping technique – roll gently, don’t jab. And the last way is to reduce apparent movement by maintaining a high shutter speed, either by cranking the ISO, using faster lenses, or using a flash.

_D90_DSC3428 copy
mmm, lenses.

2. Lenses. Good lenses have better resolving power, right? Yes, but these days, the difference is mostly visible only when shot at maximum aperture. By f8 or f11, most lenses are capable of resolving identically to near as enough makes no difference at the sensor plane. And certainly not enough to be noticed in a moderately-sized print. Having said that, test your lenses carefully to determine what the optimal aperture is, and by what point resolution is ‘acceptable’. Look at the corners. It’s pretty important to do this before buying too, to avoid any issues or inconvenience later on. Just one of the reasons I’m still happy to go to a real retail store to buy stuff; I want to make sure the lens I’m going to use is going to perform the way I expect it.

_7055995 copy
Speake-Marin Immortal Dragon. The eternal fight between more DoF and diffraction limits. I cheated a little by using a wider focal length, which has more DOF for a given aperture. Nikon D700, Zeiss ZM 2.8/28 Biogon

3. Watch out for diffraction. Although all lenses have an optimal aperture, the smaller the pixels, the closer the diffraction limit will be to wide open. Most compact cameras – especially the 1/2.33″ kind – will resolve optimally wide open, and be noticeably softer if set to f5.6 or f8. (This is one reason most manufacturers use a switchable ND filter rather than a real aperture; also on a sensor that small, everything is in focus all the time.) For instance: I can use f45 to shoot macros on the 4.1MP D2H without noticing any diffraction softening; however, by f27 on the D700, I’m seeing a noticeable reduction in acuity. That limit becomes f16 on the 16MP APS-C cameras, and I suspect as low as f11 on 24MP APS-C. F8 is as far as I’d go with any lens on Micro Four Thirds.

_7008297bw copy
Missed focus in either direction would turn this from a keeper into junk. Nikon D700, Zeiss ZF 1.4/85 Planar – manual focus

4. Focusing. If you’re shooting a rangefinder, make sure the RF is properly calibrated for the lenses you normally use. Be aware of focus shift with aperture stop down. If you’re shooting an SLR, make sure your AF system is properly calibrated, especially for wide open lenses; use the AF fine tune function if you’ve got one. Shoot live view, wide open, manual focus and magnified to determine what the absolute best result you can obtain is, and then adjust your AF system until you achieve that consistently. AF accuracy matters most when shooting wide open – sadly these days SLR focus screens are optimized for brightness rather than focusing snap, which means it’s much harder to see when something is in focus or not. (Camera makers want to sell you the latest AF lenses, so they discourage you from focusing yourself.) It isn’t helped either by tiny viewfinders. If you’re going to use your SLR manual-focus, it’s worth adjusting your mirror zero position and focus screen shimming to ensure that what you see in the finder does in fact match what the sensor sees. And a coarser matte split prism or micro prism screen helps immensely, too. Don’t try to do this yourself, however – it’s difficult and there are a lot of fragile, easily scratched components inside the finder which can be irreparably damaged if you don’t know what you’re doing.

5. Maintenance. This also covers several things: make sure your lenses and mounts are clean, for one. Clean lenses are obvious. Clean mounts, less so: a little bit of misalignment between the lens/ mount/ sensor combination can cause noticeable softness on one side of the image. It mattered less in the days of film because the ‘sensor’ plane had some thickness to it; you could be off by a bit and the image would still be focused on the emulsion. A digital sensor is a perfectly flat single plane, with no forgiveness in the front-back direction.

_M8_L1026119bw copy
A good example of condition-induced limits. Paris. Leica M8, 21/1.4 ASPH

Bottom line: if you don’t think you can handle that many pixels, shoot in a binned and downsized raw mode, or get a camera with fewer pixels. You’ll save yourself the hassle of handling enormous files, too. I know that under certain conditions – photojournalism and street, for example – it’s extremely unlikely that I’ll be able to fully achieve more than 12MP of resolution on a full frame camera. This isn’t because I’ve got poor technique, but simply because there are restrictions put on you by the shooting conditions – for instance, being jostled by people; having to shoot in extremely dark environments at high ISO; using a MF rangefinder with wide open shallow-DOF lenses on a moving subject. The list of excuses goes on. Bottom line: I know I’m the weak link in the imaging process here; I’ll try to improve, but I also recognize my limits and won’t fall into the trap of thinking more MP will make for a better image. It won’t. In the studio however, that’s a totally different matter. MT