Lens review: The Olympus M.Zuiko Digital 12-50/3.5-6.3 EZ for Micro Four Thirds

_5A00197 copy
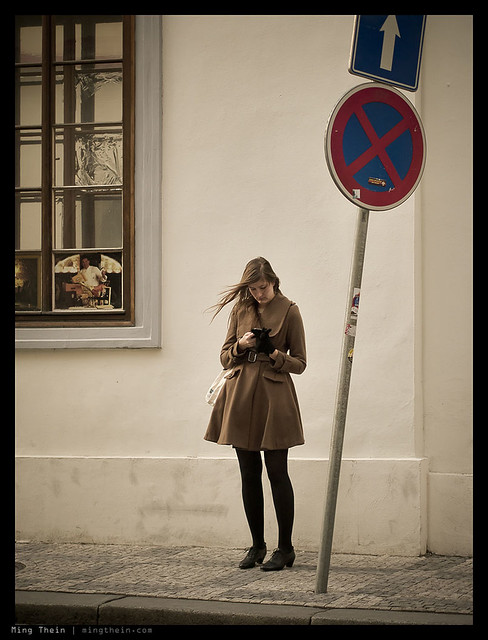
Waiting.

Olympus’ latest zoom covers a useful 24-100mm equivalent range (12-50mm actual) and is the kit lens accompaniment to the OM-D in most parts of the world. (I’ve also seen a variant that includes the 14-42 IIR instead.) It’s a bit of a Swiss army knife – the lens has a power zoom feature for video, which can be decoupled to provide a mechanical zoom ring (more on this later) plus a fixed focal length macro mode, at 43mm. It’s also got a programmable function button on the lens barrel. Like all M4/3 lenses except the 12/2, the lens is focus-by-wire only and has a continuously turning focusing ring that has no DOF markings.

       
Lens and optical formula. The various colored elements represent different types of glass. Image from Olympus Malaysia

Construction is all plastic, except for the metal mount. It’s pretty solid, though the plastics used feel a notch below those in comparable Nikon kit zooms; still, the lens is weather sealed and is the first of the Olympus lenses to feature a rear gasket. It’s not a small lens, by M4/3 standards – it’s about the same physical size as the Voigtlander 25/0.95, but nowhere near as heavy or well built. The best comparison I can give is to one of those miniature cans of mixers they give you on an airplane to go with your shot of whiskey. Like all Olympus lenses, it doesn’t include a hood or pouch (shame on you, Olympus).

_5A00399 copy
This lens is not meant for low light. This shot – 1s at ISO 800 – says more about the IS capabilities of the OM-D than anything else.

All images in this article shot with an Olympus OM-D E-M5, and the 12-50/3.5-6.3 EZ lens. Clicking on any image will bring you to the flickr landing page, where you and see larger versions.

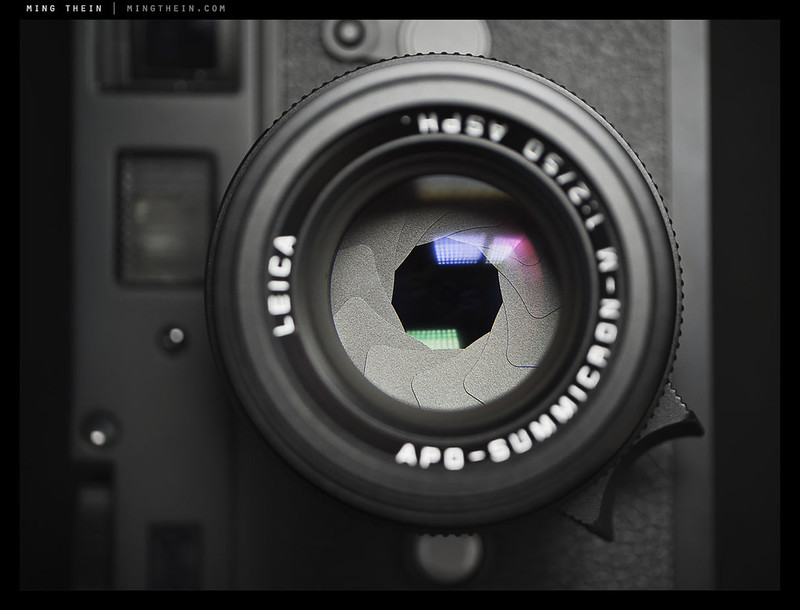
Optically, the lens uses a 10/9 construction with several exotic elements; with aspherical elements, ED elements, HR elements, and one mysterious DSA element – I think it’s a double aspherical, but it could also be a Japanese government agency. Zooming and focusing is all internal. A quick note on the former: zooming can be accomplished by servo – in the intermediate position, the zoom ring turns into a rocker switch, with one speed in either direction – or mechanically, by pulling it backwards.

_5A00067 copy
Just your average youth on Saturday

The mechanical zoom is my preference, except in this case it has no real clear stops at either end – so when you turn the camera on, it’s very difficult to tell in advance where you are exactly in the zoom range. The complete lack of external cues doesn’t help, either – there are no focal length markings, and the lens doesn’t change length. I find this very disconcerting, not to mention costing valuable seconds when trying to get a shot.

_5A00465 copy
Swirl.

The good news is that focus speed is excellent – just as fast as any of the other Olympus ‘MSC’ lenses; I’m told that the system uses some form of magnetic solenoids and a single moving element to keep things silent and fast. Whatever technology used, it’s fast and precise, and has no problem moving in small increments to match small changes in subject distance.

_5A00277 copy
Untitled

A bonus feature is a 1:3 macro mode – this covers a 36x48mm frame area at a near focus distance of 20cm (normal minimum focus is 35cm), which actually makes it pretty handy at a pinch. Optically, performance is surprisingly good too in this range – completely at odds with one’s expectations for a zoom-with-macro. The macro mode is accessed by holding down a mechanical interlock button on the side of the lens and sliding the zoom ring all the way forwards, which locks the focal length at 43mm.

_5A00272 copy
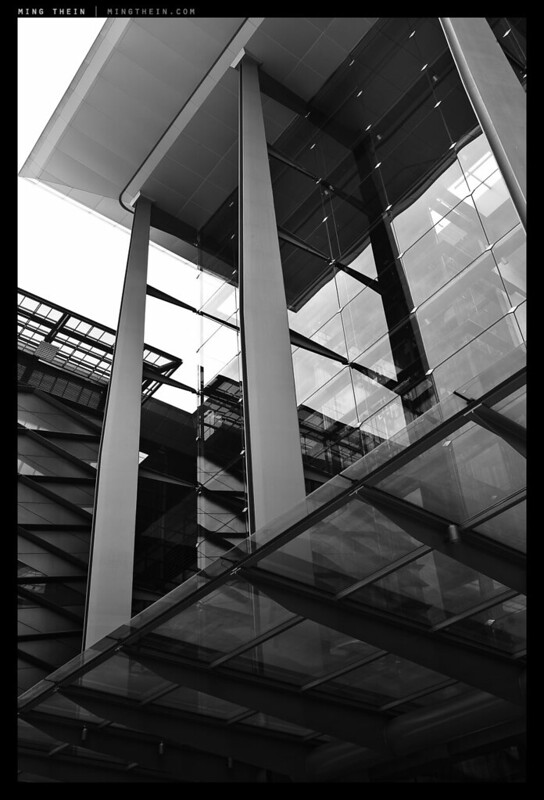
Urban geometry

You’ll notice I haven’t said much about optical performance up to this point. That’s because it’s honestly quite a mixed bag. It can be good – if you stop down a little (though not past f8, because diffraction starts to rob you of resolution by that point) – but not in the corners. The 12mm end comes close to the 12/2 in the center, but is very soft in the corners; actually, soft is not the right term, the resolution is there, but there’s very clear CA causing apparent softness due to the separation of the blue and red components in the image. It’s a similar story at the 50mm end, though not as pronounced in the corners. There’s some internal flare that creates slight haloes around contrast edges, and it lacks the crispness of the 45mm. In fact, the 45mm at f1.8 is sharper than the 12-50 ever gets.

_5A00430 copy
Waves overhead.

Personally, I find the biggest problem to be not the lack of sharpness, or resolution, or CA – but the poor microcontrast. Textures are not very well defined at all; there’s a decent amount of macro contrast, but overall, the images produced just feel blocky – things seem to fall into either highlights or shadows, and nothing much in the middle.

_5A00281 copy
The Canyon

All that said, it does pretty well for a kit lens – though personally, I actually think the 14-42 IIR actually performs a little better overall; it just feels like it’s got more ‘bite’ than the 12-50. I could of course have a bad copy. Finally, you’ve also got to watch out for the small maximum aperture; f6.3 on the long end is not bright at all. However, thanks to the relatively small number of elements, the lens’ T stop seems to be fairly close to its f stop.

_5A00241bw copy
Night crossing.

I struggle a little with the conclusion on this one. It’s a lens that is convenient, and does so many things; but at the same time, I don’t feel like the optics do the OM-D’s sensor justice at all. However, if you’re out in the sunshine, and only want to carry one lens, it’s a good option.

_5A00053 copy
Balance

I purchased the lens as part of a bundled kit with my second OM-D; the price difference was quite small compared to body-only; certainly much less than the cost of the bare lens alone. This in my mind made it a worthwhile experiment; however, I don’t think I’ll be using it much, unless I happen to go to the beach or skiing or some other bright environment where I’d rather not be changing lenses. So, if you’d like the convenience, or can’t find a body-only OM-D, it’s not a bad buy; but if you’re expecting it to come close to the resolution of the M4/3 system’s primes, you’re going to be disappointed. MT

_5A00001 copy
A lens like an umbrella: take it just in case.

The 12-50 is available here from B&H in black or silver.

____________

Visit our Teaching Store to up your photographic game – including Photoshop Workflow DVDs and customized Email School of Photography; or go mobile with the Photography Compendium for iPad. You can also get your gear from B&H and Amazon. Prices are the same as normal, however a small portion of your purchase value is referred back to me. Thanks!

Don’t forget to like us on Facebook and join the reader Flickr group!

appstorebadge

Images and content copyright Ming Thein | mingthein.com 2012 onwards. All rights reserved

Review: The Nikon AFS 28/1.8 G

_8015822 copy

Due to a risky mixture of popular request and a slight but gnawing dissatisfaction with my the performance of my 24/1.4 G on the D800E, I recently acquired the Nikon AFS 28mm f1.8 G to review. (Hereafter referred to as the 28G) The 28G was released earlier this year, and is now available with relative ease. It’s a 11/9 design with a near focus limit of just 25cm, and magnification of 0.22x.

All images in this review may be clicked on for larger versions. Photographs from this review were shot with a Nikon D800E on my last assignment to Geneva.

A note on testing methodology: I’m not a lab reviewer, but I do try and make my testing as scientific as possible. It’s part of getting to know the limitations of you gear, so you can make the most out of it on assignment and in the field. This means that if I see some odd behavior, I’ll do my best to replicate it before reporting it’s an issue. Please go by what I say, not by the images – it’s impossible to judge optical characteristics on web-sized jpegs; I’ve been looking at hundreds of D800E raw files.

_8015800 copy

The lens is both light in the hand, and fortunately also light on the wallet. At a street price of around US$650 (in Malaysia, at least) – it represents excellent value for money compared to both the AFS 24/1.4 G, and the notoriously difficult to find AF 28/1.4 D. Being a huge fan of the 28mm focal length, I find myself with few options – 24 and 35 are much more popular, and have everything from f1.4 options to macros and tilt-shifts. (To the best of my knowledge, the only perspective-control 28mm made was an early Nikon 28/3.5, which only allowed shift and no tilt.) Until now, my go-to lens at 28mm has been the Zeiss ZF.2 2/28 Distagon T* – to be the subject of a future review – which has some pretty unique optical qualities, not least its hugely pronounced field curvature.

_8015090 copy

Although the 28G carries the gold front ring signifying contents of ED glass and professional level construction, it definitely doesn’t feel like it. This is one of the lightest lenses for its size I’ve ever handled; similar in weight and size to the 18-135 DX kit lens, actually. The shell is entirely polycarbonate, and the only metal to be found anywhere is on the mount and screws. Looking at the edges of the back element, I suspect there’s a moulded aspherical element or two in there also. Still, build quality seems decent enough, with no creaks, rattles or clunking, and the focusing ring is both easy to turn and without any free play. The lens also has a rear gasket and is weather sealed.

_8015136 copy

This is a proper AF-S lens, which means that there’s full time focus override, no hard stops at either end of the focusing scale (though the resistance increases noticeably) and reasonably fast and accurate focus. It acquires focus at about the same speed or slightly faster than the 24/1.4, actually. Most of the time, the lens snaps into focus quickly and positively. I’ve had a couple of occasional ‘near misses’ where the camera thought the lens was in focus but it was just out of critical sharpness range – near enough – but only when shooting at f1.8. I don’t know if this is an issue with the lens or the D800E (and its focusing issues). Some further investigation is in order, I think. The lens is somewhat prone to the left-side AF issue of the D800/D800E, though only for the extreme most points (the column of three) – all of the other points focus as expected, at least on my D800E body.

_8014986 copy

_8014986 crop
100% crop of above

Optically, the 28G does a great job in the center – it’s sharp from wide open even on the D800E, however you need to stop down a bit to reach maximum microcontrast. Optimal sharpness in the center comes at about f5.6. There’s almost no CA or flare, even when shooting high contrast subjects; a testament to Nikon’s Nano-Crystal Coating doing the job it was designed for. There is, however, some uncorrected speherochromatism and longitudinal chromatic aberration – the latter which appears as both bloom and red/green fringing when shot wide open. The lens makes nice sunstars, too – with minimal ghosting.

_8014939 copy

_8014939 crop
100% crop of the above image, shot through glass (hence the fringing)

The corners, are a different story – they’re not sharp til about f8, and noticeably vignetted. However, it seems that the 28G also suffers from pronounced field curvature – much like the Zeiss Distagon – because there is a sharp plane of focus, curved in front of the subject and back towards the camera. It isn’t quite as pronounce as the Zeiss, but it’s definitely there. Technical shooters will hate this because it isn’t a flat-field lens, but personally I think it’s great for environmental portraiture and reportage – placing your subject somewhere in the central region means that the lens actually helps you to achieve better separation by relatively defocusing the background further. Speaking of technical shooters, there’s a hint of pincushion distortion, but nothing that isn’t easily fixable with the profiles available in Photoshop/ ACR.

_8015140 copy

Let’s talk a bit about bokeh – it’s best described as neutral to good. There are some bright edges on circular OOF highlights, but nothing too bad; there’s also a hint of texturing inside the same circles, which points to the use of a moulded aspherical element or two somewhere inside. I can’t help but think a circular 9-bladed diaphragm, similar to that used in the f1.4 G lenses, would have improved things a bit – the pennies had to be saved somewhere, and we have to make do with a 7-bladed and slightly angular iris.

_8015087 copy

If you’ve got enough distance between subject and background, the lens renders the scene with rather nice ‘pop’ – subjects are well separated from the background. Although the 28G has a maximum aperture of f1.8, it has about the same isolating power as the 24/1.4 due to the slightly longer focal length. I still wouldn’t use it for close up portraits though, the wide angle perspective distortion is definitely not flattering.

_8014954 copy

In what must be a first for any Nikon lens, the 28G seems to out-transmit its Zeiss counterpart, aperture-for aperture. The 28G has a T stop that’s about 1/3 stop greater than the 28 Distagon; a rather surprising result. (The Zeiss 85 Planar is nearly a whole T stop faster than the 85/1.4 D, and about a third of a stop faster than the 85/1.4 G.) The front elements have the same nearly-invisible look as those of the Distagon. More importantly, transmission throughout the color range is pleasingly neutral; scenes are rendered with clarity and natural saturation – though not quite with the same microcontrast punch and overall saturation of the Zeiss

_8015154 copy
Oops, missed the sensor dust.

If at this point it seems that the review has somewhat turned into a comparison between the Zeiss ZF.2 28 Distagon and the 28G, you’d be right – in my mind, these are natural competitors (at least they are in my lens cupboard, at any rate). It’s very difficult to choose between the two – the Zeiss does have a certain hard-to-define quality about its microcontrast structure and bokeh that just makes images shot with it slightly more vivid and three-dimensional; however, you lose very little with the Nikon, and gain much convenience by way of autofocus.

_8014991 copy

I am a 28mm junkie (at the last count, I’ve got nine ways to get there on four different sensor sizes) so you might want to take this conclusion in context – I can see reasons for having both. If I was shooting something for which I had time to be deliberate in the setup and craft the scene – I’d pick the Zeiss. However, if I was doing documentary work, or travel, or anything which might possibly have a hint of run-and-gun to it – I’d mount the Nikon. MT

The Nikon AFS 28/1.8 G is available here from B&H or Amazon.

____________

Visit our Teaching Store to up your photographic game – including Photoshop Workflow DVDs and customized Email School of Photography; or go mobile with the Photography Compendium for iPad. You can also get your gear from B&H and Amazon. Prices are the same as normal, however a small portion of your purchase value is referred back to me. Thanks!

Don’t forget to like us on Facebook and join the reader Flickr group!

appstorebadge

Images and content copyright Ming Thein | mingthein.com 2012 onwards. All rights reserved

_8014927 copy

_8014996 copy

_8015069 copy

Update: My 28 stopped working yesterday; up til this point it hasn’t had any issues, but suddenly none of my cameras would recognize the lens. Nikon service says it’ll be three weeks to get replacement parts (AF motor, PCB, some connectors) – which frankly is pretty unacceptable for a lens that’s only three weeks old! To make it worse, there aren’t any loan units or similar lenses other than a slow zoom or two.

To their credit though, they arranged a replacement through my usual dealer within about half an hour. With the number of problems with Nikon’s recent products, I’m starting to think that QC has suffered quite a bit following the tsunami – or it could just be because the lens is made in China.

Recommended lenses for the Nikon D800E

_8013437 copy
Not quite summer at the Lac du Joux. Nikon D800E, Zeiss ZF.2 2.8/21 Distagon

Having had a solid couple of months to use the Nikon D800E and a variety of lenses, I’ve now compiled my recommended list of recommended lenses for the camera; some of the entries might or might not surprise you. These are lenses which I would not hesitate to use wide open, and will give you outstanding acuity, color and resolution providing you manage to nail the focus, of course. I’ve tested multiple samples of these lenses, as it seems that these days, consistency is hugely important and not always guaranteed. This list is also not exhaustive, because I’m sure there are exceptional copies of lenses I’ve ruled off the list, and there are almost certainly other obscure optics which I haven’t had the chance to try (and probably won’t ever manage to, either.)

_8014884 copy
Grain silo. Nikon D800E, AFS 28/1.8

Wide
Nikon AFS 28/1.8 G
Carl Zeiss ZF.2 2/21 Distagon T*
Carl Zeiss ZF.2 2/28 Distagon T*

Normal
Nikon AI 45/2.8 P
Nikon AFS 60/2.8 G Micro
Carl Zeiss ZF.2 2/50 Makro-Planar

_8016614 copy
Pears. Nikon D800E, Zeiss ZF.2 2/100 Makro-Planar

Tele
Nikon AFS 85/1.8 G
Carl Zeiss ZF.2 2/100 Makro-Planar
Any of the Nikon superteles

_8004351 copy
Maitres du Temps Chapter 3 Prototype. Nikon D800E, AFS 60/2.8 G

Zooms
Nikon AFS 16-35/4 VR N
Nikon AFS 24-70/2.8 G N
Nikon AFS 70-200/2.8 II VR G N

_8005388 copy
Sushi. Nikon D800E, PCE 85/2.8

Special purpose
Nikon PCE 85/2.8 Micro

Near misses (close, but not quite in the awesome league).
Nikon AFS 14-24/2.8 G – performance at 14mm lets it down, in my mind.
Nikon AFS 24/1.4 G N – I think this one is very, very borderline: if you get a good sample that focuses properly, it can probably be added to the list. However, I’ve used many of these lenses and there seems to be a lot of sample variation and focusing issues even on D700/D3 bodies; it doesn’t give me a lot of confidence.
Nikon PCE 24/1.4 – I’ve used one excellent one, and one that was merely so-so. Mixed reports on the web don’t suggest that the so-so one is a rare anomaly, and there just aren’t any more of them for me to test.

You’ll probably have noticed that the 28-300VR didn’t make the list; it’s because the lens just didn’t perform on the D800E to anywhere near the same extent it did on the regular D800. Just one of those inexplicable anomalies…

For more detail on any of the lenses mentioned here, visit the CAMERAPEDIA! MT.

____________

Visit our Teaching Store to up your photographic game – including Photoshop Workflow DVDs and customized Email School of Photography; or go mobile with the Photography Compendium for iPad. You can also get your gear from B&H and Amazon. Prices are the same as normal, however a small portion of your purchase value is referred back to me. Thanks!

Don’t forget to like us on Facebook and join the reader Flickr group!

appstorebadge

Images and content copyright Ming Thein | mingthein.com 2012 onwards. All rights reserved
On Assignment: The contents of my bag

_5A00585 copy

I thought you may all be curious to see what I’m bringing to Switzerland for my current assignment. Let’s just say there’s a hell of a lot of stuff here:

Primary system:
– Nikon D800E
– AFS 28/1.8G
– AFS 60/2.8 G Micro
– PCE 85/2.8 Micro
– ZM 28/2.8 plus Leica M to Nikon F adaptor

Backup system:
– Olympus OM-D with HLD-6 grip – I plan to do some walking around too, and I don’t want to carry the D800E.
– Olympus ZD 12/2
– Olympus 45/1.8
– Panasonic 20/1.7 G
– Panasonic Leica 45/2.8 Macro
– That little clip on flash thingy to trigger the SB900s in SU4 mode
– Nikon G to M4/3 adaptor

_5A00587 copy

Lighting:
– Nikon SB900 x3
– Custom made perspex diffuser and case, various cards, papers and laminates for backdrops and diffusion.
– Manfrotto 5001B compact light stands plus heads and flash stands x3

Support
– Gitzo GT1542T Traveller 6X carbon fiber tripod
– Manfrotto 468RC0 Hydrostat ball head
– Manfrotto micro positioning rail

IT
– Apple MacBook Air 11″
– Apple iPhone 4
– Western Digital MyPassport 1TB 2.5″ USB drive for backups
– Sandisk Extreme SD/CF USB card reader
– Chargers and universal adaptors

Other accessories:
– Spare batteries and chargers for both cameras
– 8 sets of Sanyo Eneloop AA batteries for the SB9000s
– Two sets of Kenko Pro DG extension tubes
– Adaptor plugs and multi strip
– SD cards; Sandisk Extreme HD 32 GB x4
– MAHA C801D fast AA charger
– Nikon SC-31IR flash deflector panel for D800E built in
– Rocket air blower
– Soft white cloths
– Blu tack
– Duct tape
– Magic tape (for removing dust)
– WhiBal cards
– Small lens pouches

Bags
– Think Tank Airport International v1
– Billingham Hadley Pro, without the internal dividers but with some small lens pouches and a camera wrap, packed into my check-in luggage
– Manfrotto MBAG80P for light stands and tripod

_5A00588 copy

Here’s most of it packed in. What you don’t see is the diffuser case, which is quite enormous and wouldn’t fit into the picture…

____________

Visit our Teaching Store to up your photographic game – including Photoshop Workflow DVDs and customized Email School of Photography; or go mobile with the Photography Compendium for iPad. You can also get your gear from B&H and Amazon. Prices are the same as normal, however a small portion of your purchase value is referred back to me. Thanks!

Don’t forget to like us on Facebook and join the reader Flickr group!

appstorebadge

Images and content copyright Ming Thein | mingthein.com 2012 onwards. All rights reserved

The iPhone as a camera

IMG_1310b copy
Angles.

I admit to being one of the skeptics who didn’t believe that anything that wasn’t designed primarily as a camera would be able to function in a worthwhile capacity as one – I remember my first camera phone having all of VGA resolution (a Nokia 6600) and not being very much good under any conditions. In fact, the thing didn’t even have autofocus, much less any sort of manual adjustments. Successive phones thereafter all came with cameras of some sort, mostly held at the 1.3 megapixel level with sensors about the size of this full stop. In the meantime, I was shooting with APS-C DSLRs – no comparison!

IMG_0940b copy
Rain

But the relentless pace of miniaturization eventually delivered a sensor of sufficient quality and resolution, coupled with a decent enough optical system, that I put aside my biases for long enough to give one a decent try. That was the iPhone 3GS – it had a 3MP camera with autofocus; tap to select the focus point and lock exposure. A little, bit like weighted spot metering. I got a decent image or two out of that.

IMG_1319bw copy
The waiters

The iPhone 4 was a revelation, however. Not only was the sensor and optics greatly improved, we finally got a decent field of view – my favorite 28mm! Still tap to focus and expose, with no provision for adjusting any controls anywhere. Despite all that, it was (and is) possible to get some pretty good shots out of the camera – especially considering it’s a phone first, small computer second, and camera somewhere around a distant third.

IMG_1665b copy
Filling stop

In other ways though, it shows. Despite the increasing complexity and controllability of competitors’ offerings, Apple decided to keep it idiot-proof and deny the iPhone user any sort of exposure control other than the pseudo-spot meter. Nokia released a 41MP sensor that used binning to generate some of the most amazing 8MP images I’ve seen from a small sensor camera – let alone a phone – and Apple just quietly went to 8MP, and fiddled a bit with the FOV again, so it’s probably closer to 30 or 32mm in the 4S than the previous 28mm.

IMG_1446b copy
Shards

I don’t have a 4S, nor do I intend to pay the Apple ‘upgrade tax’ every year to buy one. The iPhone is a great piece of technology, but I’m entirely happy with mine until it breaks, or the new model actually offers something I want that I can’t currently have. And only then will I think about buying another one. (From a commercial point of view, I actually find it pretty amazing that they can turn a $800 precision device into a piece of fast moving consumer electronics.)

IMG_1281bw copy
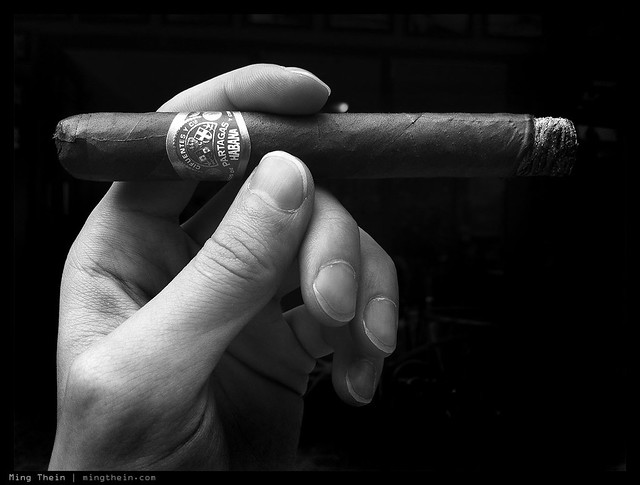
Partagas

What the iPhone lacks in controllability it makes up for in development possibilities – just so long as you stay within Apple’s limits. I still remember the app which had a shortcut option to put the camera shutter onto one of the volume release buttons – it got pulled, only for Apple to subsequently add it as a system option to the latest version of iOS. To be honest though, I’ve tried most of the popular photo apps and find them a bit cheesy. Instagram, Hipstamatic and Camera+ are the prime offenders: use the app, and your images look the same as everybody else’s who used the app – what’s the point of photography if you’re going to produce the same work as the next guy? They might as well forgo the camera and just put in a library of random images that appears whenever you press the shutter instead.

IMG_0838b copy
Auckland marina sunset

There are some good apps, however – PhotoForge is one of them. It comes much closer to being Photoshop lite than Photoshop Mobile does; that I find pretty amazing. Still, I wouldn’t do any serious editing work on that because it lacks the fine control of the real desktop version.

IMG_0926b copy
Dew on leaf in playground

I want to talk about three more things before I close.

Firstly, real world limitations:
– You can’t control white balance. This is the biggest of them all, to me – especially when the iPhone 4 does a pretty poor job at deciding what color something is. Shade is much too cool, and incandescent is much too warm. And worse still, it tends to blow out the channels so you have no hope in hell of recovering any tonal information later.
– You can only control exposure to a certain degree, and that’s linked to focus point. Generally, this is okay because it’s how spot metering works – you expose for your subject, which you also obviously focus on. However, I find again that the latitude of adjustment for exposure is limited – perhaps because the camera has an electronic shutter only – so sometimes it can’t give you a fast enough shutter speed, or a slow enough one. It would actually be nice to know what exposure parameters the camera chose, too.
– You can’t control the output JPEG parameters. All you get is Disneyland color mode – that’s it. Again, once a channel goes, so does any hope of recovering tonal information.
– Speed. Focusing speed, shooting speed and shutter lag are all slow – the 4S improves on this slightly, but still feels unresponsive compared to a good compact like the Ricoh GR-Digital III or IV. Realistically, that means you’re not going to be shooting anything moving, unless you prefocus.
– Tap to shoot. The lack of a physical shutter button means awkward hand positions and ensuing camera shake while trying to poke the button on the screen. Sure, iOS5 gives you the option of using one of the volume buttons, but it isn’t a solution – you still need to touch the screen to focus.

IMG_0912bw copy
Relax.

Secondly, advantages and strengths:
– It’s always there. We always carry our phones, and even if I didn’t, the iPhone 4 is small enough and sleek enough that I wouldn’t notice it in my pocket.
– The image quality is finally good enough. Hell, even Getty Images thinks so – I’ve got photos in the library that were shot with an iPhone 4.
– It’s silent. Thankfully that annoyingly cheesy shutter sound can be silenced by putting the phone in vibrate mode; or you could just stick your finger over the speaker opening.
– Connectivity. Sometimes, you need to share an image – something stupid, something important, something for information only. And you can’t do that easily with a camera that isn’t also internet-connected.

IMG_1663bw copy
Just another KL traffic jam

Finally, possible improvements for a future version, bearing in mind the original Apple gestalt for simplicity:
– More latitude for auto white balance and the touch-spot meter
– Show us what the exposure is! I want to know in advance if it’s too dark or will be grainy etc.
– Two more manual settings: ISO, and image output parameters.
– RAW files (we can dream, I suppose). I still have to run the jpegs through photoshop to pass muster, so I might as well start from a better base. Sorry Apple, there’s just no way you can develop one set of color/ tone/ sharpening settings that are going to work under all situations.
– Two stage shutter button, or if Jonathon Ive lost a few points of his bonus percentage for each button he added, then make both of the volume buttons do double duty: one to AF and lock exposure, and the other to shoot.
– Put the damn camera in the middle of the phone, at least in a position where you’re not likely to stick your hand into it if held in landscape orientation. The design of the phone is superb, but it’s way too easy to stick your finger into the lens.
– Better low light performance (taken as given)
– More speed! (taken as given)

IMG_1209bw copy
The Interrogator, or Behind the two way glass

In conclusion, I use the iPhone a lot as a camera because of one reason and one reason only: it’s the one I know I always have with me. (And even if I did have another camera, what would I use to take pictures of the camera? photographer’s joke 😉 MT

IMG_0682b copy
Magritte strikes again

____________

Visit our Teaching Store to up your photographic game – including Photoshop Workflow DVDs and customized Email School of Photography; or go mobile with the Photography Compendium for iPad. You can also get your gear from B&H and Amazon. Prices are the same as normal, however a small portion of your purchase value is referred back to me. Thanks!

Don’t forget to like us on Facebook and join the reader Flickr group!

appstorebadge

Images and content copyright Ming Thein | mingthein.com 2012 onwards. All rights reserved

Full review: The Olympus OM-D E-M5

_8012314 copy
My stealthed-up OM-D. Note lack of strap D rings; these are the clip points from the Crumpler strap.

I did a double take after seeing the teaser images for the OM-D, way back at the start of the year. Olympus managed to make a 2012 camera look like a 1970 one; not only that, why on earth would you need a prism hump for a camera that doesn’t even have a prism? My first impressions of the spec sheet were ho-hum, yet another over-cramped sensor with too many pixels, inside a tiny body. And it wouldn’t fit my workflow, because there was no ACR support of any kind. And what’s with having two cryptic names? Then, after a long wait, and at a camera shop in Singapore looking for some lighting gear, I made the mistake of playing with one. Not only did it not feel plasticky and toy-like as its appearance would suggest, but the camera was also very responsive – in a connected-to-your-synapses-good way that I’ve only felt with the pro Nikons up to this point. I was intrigued.

_8012328 copy
Reach out and touch me. Tilt and capacitative-touch LCD; there’s actually another accessory port under the flash hotshoe for things like GPS, macro LED lights (that look like tentacles), or for a completely bizarre twist, another EVF.

A little more research on reaching home in Kuala Lumpur revealed that the OM-D was not only surprisingly expensive for what it was – D7000 money – but perhaps enough camera that you could use one on assignment and be taken seriously. And whilst a nice idea, the two-part vertical grip both managed to look dinky and defeat the point of having a compact system in the first place.

_5001096 copy
Ladies at lunch. OM-D, 45/1.8 – this has rapidly become my favorite lens for the camera. It’s a little long to use at arms’ length on the Pen Mini, but excellently stealthy on the OM-D.

I admit, following reading a number of excellent reviews on the web, temptation peaked. ACR support was the final straw – one day, it followed me home. (My dealer has a joke about my car washes being very expensive, because while waiting for the car to be ready, I usually drop by; most of the time, I buy something. This was another one of those expensive car washes.) After all, I reasoned that I already had the Pen Mini and excellent 12/2, 20/1.7 and 45/1.8 lenses for Micro Four Thirds, plus there was all of this Leica M glass sitting around and an adaptor. The Pen Mini was surprisingly excellent. How bad could it be?

_5000140 copy
The Kicker. OM-D, 45/1.8

Actually, a lot better than expected. Turns out there’s a very good reason for that prism hump, just not one you’d expect. Aside from the 1.44 million dot EVF, there’s also a five-axis gyroscope – supposedly a world first – inside the camera that controls the matching five-axis moving-sensor stabilization system. I’m not a fan of sensor based systems, because they don’t generally have as much correction power (from an angle of view basis) as lens-based systems for longer lenses, and they tend to do odd things like ‘snap’ back into position once the limits of travel are reached. The OM-D’s system displays a little bit of the latter, but very, very little. And it’s surprisingly effective, too – it activates with a decisiveness I haven’t seen before on a sensor-IS system – but then again I don’t have any lenses over 90mm EFOV, and if I did, I’d probably buy the Panasonic 100-300 which already has lens-based IS built in, giving me the choice of both systems (but not together, as apparently both manufacturers claim they don’t play nice). You still need to give the stabilizer a moment to lock down though, otherwise you might get that unexpected jump.

_5001019 copy
A repost of one of my favorite portraits. OM-D, 45/1.8

And that brings me to the next popular point of contention with the OM-D: the fan noise. Turns out it’s the a combination of the gyroscope and the electromagnets that move the sensor, or keep it in place (if the IS system is off). In fact, you can hear a similar noise in Nikon’s VR lenses when VR is engaged if you listen carefully. I don’t think it’s a big deal, personally. You can only hear it in near-silent environments.

_5000219 copy
A shave and two bits. OM-D, 45/1.8

The OM-D is a tricky body to get a feel for – it’s smaller in person than you’d expect from pictures; it’s a little taller than the E-P3 due to the finder hump, but nowhere near as bulky and unwieldy as the E-P3 with the VF2 viewfinder attached. Ergonomically, this is good and bad news; the camera sits in the hand well, and both exposure adjustment dials fall easily to thumb and forefinger. The arrow keys on the back are still OK, but a little bit of a cramp to reach; the delete button and power switch are both far too low. Moving the power switch to that little empty bit of deck underneath the shutter button would be fantastic – a split second fumble to power the camera on can often cost your the shot. More on this later.

_5000076 copy
Damn you, Magritte. OM-D, Leica 35/1.4 ASPH FLE via adaptor

For the most part, ergonomics are solid. There are plenty of programmable buttons; the two on the top deck (Fn and record), one next to play (Fn) and the arrow pad. The play and Fn buttons are a bit small – perhaps making them pointier and longer might help – I’d be concerned about being able to hit them reliably with gloves, but then again they seem to be fine for bare-handed use. The arrow pad is set to pick focus point by default, and this is the behavior I prefer. You can assign shortcuts like ISO and WB to it, but why bother when there’s the excellent SCP which shows all settings at a glance? Hit the OK key and use your finger to select the setting, then use the front dial to change it.

_5000108 copy
Night Tree. OM-D and 45/1.8. ISO 2000, would you believe?

Oh, I forgot to mention the OM-D has also inherited the touch screen from the E-P3; Olympus has done a good job of making its operation unintrusive so you’re not accidentally shooting with your nose (you can do a touch-to-focus-and-shoot operation when in live view). It’s handy to select focus points quickly, as well as scroll and zoom images – though this behavior is just a little counterintuitive, because I don’t do it on any of my other cameras.

In addition to being hugely customizable, there are several neat touches with the operation of the camera – in playback, the FN1 button next to play zooms into the focus point to the last magnification with two presses: first to enable (after which you can also use your finger to drag the enlarged area box) and another to magnify. Amongst all cameras, only the pro Nikons do this. Better yet, you can skip between zoomed-in images to compare areas of the image using the front command dial. On top of all this, you can even select clipping levels for the shadow/ highlight warning display. Nice.

_5000206 copy
Memorial for a leaf. OM-D, 45/1.8

The OM-D has other functions which I don’t really use, but which might be nice for JPEG shooters like special effects and a form of live curve control using the dials; it isn’t very precise, but it is better than nothing.

Remember I was talking about losing shots to a powered-off camera earlier? There’s a good reason for this: if you leave the battery, it’ll probably be dead after about 300 or so frames because the EVF and LCD appear to be always on, even if the camera is in standby; the LCD might be black but mine at least has a telltale glow. My friends who don’t power off between shots are reporting battery life in this range. I’ve got no problem getting 500 shots out and barely making a dent in the battery (one little segment missing), however. I think I’ve only charged it a handful of times since getting the camera, and never has the battery been fully depleted.

_5001073 copy
Untitled. OM-D, 45/1.8

I think the EVF saves power over the LCD, but then again I’m not entirely sure; there’s a lot of dots on that little monitor. It’s definitely one of the better ones I’ve seen, with a very high refresh rate, low lag, good usability in low light (though oddly the live preview tonality etc doesn’t accurately match the captured image sometimes) and a fine dot pitch. Do I miss my real viewfinder? Yes, but to be honest, I seem to have adapted to this one. And being able to see a quick review of the image you just shot in the finder is great – you don’t have to take your eye away from it to check your composition. Similarly, if you want to shoot discretely at waist level – the tilting LCD is great. I prefer these to the swivel kind that frankly always feel like they’re going to snap off at the hinge point.

_5000222 copy
In praise of tilt screens. OM-D, 45/1.8

In use, the OM-D shows that it was designed by photographers – or at least has had heavy photographer input in most of the engineering decisions. Menus are logical, and settings are mostly easy to find – though it could really use a way of saving settings to an SD card to transfer between multiple cameras (this is a ‘pro’ feature for users of multiple bodies), or reload if somebody plays with yours. It’s solid, and surprisingly hefty for its size – the body is made of magnesium alloy a mix of magnesium alloy, plastic, and some stamped metal (brass?) parts; it’s weather sealed to the same level as the E-5. If you look closely, there are gaskets on every compartment. Although I’ve seen videos of people washing their E-5s, note that the only weather sealed M4/3 lens at the moment is the 12-50 kit lens. All in all, I’m pretty confident that the camera could take a decent beating and survive.

_5000876 copy
Remember this shot from Wesak Day? The camera was already soaked by similar blessings at this point. OM-D, 12/2

The critical thing that makes a good camera, in my mind, is responsiveness. And the OM-D has it in spades. I think it’s the fastest-focusing contrast detect camera out there; it’s noticeably faster than the Pen Mini, which I already thought was pretty speedy. It even shoots at 9fps, in RAW, with no buffer indigestion. Frankly, in good light, with a contrasty subject, it gives my D800E a run for its money. The catch is that you must use the Olympus lenses for this. Despite the supposed openness of the Micro Four Thirds standard, there are definite speed advantages to be had for using a manufacturer’s own lenses on its own bodies.

_5000941 copy
Bulding blocks. OM-D, 45/1.8

There is a catch with autofocus, however. As good as single AF is – I would say easily class leading, and giving most DSLRs a run for their money (with none of the AF alignment problems, because the imaging sensor does the focusing) – continuous AF is a completely different story. Even though Olympus claims that continuous and tracking AF is greatly improved with the OM-D, frankly, it’s unusable. Continuous autofocus can’t seem to anticipate subject motion; it drops after the first frame, and usually comes close but fails to re-acquire the subject. Tracking AF is a similar story; you can see the camera manages to find the subject in the frame and displays this in the finder, but somehow it just fails to move the lens by the right amount to keep up with it. I would personally avoid these two modes, and instead rely on its extremely fast S-AF, low shutter lag, and the higher DOF of Micro 4/3 (for a given FOV and aperture) to save you. In fact, I don’t think I’d use this camera for moving subjects at all; that’s why I still keep the D700 and battery grip around.

_5000653 copy
Holy man. OM-D, 45/1.8. Even at the slow, predictable speed of the moving float, getting this shot was a lucky break.

I haven’t seen any AF errors for single AF, except when there are objects at multiple distances inside the focusing box (whose size can’t be changed) and something other than the intended subject is the most contrasty. It’s also worth noting that because the imaging sensor is used, the AF grid covers almost the entire frame. These are two huge advantages of mirrorless systems that frankly I miss with full frame cameras, whose AF grid usually covers the central third of the frame at best.

All of this usability would be utterly, well, useless, if the image quality didn’t match. The OM-D reportedly uses the same sensor as the Panasonic GX1 I’ve been told by a number of sources that it’s a different sensor; 16MP and 3.63 micron pixel pitch. That’s tiny; the 10MP 1/1.7″ compacts run at about 2.3 microns or so. By comparison, the D7000 and D800E have a 4.88 micron pitch, and the D700/D3, an enormous 8.5 microns. (Every time you double the pitch, you quadruple the photo site area.) Even factoring in advances in technology, I’d expect pixel-level performance to be on par with the Pen Mini; going from 12 to 16MP while maintaining the same pixel quality is pretty much what Nikon did with the D3s to D4 move, and in about the same gestation period.

_5000967bw copy
Hot day. OM-D, 45/1.8

Wrong. It seems that either the old sensor was pretty old, or the new sensor has skipped half a generation – pixel level image quality is on par with the D7000, as far as acuity and noise goes; it may even be slightly better on the noise front. Color accuracy is better, too; the OM-D is both accurate and delivers excellent skin tones. The best way to describe its tonal palette is ‘natural’ – very little work is required to get my desired output from the RAW file, which isn’t necessarily the case with other cameras. The only place where it can’t quite keep up (and this is a fact of the laws of physics) is in dynamic range; I don’t know exactly how much it has, but my gut puts it at around 11-12 stops useable at base ISO with careful RAW processing, which is a little less than the D7000, and two stops less than the D800E. The sensor is further limited at higher ISOs, at which point dynamic range falls further. There’s probably no more than 6-7 useable stops at ISO 3200. This is still excellent performance for such a small sensor!

_5000552bw copy
Migrant workers. OM-D, 45/1.8. ISO 3200

On the noise front, I limited my Pen Mini’s auto ISO to 1600; anything beyond was just too grainy and edge-compromised to use. I’m happy to raise that one stop to 3200 for the OM-D; perhaps 6400 if I have no choice, since there are a few more pixels to play with – but by then dynamic range and color are really suffering quite badly. All in all, though, I’d put the noise performance on par with the Leica X2 I recently tested. One more stop of useable high-ISO, the hugely improved stabilizer, and the ability to use an eye-level finder and brace the camera against your face (increasing stability and reducing the minimum shutter speed required to handhold) means that the OM-D is capable of delivering 2-3 stops of additional usability over the Pen Mini (and by extension, E-P3/ E-PL3 cameras of that generation) – which is a huge step forward. In fact, it gives better color and detail than my D700 at base ISO, and keeps up with it noise-wise to about ISO 800. It’s probably about as flexible as the D800E in that sense. In daylight, picking this camera is a no-brainer.

_5000228 copy
The thinking man’s camera. With beer, too. OM-D, 45/1.8. ISO 2000

This doesn’t of course mean that the OM-D is perfect; there are many things that only reveal themselves with extended use, and one of the reasons why this review has taken so long (other than the X2 and M-Monochrom arrivals) is because I didn’t feel like I’ve had enough time to shoot with it to fully understand this camera; there’s a lot of functionality in here I haven’t even tried, like video mode for instance. What I do want to test more extensively – and haven’t had the chance to, because FL-50Rs aren’t exactly cheap or easy to borrow – is the wireless flash system. If it’s as accurate and flexible as Nikon’s CLS, I may well have found a replacement lightweight system for anything that doesn’t require 36MP. I did briefly play with the two-part grip; it’s very solid, and improves handling and balance dramatically – with or without the vertical portion. It takes another battery and is sealed to the same degree as the rest of the camera. The only problem I have with it is the rather stiff price for what is effectively a few bits of plastic and some buttons; it’s fully 1/3rd of the camera – at least where I live.

_5001213 copy
Untitled portrait. OM-D, 45/1.8

Things I’d like to see improved:
– Strap lug placement is awful. Using the included D-rings, the strap digs into your palm, or the web between your fingers. It seems like this is an Olympus tradition; every single Olympus I’ve owned has had this problem. I solve it in the usual way: remove the D rings, and either use a thin lanyard hand strap (fortunately, the camera is light) or a Crumpler Urban Disgrace that attaches via a lanyard-style string that threads through the remaining eyelets.
– Continuous AF. It’s not usable now, period.
– The power switch is in a terrible location.
– The buttons could be more tactile, they feel, well, mushy. It’s not always clear if you’ve pressed something.
– Playback and FN1 buttons are too small, and you can quite easily press the wrong one.
– It seems battery life could be improved, perhaps through more intelligent use of sleep modes. The camera could be a bit faster in waking up and powering on, too.
– Some way of saving settings to an SD card and transferring them to another camera – this is meant to be a pro grade camera after all, and pros have more than one camera. With that many custom settings, resetting a second camera is a colossal pain.

_5001123 copy
Contemplating the upgrade (note watches). OM-D, 45/1.8

Notice that with the exception of continuous AF performance, there are no real big issues here. In all fairness, continuous AF is something that none of the mirrorless cameras do well (with the exception of the Nikon 1, which has phase detect photo sites on the sensor).

With the arrival of the OM-D, it finally feels like Micro Four Thirds has come of age. The original promise of ‘smaller, same quality’ which was made with Four Thirds I felt was never fulfilled with earlier cameras; they weren’t small enough, or able to deliver the same image quality. Although Micro Four Thirds went a long way to fulfilling the smaller part of the equation, image quality, speed and usability were lagging behind until the last generation; only now has the promise been met. I don’t look at the OM-D’s files and think ‘wow, this isn’t bad for such a small sensor!’; instead, I look at the files and am satisfied enough to not think about the sensor size. It’s hugely liberating to be able to carry a pro grade body and three lens fast-prime kit – 24, 40 and 90 equivalents – whose total weight is around 600g, and without feeling like I’m compromising anything (at least not for what I shoot; if it were sport, it’d probably be a different case). That’s the weight of one lens for the D800, or the M9-P body only. That’s hugely appealing for travel. Even two bodies wouldn’t weigh that much.

In conclusion: it’s an exciting time to be a photographer. For the vast majority of my work, this is more than enough camera; I just need a solid macro option (there’s a 60mm 1:1 on the way) and a good wireless flash system, and I’d be seriously tempted to switch over. MT

_5000959bw copy
Waiting for more rebar. OM-D, 45/1.8

More of my work with the OM-D can be found here on flickr. This is a set which will be continuously updated as time goes by…

Update: I’ve been made aware of an excellent thread on DPReview by Archer Sully here documenting some of the ‘hidden’ features of the OM-D that the manual doesn’t cover. It’s good reading for any OM-D shooter.

Get the Olympus OM-D here from B&H or Amazon.

____________

Visit our Teaching Store to up your photographic game – including Photoshop Workflow DVDs and customized Email School of Photography; or go mobile with the Photography Compendium for iPad. You can also get your gear from B&H and Amazon. Prices are the same as normal, however a small portion of your purchase value is referred back to me. Thanks!

Don’t forget to like us on Facebook and join the reader Flickr group!

appstorebadge

Images and content copyright Ming Thein | mingthein.com 2012 onwards. All rights reserved

May 10, Part 3: Bayer vs. non-Bayer: Leica M-Monochrom vs. Nikon D800E

_MM1_L9995676bw copy
Nadiah. Leica M-Monochrom, 50/2 APO

The final part in this triptych aims at examining the differences between Bayer and non-Bayer sensors. Part one was the review of the M-Monochrom; part two, the APO-Summicron 50/2 ASPH.

Note: I’ve been informed by Leica that both camera and lens are prototypes, and there may be changes between now and the final release product.

Operational and system differences aside, the aim of this portion is solely to look at how the sensors render images in black and white, and to examine pixel-level files and resolution advantages of the non-Bayer sensor. It’s frequently claimed that the Bayer matrix removes between 30-50% of the real resolving power of the sensor – i.e. a non-Bayer sensor of the same pixel count will have somewhere between 1.5x and 2x the resolving power. Since the M-Monochrom’s sensor is 18 MP and full frame, what better to compare it against the 36MP (2x) also full frame Nikon D800E? Both cameras have no antialiasing filter, which evens out the playing field somewhat. I’ll also go on later to look at noise, tonal rendition, and ultimate image potential, which is to say, what I can do with those files in the conversion.

A note on testing methodology: for the direct A-B comparisons, both cameras were shot in lossless compressed RAW and converted via ACR 6.7 final release. The D800E files were converted to black and white with a straight desaturation in ACR, and the M-Monochrom files upsized via bicubic smoother to match the output resolution of the D800E for the real image comparisons, and the D800E downsized for one set of the noise/ resolution comparisons to see if the comparison holds both ways. If sharpening was applied, it was applied consistently to both sets of images (and very minimally at that). The lens used on the MM was the 50/2 APO-Summicron-M ASPH (50 AA), the best lens that Leica currently makes; I didn’t have anything comparable to use on the Nikon (a Zeiss 2/50 Makro-Planar would have been perfect) – the closest thing I had was the Nikon 45/2.8 AI-P pancake, which is actually a fairly competent lens. The 45P resolves well at the focal plane, but lacks the flat-field and cross-frame consistency of the 50 AA – for all but the portrait comparisons, both lenses were shots at f5.6 or f8 to achieve maximum resolution. The D800E was focused with live view and magnification, and where possible, the camera moved to match framing (obviously impossible for the distant shots).

As usual, go by what I say; do not make any conclusions from the actual images (which are there for illustration purposes only) – I’ve been looking at many full size, uncompressed images on a calibrated monitor.

Resolution and pixel acuity

_MM1_L9995637 copy
Full test scene. Leica MM, 50/2 APO

MM vs D800E 1 copy
Center crop. Full size

MM vs D800E 2 corner copy
Corner crop. Full size

It’s pretty clear that the MM is very much holding its own against the D800E; or perhaps that should be the D800E is holding its own against the MM – at least in the center. The corners tell a very different story; this is more a testament to the resolving power and cross-frame consistency of the 50 AA than anything. Even at f8, the 45P lacks the bite and crispness of the 50 AA; note especially definition of the crane cables. Slight magnification differences aside, I’d say the M9/ 50 AA combination is resolving ever so slightly more than the D800E and 45P; look closely at the antenna sticking out of the roof box. It may be a different story if I’d had a better lens, but I doubt we’re going to get much more center resolution out of any combination on the D800E – I certainly haven’t seen it with any of my other lenses, including the 85/2.8 PCE.

_MM1_L9995628 copy
Second scene, full image. Leica MM and 50/2 APO

MM vs D800E 4 copy
Center crop. Full size

The second scene appears to be much closer in terms of resolution; it was shot at f5.6 on both lenses. The 50 AA actually has a slight advantage here as the lens is now three stops down from maximum, but the 45P is only two stops down. Both cameras resolve the foliage well, and texture in the pavement and road is retained – just. If you take a close look at the motorcycle’s wheel spokes and license plate, it seems like the MM is once again resolving a hair more detail, but there’s really not a lot in it – in fact, it could well be false detail due to aliasing at this point. I wouldn’t pick one combination over the other at this point.

I did a number of other comparisons of various scenes, and could only conclude that the MM resolves at least as well as the current state of the art 36MP Bayer sensor. But for the most part, there’s not a lot in it – I would not pick one camera over the other on the basis of resolution alone.

Noise

MM vs D800E ISO comparison copy
First set of noise crops. MM enlarged to match D800E native resolution. Full size. I didn’t bother with ISO 320 because they both looked almost identical to the ISO 640 crops, which is to say essentially noise-free. Highlight and shadow recovery were both set to 10/10 for each camera.

It’s hard to say which way this comparison should go – one one hand, the MM has a much higher native ISO than the D800E (320 vs 100), and no added noise from the de-Bayering; on the other hand, it does use a CCD rather than CMOS sensor, which is known for having a higher noise floor to begin with. Once again, resolution appears to be a toss-up between the two cameras; the D800E clearly retains more useable resolution at higher ISOs.

At the pixel level, the D800E begins pulling away from ISO 1250; the MM is probably a stop behind by ISO 2500, and nearly two stops behind by the time we get to ISO 5000. I’d put ISO 5000 as being okay on the D800E, with ISO 10k being useable for emergencies. This lowers by a stop on the MM. It’s interesting to note that despite the MM exposure being slightly brighter – the exposure settings for both cameras were identical – the noise affects not just the shadows (as with the D800E) but also clearly encroaches on the midtones, too. Lowering the exposure a fraction on the MM may have helped, but it wouldn’t reduce the amplitude of the noise – there are clearly noisy pixels that have been amped far enough that they are affecting the fine detail structure of the image.

MM vs D800E reduced low IS copy
Low ISO crops. Full size

MM vs D800E reduced high I copy
High ISO crops. Full size

For the second set of noise tests, the D800E’s files have been reduced to match the size of the MM. I’m also looking at the highlight portion of the image. I’d say there’s no difference in noise or resolution to ISO 1250; the D800E’s files downsize reasonably well, but you can see some stairstep artifacts on the fine detail of the label – this is more likely a Photoshop artifact than a reflection on the resolving power of the camera. The story for high ISO is once again similar to before: the D800E has less noise, by 1.5-2 stops again. Curiously, the downsizing (bicubic smoother) has also reduced acuity of the D800E slightly.

Intermediate conclusion: downsize or upsize files to match, it won’t make any difference.

Dynamic range, tonality and a quick word on bokeh

_MM1_L9995631 copy
Reference bears again, full size image from the above crops.

_MM1_L9995627 copy
Leica MM and 50/2 APO

MM vs D800E 3 copy
Crops; full size

Although there is a huge amount of subjectivity introduced by the B&W conversion method, it’s safe to say that in general, a straight desaturation results in the lowest contrast image. Yet the MM images always land up being less contrasty than the D800E’s; it doesn’t appear that this results in there being more dynamic range – in fact, I’d say there’s if anything slightly less useable dynamic range (look at the noise in the lens barrel that isn’t there on the D800E image). What I’m seeing is a different tonal response curve that’s more shadow-biased; it’s probably something to do with the inherent differences in sensor architecture more than anything else. Is one better than the other? Only you can answer that, because it depends very much on your intended output.

I don’t want to talk too much about bokeh, because that’s a property of the lens, not the camera, but in the crops, both lenses are delivering a pleasing out of focus rendition.

Output potential

And now is a very good time to talk about output potential: what can the cameras actually do, when the files are processed properly, in a real-world scenario? The portraits were lit by a 1000-LED daylight balanced panel (not that it matters for B&W conversions), with brightness adjusted to give a reasonable exposure to simulate daylight or indoor lighting – 1/90th at f2.8 ISO 640 or thereabouts. I’ve put a fair amount of work into the output of both cameras – basically, enough to the point that I’d be happy with the finished image.

_MM1_L9995676bw copy
Leica MM and 50/2 APO

_8012864bw copy
Nikon D800E and 45/2.8P

No matter what I did to the D800E’s images, they were always slightly contrastier – especially in the skin tone highlights, which required quite a lot of tweaking to avoid borderline harshness. The MM’s files just feel tonally smoother – look at the frame contents in the bottom left corner of the image, and the model’s dress. (Clicking on any image will bring you to a the Flickr landing page, from which you can view a larger version.)

_MM1_L9995638bw copy
Leica MM and 50/2 APO

_8012832bw copy
Nikon D800E and 45/2.8P

The tonal difference mentioned above – manifested as a sort of ‘lightness’ if you will – is again apparent here. I personally find the MM’s rendition a bit more pleasing to the eye, but there really isn’t much in it. Full size crops of the image follow below (you will need a screen with more than 1200 pixels across to view them); take your pick for resolution – I can’t say that one has more than the other. Microcontrast is slightly better on the MM/ 50 AA image, though.

_MM1_L9995638bw crop copy
Leica MM and 50/2 APO

_8012832bw crop copy
Nikon D800E and 45/2.8P

Conclusion

Often when we are writing reviews, comparing gear, or reading reviews, it’s very easy to get carried away and land up making a huge deal out of small differences. It’s pretty clear – to me, at any rate – that both cameras are capable of producing outstanding image quality, minor differences aside. Yes, the D800E does offer a stop more useable ISO, but then the MM makes up for it with lower shutter vibration and an easier method of focusing (if you’re using manual focus lenses on the D800E) – these somewhat cancel out when you’re handholding. The biggest difference again is going to be in the method of working – I’ve continuously found the D800E requires a bit more care to get the most out of it – it doesn’t really feel like a casual, fluid camera in the same way as the Leica Ms do. However, even though it’s more fiddly to focus, it’s also a lot easier to determine whether the image is in focus or not – using both back to back really reinforces how poor the MM’s screen is. And as mentioned in the MM review – you’re going to have to recalibrate your internal vision to see luminance values rather than contrasting colors and perceptual luminance. The MM does not see in the same way as you are used to with traditional B&W conversions, which take into account some of the color information when performing the conversion.

Tonal rendition is a subjective thing; some may prefer the D800E and others the MM; personally, I feel the MM’s files have a bit more luminosity to them – it’s difficult to describe, and it could very well be a lens thing; this is definitely an endearing trait. If you do a lot of black and white work, I’d seriously consider adding the MM to your arsenal; just make sure you also have the right lenses to do it justice. For the rest of us who are content to make conversions from our conventional Bayer cameras – with the channel mixing flexibility that enables – I’ll be posting an article on black and white conversion options in the near future. Stay tuned! MT

Coda: There have been a huge number of people asking why I chose to use the ‘inferior’ 45P against the 50 AA. I want to clarify this logic here, and I continue to stand by the results of this test.
1. Aside from the single corner crop included out of curiosity, the center performance of both lenses at f5.6 or f8 at the pixel level is as good as I’ve seen out of any lens.
2. This is a sensor comparison. So we look at the center resolution of the sensor, which is the same as the edge resolution. We look at noise, dynamic range, tonal response etc – note I did not include color or microcontrast (those are also influenced by the lens). The former three properties aren’t.
3. Yes, I could have used a worse lens on the MM or a better lens on the D800E. But the reality is that nobody pays me to write these things, so I wasn’t about to go out and buy a lens I didn’t need for the sake of one test.
4. Finally, it’s a real world comparison. If I did have the MM and 50 AA, I probably would look into the camera cabinet and try to decide between that and the D800E/ 45P combination if I wanted that focal length. In the end I would select on a) noise, if I needed low light performance, b) if I needed color and c) weight. Both combinations are capable of stunning images. Both are also capable of utter rubbish. The biggest difference is the photographer, not the camera.

The M-Monochrom is available here from B&H, and the D800E is here from B&H and Amazon.

____________

Visit our Teaching Store to up your photographic game – including Photoshop Workflow DVDs and customized Email School of Photography; or go mobile with the Photography Compendium for iPad. You can also get your gear from B&H and Amazon. Prices are the same as normal, however a small portion of your purchase value is referred back to me. Thanks!

Don’t forget to like us on Facebook and join the reader Flickr group!

appstorebadge

Images and content copyright Ming Thein | mingthein.com 2012 onwards. All rights reserved

May 10, Part 2: The Leica APO-Summicron-M 50/2 ASPH review, and a comparison

_5001717 copy
All non-product images in this review were shot with a Leica M9-P and the 50/2 APO-Summicron-M ASPH, with the exception of the one B&W image lower down the review. Clicking on an image will bring you the Flickr page where you can access larger versions.

Part one of this review took a look at Leica’s new M-Monochrom I’ve had a chance to review already earlier; however, it’s now time to take a look at the accompanying lens. Personally, I find this a much more interesting announcement than the other two items – but then again, I’m also the sort of person who has eight ways to get to 28mm (and can find a use for all of them) – and I do appreciate the gentle field curvature of a Tessar design.

Note: I’ve been informed by Leica that both camera and lens are prototypes, and there may be changes between now and the final release product.

_M9P1_L1015932 copy

The full name is a bit of a mouthful, so I’m going to refer to it as the 50 AA from here on. The 50 AA is a complicated design: 8 elements in 5 groups, in what appears to be a heavily modified double-Gauss design with a complex rear floating aspherical group, along the lines of that used in the recent 35/1.4 ASPH FLE. Leica claims it’s their most perfect lens ever – the MTF charts certainly support this, but we will of course have to use it in the field to see if a) these claims bear out, and more importantly b) whether we can see the difference under typical shooting conditions. Perfection does come at a price – the lens’ RRP is around 7,000 USD, which is double that of the already excellent (and actually apochromatic) 50/1.4 Summilux-M ASPH.

_M9P1_L1016001 copy

Leica claims it’s the most perfect 50mm they’ve ever made – given the family lineage also includes the legendary 50/1.4 ASPH and 50/0.95 ASPH, that’s a tall order. MTF charts of this lens look flat – I don’t know if these are measured or computed, but f5.6 promises some pretty incredible resolving power and fine microcontrast structures. Let’s just say expectations were very, very high as I opened the files from this beast.

_5001734 copy

Aside from the obvious optical formula changes from the previous design (which was a simple double-Gauss with no floating or aspherical elements) – the lens has a number of physical changes despite retaining approximately the same size. Firstly, I’m pleased to see the return of the focusing tab – it makes life a lot faster, especially when you’re trying to track moving objects. Better still, it incorporates the best of both worlds and has both a wide knurled ring and the tab, which is handy when shooting in portrait orientation. Secondly, the previous telescopic hood design has been modified a bit; it telescopes but also twists to prevent it from accidentally collapsing. Finally, the cap is no longer the plastic clip-on type, but a deep metal slip-cap that makes the lens look like the 50/1.4 ASPH when it’s attached. Unfortunately, the aperture ring seems to follow recent Leica designs and is far too loose to prevent accidental changes when taken out of a bag – you have to frequently check that you’re actually shooting at the desired aperture. It’s a complaint which I have of my 35/1.4 ASPH FLE, too – how hard can it be to make slightly firmer detents?

_5001719 copy

I want to make one thing clear upfront: we’re already at the bleeding edge of diminishing returns with most lenses; your shooting discipline and rangefinder calibration are going to make far more difference to the pixel-level results than switching from the 50/1.4 ASPH to the 50 AA.

_M9P1_L1015942 copy

Performance on the M9-P
Very nearly flawless. It’s easier to talk about what’s wrong with the lens than what’s right; let’s just call it perfection minus a little bit. What are the little bits? Well, it does flare a little with strong side lighting; curiously, I don’t see this behavior shooting into the sun or point light sources. There’s also vignetting that doesn’t go away fully until f5.6, though admittedly it’s fairly minor and mostly not noticeable in everyday shooting. I really don’t have anything else to say – it’s that good.

_M9P1_L1015950 copy

_M9P1_L1015823 copy

_M9P1_L1015823 crop copy
100% crop of above image. Now this is what I call micro contrast.

Sharpness is outstanding across the frame even from wide open. There’s a very, very slight visible improvement until f4, but it’s so borderline you might as well just use the aperture for depth of field control only. Once again: if your rangefinder is properly calibrated, and you’ll want it to be for use with this lens because the focus plane transition is so sharp, you will have nothing to complain about.

_M9P1_L1015975 copy

I didn’t see any lateral chromatic aberration in any of the 500 or so test images I shots with this lens, many of then deliberately framed and composed to provoke it. There is a tiny bit of spherochromatism (bokeh fringing), but it too is fairly minor. The apochromatic nature of the lens is actually given away more by its micro contrast structure than edge CA/ fringing; let me explain why. Non apochromatic lenses focus different wavelengths of light at slightly different distances; if you cut the sensor plane through this, you’ll land up with some wavelengths being focused and others not; this is why edges aren’t perfectly defined, and why the vast majority of lenses have trouble reproducing extremely fine detail structures. The 50 AA has no such issues, by the way. Bottom line: yes, it’s apochromatic, or as near as we can tell with current sensor resolution. What would be interesting is to see how it performs on say a Sony NEX-7 body, which is somewhat notorious for not playing nicely with Leica M glass – especially in the corners.

_M9P1_L1015859 copy

Bokeh is pleasing – probably best described as neutral – it doesn’t get in the way, it isn’t distracting, but it also doesn’t dominate the image in the same way as say, a Noctilux. I did see some odd internal structure in extremely bright out of focus highlights, suggesting a formed aspherical element, but only in a couple of images. Color is also neutral and matches the palette of the modern Leica ASPH gestalt. Perhaps the best way of describing this lens is transparent. You see your subject, and not the signature of the lens – which is what I personally prefer.

_5001712 copy

Interestingly, the aperture blades – much like every other Leica lens – don’t make a perfect circle at any aperture other than wide open, yet somehow the lenses always manage to produce great bokeh. The same is true of the Noctilux 0.95, too.

_M9P1_L1015966 copy

Performance on the M-Monochrom

It is clear that this lens is capable of resolving beyond the definition of the M9 and MM sensors; even on the MM, the lens continues to be an outstanding performer wide open, though the improvement on stopping down is slightly more obvious. It delivers extremely fine micro contrast, which makes it a great B&W tool. Macro contrast – whilst great for delivering saturated color – is perhaps a little bit too high for B&W, especially if you’re shooting scenes with high native dynamic range.

_MM1_L9995346bw copy

_MM1_L9995346bw-crop copy
100% crop of image from M-Monochrom, unsharpened at f2.

_M9P1_L1015822 copy

_M9P1_L1015989 copy

The bonus bit: A comparison between the 50 AA and Zeiss ZM 2/50 Planar

Unfortunately, I don’t have a 50/1.4 ASPH or previous 50/2 Summicron-M handy for a comparison, and the Noctilux 0.95 really has a different design objective (though admittedly their prices are uncomfortably close) – so I thought the most interesting head to head comparison would be with another highly regarded 50/2 – the Zeiss ZM Planar. I tested this lens against the older 50/2 Summicron extensively before making my purchase decision, the ZM 2/50 won both optically and financially. It’s a hair sharper and doesn’t exhibit any focus shift. The coatings allow it to be about 1/2 to 2/3 stop faster than the old Summicron for a given aperture and exposure histogram, too. I also preferred the way it rendered – there was just more ‘pop’ to the micro contrast, and (personally) preferable color.

_M9P1_L1016038 copy
Reference polar bears. This image shot with the Zeiss ZM 2/50 Planar. Clicking here will get you a larger version.

_M9P1_L1016022 copy
And this one with the Leica 50/2 APO. Clicking here will get you a larger version.

A note on testing methodology: the lens was shot on a tripod-mounted M9-P at base ISO with manual (i.e. fixed) white balance, with several shots taken for the purpose of focus bracketing. However, you can still see very slight differences in calibration have resulted in a slightly different focal plane between the two lenses. However, if you look at the fine detail structure in both focus zones, you should get a fairly accurate impression of lens performance. You’re probably wondering why I didn’t do the testing on the higher-resolution M-Monochrom; simple: how else would you know if the lens was truly apochromatic or not without using a color body? Please also go by my comments rather than the images (which are for demonstration purposes) – I’ve reviewed and examined far more full-size, uncompressed images on my PC than I can post here.

50AAvsZM50planar-f2 sharpn copy (deleted 4fbb42a4-4c409-365ac916)
100% comparison screenshot at f2. Original (100%) size

50AAvsZM50planar-f8 sharpness copy
And again at f8. Original size

Focus plane differences aside, (and this is a prime example of how rangefinder calibration can seriously affect results) there are a lot of differences – and all of them in favor of the 50 AA. Neither one quite gets the color right – the 50 AA is too cool, and the Zeiss is too warm and saturated. What I previously thought was excellent and three-dimensional micro contrast (look at Bob’s scarf) on the Zeiss frankly now looks a little, well, soft (look at the label that wraps around the edge of the cigar box). The 50 AA has better bokeh, too; there’s a hint of double-edging and more spherochromatism on the Zeiss.

50AAvsZM50planar-f8 microcontrast copy
Microcontrast, 100% crop at f8. Original size

50AAvsZM50planar-f2 bokeh copy
100% crop of bokeh at f2. Original size

50AAvsZM50planar-f8 bokeh copy
And again at f8. Original size

There are two pieces of good news, however – firstly, the differences by f8 are negligible; secondly, in actual shooting, the two lenses are a lot closer than this appears. Your focusing accuracy is going to make far more difference than the MTF charts. Secondly, both lenses are already at an excellent starting point – though the relative differences may be very noticeable here, I think perhaps comparing these to a Nikon 50/1.8 D might put things into perspective somewhat.

_M9P1_L1015875 copy

_M9P1_L1015875 crop copy
100% crop of above image. Can you say, ‘detail’?

Remember my earlier article on T stops and f stops? The 50 AA meters the same as the older 50 Summicron, which is to say the Zeiss is 1/2 to 2/3 stop faster still. What this means in reality is that you can use the same aperture, get the same exposure histogram, but use a shutter speed that’s 50% to 75% faster on the Zeiss. It matters because you’re effectively getting more light into the camera, which can be critical especially in marginal situations.

_M9P1_L1015862 copy

The 50 AA is undoubtedly the best 50mm lens I’ve ever tested by a small, but very clear margin. I’d love to have something this good to make the most of the D800E’s resolution, but the only thing that might come close is the Zeiss 2/50 Makro-Planar or Coastal Optics 60/4 APO UV-VIS-IR. The former has a very, very short focus throw from about 1m to infinity, which makes it tricky to use as an everyday lens; the latter is limited to f4. The only problem I have with the 50 AA is the price – I don’t know how this can be priced at the same level as much more complicated optical designs like the 21/1.4 Summilux ASPH; one can only hope it’s the degree of quality control involved (and I’ve definitely seen clear sample variation amongst even the 50/1.4 ASPH and 35/1.4 ASPH FLE lenses.). It’s also clear that the resolving power of this lens goes far beyond the current M body sensors, and perhaps reading a little deeper, says something about the resolution and pixel density of future M-mount cameras. Having said all of that – I’ve been hugely impressed with the results I’ve seen out of this lens. If you have the money, and must have the best, then this is the 50mm for you.

Come back in two days for the final part of the Leica May 10 series: how much resolution does the M-Monochrom really have?

The Leica 50/2 APO-Summicron-M ASPH is available here from B&H orAmazon.

____________

Visit our Teaching Store to up your photographic game – including Photoshop Workflow DVDs and customized Email School of Photography; or go mobile with the Photography Compendium for iPad. You can also get your gear from B&H and Amazon. Prices are the same as normal, however a small portion of your purchase value is referred back to me. Thanks!

Don’t forget to like us on Facebook and join the reader Flickr group!

appstorebadge

Images and content copyright Ming Thein | mingthein.com 2012 onwards. All rights reserved

_M9P1_L1015873 copy

May 10, Part 1: The Leica M-Monochrom review

_5001729 copy

The focus of Leica’s May 10 announcement landed in my hands a few days ago (not counting the X2, which was reviewed here); I suppose that Facebook post might have done the trick.

_5001707 copy

This will be a three part review. Part one will deal with the M-Monochrom; part two, the new APO-Summicron-M 50/2 ASPH (which I’ll refer to from here on as the 50APO); and finally, part three will be a bit of a surprise. The latter I’ll also be testing on my M9-P, because there’s obviously no way of testing the APO specification on a monochrome only body.

Note: I’ve been informed by Leica that both camera and lens are prototypes, and there may be changes between now and the final release product.

_5001708 copy

A short note on the context of this review: I am a commercial photographer, and measure the quality of the camera by the ultimate output I can get from it – this is my litmus test, because ultimately my clients don’t care what equipment I use so long they get what they paid for. The images you will see in this review have been processed with my normal workflow (minus the B&W conversion step, of course) – there is no way I’d deliver an out of camera JPEG, and I suspect the target audience won’t be happy with the unprocessed images either; that’s like eating uncooked food and wondering why it tastes odd. Before the cynics cry ‘unfair’, remember that I do this with every camera I review. I try to get the best possible output from the camera, and if the raw data isn’t there, no amount of Photoshop will save it. I’m brand agnostic; I run four systems, will pick the most suitable tool for the job, and (sadly) none of the camera companies pay me.  If the camera doesn’t work, I won’t waste my time with it. I won’t be posting any full size images due to bandwidth – I live in the third world, internet is slow – and intellectual property issues, however, there are 100% crops sprinkled throughout the review. Clicking on the images will bring you to larger versions hosted on Flickr. Please go by what I say as I’ve pored over hundreds of full size uncompressed DNGs on a calibrated monitor; images here are for illustration purposes only.

_MM1_L9995360bw copy
Stairs. Sasana Kijang, Bank Negara Malaysia. Leica MM and 50/2 APO

The M-Monochrom (MM from here onwards) is essentially the same camera as the M9-P, but with the bayer filter covering the sensor removed, and a rejigged processing algorithm. Leica have not disclosed whether they have left UV and IR filtration elements in place over the sensor, but it would definitely be nice if they’d removed them – from what I’ve seen so far, I believe these filters have been left in place; I’m not seeing much of a telltale glow off hot black objects which would indicate the absence of an infrared filter. Aside from the new guts, the rest of the camera is almost identical to a standard M9-P, in black chrome (if it existed) with leather textured grips and a small MONOCHROM engraving on the hotshoe, which is now black. I can see detail aficionados knocking themselves out in the distant future over the various different variants of M9. Unfortunately, the same low-res from the M8 and M9 remains.

_MM1_L9995532bw copy
Phone call. Leica MM and 35/1.4 ASPH FLE

There’s also one other important detail: the ISO setting now goes all the way to 10(000) – which as far as I know, is a first for any sort of commercial digital camera CCD of any sort. (CMOS doesn’t count). Base ISO is 320, so if you plan on using your fast glass wide open during the daytime, you should probably invest in some ND filters. Finally, it appears that Leica have followed Nikon’s D800/D800E example on pricing: the camera without the Bayer filter costs more than the one with. Niche markets and all.

_MM1_L9995597bw copy
Counting pennies. Leica MM and 35/1.4 ASPH FLE

In use, there is really not a lot to say about the MM that I haven’t already said about the M9-P in my long term review of that camera. It shoots the same as any other Leica M, and existing M9 or M9-P users will feel right at home. I must admit, the color combination feels a bit nostalgic for me – I shot with nothing but a pair of M8s in black chrome for most of 2009/10. The camera also comes with a leather strap and rubber-bottomed shoulder pad, rather than the grippy synthetic of the M9/ M9-P. It looks and feels nice, but I personally don’t like it because the strap rings still dig into my fingers, and the ends have a habit of slipping through the rings and interfering with your grip – especially if you have to grab the camera and raise it to your eye in a hurry. I find the stippled standard strap more grippy, too. Care is required when slinging this one over a shoulder to ensure that it doesn’t subsequently make an expensive crashing noise on the floor.

_MM1_L9995429bw copy
The hat. Leica MM and 35/1.4 ASPH FLE

The only other notable differences are lack of white balance (duh) and a disappearance of the DNG compression options – it could be because my camera was prototype 007 (makes me feel like James Bond!) and running beta firmware. Compression would be nice as the files weigh in at an enormous 34.75MB; however I suspect this is also partially because of the amount of detail contained therein.

_MM1_L9995352bw copy
Lines of the Hoffmeister kink. Leica MM, 50/2 APO

There is no question that the MM out resolves the M9 – by exactly how much it’s hard to say (hint: come back and see the post I have planned for Sunday) – but the difference is similar to the difference between a sensor with a strong AA filter and one without; it’s almost as though there’s a layer of something between you and the image that’s been removed. The MM has a level of clarity and acuity at the pixel level that so far has only been seen on Foveon sensors; however, even those start to become a weak at ISO 800 and above. The MM maintains its acuity all the way through the maximum ISO, though above ISO 5000 noise dominates the microcontrast structure of the image.

_MM1_L9995464bw copy
Spiral, 2. Sasana Kijang, Bank Negara Malaysia. Leica MM and 35/1.4 ASPH FLE

The files require almost zero sharpening out of the camera; if you missed focus you might want to mask off and sharpen, but then you have to be careful of other areas in the image that will subsequently look over sharpened. Actually, the MM’s high ISO capabilities encourage you to stop down a little more to get the most out of the lens; there’s little noise penalty associated with shooting a stop or two down from your normal aperture. In fact, the camera encourages you to see and think about your images in a very different way: aside from the increased depth of field available, there’s also more dynamic range on tap. The overall look of the images is redolent of medium format – from the tonality to the microcontrast structure.

_MM1_L9995612bw copy
The obligatory cat shot. Leica MM, 35/1.4 ASPH FLE

I tested the MM with the new Leica 50/2 APO-Aspherical-Summicron-M (50 AA, review coming on Friday), the Leica 35/1.4 ASPH FLE, the Zeiss ZM 2.8/28 Biogon and the Zeiss ZM 2/50 Planar. The ISO comparisons and tests were performed with the 50 AA. Let’s just say that combined lack of Bayer filter and AA filter makes for an incredibly demanding sensor – focus calibration is absolutely critical* when shooting at maximum aperture or close to it; the sensor captures the falloff in depth of field with warts and all. Similarly, all lens flaws are revealed; whilst you of course don’t get CA on a monochrome sensor, this flaw is seen as a sort of blooming (which makes sense, as the light that makes up colored fringes instead contributes to the luminance values of the neighboring pixels instead).

_MM1_L9995393bw copy
Cityscape. Leica MM, 35/1.4 ASPH FLE

*My MM was perfectly calibrated for the 50 AA it arrived with, but not for any of my other lenses; after a couple of narrow misses with my 35/1.4 ASPH FLE wide open, I decided to shoot everything stopped down a little thereafter. Even though the 50 AA is an f2 lens, it demands the same focusing precision as a Noctilux on the MM body precisely because of the unforgiving nature of the sensor. I would highly recommending any potential MM owner sending back all of their lenses and any other M9/ M8 bodies to ensure consistent calibration between all lenses and bodies to avoid any nasty surprises. There isn’t much point in buying a Noctilux over a Summarit if you can’t use the extra stops due to focusing concerns.

_MM1_L9995393bw crop copy
100% crop of the previous.

The decision to release the 50 AA with the MM left me scratching my head – but having seen the resolving power of this sensor, it makes complete sense. None of the lenses were capable of delivering the same cross-frame performance on the MM as the 50 AA, though the Zeiss 2/50 ran very close especially at smaller apertures. Unfortunately the price will make your eyes water – it’s about 70% of a Noctilux – and the relative subsequent performance of your other lenses will, too.

MM vs M9P ISO comparison copy
ISO comparison vs. M9. Click here for the full size image, which contains 100% crops.

All ISO comparisons between the MM and conventional Bayer cameras are a little bit of a fudge, because there is some interpolation that will take place in the color to monochrome conversion; I’ve attempted to avoid this as much as possible by just doing a straight desaturation via ACR in all such A-B tests. The first thing you notice when comparing them M9 and MM is the huge difference in pixel level acuity – I’d normally just sharpen and be done with it. I actually re-ran this test several times with focus bracketing just to make sure it wasn’t a rangefinder calibration issue – it wasn’t. (The 50 AA was used on both cameras, shot from the same tripod position and stopped down to avoid plane of focus issues.) More importantly, this is a good illustration of the difference in resolving power between the new cameras – the M9 is no slouch for pixel-level acuity. The difference is so huge it’s almost as though you’ve removed a sheet of low-quality plastic or similar material in between shooting the two cameras.

_MM1_L9995375bw copy
Tripod. Leica MM and 35/1.4 ASPH FLE

The next obvious difference is a 1-1.5 stop noise advantage in favor of the MM; however, the difference isn’t quite as clear cut as that, because the MM retains detail much better than the M9; look at the fine text in the sample as an example. Needless to say, the noise pattern of the MM is extremely fine grained, and pleasingly random – very much evocative of film grain. The reason this skews things is because you’ll have to sharpen the high ISO M9 files to get some edge definition back; this in turn increases the amount of visible luminance noise, and certainly introduces at least another stop of disadvantage to the M9. Furthermore, due to the lack of color filters, the MM is actually about half a stop more sensitive natively – which is to say, you get need 1/15s on the MM to get the same histogram as 1/10s on the M9 would get you. In practical terms, this means the MM is probably more like 2-2.5 stops more useable than the M9.

_MM1_L9995526bw copy
Waiting. Leica MM and 35/1.4 ASPH FLE

There’s also more dynamic range, too; it’s hard to say exactly how much, but I think it’s similar to the noise gain – 1-1.5 stops, which makes sense. What’s very nice about the native tonal rendition of the MM is that it seems quite shadow-biased – which suits my B&W style just fine, but may not work for everybody. I definitely feel it’s got better highlight rolloff than the CMOS based DSLRs, too – the transition from light gray to highlights is far more gentle and pleasing to the eye. Watch the extreme highlights though, because as with the M9 sensor, once you get a huge blowout around a point highlight source, there will be blooming to adjacent areas on the sensor – and you can’t recover this information.

_MM1_L9995572bw copy
It works for Japanese-style street photography too. Leica MM, 35/1.4 ASPH FLE

One small detail on image review is worth noting – the MM is possibly the only camera that displays a true RAW histogram; normally this information is color-channel based, and thus subject to interpretation by white balance adjustments during the RAW file conversion. All other cameras that are displaying RAW histograms are in fact using a small embedded jpeg to generate this data. The lack of an embedded preview jpeg may also explain why sharpening of the RAW files seems to be very low – it’s actually very hard to determine critical focus using the monitor, more so than the M9. I learned to mostly trust it, then make up the balance of insurance through focus bracketing and depth of field. Would I be confident using this camera with a Noctilux? In time, yes, but not without more frames under my belt for a better feel of how the LCD represents images.

_MM1_L9995557bw copy
Cockblock. Leica MM, 35/1.4 ASPH FLE

Something I’m sure every reader is wondering about is the MM’s usefulness as an available light and night camera; after all, the film Ms were legendary for their usefulness in the dark because of a combination of the very low vibration horizontal-plane cloth shutter, and the ease of focusing a rangefinder. The latter hasn’t changed; the Ms are definitely easier to focus manually than an SLR (providing of course your RF is calibrated properly). However, in the film era, the ‘sensor’ was normalized across all equipment; this isn’t the case with digital. I’d long wished for the D3s’ sensor in an M9 body; that would make one incredible available light camera, especially with the f1.4 M lenses.

_MM1_L9995881bw copy
Waiting room and garage. Leica MM, 50/2 APO

My normal workflow for shooting in the dark with an M9 sees me setting ISO 1250, 1/30s and f2 as a starting point; I judge the changing light conditions by eye and adjust accordingly – shutter speed or aperture as required – but never increase the ISO any further because of the ensuing noise and loss of dynamic range. Frankly, even ISO 1250 is a bit borderline on the M9.

_MM1_L9995911bw copy
Crossing. Leica MM, 50/2 APO

The MM, on the other hand, can be set to ISO 2500 with little noise penalty – at 100% magnification it appears as very, very fine grain; perhaps comparable to an ISO 400 B&W film. Better yet, there doesn’t appear to be much loss of dynamic range, either. This is probably because the base ISO of the sensor is now 320. Having a base of ISO 2500 to start from (and 5000 for emergencies) means much higher available shutter speeds, or a bit more DOF (if desired). During my night shooting sessions, I didn’t run into the usual camera shake issues that come with borderline shutter speeds on the M9.

_MM1_L9995938bw copy
Family moment. Leica MM, 50/2 APO

Over the course of several thousand frames in the last two days, and controlled A-B testing between the MM and M9-P, I’ve come to the conclusion that the biggest difference between the two cameras isn’t the sensor. Yes, the monochrome-only version is definitely much sharper and delivers images with lower noise and higher dynamic range, but if you’re shooting the MM for an extended period of time, the change seen in your images won’t be because of these properties.

_MM1_L9995346bw copy
Traffic again. Leica MM, 50/2 APO

Rather, the camera forces you to recalibrate the way you see the world. To understand why, we need to think a bit about human vision: the eye sees mostly in color; more intensely when there’s more light, which is why the tropics are generally perceived as colorful, but London in winter is dark and gray. When it gets dark, the eye defaults to a larger patch of cells around the periphery of the retina that only perceives luminance information. This is why almost all photographers inherently compose better in black and white when the light is low – it’s much closer to how our eye natively sees, and there’s less imagination required to visualize the end shot.

_MM1_L9995346bw-crop copy
100% crop of above shot – 50/2 APO shot wide open at f2 with zero sharpening.

So how is all of this relevant? Well, because the MM forces you to ‘see’ luminance information even in bright daylight. To use this camera effectively, you have to learn to ignore contrasting colors; these frequently result in very flat monochrome images because the luminance values across the scene have to be similar for us to perceive the different colors equally strongly (and thus appear contrasting). Unlike conventional Bayer cameras, you can’t put this perceptual difference back into the final image in the RAW conversion – there’s no channel mixer. It’s easy to say, but very difficult to put into practice, even when you do consciously understand what’s going on*. During the course of shooting the MM, I started off looking for monochrome images in the same way I would with the M9-P – which is to say, colored contrasts that I might adjust later on to preserve the contrast. This produced lousy, mostly forgettable images. Looking at luminance only – oddly, sunglasses helped achieve this – and consciously remembering to do so, greatly improved the impact of my output. I definitely also noticed that when switching back to the M9-P to test the 50 AA, a lot of the frames had very strong luminance differences that worked OK in color, but were much stronger when converted to black and white.

*I was concerned about some of the early samples from the MM I saw; most of them looked incredibly flat and lifeless – until I thought about it a bit more and realized the above. It’s also worth noting that all of the tonal information is there, it’s just up to you how you want to allocate it through dodge, burn, curves etc in the processing of the raw file.

_MM1_L9995551bw copy
Meaningless graffiti. Leica MM, 35/1.4 ASPH FLE

I’m going to conclude by saying that the MM is not the camera for everybody. It’s not easy to see luminance only; if you can’t, you’re honestly going to get better results by shooting a color camera and then mastering the conversion process afterwards (to be the subject of a future article). However, with practice, some amazing things are possible with the MM – the image quality potential of this camera is incredibly high indeed. I’ve never seen pixel acuity at this level before – even Foveon cameras tend to have some degradation due to the multi-layer design of the sensor. You’ll notice I haven’t dealt with the exact resolution numbers in this review; I’ll be doing that in part three, to be published on Sunday. MT

Come back in two days for the next installment: a review of the APO-Summicron 50/2 ASPH-M (I think I got that in the right order.) A shameless plug: If you enjoyed this or my articles, please consider donating support via PayPal ([email protected]) – it takes a huge amount of time and energy to keep this site running. It’s ad-free at the moment, which means that it’s entirely supported out of my own pocket and time spent writing and testing is time I can’t spend shooting commercially. Thanks! If you’ve got any questions or thoughts, feel free to leave a comment below.

September 5: My Photoshop Workflow DVD for the Leica M-Monochrom is now available. For more details, please click here.

The Leica M-Monochrom is available here from B&H.

____________

Visit our Teaching Store to up your photographic game – including Photoshop Workflow DVDs and customized Email School of Photography; or go mobile with the Photography Compendium for iPad. You can also get your gear from B&H and Amazon. Prices are the same as normal, however a small portion of your purchase value is referred back to me. Thanks!

Don’t forget to like us on Facebook and join the reader Flickr group!

appstorebadge

Images and content copyright Ming Thein | mingthein.com 2012 onwards. All rights reserved
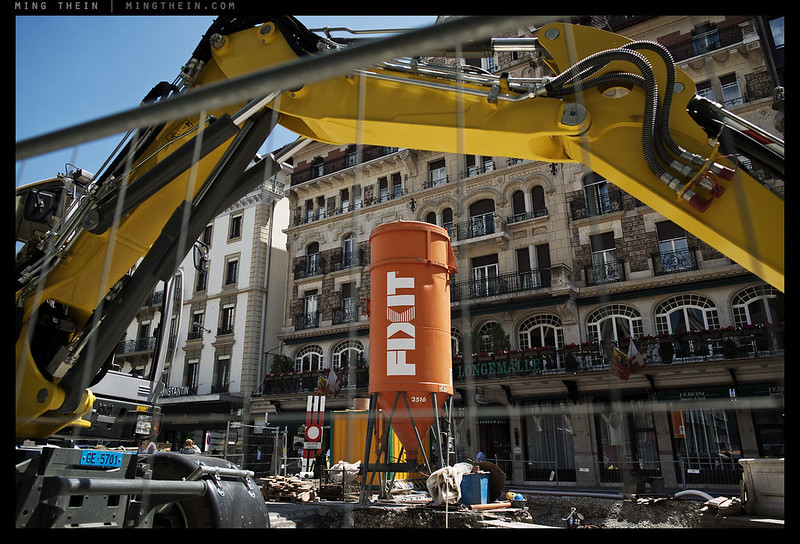
Lens review: The Olympus ZD 45/1.8

_PM05660 copy
Prague sunset by the river. Olympus E-PM1 Pen Mini, ZD 45/1.8

_8012322 copy

Last year’s lens surprise of the year was the Olympus M.Zuiko Digital ZD 45mm f1.8 MSC – it’s a lens that was announced with the E-P3, E-PL3 and E-PM1, seems fairly ordinary and innocuous on spec, but yet delivers in boatloads. It’s both cheap and expensive at the same time; let me explain why. Most conventional SLR mount 50/1.8 lenses go for $100-150 or thereabouts. This lens is closer to $300, and it’s all silver-painted plastic except for the mount – to be honest, it feels kinda cheap. That’s expensive. But, it doesn’t use a conventional double-Gauss optical design:


Image from Olympus. Purple bits are E-HR lenses, whatever that means. I suspect it’s ED glass or something similar. I certainly don’t see any purple elements inside my lens 😛

Whoa, what’s this? 9 elements in 8 groups? Not so simple. I suspect the reason Olympus chose this optical design was primarily due to the very short back flange distance of Micro Four Thirds; double Gauss designs work well if the back focus distance is close to the focal length, which it is for most SLRs. Changing the optical design to keep the lens compact introduces all sorts of other issues on its own, including corrections for the various complex optical aberrations that occur once a lens design becomes asymmetric.

_PM05089 copy
Waiting for that text. Olympus E-PM1 Pen Mini, ZD 45/1.8

Secondly, it has a very fast coreless focusing motor – Olympus brands these lenses as ‘MSC’, which means you won’t hear the focusing motor working while recording videos – a nice touch. It’s also blazingly fast, at least with the current generation of Olympus M4/3 bodies. Sadly, like all of the other M4/3 lenses (except the 12/2), there’s no full time focus override; it’s fly-by-wire only and you have to put the camera into MF mode on the body before the ring does anything. Still, it’s nicely damped if a little dead-feeling.

_PM05240 copy
Night in the Malastranska, Prague. Olympus E-PM1 Pen Mini, ZD 45/1.8

But never mind all that, how does it perform? In a word, brilliantly. It’s one of my favorite lenses for Micro Four Thirds. If I had to describe it in a word, it would be ‘transparent’. That’s probably a good thing for an optical device; however, what I mean is that the lens itself doesn’t impose any of its own optical quirks or peccadilloes on the image; it does its job moving light from the subject to the sensor, and then gets out of the way. It delivers sharpness across the entire frame wide open at f1.8; there is some slight improvement at 2.8, but it isn’t really necessary to stop down – perhaps this may be different on the higher density 16MP sensor of the OM-D, however.

_PM02054bw copy
All about the hair. Olympus E-PM1 Pen Mini, ZD 45/1.8

Fringing is almost entirely absent, as is longitudinal chromatic aberration; a sign that the optical designers have done their job very well indeed, and the lens is working well with the sensor. (In case you’re wondering about in-camera CA removal, I’m not shooting JPEG and the RAW files are run through ACR like the rest of my workflow – there’s no special treatment unless Olympus is doing something with the RAW files.)

_PM00679 copy
Echoes of red. Olympus E-PM1 Pen Mini, ZD 45/1.8

The lens is contrasty, but not that contrasty; it strikes a nice balance between sufficient global contrast and maintaining the microcontrast that is so important to preserving fine detail structures. In fact, I prefer lenses with lower macro contrast for digital use as they help to maximize preservation of dynamic range; this is especially important with smaller sensors that have lower dynamic range, like those used in M4/3 cameras.

_PM00576 copy
Ninja demolition. Olympus E-PM1 Pen Mini, ZD 45/1.8

Color reproduction is on the warmish side of neutral. No yellow casts like I see with Sigma and Tamron lenses, but a pleasing warm hue shift. Bokeh is also neutral to good; there are times when separation between subject and background is a little harsh – typically when the subject is fairly close to the background – but it’s also pretty darn good under ideal conditions.

_PM00530 copy
Mirrors. Olympus E-PM1 Pen Mini, ZD 45/1.8

Although it ‘only’ focuses down to 0.5m, it’s worth remembering that on Micro Four Thirds, 45mm is really a 90mm FOV, and there no non-macro lenses for full frame cameras that focus this close – it’s 0.8m if you’re lucky, or 1m if you’re using a rangefinder. The lens can be used handheld at arms’ length – i.e. live view style – and that’s how I’ve been using it so far; however, you’ll need to keep your shutter speeds up, because frankly the in-body stabilization isn’t that effective. I suppose if you were using this on the OM-D it’d be a different story as the built in EVF would let you get a bit more stability by bracing the camera against your eye.

_PM02093 copy
Dusk and the sign. Olympus E-PM1 Pen Mini, ZD 45/1.8

The 45/1.8 makes up part of my M4/3 ‘trinity’ – the 12/2 and 20/1.7 being the other two, though I might replace both with the new Voigtlander 17.5/0.95 (35mm equivalent, fast and versatile – though I prefer 28, and sadly there are very few fast 28mms). It forms a great lightweight travel kit which is still capable of delivering outstanding optical quality. It also works very well as a secondary camera in conjunction with something else; at the end of last year, I shot in Europe with a Leica M9-P, 28 and 50mm lenses as my primary body, with the Pen Mini and 45/1.8 in a coat pocket for those times I needed a little extra reach – made a great compliment to the rangefinder.

_PM01974 copy
Graffiti. Olympus E-PM1 Pen Mini, ZD 45/1.8

Even on the slightly higher density OM-D sensor, this lens is a gem; sharpness doesn’t seem to be compromised anywhere, but there is a very slight veiling flare that goes away about half a stop in. It has a lightness and transparency (lower macro contrast, but higher micro contrast perhaps?) that I don’t see with the 12/2 or 20/1.7, and it’s something that makes the way it renders very natural and appealing.

_5001020bw copy
A classical portrait, second version. OM-D, 45/1.8. The first version is here

Are there any negatives? Well, yes. At the price, you can’t expect fantastic build quality. Frankly, it feels about on par with the kit lens; Olympus chose to put all of the production money into optics rather than cosmetics, which is a decision I can agree with. However, the leaves the lens feeling just a tiny bit fragile; the plastics don’t feel that thick or robust, and that little blanking ring on the front (ostensibly to cover the hood mount threads) doesn’t really stay in place securely, and isn’t that well made, either.

Still, all that aside, this is a highly recommended lens for Micro Four Thirds users. It isn’t good enough that I’d go out and buy a Micro Four Thirds camera just for this lens alone, but then again the thought of having a fast portrait 90mm equivalent in a pocket is quite appealing, and the cost of a Pen Mini plus this lens is much cheaper than many full frame lens options on their own. Of course, you do get the DOF profile of a 45mm lens, not an 85 or 90mm lens, so don’t expect crazy thin DOF. There’s adequate separation, but true bokeh enthusiasts will probably have to wait for the upcoming ZD 75/1.8 – a lens which I’m pretty excited about, actually. MT

_PM01718 copy
Sunset in the city. Olympus E-PM1 Pen Mini, ZD 45/1.8

Get the Olympus ZD 45/1.8 here from B&H or Amazon.

____________

Visit our Teaching Store to up your photographic game – including Photoshop Workflow DVDs and customized Email School of Photography; or go mobile with the Photography Compendium for iPad. You can also get your gear from B&H and Amazon. Prices are the same as normal, however a small portion of your purchase value is referred back to me. Thanks!

Don’t forget to like us on Facebook and join the reader Flickr group!

appstorebadge

Images and content copyright Ming Thein | mingthein.com 2012 onwards. All rights reserved