POTD: Spot the famous photojournalism reference

_N5_DSC1804bw copy
Nomos Tangomat GMT-12 Prototype in Auckland. Bonus points for those of you who can spot the famous photojournalism reference here – hint: think Prague. Sony NEX-5, 18-55 kit lens.

On assignment this weekend, so I apologize in advance if it’s a little quiet here or on flickr. I will still be using the D800 for most things as it won’t involve much, if any, wide-angle work; there’s a D3x in case it does, though. MT

Update on Nikon D800 focusing issues

It seems that I’m going to have to redo all of my focus tracking and lens evaluation tests: my AF sensor module is misaligned. I’ve come to this conclusion after a) trying out a number of wide angle lenses, all of which exhibit a soft left side when the AF system or focus confirmation dot reports achieving focus; and b) sending it in to Nikon locally to diagnose. Curiously, the problem is only exhibited with wide angle lenses (telephotos are mostly fine), and live view confirms it’s an AF sensor issue not an imaging sensor issue.

The bad is that it’s serious enough to require a new camera because the calibration is a very high precision adjustment that takes time (and unclear if it can be done locally); the good news is that NPS Malaysia made the situation right: a couple of hours after reporting the problem, I met with a representative who informed me a new D800 will arrive next Wednesday, and I’ve been loaned a D3x until the replacement arrives – at which point it will just be swapped out. Kudos to NPS for handling the problem well though – that’s how professional service should work (though a new camera on the same day would be even better…)

Still, a bit of a shame, because I planned to use the D800 for its first commercial shoot this weekend – looks like I’ll only be using it for the stop-down telephoto shots. MT

Coda: It’s interesting just how sluggish the D3x feels when shooting in 14-bit raw mode – just 1.8fps, with what feels like a good 200ms or more of lag between hitting the button and the shutter firing. It’s very noticeable if you put the camera back into 12 bit mode, after which it feels responsive and snappy like it should. Even the menus feel a little laggy, like the camera’s processor is working very hard. The D800, by comparison, runs happily along at 5fps in 14-bit mode – 3x the frame rate with files that are 50% larger, for a total of 450% more data. You don’t feel any lag, and zoomed in images – even 14 bit raw – are very fast to navigate around. Faster than the D700, even. I don’t know how many other people have noticed this, but it’s pretty darn impressive, in my opinion.

____________

Visit our Teaching Store to up your photographic game – including Photoshop Workflow DVDs and customized Email School of Photography; or go mobile with the Photography Compendium for iPad. You can also get your gear from B&H and Amazon. Prices are the same as normal, however a small portion of your purchase value is referred back to me. Thanks!

Don’t forget to like us on Facebook and join the reader Flickr group!

appstorebadge

Images and content copyright Ming Thein | mingthein.com 2012 onwards. All rights reserved

Review: The Leica X1

_3100_DSC1318 copy

Why write about this camera now? The X1 may not be a new camera by any means, but curiously I think if anything it has become relevant again, now that large sensor compacts are all the rage (I can only hope for a digital full frame Ricoh GR1v or Olympus Mju II). I owned one of these for the second half of 2010 and into early 2011, before swapping it for the much-vaunted (and somewhat disappointing) Fuji X100 – to be the subject of another review.

What is interesting is that X1s are popping up used here and there at quite reasonable prices – though like most Leicas, they seem to resist extreme depreciation quite well. At the time, I couldn’t resist, and I was getting impatient waiting for the X100, so I traded in my Sony NEX-5 and bit the bullet.

_3100_DSC1400 copy

A little background: early attempts at mirrorless cameras seemed like a great idea to me – but also somewhat half-baked; here was a camera large enough to be inconvenient, but not large enough to do the job properly. And slow enough to make you want to tear your hair out. But yes, the image quality was definitely better than a small sensor compact. So I persevered. Early micro four thirds attempts weren’t just terrible, they were utterly dire. The Olympus E-P1 was so slow as to be unusable. And the control layout from the Panasonic G1 somehow just didn’t work well – despite being just fine on the LX3. Hmmm. The Sony NEX-5 was next; decently fast, getting smaller, but oh boy the interface was utterly horrible. And none of them had a good EVF, let alone a nice optical finder. Like every other equipment fanboy, the X100 seemed to be the perfect fix – EVF, OVF, manual controls, nice fast lens.

But the X1 got in the way.

_X1_L1000849 copy Hood reflections. Leica X1

First impressions: whoa, it’s light. There really isn’t that much inside the camera – although it’s metal, it gives the impression of being hollow rather than solidly packed like the Ms. It’s also nice and simple: the limited menu from the M8/9 made it over, keeping the important things and not adding anything superfluous. Shutter speed and aperture control dials are nicely obvious and pleasantly tactile, although they could perhaps be a bit stiffer to prevent accidental knocking. I’d ask for a lock button, but that isn’t part of the Leica gestalt. In fact, it looks and feels like nothing so much as a Barnack camera – especially if you put a compact finder on top. I like the Ricoh GV-2 28mm bright line – yes, it’s a 36mm equivalent lens, but if you use the insides of the 28mm bright line, it actually provides more accurate framing than a dedicated 35/36mm finder, which tends to be a bit too conservative for my liking. (I’m one of those people who composes their shots with the outside of their M’s frame lines.)

_X1_L1000782 copy
KLPAC. Leica X1

So, a digital Barnack – that’s a good thing, right? Well, yes and no. Let’s get the bad out of the way first: it’s slow; not in the control/ UI interface, but AF and MF were positively glacial. MF required too many turns of the little wheel to use accurately for zone focus; AF was just slow, period – even with the fastest ‘single point HI’ setting chosen. And it doesn’t focus closer than 30cm, though at times it seems even that’s a little generous. A firmware update improved things somewhat, but still doesn’t bring this camera into ‘this feels fast’ territory. I’m faster with an M9. And let’s not even talk about the Olympus Pen Mini. While I’m griping, I want to bring up two more issues: the battery life is abysmal – I mean I can exhaust a battery in an hour or two of shooting. Perhaps 300 frames and it’s flashing at me. Finally, in low light, the LCD doesn’t gain up enough; maybe it can’t without being grainy and unusable. It also doesn’t have enough pixels to manual focus easily. There are a few other niggles too – like peeling leatherette, which I was told is a tropical climate + glue compatibility issue and has been fixed on newer cameras; the flash sometimes not popping up…a bigger buffer would be nice, too.

_X1_L1001362 copy
Corporate sponsored roaring 40s party. Leica X1

With that done, let’s talk about the good things.

1. The sensor’s image quality is really excellent. For a 12MP camera using a last generation sensor. I understand it’s a derivative of the Sony sensor used in the Nikon D90, which was excellent but very much a first generation product for large sensor live view and video, and certainly without a fast enough refresh rate to be used for contrast detect autofocus – which is what the X1 does. ISO 3200 is definitely useable, and produces crisp results – with compromised dynamic range, of course; but the grain is nice and random, and mostly in the luminance channels. The tonal response of the sensor makes it excel at black and white work, even at higher ISOs. I believe the X1 also has a very weak (or possibly no) AA filter – and it shows.

_X1_L1001345bw copy
Shadow of the photographer. Leica X1

2. The lens’ image quality is also excellent. I was told that the optics are identical to the discontinued but highly regarded 24/2.8 Elmarit-M ASPH – except in a collapsible, autofocus version with an extended helicoid to allow focusing to 30cm instead of 70cm. It’s sharp corner to corner, and at every aperture. The lens clearly out resolves the sensor – aperture control is for depth of field control only, not improving optical performance. Microcontrast structure, flare resistance and chromatic aberration performance are all exemplary. Moreso when you remember that the lens is collapsible, with all of the various small potential alignment errors introduced by moving tubes and the like.

_X1_L1001184 copy
Redhead. Leica X1

3. The camera seemingly never fails to focus. Wait a minute, didn’t I say before that AF was terrible? I said slow: not inaccurate. It might take several seconds, but the camera will find focus. And that will be on the money. It doesn’t seem to get confused by point light sources, unlike most other compact system cameras I’ve used.

_X1_L1001273 copy
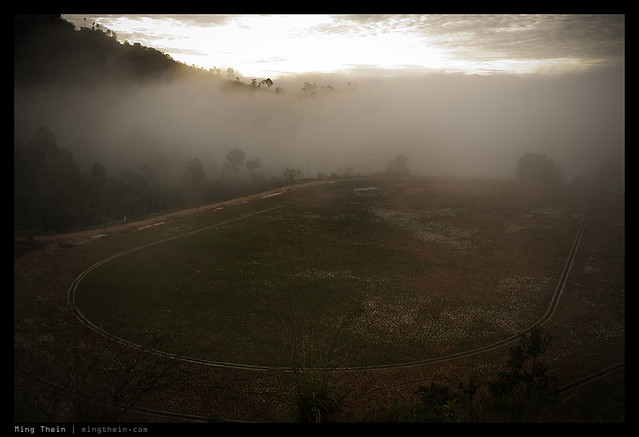
The mysterious oval in the mountains. Very, very low contrast – but no focusing problems. Leica X1

4. Flash sync speed is…1/2000s! Really? Yes, really. Say thank you to the leaf shutter. That means you can do a lot of creative work with it because you can sync at outdoor daylight speeds, as well as freeze motion very well. Oh, and there’s that handy built in flash: it’s quite useless for social work and as a primary, but as an optical slave trigger when manually set to minimum power, it’s great. One other benefit of the leaf shutter is that it’s an incredibly low-vibration camera – the release is just a smooth, quiet ‘snick’. I wish the Ms had a shutter like this – and the nice-feeling shutter button to go with it.

_X1_L1000998 copy
Hair flick. Leica X1, 1/2000s, Nikon SB900s in umbrellas.

Does it deliver the ‘Leica look’? Yes and no. These days, with enough processing, you can make a image shot from any camera look like it was shot using another one; however, there are some subtle differences like tonal accuracy and dynamic range that you can’t easily fake. The X1 feels to me like a half-Leica: the sensor is a CMOS, which by definition will have a very different – much more linear in the shadows and highlights – tonal response to a CCD, which is what is used in the M8/M9/S2 (and responds much more similarly to film, i.e. non-linearly). However, the lens definitely imparts some Leica DNA; you can see it in the way the images ‘pop’, but the color and palette might not be quite what you expect – that’s the sensor.

_X1_L1000466bw copy
Looking down. Leica X1

The bottom line is that this camera delivers what it’s supposed to: image quality. Ease of use is there, but speed could be seriously improved. And I’d like to see either a short zoom version (a 28-35-50 Tri-Elmar style lens arrangement could be interesting too) or a telephoto – say an 85/2 – which would be great for studio work.

_X1_L1000845 copy
More building color. Leica X1. I actually really liked this camera for architectural work; more than my Ms because of the precise framing afforded by the LCD. Wider would be nice, though.

I’m still trying to figure out who this camera is aimed at, though: it’s not automatic enough for a novice-who-wants-a-Leica to use and appreciate without feeling frustrated; you do need to know something about photography to get the most out of it by working around its limitations. (Hint: pre focusing is your friend). I think it’d make a good backup camera for an M user – if they sorted out manual focus; the wheel should be a bit more responsive, and it needs virtual DOF scales, I think – or an upgrade camera for a D-Lux 5 owner; but they might still want to keep the D-Lux around for the added focal length flexibility. It might also make the perfect weekend toy for the jaded SLR owner who wants to try something different.

_X1_L1001167 copy
Ferrari 430. Leica X1

One final word: as with all of the large sensor compacts I’ve used so far, don’t expect to shoot it the same way you shoot your SLR – it’s not designed for that. Instead, think of it more as an introduction to M-style photography – slower, more contemplative and more anticipative – and I believe the results will come. MT

_X1_L1001174bw copy
Lamborghini Gallardo. Leica X1

POTD: Flambé

_7060984 copy
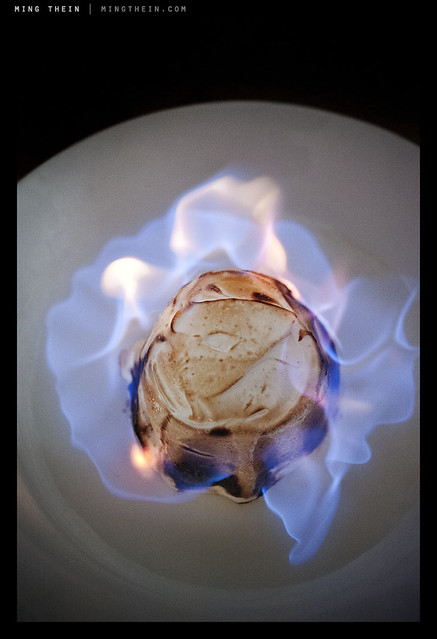
Baked Alaska. Nikon D700, AFS 60/2.8 G Micro

Flames are a funny thing – they don’t photograph well. Simply, yellow flame is bright because it contains a lot of incandescent little particles; usually, it’s too bright to photograph well relative to surroundings – you land up losing detail in the flame if you have context, or losing context if you have detail in the flame. Blue flame is almost impossible to photograph because most of its energy is heat – there isn’t much in the way of light-emitting incandescent particles. Flames are also very random in an interesting fractal kind of way; photographically that means you’ve got to do many, many takes – four Alaskas, in the case of this shot. And dozens of frames until we got just the right flame.

The problem for food photography – specifically baked Alaskas – is that the lit brandy you pour over the dessert burns blue, which isn’t so great to shoot. Sure, you could composite flames in after, but it would both look unnatural and just be dishonest. So what do we do? Simple: add a little something to the alcohol that makes it burn brighter, and a little yellower.

Interestingly, this is where the high ISO capabilities of the D700 become useful: ISO 6400 with a good amount of remaining dynamic range and very low noise. I don’t think this shot would have worked as well with the D800. MT

On assignment: Bistro food

_7060396 copy
This set shot with a Nikon D700, AFS 60/2.8 G Micro and several SB900 flashes.

I’m seeing an increasing shift in my commercial work these days towards food – as a gourmet (or perhaps as a greedy person) I’m certainly not complaining. Interestingly, food photography actually shares a lot of techniques in common with watch photography – with the huge benefit of not having any reflective surfaces to worry about. But from a lighting point of view, it’s the same.

Last week, I shot what was probably my final job with the Nikon D700 – some highlights of which are presented here. The D800 studio update will probably be towards the end of next week due to job scheduling.

I wanted to use this opportunity to say a few things about both food photography, and draw some conclusions on the D700’s use as a studio camera.

_7060499 copy

Food may not have any reflective surfaces, but it certainly presents some challenges of its own: firstly, temperature. Things don’t look optimally appetizing for that long (think ice cream) which means you’ve got to work quickly, and studio strobes are pretty much out of the question because the heat would make anything fresh wilt in less time than your fastest flash sync speed. The solution I’ve found to that is either use low-temperature LED panels or use flashes. For the most part, I use flashes because they’re more flexible in terms of light output deliverable, and have enough power to accommodate larger setups. LED panels don’t have as much throw or power, and go through batteries like crazy. And there are also color temperature issues – so far, very few panels can deliver a relatively even, neutral spectrum – and those that can are both hideously expensive and not all that bright.

_7060545 copy

The next challenge is actually detail: most people don’t want to look too closely at what it is they’re eating. I mean, a steak looks great as a whole, but I don’t think you want to start looking at meat fibers and thinking about exactly what motor function that muscle did when it was still part of the cow; there’s a huge compositional tradeoff between detail, suggestion, and emotion.

_7060248 copy

Bottom line: food images are about emotion: they must make you feel like you want to eat them. The ultimate litmus test for me is: would I want to order the dish if I saw this image in a menu? Lighting is your one control here: both softness and position of the light sources, and less intuitively, color temperature. (I’ll go into this more in a future article).

_7061864 copy

I’m going to conclude with a few words about the D700 as a studio camera. It may not deliver the most resolution, but it does have a few advantages over say a D3x or medium format – providing you don’t have clients that must absolutely have that pixel count. Firstly, there’ the built in flash with commander function – that was the #1 reason why I went for a D700 instead of a D3s, and I don’t regret it one bit. Speed isn’t an issue, but putting an ENEL4a in the MB-D10 grip gives you both speed and an incredible amount of shooting time: I can easily shoot a full day assignment on one battery. This assignment (2,000 frames in total) was completed with 60% power left over on the ENEL4a, and the ENEL3e in the camera still full. Finally, base ISO of 200 gives your speed lights a boost – and even if you don’t need the extra power, it reduces cycle time as well as extending your battery life.

_7061009 copy

Curiously, the internal flash can’t handle more than about a dozen shots or so in reasonably rapid succession before it cuts out to take a breather – unclear whether this is due to the capacitor’s limitations, or an overheat protection system of some sort to prevent your prism catching fire (which would probably be a fatal disaster considering the camera is both touching your face and made of highly inflammable magnesium.)

I’m looking forward to the quality the D800 brings, though I can’t say I’m so enthused about the amount of retouching it will require – especially for watches and other similar product. But for food, bring it on! MT

I will be attending the World Gourmet Summit in Singapore at the end of April to conduct some sessions for Leica; details to come soon. MT

_7060779 copy

POTD: Magritte Strikes Again

_8001440 copy
Magritte Strikes Again in downtown Kuala Lumpur. Nikon D800, 28-300VR

Amidst all of the chaos and panic claiming serious ‘issues’ with the new Nikon D800 (see my previous post) – I think it is important for the photographer to serenely rise above the noise (no pun intended) and remember that ultimately, the camera is a tool, nothing more, nothing less. It enables you or gets in your way. All I can say is that from this image alone, the D800 is capable of delivering some of the most accurate color I’ve ever seen. Normally I’d struggle to get the blue right and maintain the rest of the gamut – not so here. The D800 did it effortlessly, with a lens that isn’t known for the accuracy of its color transmission. I really need to get more Zeiss glass in front of this sensor. MT

Popular Nikon D800 woes, problems, issues and solutions

There’s been a lot of brouhaha on the forums recently about the Nikon D800’s various ‘critical flaws’:

1. The camera stops down in live view, so you can’t see anything!

2. You can’t get a sharp magnified live view image, so it’s no good for critical focus.

3. LCD has a color cast.

Let’s deal with these one by one.

1. I don’t consider full time DOF preview to be a problem, actually. Besides, to achieve critical focus accuracy, you should be focusing with the lens at maximum aperture anyway. One of the advantages of live view is that you actually get to see what minimal DOF looks like, unlike with the viewfinder where the focusing screen limits DOF to somewhere around f4.

2. The live view preview image is heavily, HEAVILY dependent on your picture settings because it provides a PREVIEW. So, set accordingly. Note that picture controls don’t affect RAW images unless you’re converting in NX; the settings are stored as a tag in the metadata. I set my picture controls to maximum sharpening to gauge whether an image is in focus or not, the rest don’t matter. (I have a separate set for video.)

Specifically, see below:

Above with standard sharpening set; below with +9 set. Note the difference, specifically with the text. This is at or slightly beyond 100% view. Problem solved.

3. The color is definitely different to the D700/D3/D3s – if I had to say, I think it renders a little warmer. In the image below, both cameras were set to the same WB.

Regardless, you should not be judging color on the camera’s LCD anyway – all images will have to be processed via a computer anyway, and frankly if you’re spending this much on a camera, why would you want to be cheap on your image processing or computer monitor. It’s like buying a Ferrari but only putting 89 octane fuel in it and wondering why the car feels sluggish.

One final word: these are very minor issues. They aren’t deal breakers, and there are workarounds for all of them. Curiously, users of medium format digital have to endure much more – but we never hear them complain about their LCDs, or lack of live view – despite paying ten times as much. Go out and shoot and stop whining. Ultimately, your skill limits the quality of your image far more than the native color temperature of your LCD ever will. MT

____________

Visit our Teaching Store to up your photographic game – including Photoshop Workflow DVDs and customized Email School of Photography; or go mobile with the Photography Compendium for iPad. You can also get your gear from B&H and Amazon. Prices are the same as normal, however a small portion of your purchase value is referred back to me. Thanks!

Don’t forget to like us on Facebook and join the reader Flickr group!

appstorebadge

Images and content copyright Ming Thein | mingthein.com 2012 onwards. All rights reserved

Sushi, and the philosophy of photography

_PM07501 copy
Seared Wagyu beef with momeji oroshii.

Sushi is a universe in itself – there are so few components that if you get any one of them slightly wrong, the taste will be horrible. But if you get every one of them right, the experience can be magical. Specifically, your fish must be fresh and in season; precisely the right amount of soy sauce should be brushed on to the top, with a little dab of wasabi hiding between the rice and the fish. The fish itself is cut slightly concave so it drapes perfectly over the rice, itself measured to precisely the right quantity to make a mouthful and shaped by hand, not too tightly packed and not too loose, either.

_PM07411 copy
Katsuo (bonito) with ginger.

And then there’s the seasoning that accompanies the rice – a mix of mirin and rice vinegar – which must offer the right degree of tartness and sweetness to provide a counterpoint to the fish and soy sauce, but not so much that it overpowers or tastes sour. And this is before we even talk about more complicated creations that involve multiple types of fish, or searing, or additional condiments and seasoning.

_PM07492 copy
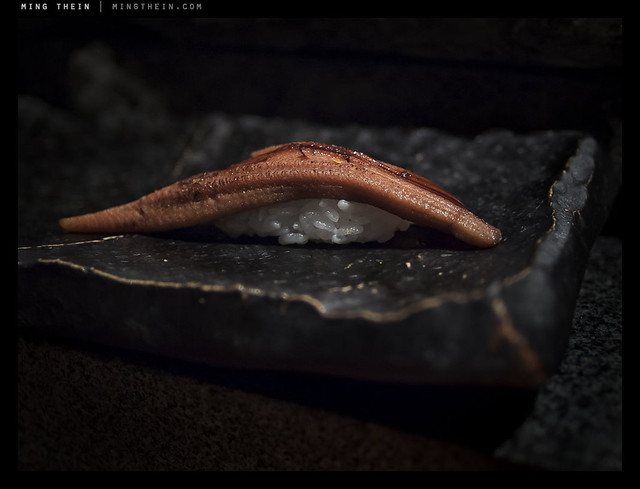
Broiled anago (freshwater conger eel).

There’s a parallel between sushi and photography (and sushi and many other things, actually) – aside from the obvious that it’s art, sushi making requires both technical skill and creativity. There are constraints, but you can work around them. It can be learned, it can be honed by experience, but there’s definitely an element of talent and intuition involved which all great sushi chefs possess. Photographs and sushi both come in small, bite-sized increments – they require little time to create if all the elements come together, and can be enjoyed in moments or contemplated for hours – I’ve eaten sushi dinners with 20+ different varieties served over many hours; I suppose that would be like going through the Magnum annual. Neither photography nor sushi is cheap, either; and mastery can take years.

_PM07485 copy
Torigai clam.

There’s even an anticipative element to it – the feeling of curiosity before you go to eat (wondering what is in season and came from Tsukiji today) is much like the feeling I get before a shoot; you’re all excited and ready to go. It’s also entirely possible that it’s just me.

_PM07471 copy
Seared katsuo

The best sushi I’ve ever eaten – so far – comes from a local chef in Kuala Lumpur at a restaurant called Hanare; Kenny Yew is an absolute genius when it comes to creating new things – for instance, seared wagyu with momeji oroshii chili – as a sushi. I need to go at least once a month or I get withdrawal symptoms and the DTs, because I just can’t eat sushi anywhere else now. The few lucky friends I’ve taken there feel the same way. It really is art – some of the pieces make me tingly and others nearly bring me to tears. I’ve eaten things there I never would have though edible, let alone ordered – and loved them. That’s much like how certain exhibitions, art or equipment inspire me to try photographic experiments that work out a lot better than expected.

_PM07446 copy
Seared hama-tai (sea bream)

And best of all, you can mix the two. The lighting conditions at that restaurant are pretty horrible, but they save me a seat at the counter which happens to have a halogen spot over it; I position my sushi carefully to be well-lit. This set might appear the same, but that’s because I wanted a consistent point of view; (and comparison)
they were also shot during the same meal. I discovered one other thing that night: the best color I’ve yet managed to achieve is delivered by a combination of Zeiss glass and Olympus cameras.

_PM07395 copy
Oo-toro. (Fatty yellowfin tuna belly)

I had the ZF.2 2/28 Distagon on the Pen Mini via an adaptor, and was utterly floored by the color when I opened up the raw files on my computer – the sushi literally looked like it had in real life. Every bit of the color, texture, iridescence and freshness was captured. I’m guessing it’s a combination of the fortuitous lighting, the great color and micro contrast of Zeiss lenses in general, and the pleasing color palette of Olympus cameras. Whatever it is, I think I’ve found my perfect sushi-camera.

_PM07426 copy
Red snapper.

My parting advice is that if you do get a chance to eat sushi made by a master, do as you would do at an exhibition of photographs by a great photographer: put away your preconceptions, go in with an open mind, and enjoy. You’ll probably be surprised. MT

_PM07424 copy
Kamburi (giant yellowtail).

POTD: One of those strange inexplicable things that happens from time to time

_M9P1_L1009159 copy
A windfall for a small gorilla. Leica M9-P, Zeiss ZM 2.8/28 Biogon

I just remembered I hadn’t posted an image today. This image has been sitting in the upload queue for some time – it reminds me that sometimes, you don’t need technical perfection for something to work; a sense of fun and whimsy can do wonders, too. MT

How-to: Improving your autofocus performance with the AF Fine Tune setting

Over the last few days and in the light of focus criticality with the Nikon D800, I’ve had a huge number of questions specifically regarding focus precision, and whether there’s anything we can do about lenses that are obviously off. Specifically, how does the AF fine tune setting work, and how does one calibrate their lenses?

1. Make sure your camera has AF fine tune. Any of the newer Nikons or Canons offer this feature, and perhaps other brands, too.

2. Find a suitably well-lit target that you and the camera can focus, and preferably one that’s flat but slightly off-plane to the camera, so it offers a variety of different focus distances. An ideal test chart is a world map on a wall, but with the camera to a slight angle to the wall (i.e. sensor plane is not perfectly parallel.)

3. Use a sturdy tripod, and set single AF. This is to rule out camera shake or false-AF movements from the camera attempting tracking.

4. Perform this test with the aperture set wide open. Stopped down, depth of field will hide focus errors.

5. If you have live view (I believe most cameras with AF fine tune do), then use magnified live view to achieve critical focus and take one shot. This will be your benchmark image – the sharpest that the lens can possibly deliver, when focused perfectly.

6. Switch back to single AF, and viewfinder mode.

7. Defocus the lens between attempts: this is important, otherwise the camera may be trying to move the focus gearing in too small an increment to overcome backlash.

8. Let the camera focus normally, and take a shot.

9. Compare the image from step 5 with the image from step 8 – if they’re the same at 100% size, then you’re fine – move on to the next lens.

10. If the images from 5 and 8 aren’t the same, then adjust the AF fine tune setting – say by 5 notches (if you have +/- 20 notches like the Nikons) and repeat 7, 8, and 9. If it’s better, keep going – do another 5-notch adjustment in the direction that created your improvement. If worse, then go back in the opposite direction. Reduce the adjustment amount changes and keep going. Basically, you want to iterate the process until you match your viewfinder-AF image with your live view focused image.

11. Save the adjustment value – if you can’t save camera settings to a card, you might want to write it down somewhere just in case.

12. Repeat for all of your other lenses.

A special note for zooms: most AF fine tune functions don’t let you input separate values for different focal lengths, so you’ll just have to try both ends of the zoom range and see which is worse; then run steps 1-12. Try to find a compromise setting that works acceptably well for all focal lengths in the range. Or, if you use one particular end of the zoom more than the other, you might want to weight your adjustment to this end of the range. MT