Film diaries: the first roll

_6001446 copy

Some months ago, I acquired a vintage Nikon F2 Titan in the hopes of both fulfilling a longtime photographic dream, as well as perhaps shooting a little film again in the name of stimulating creativity. Many of you have been anxious to see the results; I bet none more so than myself. The trouble is, I feel that I’ve set a standard here that I must uphold; if the images from this roll don’t meet that standard, then I think there’s going to be a lot of hand-wringing, rude gestures and cries of ‘pah, amateur’. In this post follows the highlights of that first roll.

2012-12-13-F2T-D100

Before I show any images, I want to give some background: I’ve shot film creatively before. I’ve even processed it before, as part of my dissertation on improving measurement precision using short-wavelength laser holography (don’t ask, because I don’t really remember). But I’ve never done both, and my processing days predate my creative photography days by a considerable period of time. Finally, the last time I shot film was in mid 2009, with a Leica M6TTL. Before that was 2005, with another Nikon – an F2A. Note: EXIF data will say ‘D800E and 50mm’, because that’s what I used to digitize the negatives.

_8025538bw copy

This roll is both the first roll of true B&W I’ve shot*, processed and scanned entirely singlehandedly. It shows, too: it’s grainy considering it’s Ilford Delta 100 exposed at ISO 100; in places it’s uneven, and there’s a streaking problem from where I got impatient and decided to try to wipe the film dry with a microfiber cloth. In hindsight, one of those Dyson Airblade hand dryers would be awesome for the task.

*An embarrassing, dirty confession: all of my previous film B&W work was C41 process (BW400CN, XP2-400) for convenience – finding somebody to develop black and white film in Kuala Lumpur is not a trivial task because serious shooters do their own, and consumers don’t do it at all.

_8025536bw copy

The ‘scanning’ was accomplished with an interesting hack-rig: my product photography lightbox, lit by a speedlight within, film passed through a cardboard mask (to prevent scratches) and the camera resting above, spaced perfectly with the long hood from a Zeiss ZF.2 2/100 Makro-Planar but fitted to the 2/50 Makro-Planar which coincidentally has the same bayonet. Add a 20mm extension tube, and the spacing is not only perfect, but I now have a 4000+DPI scanner.

_8025550bw copy

I’ve spent some time in Photoshop to automate the conversion process as much as possible, to try and keep the character of the film intact and consistent, and minimize the amount of individual work required on each image. I can’t say I’m 100% happy with the results yet, but we’re getting there. If I can run an entire roll of RAW files as an automated action – cropping excepted – then the total scan and process time is actually about the same as a comparable number of digital files.

_8025545bw copy

Anyway, more on that in another article. For now, I just want to leave you with one thought: resolution both matters, and doesn’t – we’re seriously spoiled by the degree of image quality obtainable from the current state-of-the-art FF digitals. Enjoy! MT

These images were shot with a 1979 Nikon F2 Titan on Ilford Delta 100, with a mixture of lenses – Voigtlander 28/2.8, Nikon 58/1.2 Noct-Nikkor, Nikon 45/2.8 AI-P, Zeiss ZF.2 2.8/21 Distagon, Zeiss ZF.2 2/50 Makro-Planar, Zeiss ZF.2 2/100 Makro-Planar. Can you tell which is which, other than through perspective? I can’t.

____________

Visit our Teaching Store to up your photographic game – including Photoshop Workflow DVDs and customized Email School of Photography; or go mobile with the Photography Compendium for iPad. You can also get your gear from B&H and Amazon. Prices are the same as normal, however a small portion of your purchase value is referred back to me. Thanks!

Don’t forget to like us on Facebook and join the reader Flickr group!

appstorebadge

Images and content copyright Ming Thein | mingthein.com 2012 onwards. All rights reserved

_8025531bw copy

_8025525bw copy

_8025515bw copy

_8025508bw copy

_8025502bw copy

_8025495bw copy

_8025499bw copy

Deconstructed photography, part two: compact camera masterclass

IMG_1780b copy
Imprint. Iphone 4

In part one, we deconstructed the essence of photography, and identified the critical qualities required for a good general-purpose camera. What about the candidates?

On this basis, we have a few potential candidates, in alphabetical order with specs and particular standout qualities:
– Canon G15 – 12MP, 1/1.7″, 28-140/1.8-2.8 – optical finder, zoom range, external controls
– Canon S110 – 12MP, 1/1.7″, 24-120/2.0-5.9 (!) – compactness
– Fuji FinePix X10 – 12MP, 2/3″, 28-112/2.0-2.8 – mechanical zoom, optical finder
– Fuji FinePix XF1 – 12MP, 2/3″, 25-100/1.8-4.9 – mechanical zoom, compactness, JPEG quality
– Leica D-Lux 6 – 10MP variable-aspect, 1/1.7″, 24-90/1.4(!)-2.3 – variable aspect ratios, lens speed, macro, extended warranty and Lightroom (over the LX7)
– Nikon P7700 – 12MP, 1/1.7″, 28-200/2.0-4.0 – telephoto reach, external controls
– Olympus XZ2 – 12MP, 1/1.7″, 28-112/1.8-2.5 – a safe middle of the road choice
– Panasonic LX7 – 10MP variable-aspect, 1/1.7″, 24-90/1.4(!)-2.3 – variable aspect ratios, lens speed, macro
– Sony RX100 – 20MP (!), 1″, 28-100/1.8-4.9 – low light use/ resolution/ dynamic range/ overall image quality, speed, video
– The Ricoh GR-Digital IV is a possible too, if you don’t mind a fixed 28mm lens – 10MP, 1/1.7″, 28/1.9 – steath, compactness, street/ hyperfocal photography, configurability

_RX100_DSC2925 copy
Church reflection, Melaka. RX100

Of these, I think the G15, X10, XZ2 and P7700 are probably on the large side of what you might want to carry, that said, they are loaded with external controls, and the most tactile of the group. The smaller cameras are more button-and-menu-driven, though they all have control dials whose functions can be assigned to your preferences. The X10 and XF1 are the only two cameras here with physical zoom rings; a neat touch that improves responsiveness (especially since the rings are linked to power-on). Almost all of them are based around the same sensor, and offer fast lenses at the wide end; the LX7 and DL6 are really fast (f1.4); others are consistently fast throughout. The more compact cameras (S110, XF1, RX100) trade off lens speed at the long end.

If you’re expecting me to pick a winner, you’re going to be disappointed. All are similar enough and offer sufficient control, image quality and responsiveness that any one will do for the majority of situations. Yet, they are also different enough in control philosophy and particular feature speciality that if you particularly need any one of these features, your choice may be skewed. If not, pick the one that feels best to you, the one your brand loyalty dictates, the one whose design you prefer – whatever. It doesn’t matter. You just need to like the camera enough to use it, and it should be intuitive enough that you will actually do so. Lower end cameras will work just fine, too – I’ve had great results with the ultracompact Canon SD780 IS and superzoom Panasonic TZ3.

_RX100_DSC2931 copy
May arches. RX100

Let’s get something straight upfront though: there are things you can do, and things you can’t. It’s important to know what falls into each category so you a) don’t waste your time attempting to shoot in a particular way then being disappointed by the results, and b) can play to the strengths of your equipment.

Strengths:
– Stealth
– Compressed perspectives
– Getting everything in focus/ hyperfocal photography
– Low key photography (in low light)
– Moderate to high contrast images
– Long exposures, with a relatively lightweight tripod, or IS system: the leaf shutters used in compacts have almost zero vibration, and hand shake can be eliminated almost entirely when paired with the self timer.
– Odd points of view, when used with a swivel screen

Don’t waste your time:
– Getting any sort of shallow depth of field. Only close up, with a distant background, maximum aperture and whatever lets you focus the closest. Otherwise, forget it.
– Tracking moving objects
– Very low light
– Manual focus – why bother?
– Working with thick gloves in cold environments

_RX100_DSC2958 copy
Two old ladies framed, Melaka. RX100

For the most part, there are few limitations. Most of the troubling ones can be worked around; the depth of field control one I consider to be more a compositional thing the photographer needs to learn around rather than a limitation of the camera. More problematic is the inability to track moving objects; AF-C is my preferred setting for street photography and reportage scenarios because it counters the effect of subject motion. That said, if you’re using a compact, you could either prefocus at the desired spot and release as your subject passes it, you can pan, or you can rely on the extended depth of field for a given field of view to cover you. Any one of these three approaches will work just fine. In very low light situations, a mini-pod can save you; alternatively, there’s self-timer and IS. But by far the best method is simply to shoot a low key image, or embrace the grain.

_RX100_DSC2245b copy
Tranquility. RX100

There are only a few key settings for general photography, in my mind; all of the cameras on the list above will be able to cope.

Program mode. 99.9% of the time, you will be at a focal length/ aperture/ distance combination that means everything in your scene will be in focus anyway; aperture control is meaningless. I’d rather have the camera able to shift exposure automatically to prevent overexposure/ underexposure rather than miss a shot.

Auto ISO. If you set the right limits for maximum ISO (probably around 800-1600 for the smaller-sensored cameras, and 3200 for the RX100) and minimum shutter speed (not always an option), combined with P mode, you’ll avoid missing shots because of insufficient shutter speed or exposure – but at the same time, not have to use an ISO higher than strictly necessary to maintain image quality. Yes, it appears that we’re basically transferring control of exposure over to the camera – but unless you really need to freeze motion or add it (panning, soft water etc.) then I cannot actually think of a situation in which you need to set these parameters manually.

_RX100_DSC2317b copy
A night out. RX100

Spot or center-weighted meter. The main reason I’m not an advocate for matrix metering on compacts is that it both tends to be a bit unpredictable, as well simultaneously critical due to the limited dynamic range of small sensors. Nothing screams unnatural in an image more than a blown highlight with a harsh edge transition; taking control of your meter by understanding how it responds to certain situations will help immensely to avoid this. If you use the spot meter, then add between 1/2 and 1 stop to bring the highlights up to the point just before they clip; if you’re using centerweight, then make sure you have a good mix of tonal ranges within the central spot. In either case, the priority is to ensure that the subject is exposed correctly; it’s also almost always the place where you want to focus, so having a spot meter linked to the focus point and exposure lock with a half press of the shutter is ideal – fortunately, this is also almost always the way compact cameras are set up to behave by default.

Exposure compensation easily reached. Regardless of whether you’re using spot or center-weighted meter, you’re inevitably going to need to use exposure compensation at some point – all meters are thrown out by very bright or very dark objects. Better that you either have a dedicated command dial for this, or better yet, a physical dial with the increments permanently marked.

_RX100_DSC2614b copy
Tokyo nights. RX100

Single point AF. As much as I’d love to turn over focus selection to the camera, I find that far too often it doesn’t focus on what I want it to, or it picks faces when I don’t want it to, or it finds faces in random geometric arrangements. Whilst this technology has come a long way, it’s still not perfect and can’t determine distance accurately – so the subject picked is almost always the most contrasty one, not the nearest. Just use the center AF point for focusing and metering, then recompose once both are locked.

Prefocus. A common myth is that compacts have huge shutter lag: they don’t. If anything, they have less shutter lag than most DSLRs because there’s no mirror to get out of the way before the exposure. The confusion comes when people include focus acquisition time in the mix; this is not right because you can seldom compare situations in a consistent manner. Prefocus shutter release lag for say the Nikon D4 – arguably one of the fastest cameras out there – is 42ms. By comparison, the RX100’s prefocus lag is just 13ms – so short that it takes your finger longer to physically move to depress the button by that additional fraction. Prefocusing thus obviously reduces overall response time, meaning fewer missed shots. You have to shoot a bit differently with a compact and a moving subject: with a DSLR, I’ll use AF-C and track my subject until it hits the point I want relative to the rest of the composition, then release. With a compact, I’ll frame and prefocus first, wait statically with the final framing intact, then shoot when the subject hits the point I want.

_RX100_DSC2452b copy
Duplicity. RX100

Stabilizer on. Small cameras held at arms’ length (and not braced against one’s face) are not the most stable of shooting platforms; without a stabilizer, you’ll probably need 1/2x focal length – or higher with higher resolution cameras – to maintain a pixel-sharp image. You can probably claw back around 3 stops with the best of the stabilization systems, of which Panasonic is currently king. Make sure it’s set to the mode which is always active so you can frame more precisely, too – some cameras only activate the stabilizer when shooting to save power.

RAW (with exceptions). Other than the Fujis – whose JPEG files, especially with DR400 set – are amazing – there are gains to be made by shooting RAW and postprocessing for all of the above cameras. The gap is smaller for the Sony RX100, but still noticeable. Note that some cameras like the LX7 add in-camera processing to remove CA and distortion; whilst you might get more detail and dynamic range in RAW, you’re going to be trading off automated lens corrections.

_RX100_DSC2014bw copy
Crossing. RX100

Burst mode. I don’t spray away at 10fps on my RX100 all the time, but I do have it set to CL and 4fps in case I need to shoot a sequence of something interesting; it’s the same way I have my DSLRs and OM-D set up. In lower light, keeping your finger down can partially alleviate any camera shake caused by the depressing motion.

Flash off. Unless you’re triggering remote speedlights, are shooting social images in a dark place, or perhaps trying something with rear-sync, then avoid the small built-in unit. It’s just going to look horrible, not to mention lack power to fill in daylight beyond a meter or so.

Highlight warning in playback, with zoom-to-focus-point. I find this particular combination of review settings useful because it lets me quickly assess if I nailed the shot or not: is it critically sharp (magnification amount for this will differ from camera to camera)? Are there any overexposed areas? Critical underexposure? The latter is especially important when you have both only the LCD to use in daylight to evaluate images, as well as limited dynamic range.

_RX100_DSC2054b copy
In front but not driving. RX100

Have a spare battery handy. Continuous live view drains batteries very quickly. Even the best of cameras will only manage perhaps 3 hours of continuous running time with the LCD on, which is probably about 200-250 images or thereabouts. If you are careful and turn the camera off between exposures and minimize your chimping, you might eke this out to about 5-600 shots; for me, this is bare minimum for a full day of shooting. A spare battery is therefore a must have, and allows you to keep going even when the main one is being charged.

I want to talk a bit about RAW, processing and sufficiency. Although I’ve been repeatedly revisiting the whole idea of postprocessing recently – first with film, then with medium format, and as a question in and of itself – I know I haven’t taken a position either way yet, but I don’t think not processing is an option for most compacts, with the exception of the Fuji X10 and XF1. This is because none of them have the native tonal qualities that are desirable in a photograph – namely smooth highlight and shadow transitions with reasonably punchy midtones – straight out of the camera. The files certainly have the potential to be that way, but they do require work post-capture; perhaps a bit more than a good file from a larger sensor camera. However, I wouldn’t be too worried about image quality: a good 12MP file that’s critically sharp at the pixel level will print just fine to A3 and perhaps one size beyond; needless to say it’s more than enough for web viewing. It’s often important to take a quick reality check in the pursuit of megapixels: when was the last time you printed larger than A3?

_RX100_DSC0645b copy
Imagined patterns.

In the end though, it all comes back down to the pictures, and the ideas encapsulated and communicated therein. The camera is merely a box, a tool; why should it be over-promoted to seemingly also be the endgame? My personal journey for creative evolution has taken me in a different direction: an increased focus on the purity of the idea, and continued liberation from equipment requirements. I want something that can capture what I see in a variety of perspectives; something that is unobtrusive, stealthy and doesn’t attract attention; something that’s flexible enough for most situations I might randomly encounter, but doesn’t require a great commitment in bulk or weight, preferably I shouldn’t even know it’s there. I don’t mind if it imposes some limitations on the way I shoot or the way I meter; these might turn out to be good things which provide small creative nudges in the right direction. As good as Micro Four Thirds is, by the time you load up on a lens or two, you still know you’re carrying a camera – and I would still take the OM-D for serious personal work – but for experimentation, and the kind of ligthbulb moments of experimentation that happen when you’re not planning them, it seems that for now a serious compact or two is the way to go. And the best thing of all is that if (and probably when) I get bored of it, it’s not going to be too painful to swap it for a new one and start the process all over again. MT

The various cameras mentioned in this article are available here at their respective links from Amazon: Canon G15, Canon S110, Fuji FinePix X10, Fuji FinePix XF1, Leica D-Lux 6, Nikon P7700, Olympus XZ2, Panasonic LX7, Sony RX100, Ricoh GR-Digital IV.

____________

Visit our Teaching Store to up your photographic game – including Photoshop Workflow DVDs and customized Email School of Photography; or go mobile with the Photography Compendium for iPad. You can also get your gear from B&H and Amazon. Prices are the same as normal, however a small portion of your purchase value is referred back to me. Thanks!

Don’t forget to like us on Facebook and join the reader Flickr group!

appstorebadge

Images and content copyright Ming Thein | mingthein.com 2012 onwards. All rights reserved
Deconstructed photography, part one: identifying the essentials

_M9P1_L1015932 copy
None of the images in this article have any clues as to the camera used, but I feel that they’re strong images nevertheless; if you’re curious you can click through to the image’s flickr hosting page and scroll down to the bottom right; EXIF data is there. Try to ask yourself first though: are there any giveaways that mean it could only have been shot with one particular format or piece of equipment?

This is the first article in a two-part series about photography today, with the ultimate objective – as always – of making a great image, but this time taking full advantage of all the technology at our disposal. After spending some time with medium format in a quest to get another one of those creative spurts brought on by a major change in equipment, I’ve pretty much made a complete U turn and am contemplating a Nikon P7700 instead. Allow me to explain; excuse the somewhat roundabout logic, but I think it will make sense once we reach the end.

We need to backtrack a bit to take into account some fundamental viewer psychology. In the increasingly huge sea of images that are being produced today, what stands out are those that look different from the rest. And for the most part, that difference is obtained by turning something up to 11, rather than nailing the fundamentals of what makes an outstanding image. Commonly seen ‘techniques’ include: oversaturation, HDR, fake cross-processing-hipstagram-effects, over-contrasty black and white conversions, ultrawide perspectives, supertele perspectives, walls of nothing but bokeh…I think you can see where this list is going. In short: if one aspect of the image has to shout to cover the deficiencies of the other portions, then this cannot be a good image in the first place because it fundamentally has those has deficiencies to begin with.

_RX100_DSC2119b copy

Yet the very reason why these types of images stand out will erode as there are more of them in circulation: they will no longer look different from the rest of the pack. This brings us back to a focus on the fundamental things that make an image work; I’ve said this so many times I wouldn’t be surprised if somebody decides to engrave it on my tombstone (or perhaps I should get a tattoo of it) – light, subject, composition; then, the idea. The idea can come first and override the other three if it’s strong enough, or it can be the underlying reason for their execution. Images with all four properties will endure time and transcend the medium: a strong image in this way will still be arresting whether it was shot with an iPhone or a medium format back.

_S21_L1008191 copy

In that case, why isn’t it the focus of every aspiring photographer to nail the fundamental structure of an image before worrying about the number of pixels or number of stops of dynamic range it has, or the maximum speed of their lens? Simply because it’s much more difficult to do so. On the other hand, photographic technology has some so far in recent times that there are few reasons why we should continue to bother with the technicalities of it all, so long as you know how to control the fundamental parameters that affect the audience’s perception of the image: in a way, it’s taking the Apple design approach to photography. We identify the fundamentals, throw away what isn’t important, and spend a lot more time focusing on what does matter. But at the same time, we avoid things that can be gimmicky or difficult to execute with the aim of providing the average photographer with a nice set of fundamental skills that will serve in the majority of situations.

_5010912 copy

Although I suspect most photographers already shoot this way – aim, focus, compose to varying degrees of precision and consideration, perhaps compensate exposure, then shoot – a lot of them hide behind the pretence of a lot of complex-looking settings and adjustments that are seldom used outside fully automatic mode, and more often than not just confuse and get in the way when an accidental button press delivers behaviour other than expected.

What I’m saying is that perhaps we should consider the possibility that for the vast majority of situations, it’s not a bad idea to acknowledge and embrace that. Why do I need to manually set my exposure if the camera’s meter can get it right? Why does it matter what white balance is or the exact Kelvin temperature of a scene if the camera’s automatic white balance can cope? Why do we need to pick the focus point if most of the time, the camera is right, and the rest of the time, extended depth of field covers the errors? Why spend time processing RAW files individually if the JPEGs are excellent, or even better?* Let technology do the work, and forget about all of those settings that don’t matter – don’t even bother including them. Why should there be an option for dynamic range 100%, 200% and 400% when clearly we want 400% for 99% of situations? We shouldn’t even need custom functions if the camera behaves in a sensible and consistent manner.

*See my recent Fuji FinePix XF1 review.

_RX100_DSC1851bw copy

Since it’s unlikely that I’ll ever be approached by a camera maker and offered both a blank sheet of paper and some deep funds, we’ll have to make do with what we’ve got. And in the marketing-driven world of photographic products, we actually have to go to either extreme of the product spectrum to find what we’re looking for: a camera which has solid, reliable automatic functions, no frills, and the basics like exposure compensation and spot metering. It would be nice to have a range of perspectives easily to hand too, though for novices perhaps it’s safer to go with a fixed lens and forgo the temptation to compose with the zoom. Add a good sensor, speed and responsiveness into the mix, and we’re done. I used to be hung up about having an optical viewfinder for stability and visual nuance, but that’s changed with improvements in stabilisation systems, and even more so with increased LCD resolutions more accurately displaying focus at the sensor plane and the added flexibility to shoot from other vantages where the camera doesn’t have to be at your eye. Depth of field control is a nice to have, but not critical; it’s just another way to isolate your subject – but there are many ways of doing that, and it’s not the most pictorially powerful anyway. Too many people rely on extreme bokeh to make an image that looks different; we don’t need super-fast lenses for common applications anymore now that even small sensors are capable of delivering good results at ISO 1600**. Finally, being a pack mule for your equipment isn’t fun: the less we can get away with carrying, the better.

**In the early days of photography, photographers struggled to get more depth of field rather than less – perhaps it was a case of art imitating life (perception), art (photography) imitating art (painting). Yes, we have that additional tool, but don’t overuse it: there is such a thing as too little depth of field. Note that this is different from good/ bad quality of bokeh; another axis of variables, if you will.

_RX100_DSC1676b copy

What does this mean in real terms? If you add everything up, for the majority of photographers, we’re looking at a prosumer compact, possibly with a larger sensor, possibly not. These cameras are designed to be automated; the manual controls are just put in mostly to appease the marketers and obsessive photographers who like to twiddle their aperture dials, oblivious of the fact that with a 20mm real focal length, there will be no visible difference in depth of field at f5.6 or f8 with a subject that’s 30m away, or that no matter what focusing mode you use, it’ll still be too slow to track action. I am not saying that all photographers should abandon control; if anything, the opposite. I certainly won’t be replacing my full-frame DSLR and lenses with a compact for client-critical work anytime soon, if ever. What I’m saying is that for casual photography, we should focus on mastering control of the elements that matter, which conveniently are also those that can easily be taken care of even with the most basic of cameras. For most uses, those are limited to a few critical things: light (exposure compensation), composition (perspective, positioning, focus) and subject (timing). The rest are secondary or specialised.

Compacts have some big advantages that often get overlooked:
– They’re small and discrete, easily portable and don’t attract attention;
– They cover focusing errors through extended depth of field;
– They might have limited dynamic range compared to larger sensor cameras, but that can actually be helpful from a pictorial/ artistic point of view by emphasizing contrast and differences in light;
– You can carry a lot of perspectives in a small size, without too many optical compromises – 28-200 isn’t unheard of, and I believe there’s a Canon that even covers 24-1200m (!!);
– They focus close, once again allowing perspectives that might not otherwise be possible;
– Extended depth of field + unusual perspectives = compositions not easily achievable with a larger sensored camera, e.g. highly compressed images with everything in focus
– They’re very easily positionable; lenses can be poked through holes in fences or walls, held high or low etc. – especially the swivel screen models
– Sensor and stabilizer technology has come a long way. With the D800E, I might need ISO 6400 to shoot at f8, 35mm and get enough shutter speed to handhold without shake; even with VR. Let’s assume the stabilizer advantage evens out. I could shoot at 17mm and f4 on the OM-D and have the same perspective and DOF, but I’d be using ISO 1600 for the same shutter speed; on say the Panasonic LX7, I could be at a larger aperture than f2 (unfortunately there isn’t one at this focal length) and two stops better again, at ISO 400. We’re looking at some form of equivalence here: sure, the D800E image will have more detail, but that won’t really come through in typical print or display sizes for the majority of photographers***. Perceptually, they’d look pretty similar at a 12×18″/ A3 print; I’d much rather carry the LX7, thanks.
– AF speed has come a long way – for static subjects, we’ve pretty much got as much speed as we need. For moving ones, until we get phase detection sites onto our compact sensors, they’re all equally useless and you’re going to have to find a DSLR.
– Buffer and usability isn’t really an issue anymore; it hasn’t been for compacts since about 2009. My Sony RX100 will shoot 20MP, 14-bit RAW + JPEG fine images at 10fps for 10 frames.
– Price: even the best of the compacts will cost significantly less than a midrange DSLR or mirrorless camera and a decent zoom. Again taking the example of the Sony RX100 – we’re looking at about US$700 +/-, which compares very favorably to even a Nikon D3200 and AFS 16-85/3.5-5.6 VR at approximately US$1,200 – and that doesn’t even come close to the Sony’s f1.8 wide end. And if you get bored of it, it’s not going to cost too much to trade it in for the latest and greatest. (New cameras can be a source of inspiration in themselves, but that’s another topic for another article.)

_M9P2_L1000224 copy

You’ll note that I’ve excluded Micro Four Thirds and the other CSCs from this list, mainly because there are compact and good all-in-one lens solutions that make the cameras pocketable. If you don’t mind a bit more bulk and a prime lens, then these are great options too – for not much more size, you get a lot more image quality. But there’s no way you’re going to put even an E-PM2 and the smallest 14/2.5 prime lens into your pocket without risking arrest on public decency laws.

***We’re talking sufficiency here, not ultimate image quality.

Let’s boil this down a bit further: what do we really need in a compact?
– Responsiveness: everything from AF speed to menu operation and navigability, shot-to-shot speed, image review etc. Speed is the priority;
– Fast AF. I can’t emphasize this one enough;
– A fast lens: it’s much easier to make fast, decent zooms that cover a smaller image circle than a larger one; f2 or better on the wide end, and ideally something fairly close on the long end (though that will tend to be compromised as the lens’ reach increases);
– A decent range of perspectives: wide/moderate wide to moderate telephoto; enough to get a clear difference in perspective. Personally, 28-85 is fine for me, though I don’t have any complaints about a bit wider or a bit longer; compact sensors tend to be 4:3 rather than 3:2, and since the focal length posted follows the diagonal of the sensor, you’re going to need a bit more width to get the same horizontal field of view;
– A good LCD. Forget the optical finder, it’s going to be a tiny tunnel. I’d rather have a nice, bright, sharp 3″+ LCD. Bonus points for something with an antireflective coating that’s also visible in daylight, and a tilt/ swivel screen;
– RAW support, or outstanding JPEGs;
– A good image stabilisation system;
– Easily accessed exposure compensation, preferably on a separate dial;
– A sensible auto-ISO mode, ideally allowing setting of minimum shutter speed, if not linked to the focal length used;
– A solid meter, or spot metering, or preferably both;
– Fast image review, with a quick way to check critical focus;
– Finally, tactility matters. Something that feels nice to use will simply be used more often; it’s in the quality of the materials, the feel of the controls/ switches/ buttons/ knobs/ dials; the grippiness of the rubber; the solidity of the build.

In part two, we’ll consider the current candidates and field a bit of a compact camera masterclass.

____________

Visit our Teaching Store to up your photographic game – including Photoshop Workflow DVDs and customized Email School of Photography; or go mobile with the Photography Compendium for iPad. You can also get your gear from B&H and Amazon. Prices are the same as normal, however a small portion of your purchase value is referred back to me. Thanks!

Don’t forget to like us on Facebook and join the reader Flickr group!

appstorebadge

Images and content copyright Ming Thein | mingthein.com 2012 onwards. All rights reserved

Understanding autofocus, and tips for all cameras

_7048556 copy
Levitation (and prefocus). Nikon D700, 85/1.4 G

A side effect of the ever-increasing resolution of today’s cameras is that autofocus must necessarily get more precise, too. The Nikon D800/ D800E issues have shown that even a small misalignment or miscalibration in the focusing system can basically cripple the camera into resolving at a far lower level of performance than it would be capable of under ideal circumstances. Short of using manual focus and magnified live view for everything – I would still recommend doing this for critical work, and I do it when working under any controlled lighting situation since I’m more likely to have the time and be using a tripod – it is therefore highly beneficial to pay closer attention to exactly what is going on when the camera acquires focus.

_7038950 copy
A situation where fast, reactive autofocus can help. Nikon D700, 300/4 D

For DSLRs, SLTs and some mirrorless cameras (the Nikon 1s and Sony NEX-5R and NEX-6), a phase detection system is used. This involves taking some of the light from the subject area, passing it through a beamsplitter and comparing the difference in phase of the output; a CCD is used to measure light intensity as a function of position, and the lens is moved until light from both arms of the beamsplitter is coincident upon a single point. This entire module constitutes the AF sensor array that’s either located at the bottom of the mirror box (DSLRs) or embedded in certain specific photosite locations (mirrorless cameras). If you select a specific AF point, then the camera uses only the sensors corresponding to the location of that point; if you let the camera pick, it will usually sample all points to find which is the closest subject covered by the AF sensor array, and focus on that.

_3035242 copy
En masse. Nikon D3, 70-300VR

Phase detect autofocus is fast and generally does not require racking the lens back and forth – otherwise known as ‘hunting’ – because the sensor is able to tell whether the light is positively or negatively out of phase, and thus in which direction to move the lens in order to correct this and bring the light coincident, thus achieving focusing. The precision of focus depends on several factors: firstly, the resolution of the AF sensor; secondly, the alignment of all secondary optics involved in transferring the light to the AF sensor – specifically, the main and submirror assemblies; any microlenses involved; thirdly, the alignment of the AF and imaging sensors (both must be perfectly perpendicular to the lens mount); fourthly, any calibration data the system requires to establish a perfect zero or null position; and finally, the ability of the lens’ focusing groups to move precisely in small increments that maintain perfect alignment with the optical axis.

_8013045 copy
Turning on the inside. Nikon D800E, 28-300VR

Focusing with wide angle lenses is generally less precise with this method because the differences in phase are a lot less; to complicate things, the lens itself may have optical limitations in its design, introducing field curvature, coma etc – all of which can send potentially misleading data to the AF sensor, resulting in incorrect focus. It also doesn’t help that subjects tend to be a lot smaller, and not filling the AF boxes completely. (It’s also worth noting at this point that the AF boxes themselves are an indication of where the sensor grid lies, but there’s no documentation covering precisely where the active areas are located. For greater precision, perhaps the sensors should be crosses instead of boxes.)

_3030456bw copy
Precisely a fast as a speeding bullet. Nikon D3, 24-70

For moving subjects, phase detect systems either continuously change the focus distance, depending on the instantaneous phase information received at the AF sensor, or alternatively employ a predictive algorithm and multiple focusing points in order to track the subject. The most sophisticated systems also employ information from the metering sensor in order to track the subject by color. None of these systems are infallible, and can be fooled by objects of a similar color or larger size coming between the camera and subject – for instance if your subject happens to duck behind something. Although the level of processing power and sophistication of these systems has significantly increased over the past years; I have yet to see any autofocus system that can 100% reliably track an erratically moving subject – especially if it leaves the area of the frame covered by the autofocus sensor array.

_7032151bw copy
Cyclist, Nepal. Nikon D700, 24/1.4

I’m sure you can now see why the challenge of achieving perfect focus gets more and more difficult as sensor resolution increases: if any one of these is out of tolerance by a very small margin, you’re not going to have a sharp image.

Most mirrorless/ CSC cameras, compact fixed-lens cameras and DSLRs in live view all use a much simpler method of focusing – contrast detection. This involves moving the focus point of the lens back and forth to test which direction delivers the highest contrast. The camera will then iterate this process until highest contrast is achieved; although hunting has been minimized with the new generation of contrast detect cameras; it is still necessary to rack focus back and forth simply because there is no way for the camera to know which direction in which to move the lens. Because of this contrast detect autofocus will always be slower than well-implemented phase detect autofocus, with all other things being equal. However, it will also be more accurate simply because the imaging sensor is used to determine the point of optimal focus, and there are far fewer potential issues with tolerances and alignment of components.

_780_IMG_2312bw copy
Point of view. Canon IXUS 100 IS

It is also worth noting that the size of the sensor actually plays an important part in determining just how fast contrast-detect autofocus systems can be; this is because larger sensors have shallower depth of field for a given field of view and aperture, requiring more movement of the focusing groups within the lens in order to determine where the point of highest contrast (and correct focus distance) lies. This is especially noticeable when comparing a compact camera to a DSLR; compounding this is the fact that small sensor cameras require much shorter real focal lengths to achieve the same angle of view; this results in extended depth of field for a given angle of view, requiring less focus precision because any potential errors can be covered up by increased depth of field. The slow focusing of DSLRs in live view mode is not due to the lens’ focusing motor speed; the same combination often is capable of delivering blazingly fast results when used with the regular phase-detect system.

_M224792 copy.jpg
The instant of terror when you’re base jumping and not sure if your chute is going to open or not. Nikon D200, AI 500/4 P

There’s one added method that used to be common in older cameras, but is now only to be found on some of the Ricoh compacts: active phase detect. This uses an infrared beam to light the subject, and the reflected light is measured by two phase detection sensors on the front of the camera to assist the contrast detect system. It can greatly speed things up, but range is limited because it requires active illumination from the camera – and the power of these secondary lights is always limited.

Now that you have some understanding of how autofocus systems work, let’s talk about some tips to maximize the accuracy and speed of your camera.

_M80_DSC3155 copy.jpg
Through the flood. Nikon D80, 17-55/2.8

All cameras

  • Don’t let the camera pick the focus point for you. Unless you are shooting and erratically moving subject which you cannot follow manually selecting the focus point; always shoot in single point mode and pick your focus point carefully to be over your subject. Many cameras also weight the metering in favor of the focus point; it is therefore important to ensure that it corresponds with your subject – it is almost always what you would want to have correctly metered anyway.
  • Make sure your subject is larger than your focus point. If it isn’t; you need to either move closer (this also becomes a compositional issue) or focus on something at the same distance which presents a larger target.

Phase-detect cameras (DSLRs, Sony NEX-5R, NEX-6, Nikon 1)

  • The camera will always focus on the closest object underneath the focusing point. It may sometimes be fooled by a higher contrast structure – for example, a barcode instead of a blank piece of paper immediately behind it – but in general it will pick the closest subject providing it completely covers the focusing point.
  • High-contrast subjects (again, like barcodes) make ideal autofocus targets. It is also worth noting that some autofocus points are sensitive to detail in one direction only; i.e. horizontally or vertically, and not both directions. (Cross type points are sensitive to detail in both directions; but these are generally only found at the center point, or distributed around the AF-sensor arry only on high end cameras.) It is therefore important to find a suitable target for your camera – a QR code rather than a barcode, I suppose.
  • Use continuous autofocus, unless you are shooting a static object with the camera on a tripod. This is because any small motion of either you or the subject can be enough to move the plane of focus away from the intended point; this is especially critical with fast, shallow depth of field lenses. With continuous autofocus, the camera is always focusing right up to the point of image capture. The one exception to this, is slow, or wide angle lenses. Smaller format cameras are a bit less sensitive to this issue because they have more depth of field for a given angle of view, which tends to compensate for any errors in the focusing system.
  • Try to avoid focusing at the center and recomposing your image where possible, because there are potential issues with field curvature – especially at the edges and corners of wide angle lenses. Use the autofocus point that is either directly over your subject or closest to it in order to minimize any potential issues with the lens’ design.
  • Assign a button to locking focus (AF-L) to use in conjunction with continuous autofocus; this saves you having to switch to single autofocus with static subjects. Alternatively, decouple focusing from the shutter button by assigning an AF-ON button that activates focusing when pressed; I don’t use this method as it requires you to press two buttons to shoot; I prefer to minimize the number of controls that must be attended to especially in fast-moving situations.

IMG_0940b copy
Panning in the rain. Apple iPhone 4.

Contrast detect systems (DSLRs in live view, compacts, CSCs, mirrorless cameras)

  • Once again, do not let the camera pick the focus point for you; select it yourself. If anything, cameras that use contrast detect systems tend to be far more flexible in where you can put your focusing point; this is because they use the entire area of the imaging sensor.
  • Avoid continuous autofocus. This seems counterintuitive in light of my advice for phase detect cameras, however this is because continuous autofocus on a contrast detect system is constantly hunting back and forth around the point where expects to subject to be; imagine a car trying to follow a curve that the driver can’t see until it’s almost immediately in front of him – the path (here, the focusing distance) will be erratic and not match the curve exactly. This tends to result in a very low hit rate. It also helps that contrast detect cameras tend to either have an alternate system to deal with moving objects (in the case of DSLRs); or employ much smaller sensors that are very forgiving of minor focusing errors or changes in subject position due to their extended depth of field.
  • If you have to use continuous autofocus because your subject is moving; there are two other alternatives. The first option is to set your camera to maximum contrast (for obvious reasons) – the live view image is usually a preview of your current camera settings and will match the JPEG output. If you’re shooting raw; your file will not be affected by in camera processing. The second option is an old trick using the days of manual focus photography; it’s called ‘trap focusing’. First, decide on your composition and where your subject must go in order to complete it; ensure your shutter speed is high enough to prevent motion blur of the subject; finally, choose single autofocus and prefocus the camera at that position, releasing the shutter when the subject is in the intended position. One added advantage of this technique – especially for compact cameras – is that it significantly reduces the shutter lag to the point where it is very easy to release the camera at the precise moment you intend. Note that if you cannot get a high enough shutter speed; then you will need to pan through with the subject in order to only blur the background out and keep the subject sharp; this is a combination of panning and trap focusing techniques and works best when the subject is moving across your field of view; it is pretty useless if the subject is coming towards you.
  • Some cameras have a continuous pre-focus or full-time autofocus option that is always adjusting the lens based on whatever subject happens to be under the focusing point at the time. This is generally a good option if you absolutely must reduce shutter lag and are unable to pre-focus. However, note that the system can also be fooled, most notably by moving the camera around rapidly – especially if you are not pointing it at anything in particular. It is also an enormous drain on (usually already short) battery life because the lens’ focusing groups are constantly in motion so long as the camera is switched on.

It is worth practicing all of these techniques until they become second nature; you’ll be surprised by both the increase in your keeper rate, as well as the improvement in acuity and sharpness at the individual pixel level. It is just one of the many elements of shot discipline; which is critical in achieving the highest possible image quality from your camera. You’ll also be surprised at just how much more responsive your camera has seemingly become. MT

____________

Visit our Teaching Store to up your photographic game – including Photoshop Workflow DVDs and customized Email School of Photography; or go mobile with the Photography Compendium for iPad. You can also get your gear from B&H and Amazon. Prices are the same as normal, however a small portion of your purchase value is referred back to me. Thanks!

Don’t forget to like us on Facebook and join the reader Flickr group!

appstorebadge

Images and content copyright Ming Thein | mingthein.com 2012 onwards. All rights reserved

The burden of choice

_7065342 copy

A benefit (or curse, depending on how you look at it) of the modern photography era is that we now have a huge amount of choice when it comes to equipment. A lot of it is pretty affordable, too; especially stuff that might be one or two generations behind the latest and greatest. Does it perform any worse than when it was new? Does it have any less potential? No. That still lies with the photographer.

That said, I’m as guilty as the next guy of collecting – nay, hoarding – cameras and lenses. The tactile experience of taking a photo matters to me; it should be just as enjoyable as the result. Nice equipment is a pleasure to use – ergonomic cameras, well-thought out controls, nice materials, bright finders etc. are a pleasure. I don’t like fighting my equipment – nobody sees that struggle in the final image, and it’s just frustrating. A camera that’s enjoyable to use makes you want to go out and use it, which in turn encourages you to experiment, and that – ultimately – can make your images better. It is NOT the same as collecting equipment in the mistaken belief that it will correct some fundamental deficiencies in your own skillset.

The upshot of all of this is two things: firstly, I’ve used a lot of gear over the years (see the CAMERAPEDIA! for concise opinions on everything I’ve used), and the amount that’s filling my dryboxes has steadily increased since I started doing this full time and could write off gear as a business expense. Actually, it’s gotten to the point that I had a sale last month just to clear the clutter. I’ve still got lenses and cameras I seldom use, which both make me feel guilty and like I should be out and shooting even more than I already am.

However, I digress severely. A couple of people emailed me recently asking how I pick what to use on any given day – this is not a straightforward question to answer, and it’s made more difficult by both a combination of lots of gear, a heightened awareness of image quality, and knowing that you have some very specific gear for very specific situations, some of which you might encounter during the day. It’s really about balancing compromises: you know that you’re going to encounter some situations that could benefit from a very small portion of your equipment; do you bring it along or not?

The immediate instinct of most people is to bring whatever they’ve got, just in case. I’ve done this before: in 2008/9, I went on a two week trip to Japan with a D3, D90 and pro zooms to cover 14-300mm. Without gaps. The thing that struck me was a) I really wasn’t enjoying myself by day three because of the weight; and b) at the end, I was only carrying one lens and getting much stronger images out of that. Moral of the story: the less gear you carry, the more you focus on making the most of what you’ve got. Although I’ve tried to follow that philosophy for all future trips and assignments, there are exceptions. And of course the more you shoot, the more things you see – I can count no end of the frames I’ve seen that would suit the FOV or perspective of lenses I wasn’t carrying at the time, especially more so in recent memory.

I guess it’s a very different feeling from carrying everything and wanting to try every lens in every situation to get a bunch of similar but consistently weak images; it’s more about seeing so many different potential frames that you simply do not have the time to shoot everything – to get that feeling like you’ve shot the place conclusively and captured all there is to possibly capture. You go away feeling that there are still more opportunities and possibilities you have’t yet explored or shot.

My solution to this is to focus on the essence: how can I say what I want to say in as few frames as possible? This might mean isolating a single key element and excluding every distraction to the point of abstraction, or including everything as context. But usually, anything in between just feels a little weak and compromised. I find that whilst this certainly helps me to focus, it doesn’t really do anything to appease the feeling of anxiety that I’m missing out on something. In fact, I’m finding that if anything, having more choice isn’t helping. My wife will tell you that I go through the same anxious thought process before every trip whilst deciding what to bring; in fact, it starts weeks before. I will make a list and then change it repeatedly, and in the end bring nothing resembling what I originally intended to pack.

Let’s take the last Japan workshop trip as an example. I initially wanted to go with the M9-P and perhaps GRDIII as a backup; then the RX100 came along, and I was toying with the idea of the OM-D; but if I was to bring the OM-D, should I pick up a 12-35/2.8 for an all-in-one solution? Or do I use the 60/2.8 instead of the 45/1.8? Or bring both? Should I pack the 100-300 for some very compressed perspectives, too? Would I even use it? What about the grip? And then to make things more complicated, I got the D600 and two pancake primes – the 28/2.8 Voigtlander and then 45/2.8P Nikon. The latter might be a bit short for my normal uses, but I could certainly make do. And the size was very attractive indeed, with no compromises in image quality. But how useable would manual focus be on the D600? And why not use a 50/1.8G instead of the 45/2.8P, which would give me AF and another stop? To top it off, I’d have to consider what my students might be shooting – which turned out to be a mix of DSLR, M9, M-Monochrom and compact.

In the end, they all entailed compromises; FX would have meant either size and weight or suboptimal manual focus and slower lenses; rangefinder would mean poor low light ability; M4/3 would mean not sharing a common platform with my students, and as much as I’d love to just shoot with a compact for myself – and did on the days I wasn’t teaching – it wouldn’t really let me teach the things I’d wanted to teach (or try out rare second hand lenses in Tokyo, but that’s another separate matter altogether). I went with the OM-D, 12/2, 20/1.7 (I didn’t use it), 45/1.8 and RX100. I felt like I could perhaps have gotten another 20 or so good images if I’d had the 100-300 too, but I certainly didn’t miss carrying it around, and leaving it behind in the hotel room would almost certainly mean that I’d see something at the precise time I didn’t have it – Murphy’s law and all.

Going on assignment is different, however. In these situations, I know specifically what kinds of images I need to capture, and in what style; more often than not, I have a shot list which I need to deliver, and there will have been a pre-shoot reccie trip to determine the angles, setup and focal lengths required. In short, I pack everything I might possibly need, and a spare or two – you simply cannot afford to have things fail when on assignment. And you never know when a client might ask you to try something different, or add in something extra, so it’s always best to be prepared. For commercial/ corporate style work, I pack the D800E, D600, speedlights, umbrellas/ stands/ diffusers/ modifiers, and the full suite of Zeiss lenses from 21 to 100mm; for macro work, it’s the same except except I’ll have the 60, 85 PCE and 100 macro lenses; for architecture, I bias wide and leave behind the speedlights. A tripod is a must in every situation. The only time when this setup differs fundamentally is when I’ve got to shoot a reportage job: depending on the range and light quality I’m likely to encounter, I might pack anything from the M9 to the OM-D and 100-300mm. But I’ll always have a minimal amount of gear in a waist pouch and two bodies ready to go – one with a wide and one with a tele – that way, you’re never caught unprepared, and you can move quickly.

The last situation I haven’t covered is when I’m shooting solely for myself. This is actually the easiest scenario: I simply take whatever I feel like using on the day, safe in the knowledge that I’m under no pressure to get any particular shots; this leaves me free to focus on purely creative work. I’ll usually take either the newest thing in the arsenal – something I’m least familiar with, so I can push its creative potential and see what I can do with it – or I’ll take the most compact and sufficient thing, just in case I happen to see something – this particularly on the days where photography isn’t my priority, but you just never know. These days, that’s the Sony RX100. I might even take out the F2T if I’m feeling particularly slow and contemplative, and the weather is being cooperative.

Bottom line: there is such a thing as too much choice. For amateurs, I think the best thing to do is apply a little forethought to the kind of situations you might encounter and the resulting type of shots you want to capture; this then translates into the kind of equipment you’ll need. Carry no more, because being a mule isn’t fun – nor is it good for your back. For the more advanced shooters – assuming you’re not on assignment with a shot list – it’s probably beneficial to creative development to focus on changing one or two parameters only – pick one or two primes, or a single format, etc.; I find this forces me out of my comfort zone and into experimental mode, especially if it’s something I’m not familiar with. (Depending on your self-discipline, you might want to carry a more familiar backup, too.) It’s possible that the pictorial results might be a disaster, but then again, they could also be a wild success – you never know until you try. But I do know that if you spend too long trying to decide what to bring out, the light is going to fade and you’re not going to get any pictures at all. MT

____________

Visit our Teaching Store to up your photographic game – including Photoshop Workflow DVDs and customized Email School of Photography; or go mobile with the Photography Compendium for iPad. You can also get your gear from B&H and Amazon. Prices are the same as normal, however a small portion of your purchase value is referred back to me. Thanks!

Don’t forget to like us on Facebook and join the reader Flickr group!

appstorebadge

Images and content copyright Ming Thein | mingthein.com 2012 onwards. All rights reserved

Less is more

_M8_L1026011bw copy
Too many options can be a confusing thing. Leica M8, 21/1.4

This article started out as an exploration of the liberating experience when shooting with the compact point-and-shoot camera. It then morphed into a small dissertation upon the use of the Sony RX100 is a street and travel camera; in the end I landed up rewriting the whole thing because I think there is a larger topic at hand here which is probably of more use to the photographer at large.

In previous articles, I have dealt with subjects such as using just one lens for a trip and shooting with compact cameras professionally. The August competition was the compact challenge which required participants to shoot solely with a fixed-lens, small-sensor point-and-shoot camera. I have also talked about points of sufficiency, and knowing precisely how much resolution or how much told you need for the job at hand. What I want to cover in today’s article, is something a concept spanning all of these subjects, and perhaps a little bit more.

_M8_L1024673bw copy
Ninja coffee. Leica M8, 21/1.4

Let’s throw the entire photographic rulebook and all of its associated dogma out of the window for moment. What really matters when you’re making an image? (I recently dealt with this too in a two-part article here, and here on what makes an outstanding image.) What is it that you audience sees when they look at your photograph? It certainly isn’t the camera, in so far as in that it created the image and the lens and format used enforce both perspective and depth of field properties; going beyond that, the View of a photograph sees light first. In fact, that’s pre-much all they see because without light of some sort, it is impossible to make a any photograph. Thus, the sole function of the camera is reduced to a light capturing, measuring and visualization device. Beyond this, it is all fluff and gravy.

_N8_L1002520 copy
Color coordinated car. Leica M8, Zeiss ZM 2.8/21

Suppose for a minute that a photographer has no preference for any particular focal length, is able to see compositions everywhere they go, and utilize perspectives correctly. In short, they could use any camera and any lens/ field of view combination and still produce strong compositions. Let us continue to assume, that the same photographer also has the ability to recognize interesting light. He or she should also have some modicum of technical capability – perhaps the minimum required to understand the basics of exposure and mechanics of taking a photograph. Last, but not least, they should also be able to recognize interesting subjects. In short: we want a photographer who knows how to see, aim the camera, and press a button.

I don’t think this is a very difficult set of criteria to fill; I’m sure there are many, many people out there who would have no problems in meeting the brief. Now, notice how much the camera has been decoupled from this entire process; in fact, not just decoupled, but completely relegated to being almost unimportant. Photography is about writing like to create images. If the mind of the author is clear, and his command of the language strong, then the type pen and paper employed simply do not matter.

_M8_L1017764 copy
Perfect spacing. Leica M8, 50/1.4 ASPH

In practical terms, what does this actually mean for photographers? Once a photographer has mastered the use of light, composition and perspective, identifying subjects, and I suppose the degree of postprocessing, it means that they are able to create magnificent images regardless of the equipment to hand. I remember personally going through this moment of liberation – a kind of ‘eureka!’ – after which I realized the camera really does not matter; any focal length or format is fair game. Light and composition take center stage, and all else is secondary.

Many of you have probably noticed a high level of consistency in the look and feel of the images I present on the site, regardless of whatever camera was used to capture them. I have actually been criticized for this in the past, with the prosecution claiming that I do not allow the natural qualities of the camera/ lens I am using or testing to shine through in the final image. I beg to differ; I believe that the ability to produce exactly what you envisioned in your mind at the time of pressing the shutter button means that your artistic vision is not compromised or tempered by the equipment. This is not to say that you may not choose to use a particular piece of equipment because of its artistic qualities; however, one needs to know exactly what these qualities are, and how their use affects the final pictorial impression of the final image.

_M8_L1026600bw copy
Questions or directives? Leica M8, 21/1.4 ASPH

I think this liberation came about for me around the end of 2008, or perhaps early 2009. I was shooting with a Nikon D3 at the time in Japan; I carried lenses providing continuous coverage from 14 to 300 mm. Needless to say, this was an extremely heavy way to travel. By the end of the trip, I was leaving everything except my 24-70 zoom in the hotel room and just walking around with one camera and one lens. After a couple of hours, I realized that rather than seeing compositions which I was unable to execute because I wasn’t carrying the right lenses, I was now seeing only the ones I could; a little while after that, I was seeing potential shots everywhere I went.

The second phase came later in 2009. I spent a couple of weeks with the Leica M8.2 whilst writing a review for the magazine I served as editor of at the time; I was only given one lens – a 35/2 (45mm due to the M8’s crop factor). Being completely unfamiliar with the operation of a rangefinder; I stuck to that one lens just to try to familiarize myself with that way of working and seeing. Guess what: I liked it so much, and found the small size and unintimidating nature the camera so liberating, but I landed up selling my D3, and most of my Nikon lenses in order to fund the exact same combination for my personal use. I was never able to afford more than one or two lenses at any given time, given the price of Leica glass, and my humble occupation at the time.

_N8_L1000065bw copy
Looking for company. Leica M8, Zeiss ZM 2.1/28

This austerity by necessity actually forced me to focus on improving the quality of my images through the strength of the compositions; more importantly, I learned the skill of previsualization of both composition and perspective even before bringing the camera to my eye. The were occasions, for instance social gatherings, where I felt the need for a smaller one nondescript camera. I landed up purchasing the smallest Canon point-and-shoot I could find. That IXUS SD780IS landed up following me everywhere, riding shotgun in a pocket – simply because it was so small and unobtrusive. However, I don’t think it was the camera or its size that did this; rather it was me applying the previsualization techniques learned with the Leica M8 to the smaller format. I was getting images I liked, and which were compositionally strong – regardless of the format or type of camera. For the first time in my work, the camera became transparent.

Now, rather than buying something because the spec sheet looked good, or because it came with bragging rights, I bought equipment because it allowed me to achieve the specific look or feel I desired. Coupled with my postprocessing experience, I now felt completely in control of my images; I could create and share exactly what I saw in my mind’s eye.

_780_IMG_2695bw copy
Rushing for the train. Canon IXUS 100 IS

Let’s take a step back and deconstruct my experiences along the road to compositional liberation into something which any photographer might find useful and actionable:

1. You have to begin with a reasonable degree of understanding of the technical skills for both capture and post processing. However, remember that these are merely tools, not an end in themselves.

2. Force yourself to shoot for an extended period of time with what you would perceive to be a limited set of equipment. This may be one zoom, or one prime; the point is that it conditions your mind into recognizing what you can capture and ignoring all of the things that you can’t.

_780_IMG_1784bw copy
The ladder. Canon IXUS 100 IS

3. The ultimate distillation of this is using prime lenses, shooting a good number of frames with each. By using nothing except a single perspective on extended basis, your mind is trained to pre-visualize the angle of view before you look through the viewfinder. You know when you have mastered a particular focal length or field of view when you start seeing compositions everywhere, and you can execute these with the proper perspective and relative prominence of foreground and background. It’s even better if you can do this with the lens stopped down; by eliminating shallow depth of field as a compositional crutch, you are forced to fully think about and utilize all of the space in your frame. You cannot simply fill it with a merely pleasant-looking but non-contextual wall of blur. This of course leads to developing full control of composition, even in the out of focus areas of your frame.

_780_IMG_2485b copy
Canterbury Cathedral. Canon IXUS 100 IS

If you are able to shoot with a compact camera or perhaps a camera phone, and achieve the exact composition you intended, you have come full circle. Image quality, is of course the subject of a completely different discussion. Although many photographers believe that they could manage with much less equipment, or much simpler equipment than they currently have, almost none of them put it into practice. Even I find it difficult to select which get bring on a trip; I am sometimes drawn into the trap of bringing something ‘just in case’ rather than picking a practical selection and concentrating on working with it. It requires a strong and conscious effort to avoid this. (Once again, if I am on assignment then I have the opposite philosophy; this is because you have to be prepared for contingencies, and failure to plan and deliver because of oversight is simply unprofessional.)

_RX100_DSC0319b copy
A little urban abstract. Sony RX100

Unfortunately, the fastest – and perhaps only – way to truly experience this liberation, is to go through the process. (If any of you have managed by other means, I would love to hear from you in the comments.) But I think it is important to at least try it if you’re serious about taking a photography to the next level; in my article on the stages of evolution of a photographer, you’ll remember that the most difficult thing to achieve is the ability to visualize your image first, and then execute it as intended. Strength of the idea and how obvious it is to your audience is paramount. MT

____________

Visit our Teaching Store to up your photographic game – including Photoshop Workflow DVDs and customized Email School of Photography; or go mobile with the Photography Compendium for iPad. You can also get your gear from B&H and Amazon. Prices are the same as normal, however a small portion of your purchase value is referred back to me. Thanks!

Don’t forget to like us on Facebook and join the reader Flickr group!

appstorebadge

Images and content copyright Ming Thein | mingthein.com 2012 onwards. All rights reserved

_RX100_DSC0664b copy
Service. Sony RX100

Objectively critiquing images: a primer

_PM03858 copy
The ephermeral idea of sushi. Does this image work? Why? Why not? Read on to understand and come to your own conclusions – leave your thoughts in the comments, and let’s start a discussion. For the original essay featuring this image, click here: Sushi, and the philosophy of photography

A reader sent me a great email a couple of weeks back with some suggestions on how to improve the reader Flickr group.

Since inception, it now has 400+ members, tens of thousands of submissions, about 2,500 that have made the cut – and continues to grow every day. Whilst you do get some indication of what constitutes a good image and what doesn’t based on my acceptances and rejections, it doesn’t really provide a structure for objective critiques and feedback from a wide audience – something I’d always wanted to have. Unfortunately, the infrastructure of Flickr isn’t that conducive to this – there’s no real way to tell which comments were left by a member of a particular group without having badges etc. What I propose instead is that anybody who wants to solicit feedback on an image posts it in a new thread on the attached discussion board; if you’d like to weigh in, go ahead – but remember to be objective and civil. (If the volumes get silly, then we’ll deal with it later.)

This brings me to the second problem: what is objective? How does one deliver an objective critique? Hell, what do you even look for in the first place? How do you set a benchmark and what do you compare it to? The aim of this article is to cover these bases, and provide both a structured simplified assessment/ critique framework. Its usefulness of course goes beyond the Flickr pool comments: it’s also a quick way for you to assess your own images on the fly. (The challenge there is of course stepping out away from the personal attachment that every photographer has to their photos – they’re like our children – and learning the art of detachment.)

First up, if you haven’t already read my article on What Makes An Outstanding Image, I highly recommend you do so first and then come back here afterwards. Part one is here, and part two is here. (Both open as links in new windows.)

Boiling everything down, there are only four things I look for in every image. The first three are fundamentals. The last one is a bonus. (In fact, I’ve said these things so many times at so many events and workshops that I wouldn’t be surprised if somebody decides to engrave them on my tombstone.)

1. Light
Every photograph needs light; no light, no photograph. Fantastic light can transform the most pedestrian subjects, and vice versa. I’m looking for light that isolates the subject, that shows off its textures and physical form and lines in a (preferably) unique way; a color temperature that’s either perfectly natural and accurate and puts you into the scene, or a color temperature that’s artfully shifted to elicit an emotional response in the viewer in a cinematic sense. The subject doesn’t have to be the brightest thing in the frame, but it has to be the most obvious.

2. Subject
Subsequent items get more nebulous and harder to define. In short, the subject is what the image is about. It can be a small part of the frame, or the entire frame itself; it can also be the idea. Basically: a viewer should be able to look at the image and know straight away what the focus is; who is the protagonist in the story? Timing is also a key element that affects both subject and composition – both positioning and expression. Abstracts are a little more difficult to assess, because they may not have a focus per se. In such cases, is the frame sufficiently well abstracted that you lose the sense of relativity and scale that provides the normal visual cues for identification of an object?

3. Composition
I like to think of composition as the way in which the elements within a frame relate to each other. It’s to do with positioning, balance and context; are the secondary subject positioned in such a way as to give priority to and not take away focus from the primary subject? Next, do the secondary subjects enhance the story, or take away from it? How are they relevant to the main subject? Would the image be stronger with or without them in the frame? Are any of them distracting? Next is balance; this is even tougher to define and probably should be the subject of an entire article in itself. In short, it isn’t symmetry, but it is about geometry. Are there things that make one side of the frame look heavier than the other? It isn’t a problem, but something that draws the eye in a particular direction – leading lines, for example – should do so in a way that supports the primary subject. Natural frames can also be used to help isolate the primary subject. You’ve also got to look for things that are distracting and not meant to be in the composition – edge and border intrusions are perhaps the most common example of this.

4. Bonus: the idea.
This is the hardest to define of them all. In its most concise form, does the viewer share the vision the photographer had in mind when he or she pressed the shutter? Note: it’s tough to communicate an idea if there wasn’t one to begin with, or it wasn’t well-formed in the photographer’s own mind. In fact, this is perhaps the toughest part in making a good photograph: you need to know what the final image should look like even before you take the shot. The best photographers do this consciously all the time; I know that if I can’t get what I want, I usually won’t bother taking out the camera. A lot of the time it’s because I don’t have control over the light, or because it’s not being cooperative; sometimes it’s because of technical limitations – I physically can’t get close enough, or I’m not carrying the right lenses to get the perspective I want, for instance.

On this basis, an image that scores a 2 is reasonably strong, but maybe lacking in one or two areas. Grade 3 images are excellent, and grade 4s are outstanding. Of course, there’s more to it than that, but at least you could say something along the lines of ‘3, composition is a bit loose around the edges of the frame’ and that would be implicit that the rest of the aspects of the photograph are strong. In the reader Flickr pool, I don’t admit anything less than a 2.5, or a 2 if the idea is very strong. There are a good number of 3s, but very few 4s. It might be an interesting exercise for you to go through the pool of images again to see what qualifies.

Of course, this is all relative; and that’s why it’s important to view and consciously assess as many images as possible to get an idea of what works and what doesn’t; that was one of the reasons to set up the flickr pool. There’s a lot to be learned from looking carefully at famous images: there’s a reason why they work, even if some aspects of the capture may be weak. And it’s almost always because ‘the idea’ is extremely strong, to the point of overshadowing and dominating the any potential shortcomings. (Robert Capa’s Normandy Landing series is a fantastic example of this).

Here’s the proposal – if you’re going to start a thread in the Flickr group putting your image up for critique, then give it a number (rating) – objectively, of course – and talk about what you think is missing, or what you think is exceptionally strong. That provides a good basis to begin discussion.

Even if you don’t put your images up for critique, keeping this framework in mind when viewing and assessing your own images can help immensely: you will land up with a much stronger raw material, and more times to postprocess them – which of course in turn results in an even stronger final set of images. Iterating this process has two positive consequences: firstly, you land up making ever stronger images, and not being tempted into keeping ‘not bad’ images; secondly, you will find you have a heightened cognisance of your own artistic style. This is of course a good thing – and one that’s extremely difficult to achieve. In the end, the greeks had it right: know thyself. MT

____________

Visit our Teaching Store to up your photographic game – including Photoshop Workflow DVDs and customized Email School of Photography; or go mobile with the Photography Compendium for iPad. You can also get your gear from B&H and Amazon. Prices are the same as normal, however a small portion of your purchase value is referred back to me. Thanks!

Don’t forget to like us on Facebook and join the reader Flickr group!

appstorebadge

Images and content copyright Ming Thein | mingthein.com 2012 onwards. All rights reserved

Personal evolution: changes in style

_RX100_DSC1851bw copy
2012.

This essay is a loose continuation of the previous article on Ignorance, fear and photographic freedoms in Malaysia; increasing paranoia and protection of perceived rights. It’s just the latest driver in the evolution of my photographic style over the last couple of years. There are two reasons for writing this essay: firstly, as an exercise in self-reflection and analysis, and secondly, to help my readers understand the effect of environmental factors on one’s photography. Actually, a good place to observe this trending is on my Flickr stream; there are lots of images dating from several years ago, in mostly chronological order, and it’s regularly updated.

_N200653 copy.jpg
2007. No way I’d be able to shoot that today; I tried using an RX100 two months ago and was confronted by security – this shot was with a D200 and 70-200VR.

Restrictions in subject

The aforementioned limitations on where I can shoot have forced me to revisit the easy places – cityscapes, street photography, and any abstracts I can get from public property. One of my favorite subjects – geometric architectural abstracts with human elements for scale – is now pretty much a no-go. I’m even trying out minimalist landscapes and general abstracts now; though the subjects aren’t as strong, it is forcing me to pay even closer attention to the strength of my compositions. An image with an abstract subject must be very strong indeed to stand on its own, because you’re effectively removing one of the four fundamental must-haves – leaving you only with light, composition and the idea.

_0011295bw copy
2010

A preference for physically smaller cameras

Many years of intensive laptop use (I blame this entirely on consulting), air travel and simply carting around far too much junk are now starting to take their toll on my back and neck; I simply can’t carry around as much as I used to without feeling sore after a couple of hours. I even use a roller bag on assignment now, where previously I’d have made do with a backpack for better mobility.

Although I’ve always had a compact camera for as long as I can remember, my preference has always been for larger sensors due to the benefits in image quality. It is only recently that technological evolution has permitted the quality of small sensors to reach and surpass the point of sufficiency for the majority of applications. Of course, the image quality from larger sensors has improved by a similar margin; the bigger the better continues to hold true in situations where ultimate image quality is paramount. Of course, there are restrictions involved: mostly around lenses and depth of field control. On the former, there are few high quality fast telephoto equivalents in fixed-lens compacts – Micro Four Thirds is a nice exception – which shifts one’s shooting style to prefer wider perspectives.

_7001742 copy
2010

Less bokeh, more context

A general lack of depth of field control on smaller formats forces you to avoid relying on bokeh as a crutch to save what would be an otherwise boring image – I see this as a very good thing, because the focus returns to light, strength of composition and overall balance. Depth of field control is a nice bonus when you do have it – I find I can now precisely control just how much context I want in a shot. Conversely, I also find that I’m making a lot more compositions that work with or without shallow depth of field; this can sometimes lead to paralysis by choice.

Although I think this shift in shooting style was brought on largely by my increased use of small-sensor cameras, I think it’s also a related consequence to an increasingly commercial mindset to my images; clients usually want to have more of the overall scene in focus.

_RX100_DSC1087b copy
2012 – I was on holiday, but it looks pretty darn commercial to me.

The shift from personal work to commercial work

This is a change that’s been a double-edged sword for me. Although it has forced me to up my game when it comes to lighting control and compositional variety, the fairly conservative nature of all of the industries I cover mean that there are generally accepted styles and norms, and a very low client appetite for something different. I’ve noticed the majority of my work now trending towards a very standardized, clean-looking style – I feel the unconventional angles and compositions that used to be my hallmark eroding somewhat.

There’s now a definite trending of my personal work towards the commercial style; it’s almost as though I’m almost unconsciously avoiding the grit of reality. I’m taking a lot more time to set up a shot that previously, paying more attention to potential still lifes and lighting control. Needless to say, I’m doing very little to no reportage these days – a friend’s wedding I recently attended brought home just how out of practice I was. (I suppose it didn’t really help that I chose to use two manual focus lenses that are known to be rife with field curvature.) At least I’m still continuing to put my individual stamp on color; if anything, I’m even more picky about it, because color accuracy is absolutely critical for product work.

_5013834 copy
2012. Shot RAW, converted with a little curve. That’s all – 30 seconds of work, maximum.

Efficiency in postprocessing

A part of me used to enjoy the Photoshop portion of the workflow – in some ways, it was the place where all the ingredients came together with a little alchemy to make something special. I suppose it’s akin to finding a sculpture in a rough block of marble. To put it bluntly, spending large amounts of time in front of the computer is no longer a preferred activity for me. Perhaps it’s due to the time spent on keeping this site running; then again, it’s more likely to be the D800E: the enormity of the files place huge demands on my computer and slow down the whole process by a factor of two or three. And when you’ve got a lot of images to process, this can make a huge difference in one’s tolerance. Furthermore, time spent on postprocessing is effectively dead time: you can’t do anything revenue-generating, or lead-generating, so it makes sense to keep it to a minimum. And when you work freelance for yourself, these two things are what keeps you afloat. (That, and debt collection.)

_8018238 copy
2012. Almost zero postprocessing – just dust removal.

Practically, instead of visualizing the physically impossible, getting a good base image to work from and then spending time on it in Photoshop, I’m now trying to do everything I can in-camera to minimize the amount of postprocessing. Granted, there will be some things that have to be done post-capture, but the more you can get right the first time, the faster your workflow can be. This has always been the case for commercial work – I’ve always believed that if you have to do heavy postprocessing on an image to make it look right, you’re not really in control of your lighting – but it’s increasingly also becoming the case for my personal work. If it doesn’t look 95% there in the actual scene, I probably won’t bother taking the camera out. It’s one of the main reasons I’m revisiting film.

_M8_L1026119bw copy
2009.

Seeking control with consistency

Another upshot of being more commercially-focused with my photography is increased consciousness of elements you’re changing in order to be able to replicate the shot later. This is especially true with watch photography where you might have several models of the same type where you need to have identical or near-identical images for catalogs etc; you might not be able to shoot them on the same day, but the lighting had better damn well be identical. (There are, of course, postprocessing tricks to get around this and make up for any small differences.)

_5011121 copy
2012.

From cinematic to natural

Perhaps one of the most difficult things to do is create a very natural-looking image from a natural, human perspective and still have it appear unique and arresting; I suppose having mastered the cinematic, perceptual color style and growing bored of it, I’m being masochistic and forcing myself to take on a new challenge. Or perhaps it’s a consequence of heightened color-awareness due to increased commercial work; or maybe even because small-sensor cameras do not lend themselves well to cinematic work: you need extensive depth of field control for that.

_D90__DSC6200bw copy
2009.

This site

Reviews require images, and I simply don’t have the time or budget to be able to travel somewhere new every time I want to get to know a camera; similarly, I can’t take the risk of using something untested on a commercial job, and even if I do, I frequently can’t release the images due to licensing agreements. So this means that whatever I shoot for a review has to be located relatively nearby; being nearby and having reviewed hundreds of cameras and lenses in my past life as a magazine editor means that I cannot avoid revisiting the same places multiple times. The tough part here is avoiding repetition: you don’t want to see the same test images as the last review, nor do I want to produce something boring; it is after all also my personal work. I am thus forced to revisit familiar places with eyes for a different image and composition every time; it gets increasingly difficult, but I think it’s also forced me to open my mind to different subjects and angles. In short: I am forced to experiment, and in experimenting, evolve my skill set.

_0011069bw copy
2010

Workshops and articles are the complete opposite to reviews: they rely on repetition and consistency. I have to have enough understanding of both the shooting process and my thought process to be able to give an objective account and description of the mostly qualitative elements involved. In a workshop, I have to be able to structure and demonstrate the techniques I use when I shoot. The trouble is, there are a lot of them which may be minor variations on a few major themes, and you may need to use one or several in any given situation. How does one decide what is a conscious technique choice, and what is a fundamental skill that runs on autopilot in the background of a photographer’s brain? It’s not easy to find a balance – too basic and you appear patronizing, and too complex and your students get frustrated or confused.

_RX100_DSC2119b copy
2012.

I’ve always found photography to be fascinating because it involves mastery of both quantitative and qualitative skills: there is only one correct exposure to get a certain luminance value in your image, but how you decide what that luminance value should be is an entire matter altogether. This of course is just one of the hundreds of tools a photographer has at their disposal; the evolution of style is a process that requires one to continually test, evaluate (objectively, but with a consistent level of personal and artistic bias) and experiment. I have no idea what or how I’ll be shooting a year from now, but I’m almost certain there will be value in repeating this evaluation exercise. MT

____________

Visit our Teaching Store to up your photographic game – including Photoshop Workflow DVDs and customized Email School of Photography; or go mobile with the Photography Compendium for iPad. You can also get your gear from B&H and Amazon. Prices are the same as normal, however a small portion of your purchase value is referred back to me. Thanks!

Don’t forget to like us on Facebook and join the reader Flickr group!

appstorebadge

Images and content copyright Ming Thein | mingthein.com 2012 onwards. All rights reserved

Ignorance, fear and photographic freedoms in Malaysia

_M9P1_L1006044bw copy
Photograph all you want. Prague, Leica M9-P, 50/1.4 ASPH

Several recent experiences in Kuala Lumpur have prompted me to write this article. They’re all pretty similar: I’m out and about walking on a public road, photographing various objects – never people – and I will be accosted by a rent-a-cop or security guard telling me that I am not allowed to photograph. Photograph what, specifically? Everything and anything which he deems is under his jurisdiction. There are two problems here: firstly, photographing from a public place is allowed so long as you are not on private property; the intended use is actually irrelevant – at least in Malaysia. The second problem is that these people are often immigrants who have both a very poor command of any of the local languages, zero to no education, and often questionable immigration status.

_3100_DSC0650 copy
Think carefully. Though this was shot a few years ago from the street and a good 50m away, I still subsequently had unhappy people waving and holding out stop-hands at me. Nikon D3100, 28-300VR

What this means is that even though you might be able to legitimately convince another person that you’re within your legal rights to photograph where you’re standing, you’re at a dead end because the rent-a-cop you’ve got to deal with is both ignorant and incommunicable. It’s extremely annoying because I’ve had this happen four times in the past week; I know my legal rights and won’t push it in a situation where I’m on private property and I’m trying my luck. The trouble is that this seems to be a worrying trend; it’s happened with increasing frequency over the last year or two. And it’s not because I’m photographing any different subjects than normal, or any more frequently – if anything, I’m shooting a bit less of my own personal work.

Although you could try very hard to convince them that you are a) harmless and b) within your rights, I’ve since found it less frustrating to simply move on to the next place and try to continue shooting – assuming of course that I’m still in the mood at all.

I can see why some of the more interesting places might be off limits – building owners have a legitimate interest in protecting their property rights after all; the problem comes when somebody is trying to protect rights that are not legitimately theirs in the first place. In fact, smart building owners should generally encourage non-commerical photography – in a world that is now full of social-media savvy consumers, you’d be stupid not to do otherwise. I can’t see any downside in having hundreds of images – some of them probably quite good – of your property out there, especially if it’s a commercial building and high tenancy rates are one of your objectives.

This level of ignorance is a very sad thing for Malaysia, because it compounds the existing lack of appreciation for art the population at large already suffers from. People are very happy to pay hundreds of thousands of dollars for a stack of PowerPoint slides that contain absolute garbage and executionally impossible strategies, or for life insurance schemes with an EV far less than parity – yet something that actually requires skill such as the production of a photograph, or copywriting – goes completely unappreciated.

The underlying problem is twofold: firstly, education, and secondly, something a little more deep-seated that’s a cultural mentality which we shouldn’t be proud of – and certainly shouldn’t keep encouraging. The lack of education keeps the population as a whole focused on assigning value to tangible things only – ignorance keeps people from realizing the added value of service, design, packaging, visuals – in short, the whole customer experience. It seems that repeat customers are not really a high priority for most businesses here – they just want your money; whether you come back or not is not their problem. It certainly isn’t the problem of the minimum wage employees actually doing the work.

A viciously destructive cycle is born: you don’t get repeat customers because the service is crap, so you have to cut costs to maintain profitability, which means even worse service, and even fewer customers. Do something wrong, and everybody is reading about it on Facebook or Twitter in a matter of minutes. Make the wrong person angry, and that number can easily run into the tens of thousands. The inverse is also true, of course. (It’s just one of the many reasons why I try to reply to every single message I get.)

I can’t help but wonder if a lot of why we’re stopped from photographing things is because there may be some borderline illegal elements at play – foreign workers without permits or operation without permits or licenses are at the top of the list, and both are rampant in Malaysia. In cases like this, I can understand why proprietors get understandably nervous about any form of documentary, especially cameras. A government that seems to turn a blind eye to this kind of thing for the right amount of ‘convincing’ does not help things, either. Once again, it boils down to a lack of education – forget prioritizing a sustainable business over a profitable one – and the cultural obsession with making money any way possible. Again: if you’re running a legitimate operation, a smart person would want as much publicity as possible to create awareness. It would seem that there are not so many smart people here.

On the whole, I’m both saddened and frustrated. Malaysia remains one of the most rich countries for photographic opportunity because of both the pace of change, depth and variety of cultural traditions and large social contrasts. It’s a great place to practice social documentary and architectural photography – or it would be, if we could just photograph within our rights. Interestingly, I’ve almost never experienced this kind of restriction overseas – I don’t know if it’s because I fit the stereotypical Asian tourist profile, or because the general level of education is higher, but the difference can be felt. In fact, I think I only remember being stopped from photographing something once in London – and I was at fault because I was trying to be stealthy despite the liberally posted ‘No Photography’ signs inside a private museum.

There is one workaround, however. Despite proliferation of cameras and variety, the perception of ‘big black camera equals threatening’ remains; use a small, nondescript compact and you’re generally ignored. (In fact, I was most frequently stopped when shooting with the F2T; it probably doesn’t help that I’m very, very slow with this camera due to a lack of built in metering, manual focusing and general care with film.) Fortunately, compact camera technology has evolved enough that using one doesn’t entail as much of a compromise in image quality as it would have done a few years ago – even under low light conditions. Granted, I love the D700+85/1.8G’s ability to make beautifully cinematic stills at night, but I can still do exhibition-grade work with the RX100 and it’s 28/1.8 equivalent. What it does mean is that a change of style is in order; mainly because I no longer have the same freedom of choice in equipment if I want to shoot the same subjects – or, I simply have to shoot different subjects.

I suppose one really has to look at the bright side of things here – I could continue to bemoan the ignorance and diminiution of photographic freedom, or I could embrace the forced change as a challenge to push me out of my comfort zone which would in turn force my evolution as a photographer. I might not like it, or think the overall change in societal attitude is a good thing, but it’s not as though we have much of a choice is it? MT

____________

Visit our Teaching Store to up your photographic game – including Photoshop Workflow DVDs and customized Email School of Photography; or go mobile with the Photography Compendium for iPad. You can also get your gear from B&H and Amazon. Prices are the same as normal, however a small portion of your purchase value is referred back to me. Thanks!

Don’t forget to like us on Facebook and join the reader Flickr group!

appstorebadge

Images and content copyright Ming Thein | mingthein.com 2012 onwards. All rights reserved

Photographic integrity and the use of Photoshop

Even amongst photographers, I think it is very important to demystify something which has plagued the photography community and the craft in general, especially since the early days of digital capture. I’m talking about Photoshop; yes, that dirty word which has now come to be associated with over-airbrushed models, extra crowds, and general media hoaxes and fakes of all possible descriptions. I think never has a creative tool been so universally reviled and misunderstood by the general population. The word ‘Photoshop’ in itself has almost come to be synonymous with making alterations or changes to something to the point that it is no longer representative of the original object or subject.

Whilst it is, of course, possible to turn a Oprah into Britney Spears and vice versa; to do it well exceeds photography and solidly enters the realm of digital illustration. I am not going to discuss that in this article*; suffice to say that it is a completely different challenge and requires the hand and eye of a painter combined with the logical, structured thinking of a programmer.

*In the interests of full disclosure, I was taught the vast majority of my Photoshop knowledge by one of the best illustrators in the UK. He also happened to be a photography enthusiast, my neighbor in London, and also the reason why I now shoot with a Nikon instead of Canon. I also use Photoshop for illustration, layout and design purposes, but in my experience, that requires an almost completely different set of tools to what a photographer would use – another story for another time.

That is not to say the retouchers couldn’t learn a thing or two from the digital illustrators; too often a much-too heavy-handed approach is applied to any corrections that are performed on an image. It is very important to have an eye for the original subject, a sensitivity to the natural pre-existing lighting in the frame, and the touch of a feather to seamlessly and imperceptibly blend any changes made with the original image. This applies not just to airbrushing and heavy commercial grade retouching, (such as smoothing skin and removing dust or unwanted reflections) but also to normal photographic corrections during postprocessing – I’m thinking specifically of dodging and burning or saturation adjustments.

This is one of the reasons why I’m a huge fan of using an editing tablet and pen; the pressure sensitive and tilt sensitive nature capabilities of the setup allow you to have very fine control over precisely how strong the effect applied is. Both size and density can change depending on the pressure on or angle of the pen; it’s very much like drawing or painting. I suppose if one were to substitute the brush tool for the dodge and burn brush and start a new layer, the resulting image – representing the corrections applied – would almost like a sketch of the original image. (I like to use the Wacom Intuos series because of their high precision and natural feel.)

There are a few worthwhile rules that I think all photographers should keep in mind as they are retouching and postprocessing:

It is possible to overdo it. precisely how much is enough is actually not a very easy thing to determine. However, this is where it is useful to see plenty of other images; look at enough photographs and you will eventually develop a sense of those that work and those that don’t, and more importantly, an eye for just how much processing is required to achieve the desired look.

If you can see where an image was retouched/ edited/ processed, you’ve gone too far. if the corrections also obvious, then the resulting image is no longer photograph but a very poor illustration. This of course is not the intention of photography.

Do things in small, gentle increments. this permits finer control as well as better blending and integration of the changes with the structure of the original image. It is also much easier to undo things and not have to repeat signification amounts of work if you happen to make a mistake.

Any sort of documentary or reportage photography which is intended for editorial news or recording purposes should not have the contents of the image altered at all.

The final point brings me to the second half of my article. In a situation where a photograph is meant to serve as witness to an event, object or place, integrity is paramount. This includes news, reportage, documentary legal documentation, or any sort of archive or historical reference. Although it is perfectly acceptable for the color, contrast and general tone of an image to be altered in such a way as to best present the subject to the viewer; it is definitely not acceptable to change what constitutes the contents of the image. Overenthusiastic use of the clone stamp, healing brush, and most notoriously, mask, copy and paste have cemented Photoshop in the popular consciousness as the tool of choice when deliberate deception or obfuscation is the intention.

That said, I think it is equally important to define what is acceptable in the context of not altering the contents of the image; this list includes exposure, shadow and highlight recovery, curves, levels, dodging and burning, desaturation/ black and white conversion, and minor hue and saturation adjustments. Frankly, the final item – hue and saturation – is also a little bit borderline. This is because a decisive change in the color of a photograph or subject can result in very different interpretations, for example, naturally occuring blue carrots would be an event of note, but postprocessed ones would not. It is therefore the responsibility of the photographer to ensure that color is as accurate and faithful to the original subject as possible. The alternative is to shoot in black and white; this has the effect of removing the psychological aspects of color from the image.

Determining what is naturally occurring and what is the product of Photoshop skill has become more and more difficult since the increasing popularity of shooting in RAW. It is actually nearly impossible to spot well executed retouching; in fact, I actually make it a point to look for flaws in retouching in order to avoid these mistakes in my own commercial work. Even in very good work, there are two giveaways. The first is that everything simply looks too perfect; reality is dirty, rough and full of flaws; an image that is meant to serve as documentary witness should also reflect that. It is possible (but highly unlikely) that a subject will be perfect and flawless at the full resolution level; and this is where such inspection should begin. The second clue is a lot more subtle, hidden in the noise characteristics of the camera. Even by eyeball, if this texture microtexture is not properly replicated in a retouched area of an image it will be fairly obvious. Although it is possible to have images with zero noise even in the shadow zones, or alternatively add it back, it is almost impossible to perfectly replicate the native noise pattern of the sensor, or have zero noise in the shadows. It is also possible to reveal these inconsistencies either through extreme total manipulation – which amplifies the differences between the retouched and surrounding areas – or through the use of forensic statistical analysis software.

There is a big gray area between documentary photography and conceptual or artistic photography. This twilight zone is home to the commercial photographer. Understandably, it is highly desirable to make your product or service or people look as appealing, flawless and perfect as possible; however there is also the question of integrity. This is where too much Photoshop can get you into trouble. Once a photograph no longer reasonably represents the actual product or service you are going to receive; in some countries it is quite reasonable to take legal action on the grounds of misrepresentation. One very good example of this is fast food; in the hundreds of times I’ve at McDonalds, I can’t recall ever having received a burger which actually resembles anything on the menu. Natural lettuce is simply not that green most of the time, nor are the burgers that big! (I also remember an oldish article circulating on the Internet which shows just how much effort and preplanning is used in the preparation of a burger for one of these shoots; there were spare parts for everything and a huge pile of discarded ingredients that would be perfectly edible, but due to a slight blemish were rendered unsuitable for photography. This was obviously in the days of film, before Photoshop retouching.)
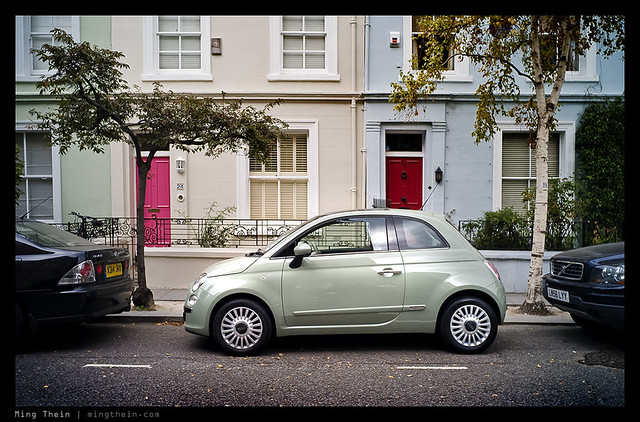
I personally deal with this issue on a fairly regular basis. As you know know, I’m a commercial photographer whose work covers subjects that are meant to be desirable – expensive watches, gourmet food and avant-garde buildings. There is therefore some degree of retouching required to ensure that the subjects look as perfect as possible; you can reasonably expect there to be no loose drips of sauce around your entree, or dust and scratches on your new watch. But just where do you stop making the tomatoes redder, and the meat more golden brown? To complicate things, it’s also a tough balance between finding a unique and aesthetically pleasing angle (a commercial photography requirement) against representing a perspective that a normal person might reasonably expect to experience. I honestly don’t have an answer for this question; the personal guidelines I generally work to are that the images I produce must look natural, even if they are conceptual in nature and require compositing multiple images (which frequently happens to manage reflections, deal with large dynamic range while maintaining shadow image quality, or photographing prototypes that might not be representative of final finishing). A dedicated and careful viewer should not be able to tell which part of the images has been retouched or composited, oh where the break points used were.

For my limited documentary work, I do absolutely zero retouching or airbrushing on any portions of the image and seek to deliver as faithful color to the original scene as possible. Adjustments are limited to curves, dodging and burning and sharpening; hue and saturation adjustments are made solely in the quest to deliver more accurate color. Personal or artistic work is basically open season; however, if I want to do illustration, I’ll do illustration; since I’m focusing on the photography, and my style these days is predominantly natural, I try to do as little retouching as possible. (It also helps me to speed up my workflow and throughput.)

By no means am I saying these guidelines are a hard and fast set of rules for every photographer to follow, however they are worth keeping in mind depending on the intended usage and purpose of your photographs. In the interests of maintaining the reputation and integrity of both the profession and the individual; working photographers should be open to fully disclose if an image has been edited or retouched, if it is ever called into question. The editing and retouching of images has been around for many years before Photoshop – there were even services for adding color to black and white images – but during the film days, retouching was never perceived as a threat to integrity, perhaps because the tools available were rudimentary, and it was nearly impossible to achieve a perfectly natural looking result. Today, it is very much our responsibility as photographers to do our best to restore public trust in the integrity of documentary images, as well as faith that what you pay for is actually going to be what you receive. MT

____________

If you enjoyed this post, please consider supporting the site via Paypal ([email protected]); Ming Thein’s Email School of Photography – learn exactly what you want to learn, when you want to learn it or learn how to achieve a similar look with our Photoshop workflow DVDs.  You can also get your gear from Amazon.com via this referral link.  Prices are the same as normal, however a small portion of your purchase value is referred back to me. Thanks!



Don’t forget to like us on Facebook and join the Flickr group!

Images and content copyright Ming Thein | mingthein.com 2012 onwards. All rights reserved