The four stages of creative evolution of a photographer

_7037765 copy
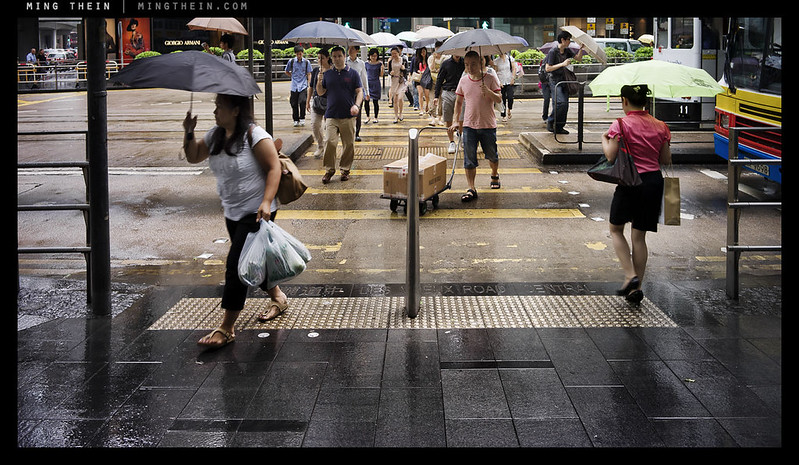
As close as I got to Everest. Nikon D700, 85/1.4 G

On careful reflection, there are a number of stages which every photographer (hopefully) goes through as their creative vision develops. In fact, it’s more like a pyramid or mountain that requires climbing: the higher you go, the more difficult it gets, and the more commitment is required. The lower slopes are gentle, easy and well-charted; the higher slopes are rocky, icy, treacherous and the preserve of the supremely brave or foolhardy. At the same time, far more people visit base camp than the summit; and few do it without supplemental oxygen.

Perhaps that metaphor has gone a bit too far. Like every pursuit, photography is one of severely diminishing returns: it isn’t difficult or expensive to become reasonably good, but if you’re trying to push the boundaries, be prepared for frequent dead ends, wrong turns, and never-ending criticism: the simple reality is that if you are always experimenting, not all experiments turn out better than the previous one, let alone tried and true methods.

I was at a dinner with a number of fellow commercial photographers recently where this point was discussed in some detail: we work in an environment of shrinking budgets and drying up jobs, yet there will always be some clients who perhaps are more like patrons than business as usual: they don’t mind you trying to push the boundaries. The comparison to the art world was drawn: a piece that may not make any sense to a casual, external observer makes no sense precisely because of the casualness of the observation: the viewer does not have the benefit of having experienced and seen the evolution of the artist from the starting point into their current form of expression. I think the same thing is true with photography, though to a lesser extent; we were discussing another recent batch of image submission which had to be graded/ sorted/ reviewed etc. and how to judge whether something had extremely deep and complex metaphors, or whether it was simply a bad image – the conclusion was that the caption was the giveaway. (It stands to reason that a casual-looking image with a deep meaning and careful execution would have an equally-carefully crafted caption that supports the message of the photograph. None of these particular images did.)

Pre stage
The vast majority of the population falls into this group. These are the people who own cameras and perhaps use them at social occasions, or for recording/ documentary purposes, or when they are expected to – like when on vacation – but do not actively seek to go out and take photographs. They may be creative in other areas, but just not photography. Composition is not something that they actively think about and technical skill is limited to turning the dial to the green mode. For the purposes of this discussion, I will classify them but not discuss their traits in any greater detail; I’m almost certain that none of my readers fall into this category anyway.

First stage
To progress to the first stage, you need to have the intention; you have to make a conscious choice in wanting to make a image. You may or may not know what is good, what works and what doesn’t, or the technical aspects of photography; the bottom line is that a person in this category has the desire to photograph. I suppose this is what separates newbie photographers from the rest of the population who might merely own a camera. Intention is what gives people the motivation to actually get out and do something – in this case, learning, experimenting, and trying out things. It is impossible to learn photography solely by reading or looking at other people’s images, though this can be very useful – you really don’t get a feel for things without experience, and this experimentation is something which is a common factor to all forms of creativity.

The other characterizing traits of a person in the first stage of creativity is that the way they shoot and the work they produce is reactive; they may make a conscious choice to embark on an outing whose sole purpose is to take photographs, however, it is very much a case ‘of shoot what you see’, and only photographing a subject if it’s obvious and front and centre. There is no element of anticipation, preconception, or previsualization involved; this means that the images are frequently lacking in a story – ‘the idea’ – because the photograph frequently contains only the subject and no related elements (the context) – or worse still, a bunch of distracting and misleading elements.

Second stage
The next phase of development involves some awareness of ‘the idea’. It is usually also accompanied by a heightened consciousness of one’s surroundings; this is caused by the development of one’s sense of observation and anticipation. The photographer in the second stage will visit a particular place and feel that it is photographically ‘rich’, with a lot of opportunities or stories; or perhaps that there are certain elements that must be included in a shot in order to the essence of the location.

However, the idea may not be fully formed, or the photographer may lack the technical ability to execute what they are envisioning in their minds. Images produced by the photographers in the second stage tend to feel a little bit chaotic; this is because not all of the elements in the scene are under control, or were included or excluded as a conscious choice on the part of the photographer. It is very possible for a second stage photographer to occasionally produce a brilliant piece image; the problem is that although the outcome may match the intended story perfectly, it was more due to luck than planning and would not be consistently repeatable. Most dedicated amateurs will reach this stage.

Third stage
The first part of this stage – let’s call it 3A – is when a photographer firstly has a vision in their mind of what the end product should look like, can consistently execute this, and have the image communicate its meaning or intention to a viewer on its own merits, without the help of a caption, or intervention from the photographer. These photographers tend to have nearly every element of the image under conscious control; and have a level of technical skill that enables them to consistently repeat the execution if required. There is practically nothing left to chance, and no detail is too small. A good commercial photographer would fall into this category, and it’s probably beneficial for them not to push too much farther, especially in Asia and other conservative markets – there are far more clients that prefer the ‘safe’ route rather than the experimental one.

At the same time, there’s something missing from the images – they’re too safe, too perfect; stage 3B is where the creative realizes this and is trying to produce something different, but can’t quite make it work; it isn’t a bad image, but the full idea or story isn’t getting through. On the way to the pinnacle, one has to expect to fail at least some, if not most of the time. And by fail, I mean produce images that are not quite satisfactory for some reason or another – usually because they fall short of fully and clearly communicating the photographer’s idea at the time of capture. If this isn’t happening, then chances are you’re playing it overly safe and stagnating.

Fourth stage
Defining what makes a photographer qualify for this level is tough, simply because it’s impossible to pin a concrete set of limits on creativity. Perhaps it’s best to say they have to be gifted in some way and give examples; we start with Louis Daguerre, include Oskar Barnack, H-CB, Capa, Kubrick, Salgado, Majoli and perhaps also Avedon and Leibowitz; I think some of the Japanese photographers like Araki would also qualify, though I don’t claim to fully understand their work – but it is clearly a very developed, evolved style. I’m sure there are plenty more out there whose work I haven’t yet had the chance to see, or whose work is either kept private (Vivian Maier, for example – though I don’t think she’s a stage four) or not well publicised. There are but a small handful of people who ever reach this point; they have the common trait of pushing the boundaries in one or more aspects of the image making process simply because they can imagine and envision things which the majority of the population are unable to. I suppose in some ways, this aberration of the mind or difference in thinking is a bit like having a disability, but in a way that’s more beneficial than debilitating.

Although these people have the benefit of being able to see in a way that the rest of us cannot; a lot of them are also handicapped by it because this way of seeing is so ingrained into their thought processes and consciousness that it is very difficult, if not impossible, to break away from. This is in a way analogous to a form of savantism in which the subject has a narrow, obsessive focus on one particular topic that leads them to consider every possibility and outcome; including the ones that are normally discarded through a more balanced rational thought process. This focus results and creativity or games in one very specific niche; a slightly less intense variant of this is the development of personal style. Discovery and adoption of a personal style, in a way, is the development of and obsession with a particular look or mood to an image.

One little thing I notice about photographers who are at the fourth stage is that none of them will ever admit it: their work is never excellent, it is merely good enough (and rarely, if that). They are proud of what they do, but they know that things can still be taken further with another push; ideas fleshed out and illustrated more fully. Their work is always technically very well executed, and frequently polarising; their creativity is so far ahead of the interpretative capacities of most people that there are two camps of viewers: the concept or message is so fundamental that either you understand it, or you don’t. They have a deep passion in what they do, bordering on the obsessive; and are frequently difficult people to interact with in social settings, simply because their thought processes are so different to the majority of people that there is no common ground or reference basis on which for them to interact, leading to frequent miscommunication and awkward gaps in conversation. This in turn contributes to such artists being misunderstood or developing a reputation for genius – it’s not that they don’t want to explain the rationale behind their thought processes, it’s because they simply cannot – what seems perfectly ordinary to them and not requiring a second thought is something that requires a huge number of mental leaps for somebody else.

The conclusion of this article has deviated somewhat into an examination of the mind of how an extremely talented and gifted person would think; this was not intentional however in the interest of full disclosure it is a topic that is very personal to me because of things I have faced in my own life. I graduated young, and have always been – by a large margin – the youngest person at my level in any organization I’ve worked at; in my last corporate job, my peers were in their 50s (I was 25). I had no problems doing the job – the huge delta in thought processes and social experience is what made me feel highly uncomfortable with my day to day situation.

One of the reasons I’m so passionate about photography is because it is one of the last few truly meritocratic fields; it doesn’t matter how old you are or who you’re related to (there are of course exceptions); in an anonymous viewing, a crap image will always be a crap image; there is far less discrimination based on age than in other fields. Perhaps it’s because a perception thing: you can instantly judge the merits of a photograph visually, but it’s impossible to know if somebody is a good investment manager or consultant or operations director simply by looking at them. (And even several years down the line, it’s still difficult to tell; it’s impossible to separate out the person from the other environmental factors affecting their work.)

This is of course not to claim that I fall into stage four or even 3B; I think it takes recognition by a large body of people for a person to be recognized as gifted. But I do know that I plan and think about my images to the point of being neurotically obsessive; there is always something that can be better, there is always something else to try, another article to write or another thought to elucidate and share. And in a weird way, I think I rather enjoy it. MT

____________

Visit our Teaching Store to up your photographic game – including Photoshop Workflow DVDs and customized Email School of Photography; or go mobile with the Photography Compendium for iPad. You can also get your gear from B&H and Amazon. Prices are the same as normal, however a small portion of your purchase value is referred back to me. Thanks!

Don’t forget to like us on Facebook and join the reader Flickr group!

appstorebadge

Images and content copyright Ming Thein | mingthein.com 2012 onwards. All rights reserved

Clearing up the myth of higher resolution, shot discipline and image quality once and for all

Empirical observation #1: Cameras with higher resolutions, for a given sensor size, are harder to hand-hold and get a good result than those with a lower resolution.

And I define a good result as one which the image is critically sharp at 100% actual-pixels view, with no motion blurring or other artefacts such as slightly missed focus (we’ll get to this later). Motion blur is when the camera moves by a greater amount than a pixel during the time when the shutter is open; if it’s less than this, then you see either hard edges on your subject as a perfect sharp edge, or with slightly lower contrast than expected due to the image projected by the lens on the sensor plane ‘spilling over’ into the next adjacent pixel slightly when the camera moves.

The simple reason why higher resolution cameras are less forgiving is that for a given angle of view, the camera with the high resolution will put the greater number of pixels per degree of field of view on the subject. This means, that less angular movement is needed before it becomes visible as blur on the image – i.e. you need to be more static than with a lower resolution camera to avoid seeing the effects of motion blur at the pixel level.

But what about the image when viewed as a whole at the same reproduction size? If we started out with a huge number of pixels with both – say 24MP and 36MP and resized both them down to say, 4MP or so – we would not see any difference between two cameras assuming one assuming both were equally downsized. This is because the downsampling process has enough information for each pixel to accurately determine its color and luminance value and therefore appears as true detail. If we downsize 36MP to 24MP, it might or might not look better: a lot of the outcome depends on the interpolation process. It isn’t a ‘clean’ situation where each new, downsized pixel has multiple pieces of information (the original pixels) to form an average that would be the same whether you used 8 or 12 pixels originally. Since 36 doesn’t divide cleanly into 24 – you get 1.5 old pixels per new one – there’s always going to be some guesswork as to precisely how that half pixel is allocated. And depending on the algorithm, any one of the following might happen – blur edges; stairstep artefacts; haloes or abrupt transitions; odd discontinuities in diagonal lines.

Let’s take an example: if you have a scene shot with 12 (8.45um pixel pitch) and 36 MP (4.88um pixel pitch) cameras, and both are equally motion-blurred. The degree of camera shake may be less than a pixel on the 12MP camera – let’s say 5um for argument’s sake, which will still produce a critically sharp image. However, the 36MP camera is now blurred by more than one pixel, which definitely will not look critically sharp at 100%. Yes, we can downsize – but you are downsizing not to 1/2 of the original linear dimension (which would yield 8MP, and bin the two blurred pixels into one sharp one that looks perceptually okay), but to 1.7x of it – and once again, we run into potential issues in trying to fit discrete, nonlinear data into a linear continuum.

This is one of the reasons why less pixels might actually produce a perceptually sharper/ crisper image for a given reproduction size, providing that this size is reasonable for the amount of resolution you’ve got in the smaller image.

The upshot of all of this in practical shooting is that you’ll need to use a higher shutter speed than you expect, which lowers your shooting envelope by a corresponding number of stops as noise increases as you ramp up the sensitivity to keep shutter speeds high. Perceptually, if you’re going to be shooting under already borderline conditions to get a critically sharp image with a 12MP camera, you’re not going to get one with a 36MP one – even if you print them at the same size.

Empirical observation #2: Cameras with higher resolution require more precise autofocus.

Comparatively, this one is very simple to explain: if the camera misses focus, the resolving power of the lens is diminished. You need to have the ability to resolve slightly smaller structures than the pixel pitch of the camera in order to create a perfectly sharp image at the sensor plane. If you miss focus by an arbitrary amount – let’s say 1% of your subject to camera distance – this may result in a loss of resolution corresponding to the inability to resolve structures below 5um in size. For our 36MP, 4.88um pitch camera, this will appear to be a blurry shot. For our 12MP, 8.45um one, things still look critically sharp.

A lot of what we’re seeing isn’t necessarily worse autofocus; what’s happening is that we are now visibly reaching the limits of tolerances and precision since sensor quality is now high enough to resolve at or close to the previously acceptable tolerances.

A lot of the reasons why an image appears sharp or not has to do with the reproduction medium, as well as how our eyes interpret information: an image with hard edge is seen to be ‘sharper’ than an image without one, even if there is less fine detail or edge definition. The fact that digital capture splits out our images into distinct zones – the pixels – doesn’t help this at all, either. It’s important to remember that a slightly blurred image (depending on the degree of blur, of course) from a higher resolution camera may technically still have more detail, our eyes don’t necessarily pick up on this; it’s a perceptual thing. Bottom line: don’t use more pixels than you are capable of handling properly for a given situation. It’s one of the reasons why I don’t shoot the D800E for casual work…but it’s also the reason it’s my camera of choice when I have full control of the execution. MT

____________

Visit our Teaching Store to up your photographic game – including Photoshop Workflow DVDs and customized Email School of Photography; or go mobile with the Photography Compendium for iPad. You can also get your gear from B&H and Amazon. Prices are the same as normal, however a small portion of your purchase value is referred back to me. Thanks!

Don’t forget to like us on Facebook and join the reader Flickr group!

appstorebadge

Images and content copyright Ming Thein | mingthein.com 2012 onwards. All rights reserved

Basic street photography techniques

_RX100_DSC0385b copy
Offerings for sale. Sony RX100

Continuing in this mini-series on street photography, there are a number of techniques that I use while shooting. Although it’s possible to describe most of them in some detail, full understanding requires both demonstration and practice – this is where joining one of my workshops is ideal 🙂 Together with the basic principles of balance, perspective, composition and what makes a good image – these techniques may be used singly or in combination to generate strong street images. In fact, they also apply to documentary and reportage work, too; the only difference between good street photography and photojournalism is that the latter has a consistent theme and subject.

It’s important to note that not every technique is suitable for every situation, and vice versa; as always, a good portion of making a strong image is knowing what to leave out.

_M9P2_L1000182 copy
Hiding from the rain. Leica M9-P, Zeiss ZM 2.8/28

Timing and anticipation
In a photographic situation where you have effectively zero influence of any of the elements in your frame except the composition and exposure, timing is the one key bastion of control that remains in the hands of the photographer. By making a conscious choice of when you push the shutter, you decide when each and every single one of the moving elements in the frame is in the position you want them to be in. However, it is too late to react only at the exact instant you see the composition you want. It is therefore important for photographers to be able to see a scene, visualize the potential contained there, and be able to imagine what the finished frame will look like once all of the desired elements are in place. It is then a matter of simply waiting for those elements to all come together, and being ready with the camera when they are. No matter how fast reflexes, or your camera, the fact is that if you react off to you see something, it’s too late; training yourself to anticipate action is something that can give you the critical second or half-second which can make all the difference between getting the that and missing it completely.

_5006872 copy
Progression. Olympus OM-D, Panasonic 20/1.7

Shoot stopped down
A lot of these techniques are about timing. Specifically, gaining yourself a little bit of extra breathing room to react. In this case, shooting stopped down allows you to simplify the process somewhat by not having to decide what to have in focus, and what not to have in focus. If you’re shooting with an autofocus camera, it also allows a little bit of leeway for the camera to misfocus, yet still allow the final shot to be in focus thanks to extended depth of field. Note that of course this technique does not work under low-light situations, where you need every stop of aperture you can get. Compositionally, shooting with great depth of field actually forces you to create stronger images. This is because you have to think more about your subject placement, leading lines, empty spaces, etc – which all affect the overall balance of the image. If you can make interesting image without relying on the crutch of bokeh, then you will find yourself with increased compositional and artistic flexibility when you do have this option in your toolkit.

_M9P2_L1000213 copy
Divided. Leica M9-P, Zeiss ZM 2.8/28

Shoot wider
There are many reasons to shoot with a wider lens. First of these, is of course the enhanced foreground perspective emphasis that it provides, hopefully on your subject and not an expanse of pavement. Having a lens with a shallower and more forgiving depth of field profile both allows greater latitude for focusing errors, as well as allowing extended depth of field without having to stop down too much. There are also other non-obvious advantages of going wider – not only do you eliminate or minimize the possibility of having unwanted elements come between you and your subject due to physical distance (and you subsequently missing the shot because in the time it takes for your frame to clear, your primary subject has already moved on or changed position), but also you can get people in the periphery of the frame as edge subjects or context without them suspecting anything. In this sense it’s also about minimizing the reaction time between you visualizing the shot and executing it.

_RX100_DSC0688b copy
The taxi men. Sony RX100

Act as though you belong
In pretty much all situations, you will notice the confident people rarely – if ever – get challenged. This of course also applies to street photography. By acting like you belong, and you’re confident and know what you’re doing, casual observers to the scene assume that you have every right to be there and generally allow you to go about your business without interference. A subset of this is acting like a tourist. Tourists are not self-conscious and they are generally expected to take photographs of everything encountered; by doing this you’re fitting the expected stereotypes. And, as you will no doubt already know by having read my earlier articles, a large portion of photography – including the execution – is seriously influenced by human psychology at a subconscious level. Spend some time understanding how people think, and you will find that you both have more control over the way you images are interpreted, as well as how people react to you while you’re out shooting.

_M9P2_L1000693 copy
A glitch in the matrix. Leica M9-P, Zeiss ZM 2/50

Hyperfocal and zone focusing
One way of speeding up the shooting process is by completely eliminating focusing altogether. Hyperfocal focusing means that you have everything in focus beyond a certain point; it requires the lens to have a comprehensive depth of field scale in order to set your focus distance precisely. Manual focus lenses tend to be better for this, I suppose because manufacturers of autofocus lenses think that photographers will not use the manual option and therefore simply choose not to include proper depth of field scales. (Most of the time, they’re right.) Zone focusing is similar. What you do, is ensure that your desired subject distances fall between the two aperture markings on opposite ends of your depth of field scale. For the current bunch of high density digital sensors (anything over 12MP or so), you will need to use an aperture one stop smaller than indicated on the depth of field scale because these scales were calibrated for the circle of confusion corresponding 35mm film, and haven’t been updated since. There is a game played by rangefinder shooters that can help you improve your skills at estimating distances; pick a subject, set distance on the lens, and then check through the rangefinder to see how accurate you up. Do this often enough, and you will find that your focusing ability has magically improved. The upshot is that with sufficient practice, it is possible to estimate distances without even having to look through the viewfinder. This means that you can focus the camera and have it ready even while at waist level or in your hands, before you frame up the shot – once again, it’s all about reducing your reaction time.

_5001813 copy
Querry. Olympus OM-D, Panasonic 20/1.7

Stages
I don’t believe ‘stages’ is a commonly used terminology. I use it to refer to a setting, or scene, where the light is interesting and directional, and all it needs to complete the image is a human element of some sort to add context. I’m constantly on the lookout for these ‘stages’ when I shoot; when I find one, I will stay and work to seeing for his long as it takes for me to get an image that I’m satisfied with. Sometimes this is within seconds; sometimes it can take hours and I leave without getting the shot I wanted. But if I have a chance, and it’s a case of ‘unrequited stage’, then generally I’ll return again at some future point in time to get the shot I’d originally envisioned.

_M9P2_L1001019 copy
Haircut. Leica M9-P, Zeiss ZM 2.8/28

Layering
Layering is a technique that you can use to add context and depth to an image. It requires the use of a longer lens, which is ideally suited to this because it naturally separates out your scene into foreground, midground and background, all with relatively similar prominence. This allows you to place your subject in any one of these zones, and use the remaining zones to form the context and tell the story. Aside from using a longer lens, the other way to achieve layering is by the use of reflections; whether it be in a building’s glass, a puddle or perhaps some other shiny object. In this case, a wider lens is actually preferable because it allows you to capture more of the reflection. Note that when you’re composing, your reflected background is going to be further away than you think because the light has to come from the subject, to the point of reflection and then back out again to the camera; this can affect perspective in strange ways if it not consciously compensated for.

_X21_L1020034bw copy
They don’t know you’re there. Leica X2

Shoot through people
The most difficult and counterintuitive technique that I use is something I call ‘shooting through’. It basically requires you to stand still in a flow of oncoming people, and just shoot into the crowd. Although this will feel strange but first because you’re pointing your lens directly in people’s faces, offer a while you get used to it. The challenge then becomes actually separating out individual frames from the general scene as a whole. This technique works better in busy spaces and thoroughfares, simply because this means people tend to be more concerned with where they are going rather than what you’re doing. In a relatively quiet space, this technique is not very effective because people can see you coming – or rather, standing there – from a mile away. It is important to note that the psychological reaction to somebody standing still with a camera held up and ready to shoot is very different to if the same person stood there and suddenly brought out the camera to shoot; the action of raising the camera draws attention to yourself. Psychologically, sudden movements also catch us unawareness and make us uncomfortable. By looking like you have been there for a while, and will continue to be there, people are put at ease which allows you to operate without drawing unnecessary attention to yourself. In fact, oncoming pedestrians will probably take pity on you (poor tourist, trying to take a photo but we’re all in his way), not knowing that they themselves are actually the subject of your image.

_5A00477 copy
Garden of earthly delights. Olympus OM-D, 45/1.8

Stealth or flamboyance?
The final technique is simply being inconspicuous. This involves techniques such as not making any sudden moves, and most of the time, not even having the camera raised to your face when you take a photograph. The smaller, blacker and more nondescript the camera you use, the better, because it does not draw any attention. This is one of the reasons I like to use compact cameras for street photography – not only do I look like a tourist, but what possible threat could a small Asian man with a point and shoot pose? He’s probably just lost and on holiday. The complete opposite of this, and also viable option, is to be completely flamboyant and ridiculous. You stand out to the point that nobody takes you seriously; and this allows you to get on with your serious work in peace. I’m talking about shooting a bright pink camera dressed and perhaps being dressed red and blue; or maybe using a view camera on a tripod whilst dressed a three-piece suit and top hat. Then, you become a subject of interest and curiosity rather than the potential threat. (I have never done the latter myself, although in the interest of improvements in image quality, and perhaps the different look to my images, I am quite tempted. I plead the fifth on the former.)

Although this list is by no means exhaustive, I hope this article has given you some insights into both how I shoot when I’m on the street, and some new techniques for you to try out yourself when perhaps you see a great shot but you’re too shy to go out and get it. Bottom line is that street photography is not very different to being a Boy Scout: be prepared and confident. MT

____________

Visit our Teaching Store to up your photographic game – including Photoshop Workflow DVDs and customized Email School of Photography; or go mobile with the Photography Compendium for iPad. You can also get your gear from B&H and Amazon. Prices are the same as normal, however a small portion of your purchase value is referred back to me. Thanks!

Don’t forget to like us on Facebook and join the reader Flickr group!

appstorebadge

Images and content copyright Ming Thein | mingthein.com 2012 onwards. All rights reserved

What is street photography?

_RX100_DSC1889 copy
Calling in to check if the city is really there. Sony RX100

Sometimes, I think I’m a bit of a masochist. I actually like to shoot difficult subjects, and increasingly of late I’m also starting to write a lot about difficult topics. Today’s article seems like a very simple question to answer: what is street photography?

The more I try to nail it down – and I spent a considerable amount of time on this before the Finding Light workshop – so I would know what to cover, and more importantly, what my students would expect me to cover. The first point of confusion comes when you try to decide what is ‘street’ and what isn’t: what about public spaces? What about museums, galleries, fora etc? Stairs? Restaurants? Hawker centers? Public transport, like the Underground?

And here’s another question: does street photography always have to have human subjects in the frame? And when does street photography turn into travel reportage?

You can see how this becomes confusing. I’ve decided that in general, the genre is loosely defined around several broad guidelines (at least for me; your mileage may vary). Let’s take a closer look at these.

_VL31_L1010048 copy
Hands up. Leica V-Lux 3.

Street photography is unplanned.
If you’re controlling any of the elements in the scene, then it starts to become a conceptual or even outdoor studio shoot – posed models in public definitely do not count as street photography: the photographer knew (or should have known) exactly what poses, look and lighting he wanted before beginning the shoot. (You certainly wouldn’t hire a model and get shooting permission if you had no intention to shoot there, would you?) There is also a reactive element to it – spontaneity and the ability to anticipate are both critical tools for the street photographer. You really never know what you’re going to get on any given day, and that’s what draws photographers to the genre: a never-ending source of material.

_5010054bw copy
Breakfast. Sony RX100

Street photography mostly uses available light.
In fact, the only exception I can think of to this rule is the work of Bruce Gilden and his imitators. Setting up lights on the street corner or using a big flash tends to make the photographer extremely conspicuous, which that removes the unplanned element. People either go out of their way to be photographed, or alternatively, avoid you completely. Part of the challenge and attraction to street photography is the very fact that the light, amongst other things, is not under your control. A photographer has to train their eye to see interesting light, and their muscle memory to be able to take advantage of it – sometimes under extremely fleeting circumstances.

_RX100_DSC0731b copy
Rojak. Sony RX100

Street photography may or may not involve people.
This is a question of scale; at the near or human scale, you have that which are dominated by people as the primary subject; at the large scale you have entire cityscapes and street scenes, that use people to give context and scale to the image. The farther away you go, the more the image becomes about the atmosphere and the feeling of the place, rather than the people who inhabit it. That said, there is no reason why you cannot take photos of something which you happen to see while walking around looking for these scenes or people; this is the kind of thing which I like to call ‘street furniture’ – interesting lampposts, mail boxes and other geometries are also fair game. I think it is also possible to make an argument to include casual architecture in the genre; I know that when I travel, I tend to shoot a lot of interesting buildings with or without human context involved – simply because these are things I see while walking around, and they add a lot to the context and general feel of a place.

_RX100_DSC0728b copy
Morning papers. Sony RX100

Street photography, if involving people, tends to do so under situations where they generally do not expect to be photographed.
I suppose this sounds both a little bit voyeuristic, and slightly contradictory when it comes to frequently photographed public tourist attractions such as Trafalgar Square, but in general even though a person may know that you are photographing them, they certainly didn’t leave the house preparing for in the morning. This variety and unpredictability of people is yet one more aspect of what makes street photography interesting.

_RX100_DSC0628bw copy
Door symmetry. Sony RX100

Street photography, if involving people, generally has subjects that are unfamiliar or unknown to the photographer.
Perhaps this may be an overly fine distinction to make, however if a subject is known to the photographer and the photographer is familiar with the subject, there is usually some form of interaction between them. This relationship is usually clearly reflected in the photograph. I personally find that one of the things that makes street photography interesting is the fact that for that brief moment while you’re photographing somebody, there is that instant of connection between you and your subject which is then preserved for posterity – even if you never happen to see them again.

_RX100_DSC0351bw copy
Sometimes, smaller is better. Sony RX100

Street photography must always have a subject, regardless of any of the above restrictions.
This rule is a fundamental of photography in general, not just street photography. However, I feel it necessary to draw attention to this specifically because there are so many images out there on the Internet which claim to be ‘street photographs’ – yet they fail fundamentally as photographs because they lack a clear subject or idea. Even though the photograph itself may not be planned, this does not mean that you can’t have an idea in the instant instant when you see a potential frame, which is then executed immediately.

_RX100_DSC0645b copy
Evening. Sony RX100

Street photography must observe certain ethical restrictions.
This is very much a personal thing. There are certain people or things that I will not photograph because I do not feel comfortable doing so. In general however, a good rule to go by is not to do to other people what you would not want done to you; this includes intrusion into personal space, photographing people in potentially compromising positions, or under duress. I do not believe in taking photographs of the homeless, because I feel this is both exploitative and does not help them in any way. Similarly, paying somebody money to take their photograph may be an acceptable way to make a living in certain countries where there is no choice, however this is not something I want to encourage because I feel that widespread proliferation of this both discourages social documentary as well as taking away from the authenticity of the image.

_RX100_DSC0397bw copy
Christo comes to Kuala Lumpur. Sony RX100

Street photography has an element of reportage or the documentary to it.
Given that a strong photograph must have a distinct subject and a clear idea, the easiest way to do this in a street photography image is by capturing a moment. This is where HCB’s idea of the decisive moment becomes critical; in that one moment, all of the elements in the frame come together to tell a story. There is only one decisive moment for each story, but many possible stories for any given scene. If all street images have a story to them, then becomes clear that what we street photographers are collectively doing is capturing daily life for posterity. In areas where the pace of change is increasingly rapid – especially in developing countries – I feel there is a certain element of social responsibility here for all able photographers. (Or, at very least, the desire to show your descendants what life was like during your time.)

_M9P2_L1000663 copy
Outside the W. Leica M9-P, Zeiss ZM 2.8/28

Street photography is not restricted to black and white.
There are many reasons why historical street photography was done in black and white; most of them because that was either the only film available, or because it was a lot cheaper than color – especially in the quantities that prolific street photographers tend to shoot. Today, I sometimes get the feeling that black and white is overused as a distraction to cover up the fact that the image itself is fundamentally mediocre. Instagram certainly does not help things. Is important to remember the fundamental rules of color and composition to decide when black and white or color may be more appropriate. (Black and white works well for strong luminance contrasts and oblique lighting; color should be used when it is the primary means of isolation of your subject.)

_M9P2_L1000234 copy
Looking up. Leica M9-P, Zeiss ZM 2.8/28

Street photography takes place in public spaces.
In a private, or restricted access space, the people who use the space tend to be known to each other, which changes the dynamics of interaction between them (and the photographer). Public spaces maintain a degree of unpredictability simply because you never know who is going to be your subject.

Street photography doesn’t always have to have a purpose, but each image must aim to say something.
In fact, most photographers tend to shoot in the street genre simply because they feel like going out to photograph, but may not necessarily have any specific subjects in mind; I do this all the time. This of course does not mean that week images are acceptable!

_M9P2_L1000119 copy
Contemplating the markets. Leica M9-P, Zeiss ZM 2.8/28

Street photography doesn’t require you to fill the frame with a random stranger’s face.
One of the common misconceptions is that street photography always requires a clearly identifiable stranger or or person dominating the frame; let’s take a step back and think about the way we perceive the world when we are out walking on the streets. Our eyes scan around us, taking in the entire scene, and this generally corresponds to something around the 28mm field of view. It is very rare that our attention lingers on any one particular person or point, unless they are strikingly outstanding. Personally, my photographic style is developing in a direction that makes me want to replicate and reconstruct what I see both in reality altered by the filter of my mind’s eye, which means that the perspective I choose to frame my images tend to correspond to what I see. These tend to take one of two distinct perspectives, the first of which is slightly wide, corresponding to my general field of view; the second is narrower, akin to when you are focused on something and the rest of the scene gets ignored – 28, and 85mm.

_X21_L1020014bw copy
Escape route. Leica X2.

Street photography can be done with any equipment.
Although there are some cameras that are better suited to street photography than others, there is really no reason why you can’t use anything you happen to feel like using on the day. There are two ways of shooting street; the first is always to be set up and ready, which requires you to preset focus and exposure and work solely on framing at the instant of capture; the second is to be reactive and have a camera that is capable of both focusing and exposing very quickly. However no matter how fast the camera, a degree of anticipation is required in order to capture the decisive moment – there will always be some lag between you seeing the moment, due process happening, and the shutter firing.

_M9P1_L1012531 copy
Shadows. Leica M9-P, 35/1.4 ASPH FLE

Street photography and travel photography are largely interchangeable.
The only difference between the two is purpose and intention: the former can be when you are shooting with no specific goal or project in mind; the latter is almost always when you want to capture the feeling or mood of a place that happens to be both unfamiliar to you and fleeting or temporary; there’s a time limit on how long the photographer has to absorb and observe. That also introduces a perspective difference: when you travel, you look at a place through different eyes than a local; however, most street photographers operate primarily in their home cities.

_M9P1_L1012454 copy
Bangkok bus. Leica M9-P, 35/1.4 ASPH FLE

Having broken down my thought process in this article, I’m actually no longer sure that there is a concrete definition of street photography. At the same time, I don’t think that it should be a catch-all genre for everything else that doesn’t have its own category. Perhaps the simplest, and most accurate, definition is simply to think of it as ‘reporting on life’; through our images we are documenting the daily life of the people around us. I wouldn’t go so far as to think of ourselves as social anthropologists, but who’s to say what these extensive collections of images – assuming they survive – may be used for a few hundred years from now? MT

____________

Visit our Teaching Store to up your photographic game – including Photoshop Workflow DVDs and customized Email School of Photography; or go mobile with the Photography Compendium for iPad. You can also get your gear from B&H and Amazon. Prices are the same as normal, however a small portion of your purchase value is referred back to me. Thanks!

Don’t forget to like us on Facebook and join the reader Flickr group!

appstorebadge

Images and content copyright Ming Thein | mingthein.com 2012 onwards. All rights reserved

Candid thoughts on the online photography ecosystem

Let’s start off with a bit of a definition: the ecosystem covers all of the photography-centric bloggers, reviewers, pro photographers with blogs, corporatized review sites, e-commerce sites that might have some reviews, rumor mills, niche manufacturers of little photo-related widgets, gadget websites that might cover photographic equipment, testing houses, subscription review sites, point-and-click review factories, brand forums, community forums, photo sharing and hosting sites, facebook pages for photographers, columnists, contributors and so on and so forth – anything that’s photography-related, offering an opinion, and online.

This post is going to potentially offend a lot of people, but in the interests of continuing transparency and trust, I feel it is necessary to fully clarify my position.

There seems to be a bit of schism that’s taken place over the last couple of years, as the photography industry has both matured and moved truly into the digital age: correction, the primary consumer market of the photography industry has moved into the digital age. By that, I mean that increasing numbers of camera buyers are actually spending the time reading and then relying on the opinions of a relatively small (but growing) group of reviewers and websites. What I basically mean, is that photography online is becoming very much like either the automotive industry or the hi-fi industry. (I can understand why it’s so important to seek opinions in the auto industry – a car is a large, long-term purchase and you’ll probably only own one or at most two at a time; curiously photographers tend to own dozens of pieces of gear, whose combined purchase price probably exceeds their cars.)

Everybody and their dog (and their dog’s trainer and groomer) have an opinion, and many become self-proclaimed experts overnight.

It’s now both easier and harder than ever to check credibility: the louder a person shouts – and there are some bloggers who shout very loud about nothing much, or worse, illogical nonsense – the more weight an opinion seems to be given. This ‘expert opinion’ becomes repeated, quoted, and taken as gospel – all when the writer probably hasn’t done a shred of research, or worse, said something as a throwaway comment. People who in the real world, are generally sensible and making considered, planned decisions, are now following the town crier with their wallets open and thousands of dollars in their hands. Worse still, major camera makers are encouraging this by supporting the people with the loudest voice – not necessarily the most factual credibility. Where has common sense gone?

Perhaps it’s a case of information overload; the more text we have to read, the less we want to spend time looking for it, and so the first item on Google (or maybe the second, too, if we don’t have any meetings lined up) is all we read. The writers get more and more popular, and it’s a self-destructive cycle. The problem for the camera makers is that in the short term, people will follow the loudest voice. Obviously, this helps to sell a lot of cameras, which is what the companies want. In the longer term, as consumers get more educated, they’ll discover the louder voices are often incorrect, which discredits the previously ‘expert’ loud sources – and individuals are less inclined to trust future claims, which will have a negative impact on sales. It seems that feast now, famine later isn’t a problem for most executives because this year’s bonus assessment is coming up next month, and somebody else will be the one in the middle of the future famine.

As a consumer, you’re spending a not inconsiderable sum of your hard-earned money on something. Make sure that you know yourself, and what you’re going to use it for, before trusting the opinion of somebody who’s never used the item in question for your intended purpose. Most importantly: give weight to the review according to the output, i.e. the images. If a reviewer writes badly but is able to produce stunning images, then chances are they have enough knowledge that their opinion is meaningful. Do not trust reviews with mediocre (or worse, no) images – this is an obvious sign that the reviewer has no clue what they’re doing, and probably doesn’t even know what the equipment is for.

As a manufacturer, there’s a natural inclination to support those who are blindly loyal to promoting your product, especially if it’s at the expense of other companies. Wake up: if you can’t see that using many products gives a reviewer if anything even more credibility, then you might run the risk of being caught with your pants down when your customers (or somebody else with an even louder voice) says something to the contrary. A case of the Emperor’s New Clothes you do not want.

Forums full of equipment-masturbating fanboys are probably the worst hotbed of this kind of activity: people with relatively little knowledge go to seek the company of other people with similarly little knowledge, to try and reinforce the validity of their purchases – sometimes at the expense of common civility, or just being openly hostile to any challengers. Wake up: there is no absolute right or wrong piece of gear, the very reason that there’s a variety is because there’s no such thing as one size fits all. I don’t need my choices to be validated by somebody else to be able to take a good picture – that’s stupid.

One related trend that’s popped up and taken to the fore in the last year or so are the rumor sites: they serve an underlying malcontent insecurity amongst hobbyists who prefer to spend money on equipment in the mistaken belief that it will solve all of their problems and make them instantly better photographers. Worse still, titanically huge noises are made when the rumors aren’t as expected, and people forget that a) most rumors are intentionally leaked by manufacturers; b) nothing that might be released tomorrow will change your skill level or ability today; c) they’re rumors!!

What I really cannot understand is how people – and a lot of popular ‘reviewers’ fall into this category – can pass opinion on something that neither they nor anybody else have physically handled or used, and then treat this as gospel. Once again, the problem is that if something is repeated enough, and a sufficient number of people believe it, it becomes true.

But I’m probably preaching to the choir here: I don’t think the majority of my readers are under the illusion that practice and skill come second to equipment.

And that brings me to the crux of the matter: yes, cameras are now more than sufficiently prolific to be considered consumer goods (and with similarly short life cycles) – but ultimately, the pursuit of photography is about the production of images, not the collection of gear. There is nothing wrong with collecting cameras for the sake of collecting cameras*, or because you enjoy the designs, or for whatever other reason – just don’t confuse it with photography. It annoys me to no end when I’m challenged or criticised by people online, often hiding behind the anonymity of an ambiguous username on a forum, on something I’ve written that perhaps offends them because they purchased something I might have deemed to be slightly inferior to something else, or who insists on arguing a point that makes absolutely no difference in the real world. It is clear that these discussions are pointless, because a) you’re never going to convince a fanatic, but they can definitely waste a lot of your time; b) more often than not, they either haven’t posted a single image anywhere, or certainly none worthy of note: these are not photographers, they’re equipment fetishists.

*I highly doubt that anything mass produced and reviewed by every popular site on the internet is ever going to be collectible; there will simply be too many of them out there to appreciate in value – simple economics.

With that, I want to make some things clear about the principles under which I have so far and will continue to operate this site:

I am a photographer first, a writer second, and an equipment reviewer a distant third.
Everything I write about, I do so because it’s either interesting to me, or because I plan to (or already) use it in my professional or personal work. Time is far too limited for me to review things to promote them for manufacturers (several accusations) or bother testing extensively and reviewing a bad product. That is pointless, especially when I have to spend my own money to buy it!

My methodology is consistent.
I am a scientist by training, and know that a comparison with no baseline or repeatability or consistency in methodology is meaningless. I also know when the results are so close that the differences are within the margin of probable error, it’s impossible to call one superior over another.

If something seems off or unexpected, I double and triple check my results.
If there is a question in the results due to the possibility of sample variation, I will test enough samples to rule this out. The best example of this is the D800 and its focusing issues: I was accused of a) covering up the issue (!!) and b) crying wolf initially. I tested five bodies with a good spread of serial numbers variety of lenses; every single combination exhibited the problem. We can therefore conclude that there is a problem. If it had only been one out of the five, it would most likely be an individual sample defect.

I won’t ever post unedited JPEGs or similar images.
This is like making a judgement on a restaurant by eating half-cooked food. It isn’t giving the equipment a fair chance against other equipment, nor does it take into account the potential – and as a photographer, that’s what I want to have some concrete idea of. Would I buy a camera with crappy JPEGs but incredible RAW files? Of course, because I don’t shoot JPEG for the reason that I’m not maximizing the potential of my equipment.

I don’t do quantitative testing or pixel-peeping.
There are other sites that do this if you’re so inclined; however, sensor and camera technology has long past the point of sufficiency for the vast majority of uses, and even for those of us who make a living from images, our clients haven’t said anything about image quality for some time now (assuming of course you’re maximizing the potential of your camera). The fact that I need 3x higher a shutter speed to handhold adequately, or the fact that I can’t reach several of the major controls without contortion is far more important to me than the fact that the signal-to-noise ratio might be 5% better than its predecessor. One affects the way I work in practice, the other doesn’t.

I try to keep things relative.
In a previous life, I served as Editor and Contributing Editor to a photography magazine for over five years; in this time, I reviewed and used just about every major piece of equipment made; this totals some 300+ reviews. Using a variety of equipment both allows me to pick the best tool for the job, as well as have a good basis for comparison for one piece of gear against another. It’s of course impossible to use everything, but it’s also important to use enough that you can’t get called out for a glaring error.

I am not allied to any brand, though I work with many of them.
The brands I work with are fully accepting of the fact that I do so with no exclusive interest, and because I feel their product is the best for whatever I happen to want to do with it. I have full editorial freedom over what I write. And yes, there are brands and companies (I think you can figure out which ones by elimination) that I do not work with because they insist on censoring everything written first. That completely defeats the point of having an independent review, not to mention undermining everybody’s credibility. Saying something is good when it really is good is fine; it’s when people say something is good when it clearly isn’t that problems of objectivity arise. You won’t see me saying much (if anything at all) bad about most things, because it if’s bad, I won’t waste my time using it, or potentially affect my relationship with the brands by posting something negative that might be later constituted as inflammatory.

If I don’t know something, I’ll admit it.
There are aspects of photography where my knowledge is next to zero – sport, videography etc – and I’ll be the first to admit that. I’ll also not pass opinions on something that I have no knowledge of, or no ability to support through fact or experience.

My opinion is subjective, but I do try to be as objective as possible.
The outcome of any qualitative assessment is open to interpretation; photography very much qualifies as subjective in this regard. It is impossible to completely remove any interpreter bias, even moreso when it comes to the aesthetic considerations of an image – yet this is the area in which I receive the least (almost zero) discussion and challenge, by a long margin. I’ve always strongly encouraged my students and readers to seek a second opinion and not make a choice solely based on what I say; what works for me may not work for you, and what I like may differ from what you like. Seeking the opinions of multiple credible sources helps you to build up a objective, balanced picture – and hopefully make a better decision.

The primary focus of this site remains the creation of images.
From day one, this site has been about the pictures, and the creation of images. Everything else is a tool, technique or enabler, nothing more. It is information for the reader to absorb, and in turn allow themselves to be guided or influenced (or not) as they choose in their photographic journey. I initially didn’t want to review equipment, but eventually saw that it was a necessary part of photography – because so much of the way we see and create is inextricably linked to the tools we use, it is important to have an objective view on these tools from the point of view of a person whose primary focus was images. Don’t get me wrong: I like a good camera or lens as much as the next person (probably more so because I’ve used enough crap to be able to tell the difference) – I just don’t and will never let it be the dominating factor.

One final point: above all else, I value integrity and honesty – it takes a long time and several lucky breaks to build up a solid readership; but only one or two mistakes to erase your credibility. The danger comes when the commercial value of being dishonest is greater than the commercial value of being honest; this site remains a labor of love and a platform for me to share my knowledge with the photography community, and is nowhere close to being my primary source of income. (I think in over the last three months I’ve made a grand total of $400 or so from referral fees; nice pocket money, but not even close to being enough for a decent lens.) This allows me to maintain a level of objectivity that is impossible for pretty much everybody else – and I intend to keep it this way. MT

One final reminder for Malaysians: Today is the last day to enter the Maybank Photography Awards. Lots of great prizes up for grabs – and yes, I’m judging. 🙂

____________

Visit our Teaching Store to up your photographic game – including Photoshop Workflow DVDs and customized Email School of Photography; or go mobile with the Photography Compendium for iPad. You can also get your gear from B&H and Amazon. Prices are the same as normal, however a small portion of your purchase value is referred back to me. Thanks!

Don’t forget to like us on Facebook and join the reader Flickr group!

appstorebadge

Images and content copyright Ming Thein | mingthein.com 2012 onwards. All rights reserved

Film Diaries: Revisiting film under the pretext of creative development

_MT57330bw copy

Followers of my facebook page and those who joined me for the Tokyo workshop will know that I’ve recently acquired two vintage cameras, ostensibly in the name of investment, however in reality it’s simply because I enjoy using cameras of this generation; they really don’t make them like they used to.

For the curious, my acquisitions were a 1979 Nikon F2 Titan, and what is approximately a 1986 Nikon 58/1.2 Noct-Nikkor Aspherical*. In my mind, these two represent pretty much what is the pinnacle of 100% completely manual technology. The camera body is 33 years old, and looks just as pristine as the day it left the factory floor. (I doubt my D800E will be functional 10 years from now, much less 33; I think the batteries will be long dead and unavailable, and the media and file formats either unsupported or unreadable. Hell, my D2H is already dead, and judging by the slow disappearance of cameras from just six years ago on the secondary markets, it’s likely that a lot of those have either died or entered a quiet retirement too.) Testing the shutter speeds using a digital stopwatch and point-and-shoot on long exposure with the film back open is proof that despite its age, the mechanicals are still functioning perfectly. This is actually fairly amazing given the condition of the camera, because either it has not been used, or was shot by exceedingly careful and paranoid photographer. It is unclear, though unlikely, that the camera has ever undergone a CLA. At the time of writing, the accompanying lens has not yet arrived from Japan so I will refrain from drawing conclusions; however, given the relatively simple nature of the mechanics inside lenses, I’m not expecting any issues.

*In case you’re wondering why I selected this combination, there are some simple reasons: firstly, because I’ve always wanted an F2T since seeing one – the paint finish and weight are much like a modern Nikon, but the rest of the camera is entirely classical. Secondly, it’s familiar to me because I shot extensively with an F2A before; thirdly, the camera distills everything down to the bare minimum – no custom functions or AF issues to worry about; you focus where you want, you adjust exposure manually, hell, it has no meter, let alone DX coding or exposure compensation. Part of what I want to do is retrain my eyes to be my meter – I have this skill, but it isn’t accurate enough for my liking – a stop plus minus isn’t good enough for slide film or digital. At the moment while I’m learning, my Sony RX100 has now become a ridiculously over-specified meter.

For a person whose photographic credo throughout the digital age has pretty much followed the pursuit of perfection through control, you probably are going to think that the use of film is a little unexpected, to say the least. My history and experience with film so far has been somewhat chequered. Not counting my use of film cameras in the days before I had any meaningful interest in photography, I had a brief affair with a Nikon FM3a in my early digital (D70) days; I couldn’t get along with it and in the end landed up trading it in (with one of the rare black 45/2.8Ps) for a 12-24. I think I shot all of four rolls with it. Then, when I got serious, I picked up another film camera (Nikon F2A); the majority of my learning of photographic techniques was accomplished in parallel on both film and digital. In fact, I even shot watches on slide film (of all things), manually calculating guide numbers, diffusion factors, magnification factors and bracketing just to make sure. I got so used to shooting film, that I was almost treating it like digital. This led me to put on the brakes once again; I simply could not afford to pay for the amount of slide film and processing that I was running through on a weekly basis, much less find time to do the scanning.

At this point, we enter a silver halide desert. The next time I even so much looked at a roll of film was in mid 2009, when I picked up a Leica M6TTL as a backup body to my M8. The two biggest things I remember about that experience were that I completely wasted the first roll because I loaded it incorrectly, and as a result landed up with precisely zero images on it; and secondly the feel of the horizontal cloth focal plane shutter of the film Leicas is completely different – much smoother and quieter – than the vertical-travel, metal-bladed units in the modern digital Leicas. I think I must’ve used it on and off for a couple of months, and then decided I wanted the 50 Summilux ASPH more – so off it went.

By this point, I was too preoccupied with both work and the seemingly newfound degree of control that I was able to obtain through digital capture. There were also things I simply could not easily do with film – such as dodging and burning – unless I developed it myself – and I definitely didn’t have time for that. Ironically, this is one of the reasons that I am choosing to revisit film at this point. I’m finding myself spending far too much time in front of the computer post processing. It isn’t because I’m slow – far from it; it’s because I’m trying to do more with each image, and I’m simply shooting a much larger number of images these days.

Of course I am not shifting my commercial work back to film; that would just be stupid. There is no way, I can achieve the same degree of control and quality as I can with digital. And I’m certainly not going to take the risk of something unforeseen happening to the film in the intermediate process between shooting and client delivery. For the mall, there is simply no way I can keep up with the volume if I have to develop and scan every single print plus don’t forget this also dust spotting, retouching and color/ density correction required. Needless to say, I don’t think any of the clients these days would be impressed if you had to bill back the film costs – especially if you shot the same number of images as you normally would with digital.

For my pistol what however, I feel that it’s time to shift gears. I’m definitely experimenting and shooting more, but the improvement seems to be incremental and diminishing. Perhaps part of the problem is that I’m simply shooting too much. I need to be more selective before I take the picture; and again after take the picture. If this sounds like a breakdown in the editing process, that’s perhaps because in some ways, it is. Even though I usually throw away 98% of what I shoot in the quest for perfection every single frame, that 2% is starting to become quantitatively a very large number. Combined that with ever increasing file sizes, and the usual photographers attachment to the images which they shoot, and you have a recipe that’s going to eventually result in either of two things: you spend all of your time processing your personal work and doing nothing else, or you eventually give up shooting for yourself altogether. Obviously, neither of these is a ideal; the first results and you not having any income; the second, creative stagnation. (I’m not sure which is worse for a photographer. I suppose we’re all somewhat accustomed to the former.)

The unstriped come up with, is that I need to find a balance. A change to my shooting process that forces me to think even harder about the image before capture; to minimize the amount of postprocessing I have to do by ensuring that the critically important elements of a strong image are already in place before I press the shutter; and moreover something that forces me to think differently from a creative point of view. I need to play mind games with myself in order to improve to the next level. I suppose I could accomplish most of the former by forcing myself to shoot cameras with relatively small files, and even then only with a very small card – say 2GB, which is probably good for about the equivalent of two rolls of film in a D800E, or even 512MB, which would get me just over a roll from a D700.

The problem is really the creative portion. Although I find changing equipment does frequently force me to think differently, I spend just as much time figuring out how to get the most out of the equipment as shooting, which of course results in more experiments, more files, and even more computer time. This would just land me back in square one, not to mention significantly worse off thanks to the depreciation costs of new equipment. I even seriously considered switching to medium format at one point. However, this would have to be as much a commercial decision as a creative one, and the market in Malaysia, plus the majority of my overseas work being macro-centric simply does not justify the increased expenditure.

It seems as though once again there are good reasons to revisit film. In some ways, it’s much like shooting with a compact; you are removing an element of creative control so that you are forced into making the most of the others. This element of course is postprocessing and post-capture control**. The other added bonus is somewhat progress; every time you press the shutter it cost you money – I calculated to be around $.40 per shot, including processing. This makes you think very carefully before you push the button. I’ve met a lot of people say, that if you get one keep up on a roll you doing well; however, I think my keeper rate is far, far higher with film the digital; simply because it forces you to do everything you can to get the image right the first time. A nice bonus is that it’s also possible to try larger formats for not that much money; possibly because nobody seems to want the equipment anymore, and partially because the gear will be second hand, and therefore not lose a lot of value when you eventually move on and resell it. (You might well even make money on some of the rarer equipment – at least, that’s part of my plan with the F2T and 58/1.2; I also see a Hasselblad 501CM in my future.)

**Granted, I will be digitizing the negatives using one of the Nikons and a slide coping adapter, which of course creates the opportunity for me to intervene digitally at this point, but that’s not the objective of the exercise – there will be far fewer images to deal with, and I’m almost certainly not going to be doing any heavy duty RAW processing.

You’re probably wondering why there are no images to accompany this post. The reason why is simple; it’s because I haven’t developed any film yet. Instead of shooting hundreds of image a day, I’m now shooting perhaps half a dozen, if that. And I’m fairly sure (providing I didn’t mess up loading the camera), that the images I do eventually show will have helped my creative development. You’ll just have to wait and see. MT

____________

Visit our Teaching Store to up your photographic game – including Photoshop Workflow DVDs and customized Email School of Photography; or go mobile with the Photography Compendium for iPad. You can also get your gear from B&H and Amazon. Prices are the same as normal, however a small portion of your purchase value is referred back to me. Thanks!

Don’t forget to like us on Facebook and join the reader Flickr group!

appstorebadge

Images and content copyright Ming Thein | mingthein.com 2012 onwards. All rights reserved

Achieving ultimate image quality*

*Both with what you own, and what you don’t.

This seeds of this article started to plant themselves in my mind during a recent assignment. It dawned on me that my shooing style had been slowly changing over the last few months; from trying to run and gun handheld with speed and (mostly) precision, I was now bolting everything down to a 5-series Gitzo Systematic, hydrostatic ball head and geared head, shooting at base ISO at optimum apertures and compositing my shots. Oh, and bringing in lighting. I can only suppose this represents the next step in my evolution as a photographer, as my work becomes increasingly skewed towards commercial and less documentary/ ad-hoc/ personal. (I, and my bank balance, can only hope that medium format isn’t next!)

That said, there’s a right and a wrong way to go about the technical aspects of shooting. I want to cover tips on how to obtain the maximum image quality from your equipment under three different scenarios: firstly, handheld with the gear you own; without upgrading or buying any more gear, and finally, a hypothetical what-if scenario if the sky was the limit. Shot discipline basically boils down to two things – support/ stability, and optics. The former resolve as camera shake issues; the latter as softness and a general lack of resolution. I’ll address both here.

Handheld and making do
This scenario assumes you don’t have a tripod, and you’re shooting available light.

1. Watch your shutter speed. Make sure you don’t fall below 1/2x 35mm focal length for critical applications, or 1/35mm focal length if you have no choice. If you have IS or VR, you can safely shoot at twice as long a shutter speed as without; just make sure you give the VR or IS system a second or so to lock in first.

2. Use Auto-ISO, if you can control it. Auto-ISO may be derided as being for amateurs, but the reality is that it helps you to maximize image quality by giving you precisely the sensitivity you need and nothing more; if you increase ISO beyond what you need to get a decent hand-holdable shutter speed, you’re going to also incur unnecessary noise. This of course assumes that your camera allows you to set the minimum shutter speed and maximum ISO; not all of them do. The better ones automatically default to 1/focal length.

3. Check focus. This seems obvious, but relying on your camera to decide what should be in focus is a huge mistake. Pick the AF point, make sure you’re using continuous AF in case you or your subject moves – for very fast lenses, less than a centimeter can make a huge difference to the final result. I typically tap the shutter a few times to confirm focus and even defocus a bit manually and reshoot if I’ve got time. Inevitably, there will be variations in sharpness between frames; sometimes due to camera shake, sometimes due to the focusing system. Especially at the edges; not all lenses are flat-field, and some may have field curvature issues to take into account.

4. Use optimal apertures. Spend some time figuring out at what apertures your lenses perform best, and how this changes if you’re focusing at the borders or edges. Very few lenses deliver optimal performance wide open. Some lenses can also move their point of best focus on stopping down (‘focus shift’); this matters because all AF systems focus with the lens wide open. It’s important to know that even if your depth of field at f8 covers focus shift, it might not extend in the direction you were expecting.

5. Control your breathing. Exhale slowly as you release the shutter; the camera is coupled to your body either via your face (viewfinder) or worse, held at arms’ length; if you’re breathing hard when you take the picture, this motion transfers to the camera, which results in shake and softness.

6. Shoot RAW. A no brainer: keep all the image data your camera can produce. Storage is cheap. Near misses are more frustrating than not having the opportunity to shoot something at all.

7. Nail exposure. Getting exposure right, or as close to it as possible in-camera minimizes noise from shadow recovery or posterization and odd colors from highlight recovery afterwards. It gives you the maximum amount of dynamic range to work with. Note that getting it ‘right’ doesn’t mean making it as close to the final desired exposure as possible, it almost always means exposing to the right so that the highlights just clip – this keeps as much of your shadow data out of the lower, noisy, bits of information as possible. You can always reduce the exposure later with no penalty to image quality, but it isn’t the same in reverse.

8. Shoot bursts. Bursts minimize the effects of jerky fingers on the button, as well as giving you a couple of extra shots as insurance. This is especially important under low-light (read: dodgy shutter speed) conditions, as well as fast-moving events where anything could happen.

9. Watch your stabilization system. Stabilizers all involve a moving element of some kind to counter motion – they don’t work well with high frequency motion, simply because there’s a limit to how fast things can reasonably move. If your shutter speed goes above a certain threshold – generally 1/1000s or so – then the moving parts in the camera can create a minor vibration that won’t cause visible shake in the image, but it will trigger the stabilization system to try and compensate for it – and it usually overcompensates, resulting in a double image as it snaps from one place to another. Turn it off if your shutter speed is high enough. At the opposite end of the spectrum, giving the stabilizer a second or two to ‘bed in’ before you shoot can make a huge difference to its effectiveness. Mashing the shutter all the way down simply does not give the stabilizer enough time to lock in.

10. Stand firm. If you can’t bring fixed support, then be your own support. Find something firm to brace the camera on, or at very least, have both feet firmly on the ground. Tiptoeing or holding an awkward angle is almost certainly going to result in camera shake.

11. Don’t jerk around. Be smooth when you release the shutter – roll your finger over it and gently press, don’t stab at it. Use the half press position to lock in or activate focus, then just add a little more pressure to release. You’ll be surprised how much difference this makes to the sharpness of your images.

Under ideal circumstances, but you’re not allowed to buy anything
This is effectively how I approach my current assignments. Note: many of you will be surprised by just how good the image quality from the current generation of compacts can be, if given enough light, careful exposure and used on a tripod. My earlier article on the use of compact cameras for professional work shows some examples of that – and at that point, we didn’t even have such interesting options as the Sony RX100.

1. Support is critical. Although I both of my tripods and heads are rated far beyond the maximum equipment load I have – a light Gitzo 1542 Traveller and a much heavier Gitzo 5562 Systematic, I seem to be using the 5562 all the time. It’s simply as sturdy as a rock: the thinnest leg section is about an inch in diameter, which is much better than metal for damping vibrations. I don’t even use a column; the head – a Manfrotto Hydrostat – is bolted directly to the large platform. This tripod is so sturdy I can sit on it (without the head, of course) and the thing doesn’t move or flex. Simply no comparison to shooting handheld – there’s just no way to obtain this level of stability or precision in framing. I can’t imagine doing commercial work handheld anymore.

2. Use base ISO. Covered above.

3. Use optimum apertures. Covered above. Note that when you’re shooting a high resolution camera on a tripod, diffraction becomes very obvious. Unless you have no choice, don’t stop down farther than you need to – you can actually make the image softer that way.

4. Bracket and composite. For scenes with large dynamic range, or elements so far apart that no depth of field at reasonable apertures will cover them, I find myself using multiple images – one for each distinct exposure or focus zone – and compositing them afterwards in Photoshop. Care has to be taken to make things look natural, too; HDR this is not. And you simply can’t do it without a good tripod.

5. Bring your own light. I’ve always said that without light, there is no photography. With good light, the most banal subject can appear arresting. So why rely on unknown or potentially insufficient or spectrally-odd light? I bring a set of speedlights, umbrellas and softboxes to every job. Not only do I know exactly what I’m getting color- and exposure- wise, bringing your own controllable light also allows you to increase your shutter speeds to further minimize the possibility of camera shake or subject motion. Use the maximum sync speed unless you need to blend in ambient light too.

6. Watch your shutter speeds. There are a few critical threshold levels for shutter speeds – some support systems or cameras have a range in which there are inevitably vibrations, no matter how stable the tripod; you can’t go below about 1/60s for a slowly moving person, or 1/500s for sport; other, faster, subjects may require even more shutter speed. Even if in theory you could get away with 1/500s to freeze motion, you will probably see a significant improvement at say 1/1000s.

7. Use manual white balance. Although modern AWB is pretty good, and current sensors have a large dynamic range, what doesn’t change is the fact that once a channel blows, you can’t recover the information. Most of the time, RAW converters are interpolating data from the photosites of non-blown channels and adjacent areas to guess what the color for the overexposed area should be. Shifting white balance too much can actually cause channels to blow, or require blown channels to be brought back under Level 255. If you get the white balance right out of camera, not only does this save you the hassle of having to do major color corrections later, but it also prevents false color and minimizes noise in individual channels.

8. Use live view to focus. Both the resolution and focusing system problems of the D800 have made it clear that for critical applications, live view focusing is the way to go. You can’t get any more accurate than focusing on the actual imaging plane. This also allows you to check depth of field and preview exposure; finally, no modern DSLR seems to have been designed with critical manual focus through the viewfinder in mind – the focusing screens simply lack ‘snap’ and are optimized to deliver a bright image with slow zooms. I have to admit, I initially didn’t see the point of live view, but on a tripod, for precision work, it makes perfect sense. Especially with a good LCD. Now, if only we could get Retina Displays on our DSLRs…

9. Shoot RAW. Covered above.

10. Nail exposure. Covered above.

11. Use a timer or mirror lockup. No point in having the most sturdy support system in the world, and then inducing vibration by moving the camera yourself when you trip the shutter. Either use the self timer, a remote release or mirror lockup (or preferably, all three) – this truly minimizes the amount of camera shake at the point of release, and allows any residual vibrations caused by the mirror cycling to die down before the shutter opens.

12. Limit the amount of optical intermediaries. Teleconverters, adaptors and extension tubes all introduce another set of mounts into the equation, not to mention possibly degrading image quality if there are optical elements involved. The perfect planarity of each mount surface is required to maximize image quality at the sensor plane – there’s no point in having a perfectly flat-field lens if the mount is at an angle!

13. Turn IS off. You just don’t need it if you’re shooting on a solid tripod and making your own light.

14. Limit the tilting and shifting. Even though tilt-shift lenses are designed with a much larger image circle than the format they’re meant to cover, like every other lens, the edges of this image circle are often far from perfect. Limiting your lens movements helps to avoid these areas.

Sky’s the limit…
Here’s what I would have if money were no object.

1. Full movements. If I could place my depth of field and focal plane precisely where I want it, I wouldn’t need to use large lights or very small apertures; Scheimpflug is your friend.

2. A large format back with enormous pixels. Large format for better DOF control; a single shot back (if anybody makes them that large for non-military use) with big pixels for fantastic dynamic range and color accuracy. Forget JPEG, RAW is all I need. And it should have a nice, high-resolution preview screen for critical focusing, too.

3. High CRI LED panels, and lots of them. Bringing my own light – with low weight, low power consumption, no chance of bulbs going pop, and good spectral transmission. Plus, the ability to preview the outcome of a particular lighting setup lets you work a lot faster.

4. Some serious support. I’m very happy with the Gitzo 5562 I’ve got now, but it seems that the combination is let down by the head. Specifically, not so much the rigidity of the head as the lack of precision in positioning; I think I need an Arca-Swiss Cube or D4.

5. Apochromatic lenses with leaf shutters. No loss in resolution due to CA; great color reproduction, and minimal camera shake thanks to a teeny shutter with very low mass.

5. A packhorse and/or a good chiropractor. Either it carries itself, or my spine is going to go…MT

____________

Visit our Teaching Store to up your photographic game – including Photoshop Workflow DVDs and customized Email School of Photography; or go mobile with the Photography Compendium for iPad. You can also get your gear from B&H and Amazon. Prices are the same as normal, however a small portion of your purchase value is referred back to me. Thanks!

Don’t forget to like us on Facebook and join the reader Flickr group!

appstorebadge

Images and content copyright Ming Thein | mingthein.com 2012 onwards. All rights reserved

Technology, art, and pushing the boundaries

Even from the earliest days of photography, there has been an inextricable link between the medium and the technology used. Classical artists saw it as an abomination: where was the skill required to recreate the form of a subject when the device did everything for you? If anything, the early photographer was more engineer and chemist than artist. Relative unfamiliarity with some properties of the medium – depth of field, perspective, etc. and near complete unpredictability with others – tonal reproduction, exposure, colour, lighting, emulsion quality etc. meant that results were hit and miss, and more often about getting any image at all – rather than one of any longstanding artistic merit*.

*I believe the popular analogy goes ‘what’s amazing is that the horse can talk at all, not so much what it has to say’.

And for this reason, many of the images we see from the early days of the medium – especially portraits – resemble conventional paintings in the posing, light and general composition. Is it any wonder that early photographers weren’t taken seriously by artists? In fact, I think we can argue that photography as an art medium didn’t really come into its own until the second half of the 20th century, coinciding with not one specific event, but a few technological ‘enablers’:

1. Built-in meters.
2. TTL flash.
3. Consistency – both in the cameras themselves, as well as the processing
4. Mass market processing of film.
5. Later on, autofocus.
6. Still later, digital.

Each one of these things has brought its own little impact on the way photographers work; arguably, making executing a technically good photograph a lot easier than it used to be, but also removing the other distractions and freeing the photographer to concentrate solely on the contents of the frame. All things equal, if you don’t have to think too much about exposure, or focusing, or whether you need to remember to adjust the lens a few degrees past the mark to get true infinity, then you should have a bit more spare brain power to spend on composition – which in theory, should make for stronger images.

But on the whole, I’m not sure we’re seeing this. I remember a statistic that said 10% of all images ever taken were shot last year – that’s mind boggling. By simple laws of statistics, more images means more better ones as an absolute number – but perhaps not more as a proportion. I think maybe making things easier has actually resulted in taking a photograph both crossing the threshold of ‘something you do casually without thinking about it’ as well as opening it up to a whole bunch of people who might otherwise have been intimidated by all of those buttons and knobs. Give a random person your Leica M3 to take a photo of you with in the 1950s, and he’d probably do okay. Do the same today, and chances are they’d run off with your camera.

Yet for those of us who are taking the whole photography thing seriously – and I’m not talking about the gearheads and collectors here – it’s a golden era. We photographers have never had such a wide choice of equipment to use; all of which performs well above the sufficiency threshold. Arguably, even the enthusiast compacts of the current era can deliver at a level that was very much cutting edge for anything below medium format not so long ago. Beyond that, the expansion of the overall market has made room for niche equipment makers to survive and thrive; a good example would be a tilt shift bellows for M4/3, made by Novoflex – combine that with the small sensor, and never-ending depth of field, anybody?

And that brings me to the core of this essay: in a creative form that has always been tied to its technological roots, we might as well embrace it and use the technology to open up new creative doors; I think the current generation of photographers is doing that well, but perhaps not taking it as far as they could be. I’m talking about vision, imagination, and the idea; the ability to see in your mind your final frame before you shoot it. And it doesn’t have to come out of the camera that way; there are some things that must be done in post-processing, like compositing or retouching – so what? The only limitation in the results is very much down to how far ahead the photographer can see; how well they can visualize the effect or potential applications of the new tools. At the same time, though, we must be careful not to get caught up in pop culture: a good example would be that not all HDR has to look like a multi-colored psychedelic tone map. What else can we do with HDR that would result in a frame that a) doesn’t look like every other HDR frame, and b) allows you to present a different view on the world? At the same time, it’s important to note that for journalism purposes, a degree of integrity is required in images: changing the tonal presentation is fine, but changing the contents of the image is absolutely not.

I want to talk about some of the emerging and maturing technologies that make me excited because I can see creative applications for them; I’m sure that there are plenty more I’ve not even heard of. So bear with me.

3D/ Lytro.
The presentation aspect of this has some ways to go before it becomes really mainstream; I’m more interested in the ability to fix a ‘near miss’ after capture, or to have perfect focusing all the time, or have control over the depth of field after taking the shot. For this, we wouldn’t need to have an infinite number of light fields to enable focusing at any distance, but just a few before and after the captured focus point to be able to tweak things afterwards. With sufficiently high density sensors, we wouldn’t even have to take much of a hit in resolution – and I’m sure a smart algorithm could make use of the nearby non-image forming pixels to reduce noise or improve dynamic range.

Composite sensors.
It’s a bit surprising that the conventional Bayer array CCD has lasted this long, actually. Although the idea of Foveon – with multiple photosites per pixel – is a good one, there’s no way that vertical stacking is going to be able to deliver the same noise and dynamic range results, because by the time the light hits the lowest layer of the sensor, it’s already been attenuated severely by the filters above it. And if you don’t have much light in the first place, all you get is noise. What would make more sense is some form of pixel binning – especially with the increasingly dense sensors we’re seeing today. The OM-D’s 16MP sensor is a quarter of the size of full frame; that would make a 64MP array at the same pixel density. But what if the pixels were grouped into bunches of four – RGB and luminance – for true color at each photosite? The luminance pixel could be used to further improve dynamic range and noise, too. And I don’t think a real resolution of 16MP is anything to sniff at.

Speed and HDR.
Input dynamic range should not be confused with output or display dynamic range. Even though the display methods we have today are limited to ~8 stops because they can’t all be lightbulbs to replicate the brighter areas – an LCD for instance, or a print – that doesn’t mean we can’t use more input dynamic range. What this lets us do is choose where and how we allocate the output tonal scale, according to our artistic intentions for the scene. The current limitation is that single-capture DR is around 14 stops maximum; whilst this is far ahead of anything we’ve had previously, there are still scenes that exceed this dynamic range, yet remain clearly visible to us in real life without clipping to black or white. At the same time, capture speed is getting faster – why not take two shots very close together with the mirror up, and then merge them in camera to prevent clipping? We’re already nearly there with the back end coding, but the speed (and camera/ subject motion related to it) needs a bit of work. No reason why at say shutter speeds above 1/1000s we couldn’t have a 1/1000s and a 1/2000s exposure…

Extreme perspectives.
Slowly but surely, lenses are getting both wider and longer. They are also quite unwieldy to handle or compose with – how close do you have to be to something with an 8mm lens on FX to make it fill most of the frame? Very, is the answer. But yet there are plenty of creative photographers who are using these tools to create interesting perspectives. On the opposite end, the Phantom HD camera used by the BBC to film Planet Earth comes to mind – it lets us get close, at a surprisingly natural perspective, without having to either endanger the lives of the crew, or scare off whatever it is we’re filming/ photographing. No doubt it’s a bit voyeuristic, but hasn’t that always been the nature of photography?**

**A good example of this is Miroslav Tichy – although pretty much seen as a pervert during his lifetime, he’s now considered an artist. And yes, he made his own cameras out of cardboard and string.

Miniaturisation.
I think it’s impossible to separate perspective from location – getting the camera into places previously impossible, or inaccessible, is also a big part of this. Aside from the obvious aerial rigs to get us remote unsupported shots in the middle of the action (at the Olympics, for example) – there’s also the whole field of miniaturisation. Perhaps the best example of this is what the GoPro camera started: POV filming from absolutely any point of view. What if we could do that to a decent image quality level with still cameras? In my mind…taken to the extreme, I envision sticking the end of an extremely fine endoscope inside a watch movement to photograph it. I’m sure you all can think of other uses.

Endurability/ survivability.
Taking perspectives and location even further – we’re now sending cameras to places where we physically can’t go, like space, or the deep ocean, for instance. The more advanced our technology gets, the more options we have. Just like in the early days of being wowed at capturing any image at all, eventually there might be some thought given to composition, framing and the artistic merits of the photograph – once we’ve sorted out getting the photograph at all.

Increases in sensitivity and color accuracy.
Since the D3 generation of cameras – I feel we have been able to get a useable image under conditions previously unimaginable, or where we’d just say ‘forget it’. But that kind of flexibility ha, if anything, made me even more aware of the other even more difficult shooting conditions under which I can see a shot, but it remains beyond the ability of my camera to capture. Or we can capture it, but it doesn’t quite come out looking as we saw the scene. The ability to really reproduce what your eyes can see, under all conditions, is something where technology has made great strides but still isn’t quite there yet.

Integration with the photographer
Here’s a crazy idea: what if you could just download the image you saw directly from your eye/ optic nerve/ brain? I wouldn’t be surprised if some research lab somewhere is working on it. We’ve already seen integration of CCDs with the optic nerve to be able to restore sight to some degree, so why not the other way around?

It’s definitely an exciting time to be a photographer. At the end of the day though, it’s important to remember that all of the technology is but an enabler: it’s up to us to push our own creativity to come up with something different, and create your own vision. And although that will always remain the biggest challenge, there will be also always be some people who conquer it and move the medium forward as a whole. MT

____________

Visit our Teaching Store to up your photographic game – including Photoshop Workflow DVDs and customized Email School of Photography; or go mobile with the Photography Compendium for iPad. You can also get your gear from B&H and Amazon. Prices are the same as normal, however a small portion of your purchase value is referred back to me. Thanks!

Don’t forget to like us on Facebook and join the reader Flickr group!

appstorebadge

Images and content copyright Ming Thein | mingthein.com 2012 onwards. All rights reserved

OpEd: The democratization of photography and the state of affairs in Malaysia

_5100_DSC1117 copy
Inclusive? Exclusive? Fair? You be the judge. Nikon D5100, AFS 85/1.4 G

This article was originally written by me to provide context for the 2012 Maybank Photographer of The Year Awards, for which I’m serving as Chief Judge. It was published in The Malaysian Reserve, 14 September 2012 edition. Reproduced with permission. A scan of the original article is available here.

Humans are visual people: we are drawn to things that look different, things that are aesthetically pleasing, and above all, things that communicate with us at an emotional level. This applies to both objects and photographs; in fact, half of the neural connections in our brains are related to vision in some way. What’s changed notably in the last eight years – since 2004 – is an explosion in visual content creation, sharing and awareness, fueled by proliferation of internet access, falling prices of digital cameras, and more recently, the rise of social media.

I pick 2004 as the turning point because it was a landmark year for photographers: it brought the affordable consumer digital SLR. Professional quality was now accessible to the masses at a tenth of the former cost, reducing the sole differentiator of photographers again to skill. More importantly, the learning process became extremely fast thanks to instant feedback. With film, you might not see the results of your experiments for days or weeks.

This gave birth to a new generation of digital-only photographers who have no affinity to Velvia or Neopan or Tri-X. Today’s generation even further removed – film is merely what the various Insta-whatsit or Hipsta-thingy app filters try to emulate. Yet, mostly due to that instant feedback loop, the average standard of today’s generation of photographers is higher than ever, with increasing numbers of people getting interested in and trying to make a living from photography. In fact, there are so many photographers everywhere now that it’s normal for the most people to sling a DSLR around their necks when they leave the house, and share everything with their friends online later. We communicate visually.

I’m of the transitional generation. I started pre-2004 with both film and digital – one helped me understand the other – and ‘turned pro’ in early 2012. There are two definitions ‘pro’: one, is that you make the vast majority of your income from photography or related activities; the other is that your images are of a consistently high standard, regardless of the conditions or subject. There are plenty of the former, but precious few of the latter – and the majority cut their teeth during the silver halide days. I aim to be both.

What photography clients often overlook is that you generally pay more for experience, translating into consistency. And it’s as much about time as it is about the number of experiments you’ve done or things you’ve tried. A chimpanzee could probably make ten incredible images out of a million through random chance alone. A professional should hit that mark nine times out of ten. As the client, it’s your responsibility to be educated about the services you’re paying for. Needless to say, selecting a provider with price as sole criteria – sadly a common practice in Malaysia – is a poor guarantor of quality. Thanks to the internet, it’s very easy to find specialist photographers and quickly identify if they’re good or not; in fact, picking a niche and excelling at it is probably the only way professional photographers can survive commercially in the longer term.

There are actually a number of world-class commercial photographers in Malaysia – but we don’t hear much about them here because they do the majority of their work outside the country. Much of my own business comes from Singapore and Switzerland – I specialize in watches, food and architecture, which also happen to be personal passions.

As organizations and individuals, it’s important that we do what we can to support the creative industries, beyond photography. The government can budget for ‘innovation incentives’, but something more than that is needed to make creativity flourish and grow: an ecosystem. Any industry creative will agree that inspiration isn’t always available on demand, but the environment is a large contributing factor. Take The Louvre, for example. Its archive gives inspiration to budding artists, and supports an ecosystem of its own, providing intellectual nourishment for future generations. Malaysia needs a legacy like that.

In a previous life, I was a director in the education and professional services sectors. Come recruitment time, I was saddened after interviewing many graduates with great paper scores – they were simply unable to perform at all in a professional environment. The missing elements? Creative thinking and initiative. At the same time, there’s still a ray of hope: at a recent major competition I judged, the best entries by far – and the bulk of the shortlisted ones – came from the student category. There is potential out there; we need to nurture it.

Support comes in many forms. There is commercial recognition – giving fair value for a professional service, recognizing and rewarding quality. Then there is also intellectual recognition – public acknowledgement and respect for the creator’s (and photographer) intellectual property rights. (Don’t know what an image license is? Don’t be afraid to ask). People are proud to show their best work – especially to a wide audience.

Equally important is teaching and encouragement. Since early this year, I’ve tried to do my part via http://www.mingthein.com. I aim to give back to the greater photographic community by openly sharing thoughts on technique, philosophy, and the life of a professional photographer – something beyond the other million gear reviews. The response has been fantastic so far – over a quarter of a million international visitors every month.

Collectively, this is why as a professional, a creative, and a Malaysian, I was proud to be invited to serve as Chief Judge for the inaugural Maybank Photographer of The Year Awards. It’s great to see a major company recognizing the importance of creativity, and giving Malaysians an opportunity to showcase their work, and the incentive to up their game. There are some pretty sweet prizes, too. As tempted as I am to enter instead of judging, I’m much more excited about seeing the entries. MT

The Maybank Photographer of The Year Awards may be entered online at www.maybankphotoawards.com. Submissions are open from 3 September to 31 October.

____________

If you enjoyed this post, please consider supporting the site via Paypal ([email protected]); Ming Thein’s Email School of Photography – learn exactly what you want to learn, when you want to learn it or learn how to achieve a similar look with our Photoshop workflow DVDs.  You can also get your gear from Amazon.com via this referral link.  Prices are the same as normal, however a small portion of your purchase value is referred back to me. Thanks!

Don’t forget to like us on Facebook and join the Flickr group!

Images and content copyright Ming Thein | mingthein.com 2012 onwards. All rights reserved

Points of sufficiency: do you really know how much is enough?

The never-ending photographic arms race got me thinking recently about sufficiency: how many pixels, fps, AF points, ISO settings, etc. are enough? The troubling thing is that I thought I used to know the answer: I’m no longer sure it’s quite as clear cut. See, the thing is that if you’re viewing images online, in theory, anything close to your screen resolution (leaving space for UI elements, text, menus etc.) should be sufficient – 1000px wide is more than enough for most purposes. The images on this site are mostly 800px wide, for reference. In theory, that should mean an iPhone is overkill. Yes and no; just because resolution sufficient, it doesn’t mean that we’re going to have enough dynamic range, or color depth (or accuracy).

This raises a hypothetical question: suppose we could have say a ‘perfect’ 3MP – in a compact camera, with a reasonably good zoom lens; if we put those 3MP into a 2/3″ or 1/1.7″ sized sensor, we could probably get a fast-sh 24-120mm f2-4 equivalent into something that would be reasonably pocketable. The relatively low pixel density would mean several things – good acuity, low noise, good color accuracy, and much higher forgiveness of the lens quality. With today’s technology, I don’t see why you couldn’t get a clean ISO 6400 and useable ISO 12800. Even with a lens of moderate speed, that’s a more than sufficient shooting envelope for most photographic purposes. Add a good optical stabilizer, fast AF, 14 bit RAW, responsive buffering and controls, and most people would be set. And with raw files that small, you could probably get 10,000 of them onto a 32GB card.

But, nobody would buy it and it would be a commercial failure. Only 3MP? Really?

That’s the kicker. If you’ve ever had a really high quality, but small-ish file, then you’ll know that you can actually do quite a lot with it; I remember seeing some images from the 2005 Wildlife Photographer of the Year competition – prints, at 40×60″ or so – which were shot with a Nikon D1H: that’s right, all of 2.7MP. Did they sing? You bet. Did they look grainy, or pixellated? Not especially so, but I’m sure you’d see the difference if you shot the exact same scene with a D800E. The shot that won would no doubt still be a great capture even twenty years from now. A hundred years from now. Does the equipment matter? Insofar as it didn’t get in the way of the capture, no.

In a more realistic scenario, a proper 300dpi print (actual pixels, not printer ink dots) looks extremely sharp. 200dpi is still acceptable; do you know what most computer screens are? Closer to 110. Sharp images still look sharp, don’t they? And the reason things appear pixellated is because the pixel mask of the screen gives each pixel a hard edge. If the edges of each dot were just a tiny bit fuzzy and overlapped the next dot, like in a print, then things would look just fine. The reality is that short of sticking yourself a few inches away from the display, you’re not really going to see the individual pixels. I have to be honest; the Macbook Pro’s 220dpi ‘retina’ display doesn’t look all that different to my 15″ non-retina from healthy viewing distances. But it requires four times the amount of graphics power to run, because guess what: every graphical element requires four times the pixels.

Most people print no larger than 6×4″, or perhaps out to 8×12″ for special images; survey a group of enthusiasts on the largest print they’ve made, and you’ll probably find 13×19″ a good end point. There are two reasons why: cost, and lack of display space. Enormous prints are great, but you’d also better have enormous walls to hold them.

So what does a 1500×2000 pixel, 3MP file get you? At 110dpi, 13.6×18.2″ – lo and behold, that’s pretty darn close to 13×19″! The one problem with this scenario is that it assumes that all photographers using the ‘sufficient’ camera have the shot discipline to get things perfect at the pixel level, and that they’re really getting the full resolution of the sensor. Sigma/ Foveon shooters will know what I mean by this – the files may be small, but the real resolving power is pretty darned high. Higher than the sensor’s pixel count would lead you to believe (but not as high as Sigma’s marketing department would like you to believe).

Even for use on a next generation ‘retina’ display, you could still get a 7×9″ image out – comfortably fitting the display size. You could probably interpolate it a little too, and not see too much degradation in quality.

Let’s put this all into context. The recently-released Sony RX100 (reviewed here) has 20MP effective – that’s a whopping 5500×3600 or so pixels, or enough for a 50×33″ print – I don’t have enough space in my house to hang more than one or two of those, and at that size, I’d struggle to think what image I wouldn’t mind looking at for hours on end. Yet there are still people crying ‘not enough resolution!’. At that sensor size, pixel density is so high that critical focusing and shooting discipline become very important; I notice that the stabilizer seems a lot less effective than lower-pixel count cameras, but I’m now starting to suspect it’s because it’s got to work quite a lot harder to maintain perfection at the pixel level.

Take the argument a notch further: okay, so there are still reasons to have something with interchangeable lenses. And those things always come with bigger sensors (okay, so not the Nikon 1 cameras, but they haven’t exactly been a commercial success – expensive, small sensor, low pixel count; even if the pixel quality is reasonably high and the cameras are extremely responsive). Bigger sensors mean more expected resolution. I’m going to bypass M4/3 and APS-C for the time being, because they all top out at reasonably similar resolutions; there isn’t that much difference between 16 and 24MP – remember, area scales with the square of length. Let’s go to full frame DSLRs – one of the most common questions I’ve received via email in the last few months is ‘I have a D700. Should I upgrade to the D800/ D800E?’ The fact that that question is even being asked signals that the marketing department has done a good job. They’ve sold you on the lure of the enormous number of pixels; you haven’t bothered to do a bit more reading to find out that a) you’re going to need much better lenses; b) shot discipline once again becomes critical; c) stability is a hot topic; d) your AF system might not be quite as accurate as you thought – especially if you’re using auto-area and letting the camera do the thinking for you.

The answer to this question is simple: how big do you print, and do you need video? If the answer to the latter is yes, go ahead and buy it; video isn’t something the D700 can do. The former is a bit more subtle: if you can’t get a good 45×30″ or so print out of the D700, then your shooting technique needs work. I’ve had images shot under ideal conditions printed to 40×60″ for exhibitions – they still looked great. Granted, the subjects weren’t crammed with fine detail like leaves and grass, but they weren’t high-bokeh content portraits, either. So, if you’re not making say 20×30″ landscapes on a regular basis – do you really need the heartache that comes from having to revaluate all of your lenses, and shunt around 50MB RAW files? Probably not. But, the bragging rights are a different matter altogether.

One of the reasons why the photographic industry is still growing despite passing saturation point some time ago is because of the photographers themselves: they don’t know when to stop. Canon will happily sell you a 50/1.2 for three or four times the price of the 50/1.4, which itself is three times the price of the 50/1.8 – simply because there are people who will pay for that extra half a stop. (And it may be an extra half a stop of aperture, but it’s almost certainly less than half a stop of transmission.) Let’s be realistic: the camera’s metering doesn’t gauge scenes that accurately; I routinely make adjustments of +/- 1 stop, and that’s with Nikon’s super-accurate matrix meter in the D700 or Olympus OM-D (I consider both to be more reliable than the D800, which has a tendency to put too much weight to the active focus area). The Sony RX100 is out by so much that I have to constantly use exposure compensation or risk an unsalvageable image. With the degree of adjustment latitude our modern sensors give us, whole stops changes are what you have to be making before you see any appreciable differences in image quality.

Here’s another curious thing: equipment with more conservative specifications often performs better than more extreme gear, even though the extreme gear frequently costs several times more. This is because we’re dealing with known technology, with greater tolerance for error: this is why there are many superb 50/2s or 50/2.8s that perform excellently wide open, but few 50/1.4s and faster that do. It’s also why lenses with higher resolving power – take the macros for instance – have modest apertures. It’s easier to correct for smaller apertures. Same thing with sensors – it’s easier to get good dynamic range and a high signal-to-noise ratio out of a sensor with a larger pixel pitch; the supporting electronics for each photosite has to be of a certain size, and if there isn’t much area to go around in the first place, that circuitry starts to make a significant and noticeable difference to the light-collecting ability of the sensor.

The bottom line is very Socratic: Know thyself. Specifically, think carefully about which pictorial limitations are due to the photographer, and which are because of the camera. Low light performance? It’s probably your gear. Poor composition? More pixels isn’t going to help you. Blurry images? More pixels definitely aren’t going to help you; examine your technique first.

The recent series on inspirations from older cameras was posted specifically to illustrate this point: just because a camera is old, it doesn’t mean that it’s no longer capable of producing good images. If somebody could use it to get the shot when they had no other choice, it means that you can still do that. The important thing to remember is that most of the time, the limitation is in the user, not the equipment. So next time, before buying more gear, think about spending money on improving your skill level first. I guarantee that you’ll see a much bigger improvement in your images. MT

____________

Visit our Teaching Store to up your photographic game – including Photoshop Workflow DVDs and customized Email School of Photography; or go mobile with the Photography Compendium for iPad. You can also get your gear from B&H and Amazon. Prices are the same as normal, however a small portion of your purchase value is referred back to me. Thanks!



Don’t forget to like us on Facebook and join the reader Flickr group!

appstorebadge

Images and content copyright Ming Thein | mingthein.com 2012 onwards. All rights reserved