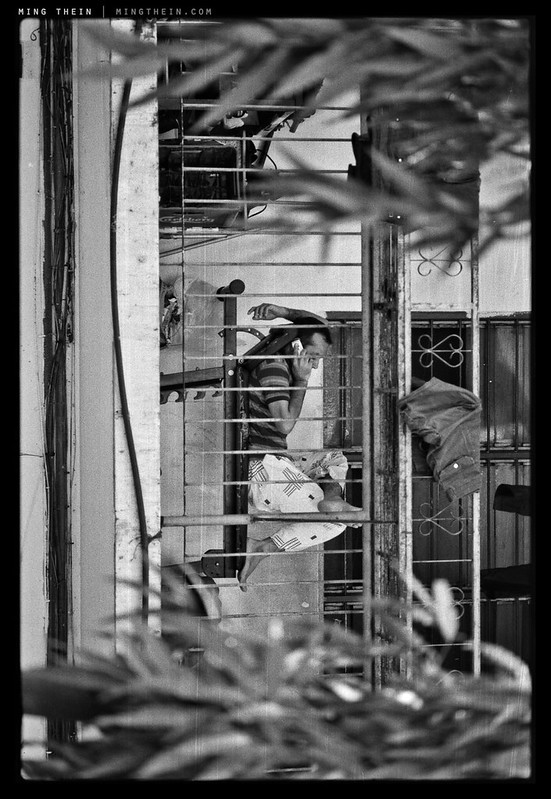
Some experiments in 2.4:1 widescreen

_8024331 copy
Rain

Before I launch into another lengthy and text heavy (but necessary) article, I’d like to take an interlude to remember why this site exists, and why we bother with cameras at all: it’s about the making of images.

Over the last few months, I’ve been experimenting with even wider aspect ratios than the usual 3:2 or 16:9 cinematic; I feel like I’ve got composition down pat for those two already. But what about going wider, and even more cinematic – say 2.4:1? This extremely skinny format presents a few challenges – compositionally, it only suits scenes with some depth and layering; otherwise the majority of the frame is just going to look empty. Technically, not many lenses have the required edge performance especially if you’re going to maximize subject isolation by bringing shallow depth of field into play, which means shooting wide open or close to it. And since you’re throwing away about half of a 3:2 frame, you’ve better have a decent number of pixels to start off with. Even from a display point of view, there’s going to be a serious amount of letterboxing which means not a lot of detail rendered.

_8024642 copy
Crossings

It’s definitely an aspect ratio that works better on a larger display; an image that looks great across the whole width of my 27″ Thunderbolt Display looks rubbish on my 11″ Air. Our eyes might be next to each other, but we only consciously see this much perhiperal vision when it occupies most of the field of view in front of us – making us less aware of the limited vertical height. (To be honest, I’m not convinced that this blog is the best medium for display – horizontal images are limited to just 800px wide, which is probably about the same size as an XPAN negative on most monitors. Scrolling is just impractical and silly.)

_8024386 copy
Rain II

Compositionally, it’s a challenge. A huge challenge. Mainly because for some odd reason I tend think of 2.4:1 as extremely cinematic, and cinema has shallow depth of field and mostly telephoto rendering; yet it’s the separation here that draws our attention to the motion and drama on screen. In a static image, this kind of perspective looks extremely boring: there simply isn’t enough depth rendered in a single frame to hold the viewer’s attention for very long. Moreover, I kept running into the problem of overestimating the vertical space available, resulting in cuts to anatomy or very small people – the solution to this of course being cut, but just be careful where you cut – that’s what happens in every single cinema frame. (I don’t think I’ve ever seen the top of somebody’s head in a tight shot.)

_8024409 copy
Hiding from the world

I’m now convinced that the answer is counterintuitive: you need to go even wider. I suspect that this aspect ratio would work wonderfully at 21mm, where if you’re not careful floor and sky can turn into vast desert expanses; however, the rendering of the central portion of the frame would be perfect. Forget what you know about perspective: the lack of proportion vertically means that frames render as a much longer focal length than they actually are; about 1.5-2x, I’d say. Crossings, for example, was shot at 120mm but feels a lot more like 200mm. Presumably, this has something to do with the horizontal field of view being very close to the diagonal field of view, instead of maintaining the usual relationship we see in a more square-shaped frame. One other thing I noticed was that if you composed for action in one portion of the frame, the rest became boring; there was too much context or empty space. I began to treat the single long frame as multiple small ones, and this resulted in much more interesting compositions.

_8024309 copy
Destruction is the price of progress

In any case, it’s proved to be an interesting experiment; I’ll probably use it in busy compositions that have plenty of natural depth; these kinds of scenes lend themselves well to wider compositions. Somehow I can’t see myself using it for portraiture, though. MT

Images in this series were shot with a Nikon D800E, 85/1.8 G and 24-120/4 VR lenses.

____________

Enter the January 2012 black and white challenge – win a multispectral Sony NEX-5 B&W machine modified by yours truly!

If you enjoyed this post, please consider supporting me via Paypal ([email protected]). Visit our Teaching Store to up your photographic game – including Photoshop Workflow DVDs and customized Email School of Photography; or go mobile with the Photography Compendium for iPad. You can also get your gear from Amazon.comhere. Prices are the same as normal, however a small portion of your purchase value is referred back to me. Thanks!

Don’t forget to like us on Facebook and join the reader Flickr group!

appstorebadge

Images and content copyright Ming Thein | mingthein.com 2012 onwards. All rights reserved

Project: Creating a multispectral camera

_5015948 copy

Those of you who also follow the site’s Facebook page will have noticed some images posted of late by a mystery camera, one un-purchaseable, and un-available to the general public. (And no, it’s not the new Leica M 240 or a Hasselblad Lunar.) You’ve oohed and ahh’d at the tonality, and wondered why the output was solely monochromatic. Several people speculated that it might even be from a Phase One Achromatic medium format back! The camera is in fact a Sony NEX-5, with the kit lens. The images you saw were almost un-processed; just shot RAW and desaturated.

Sometimes, I get donated photography-related things by generous readers. One of the more generous things I’ve received was this cameras: mint, almost-new-in-the-box and hardly used. Originally, the donor suggested I run a competition to give it away; though a generous offer, I’m pretty sure the camera wouldn’t interest too many of my readers – being nearly three years old and all. So, I hatched a plan: why not make it into something a little more interesting? I’ve been paying a lot of attention to black and white tonality both in the past, and of late in conjunction with my serious re-exploration of film; there’s something about the way film responds that gives it wonderful quarter and three-quarter tones. The look is achievable in digital, but it requires a lot of post processing simply because sensors do not natively respond to light in that fashion.

_N5MT_DSC0112 copy

The why

In fact, almost all sensors are optimised for accuracy of colour reproduction in the visible spectrum; this is a quantitative, tangible thing that can be done through measurement and iteration. It’s fairly consistent: accurate colour is the way most of us perceive things, to within the limits of our output media. Black and white, on the other hand, is hugely subjective: some people like mega grain and huge contrast with no midtones, others won’t settle for anything less than an over-HDR’ed mess that’s all mid tone and not much else. Personally, I’m a big fan of Ansel; it’s just that it requires a lot of work and careful exposure to achieve. But what if you could have a camera that made wonderful B&W images without much work, and better yet, had a bit more sharpness and sensitivity to boot?

Returning once again to the rationale for me shooting film – more upfront thinking, less work, something in the tones – I decided to see if such tonality was really possible natively out of a digital camera. I recall the Leica M8 creating raw files which were excellent candidates for B&W conversion because of their luminous quarter tones – this was thanks to the camera’s weak native IR filtration. These files too required some work, but not as much as heavily-filtered cameras. I wondered if there was something of a nugget here. Not only would you get more luminous blacks, you’d probably get a bit of a sensitivity boost, too – given that the sensor would be seeing light in UV, IR and the visible spectra.

_N5MT_DSC0128 copy

The how

Infrared, and to a lesser extent, ultraviolet, photography have been done for some time. There are companies out there which offer (not cheap!) conversions to either or both; there are even companies which offer services removing the anti-aliasing filter – though oddly, not both. But to create what I envisioned as the ultimate black and white camera*, all of this would have to go: no UV or IR filters, no AA filter. Just bare naked sensor. After several days of monkeying around with dozens of tiny ribbon connectors, and breaking one (caveat: the camera of course still works, but that connector will never be able to be opened/ released again) and nerve-wracking moments with various sharp implements, I’m pleased to report that this particular Sony NEX-5 has no filtration at all in front of the sensor, except for the Bayer filter, which is part of the sensor itself and thus cannot be removed. It’s about as close as you’re going to get to bare silicon – in fact, what you see when you take the lens off is the bare silicon of the sensor surface. Note that silicon is a very hard material – it’s used in portions of mechanical watches that require extreme precision and zero lubrication, and move/ interact against other parts at 8Hz or higher (the escapement) – but I still wouldn’t recommend touching it. This sensor has been properly cleaned, but may have a small dust bunny or two on it from swapping lenses. Use a blower.

*I admit I was disappointed when I learned that the Leica M-Monochrom retained its UV and IR filtration, but it turns out that decision actually makes a lot of sense, as does the 50/2 APO-Summicron – I’ll explain why later.

_5015962 copy
What you don’t see in this shot are the hundreds of little screws, connectors and oddly-shaped parts that somehow go mesh together neatly to hold things in.

The NEX-5 is a very densely packed camera indeed; there isn’t a single cubic centimetre of free internal space for any additional components. For the most part, it’s quite well designed, and there are even some bits that are quite over-engineered. Some of the connectors are incredibly tiny indeed; I wonder how long it takes them to assemble one of these things. The first time I took it apart, it was a very cautious three hours – about an hour for reassembly. By the third time**, we were down to fifteen minutes in-and-out. The machining tolerances for this thing must be extremely tight indeed: not only are there no shims in the mount, but there are only (thankfully) three very small washers between the sensor board and the main frame of the camera itself, which is magnesium. The lens mount bolts directly to the other side of this – it doesn’t really get a lot more rigid.

_5015963 copy
UVIR and AA filter pack, removed. Also, damaged – they used some insane glue to stick it to the sensor frame.

**The reason why it took three tries at all was because the camera didn’t work after the first one; it turns out I forgot a very small ribbon cable that got trapped under the main board which controlled the shutter timing. The third time was to do with focusing: the rather thick (nearly 1.5mm) filter pack was glued to the sensor heat sink frame with some very tenacious adhesive. What I didn’t realise was that this component was part of the optical formula of the system, and the lenses do not have enough additional focus travel to deal with the missing bit of glass; as a result, it was impossible to achieve infinity focus. The solution was to move the sensor closer to the mount; and here I’m thankful that there were those three little washers between sensor and internal frame, because if there wasn’t, then we’d have a serious problem – the Sony engineers did not provision a way to reposition the sensor (they must have been pretty confident of alignment and machining tolerances). Curiously, those washers were precisely the optical thickness of the filter pack (it’s almost as though they intended for something like this to be done), and the camera now focuses to infinity with all lenses.

_N5MT_DSC0121 copy

Results, notes and cautions

I’m going to be blunt here: the camera doesn’t hit full marks across the board. From a tonal viewpoint, the results are fantastic – just shoot raw and desaturate, and that’s all you have to do for almost every situation. All of the images in this post have had almost no work done on them at all – just desaturate. They came out of the camera 99% there, with this wonderfully filmic quality – even at high ISO. Is the more dynamic range? Not really. Skin tones are smooth yet delicately textured; deep shadows have that glow thanks to IR reflectance; and the detail is definitely better than a standard camera – I owned one for several months, and never saw this degree of sharpness. I wouldn’t use JPEG though, simply because it doesn’t retain as much information as the RAWs, and this will certainly affect tonal subtlety and resolution, to a lesser extent.

_N5MT_DSC0100 copy

Yet where the camera falls down is also resolution: it’s not because of the sensor; in the centre of the frame, there’s clearly a great degree of fine detail. The edges, however, look like crap. (Bear in mind the only E-mount glass I have now is the kit lens that’s bundled with the camera.) This is not because of the sensor: it’s because of the lens, which although it resolves quite well in the visible spectrum, is clearly nowhere near apochromatic enough in the corners; they look like a smeary mess in some cases. The smearing is caused by UV and IR spectrum image forming rays from the subject – cut out by the filter pack, normally – being registered on the sensor at a different physical location to visible light. There is still more visible light, of course, which means that focus is mostly where autofocus puts it, but not for all subjects – warm subjects in low ambient light – people indoors, for instance – tend to be a little back-focused because of this. Outdoors, things are fine (visible light > IR again).

_N5MT_DSC0049 copy

Results are better at the telephoto end of the zoom, stopped down, and of course with better glass. I’ve got a few adaptors lying around from my NEX days; unfortunately they’re discount Chinese items off ebay, and they perform as you would expect: crap. My M-adaptor doesn’t focus close up and has planarity issues; my F adaptor won’t focus past a couple of meters. (It would seem that their tolerances aren’t enough to deal with short flange systems.)

In my preliminary testing, the Zeiss ZF.2 2/50 Makro-Planar, ZF.2 2.8/21 Distagon and ZF.2 2/28 Distagon are all excellent performers – even into the corners. Surprisingly, the old Noct-Nikkor does very, very well from f2 onwards, and is quite passable with a little IR-induced glow even at f1.2. The Nikon 85/2.8 PCE and 45/2.8 P are also excellent, even if the former is rather impractical because of its tight focusing helicoid and inability to be stopped down without electrons. You’re probably wondering about the M-mount glass: forget the wides, they’re lousy on any mirrorless camera not optimised for them (i.e. anything that isn’t a digital Leica M). I don’t have anything telephoto. I suspect the 50/2 APO ASPH would be the lens to use on this camera, with its true optical potential seen outside the visible spectrum; and now it makes perfect sense why the Leica M-Monochrom retained its UV and IR filtration: without it, the other lenses – especially older wides – would appear very soft indeed, thanks to their property of focusing non-visible light at a different distance to visible light.

_N5MT_DSC0134bw copy

So how would I describe the tonal characteristics of this camera? In a nutshell, it produces B&Ws that are warm and rounded, if there’s such a thing. The sharpness is there but it’s not biting; the tones are rich and deep. If used with better glass, I think it would really sing – especially for portraiture. Skin looks baby-soft. Don’t use it in colour, it looks horrible due to pollution of the blue and red channels by UV and IR respectively. However, note that with a visible blocking filter over the lens, you could shoot either IR or UV without issue. The camera also gains some sensitivity – about 1-1.5 stops depending on the situation – because of the extra light it’s collecting. With the right filters, it might be an interesting tool for astrophotographers or voyeurs, for instance. Of course, you can always use one of the B&W or Leica UVIR filters and then have a regular NEX-5 again, but this time without the anti-aliasing filter.

An interesting experiment? Undoubtedly. Would I do it again, with a more interesting camera, better sensor, and something I have better glass for? Sure, why not? Though I think mirrorless makes an ideal candidate because a) you don’t have to mess around with a mechanically complex camera, and the attending realignment issues associated with disassembly (mirror, AF system etc.); b) the LCD/ EVF gives a great live B&W preview, so it makes it easier to visualise how the results will appear after conversion – the colours really are pretty funky – and c) these are just cheaper to experiment with.

Now, if somebody would like to donate a D800E to the cause, I think some very interesting results might ensue…in all seriousness though, if anybody would like to donate a camera to be experimented on (you will of course get it back afterwards, but no guarantees that it can be done) then please send me an email. MT

Note: We’re still giving this camera away. Tomorrow, I’m going to explain how – there will of course be a photographic competition involved! Update: Full details on how to enter here.

Coda: since I was asked by a couple of people over email and in the comments, here’s how the color images out of the camera look: heavy pink-magenta casts due to IR and UV pollution in the red and blue channels respectively. I suppose some (of the hipstagram persuasion) might like the look…

_N5MT_DSC0208 copy

_N5MT_DSC0128 copy

____________

Visit our Teaching Store to up your photographic game – including Photoshop Workflow DVDs and customized Email School of Photography; or go mobile with the Photography Compendium for iPad. You can also get your gear from B&H and Amazon. Prices are the same as normal, however a small portion of your purchase value is referred back to me. Thanks!

Don’t forget to like us on Facebook and join the reader Flickr group!

appstorebadge

Images and content copyright Ming Thein | mingthein.com 2012 onwards. All rights reserved

Understanding metering, part two: what to use, when

In part one we examined why metering is important, and how the basics of how meters work. In today’s article, I’ll take a closer look at the different types of  metering, how they differ, and under what situations they should be deployed.

metering-viewfinder

A sample viewfinder – in this case, a rough representation of the Nikon D2H/ D2X finder.

With that background out of the way, let’s look at how the various metering options work, and what typical situations they might best be deployed under. Cameras typically have three options, or some variation upon that. Within these options, it’s also usually possible to fine tune various aspects of the meter’s operation. I’m going to leave out handheld meter operation since this is something that’s almost never encountered today. An important point to note is that all meters can be fooled by situations of uniform luminance, so don’t trust the readout blindly. Remember, meters function by averaging the entire evaluated area out to middle gray; this means if your evaluated area is meant to be black or white, you’re going to need to add or subtract some exposure compensation. For predominantly light/ white scenes, you need to add; for dark scenes, subtract. This holds true for every one of the different metering methods detailed below.

Average
The simplest form of metering evaluates the frame as a whole, and tries to expose it to middle gray – under the assumption that there will be shadows and highlights, but these will average out. Seldom used today because you will almost always require exposure compensation (making it unsuitable for the point and shoot crowd which constitutes most of the global camera market), but has the one enormous advantage of behaving predictably under every situation.

Spot
The simplest form of meter is the spot meter. This evaluates luminosity at the desired point only, ignoring everything else in the frame. There are two important things to be aware of with a spot meter: the location and size of the spot. The metering spot’s location is either in the center of the frame, or tied to the selected or active autofocus point; the logic there is that you would typically want to ensure your subject is both in focus and properly exposed. Variations on the spot meter include types that are biased for highlights or shadows – i.e. you meter a shadow or highlight and it doesn’t turn out over or underexposed. Don’t forget to add appropriate exposure compensation.

The size of the spot is also very important – don’t be fooled into thinking that it’s a tiny, precise eyedropper the same size as your autofocus area box – it isn’t! Most consumer cameras have a spot size that’s about 2.5% of the frame area, which is actually quite large – imagine your frame divided into six vertically and horizontally, i.e. a grid of 36 boxes; a 2.5% spot meter is the size of one of these boxes. Professional cameras might have a 1% spot meter; imagine a 10×10 grid of 100 boxes, and this is pretty much what you’ve got. In our sample viewfinder above, the cyan box is a 1% spot meter, tied to the active (red) AF point. Keep this in mind as you’re moving it around. If your spot meter is tied to the center of the frame, then you’ll need to assign another button – perhaps the shutter half press – to lock exposure once you’ve metered for your subject (unless it is of course dead center, which is highly unlikely).

The obvious question would be why spot meters aren’t smaller – firstly, you don’t actually want them to be that acute, otherwise moving the camera by a fraction of a degree might yield a vastly different (and incorrect) exposure – they’d be too sensitive to use. Secondly, some averaging is still a good thing – you can move the camera around a bit until the spot falls onto the right mix of light/ dark to give the desired exposure. With practice, this can be much quicker than using exposure compensation.

Use the spot meter in situations where your subject is in very different light to the rest of the frame – either much brighter or much darker – in order to ensure that the focus of your shot is properly exposed. It’s great for high key or low key images – put your subject in the shadows or highlights respectively, and spot meter there – or even general situations under which the luminance of your composition doesn’t vary that much. I don’t generally use it for street photography or fast moving situations, because it requires precision and/ or a little meter-and-recompose dance that can cost you valuable time.

One tip: the way I use the spot meter is always either covering my subject, if the subject is darker than the rest of the frame; or, on the highlights plus a bit of dark area if your subject is lighter than the frame. This effectively tricks the meter into adding a bit of exposure compensation to average out the bright/ dark areas – you need to do this to prevent your highlights from falling into middle gray and consequently completely losing your shadow information. It also adds a bit of speed in operation since you don’t have to muck around with exposure compensation.

Spot meters only came about when the metering cells in cameras could be made small enough to evaluate only a portion of the frame; they’re common now because our metering sensors are made up of hundreds, if not thousands, of discrete individual elements.

Centerweight
In our sample viewfinder, the circle around the center AF point represents the centerweight meter area border. That sounds like a bit of complex mouthful, but in reality it’s not. A centerweighted meter divides the frame into two areas – the circle in the middle, and the border. The circle in the middle is presumably roughly where most subjects are going to be framed, which in turn you would like to expose properly etc – it is metered separately from the border area. The two metering values are combined in a predetermined ratio – usually 70-30 in favor of the central portion, sometimes 60-40 – to determine the final exposure value.

Centerweighted meters are the predecessor to matrix metering – they try to average things out over the entire scene, and make a sensible assumption or two about what you would like to expose for. Modern cameras allow you to change the size of the center area – the D800E, for instance, allows a spot anything between 8mm and 20mm in diameter. The default center area is usually etched onto the focusing screen for reference. Note that centerweighted metering was the successor to evaluative metering, and shares its advantage of predictability: if you put your subject in the circle, chances are the exposure will be right; the advantage it has over evaluative metering is the ability to bias the exposure towards your subject.

In situations where spot metering would not be suitable – action, for instance – I actually prefer using centerweighted metering to matrix in unfamilar cameras; at least I have some idea of how the meter will respond. There’s nothing more frustrating than missing a shot to over or underexposure because matrix metering has gotten things very, very wrong.

Matrix
Matrix metering is either a miracle or a curse, depending on where you stand. For those who don’t want to take control of their cameras, matrix metering provides a higher ‘hit rate’ than evaluative or centerweight; the problem is, you have absolutely no idea when it’s going to get it wrong, and how much by. This can be rectified with experience with a certain system; as you encounter more situations, you get a better idea of when the camera is going to miss. It’s for this reason that the only time I use matrix metering in a situation where delivery is critical is when I’m shooting cameras I’m familiar with – the Nikons, and the OM-D. Everything else is either spot or centerweight.

That doesn’t of course explain how it works. The frame is divided up into a number of areas – up to 100,000 of them in the Canon 1Dx – and a reading taken of each area, for both luminance and color. The camera then either compares this to a database of similar situations (i.e. photographs converted into 100,000 or however-many pixel maps, along with exposure values) and then determines the exposure. If the camera can’t find a matching situation, then it makes an intelligent guess about what the exposure should be based on a combination of overall scene luminance, color, and the current AF point. With this many variables, it’s actually surprising that the meters get it right such a high percentage of the time – perhaps there are only so many possible luminance maps?

In any case, matrix metering tends to be more reliable in situations that don’t have extreme contrasts, or bright point sources in the frame, or very small subjects. Under quickly-changing circumstances, it’s the method of choice – it might get things wrong, but most of the time it will save you from having to move around the spot or use exposure compensation. For most users, matrix metering is sufficient, and you can always add or subtract exposure compensation and take another shot. It’s also worth noting that matrix meters that use the imaging sensor are much more accurate and reliable than those that have separate metering sensors simply because the tonal response characteristics of both match, making overexposure almost impossible. Presumably, these should also run some form of ‘expose to the right’ algorithm for digital cameras, but then again perhaps not as it would only be useful for RAW shooters.

I think considering some examples would be useful at this point. Let’s take a few of the images from my recent Introduction to Wildlife workshop:

metering-1-master

This image could be taken care of by either spot or centerweight; I have no idea if matrix would have been accurate or not. For centerweight, you would need to ensure the central spot is over the subject area, like so:

metering-1-cw

This implies a lock-exposure-and-recompose is necessary – or, perhaps not seeing as I intended to crop the final image to a more square aspect ratio anyway. You might wonder whether the 70-30 distribution – specifically the metered portion falling on the black water – would throw things out; in this case, actually it helped. The center portion would have metered the white bird to middle gray, i.e. too dark; the outer portion metered the black water to middle gray, i.e. too light. They averaged out.

metering-1-spot

We could also have used the spot meter, in a few different ways. For location A, no compensation would be required so long as we took a bit of the dark portion and a bit of the highlight portion – i.e. enough to average out to middle gray. Location B would have required some positive exposure compensation as it is a highlight, in zone VII-VIII or so. Location C falls in zone V anyway, which is middle gray – so no exposure compensation would haven been required. In this case, I would have picked location C if using an AF lens (I wasn’t) as it’s of both the right luminance value and subject distance – alternatively, the head would have been a good choice, too.

metering-2-master

Here’s our second example. This is a much trickier situation because of the thin rim of backlight around the bird; you don’t want to overexpose that else you’ll lose all tonal detail in the feathers.

metering-2-cw

You can see here that centerweighted metering wouldn’t work; the highlight areas – in this case, the subject from the meter’s point of view – is just too small. It would expose for the dark area and result in blown highlights. Spot metering, on the other hand, is ideal:

metering-2-spot

Location A is obviously nonsensical because although it might be the same luminance value as most of the bird, that isn’t the part we’re exposing for; using location A would result in huge overexposure. Location B is fine, and the highlight area is small enough that it wouldn’t require any exposure compensation since some of the dark background is also included – this is actually what I used – C and D are also workable options, though C might require a little negative compensation.

How about a few more examples?

_5014972 copy
Clearly, spot metering on the eye is the only way to go – all other options would have resulted in overexposure and both detail loss and an imbalance in the composition caused by the eye of the viewer not going to the intended area.

_5014910 copy
Actually, any metering option would work fine here – the scene is divided into relatively large portions of different luminance. If you used spot on the feathers, you’d have to add a bit of exposure compensation to keep things white; if you used center, you’d have to lock exposure and then recompose.

_5014793 copy
Our frame is fairly consistent in luminance, so once again, any metering method would work. However, all would require a bit of positive exposure compensation as the overall tone of the subject is light, and should be kept high-key.

_5015451bw copy
Small white subject against a dark background, intense contrasts – spot meter.

_5014828 copy
Here’s one situation where matrix metering would actually work better than the other options: you have relatively even luminance across the frame, a strong colored background (making centerweight possibly inaccurate) and a fast moving subject (making spot metering impractical).

Of course, knowing which metering method to use in a given situation is quite useless unless you have things set up so that it’s easy to switch between them; otherwise, pick one and get used to the way it operates. If you can lock exposure separately from focus, then you don’t really need to use exposure compensation most of the time – the spot meter is all you need. If you can’t be bothered to do the finger dance, well, that’s why matrix was invented. Needless to say: as ever, practice is the key to mastery. MT

____________

Visit our Teaching Store to up your photographic game – including Photoshop Workflow DVDs and customized Email School of Photography; or go mobile with the Photography Compendium for iPad. You can also get your gear from B&H and Amazon. Prices are the same as normal, however a small portion of your purchase value is referred back to me. Thanks!

Don’t forget to like us on Facebook and join the reader Flickr group!

appstorebadge

Images and content copyright Ming Thein | mingthein.com 2012 onwards. All rights reserved
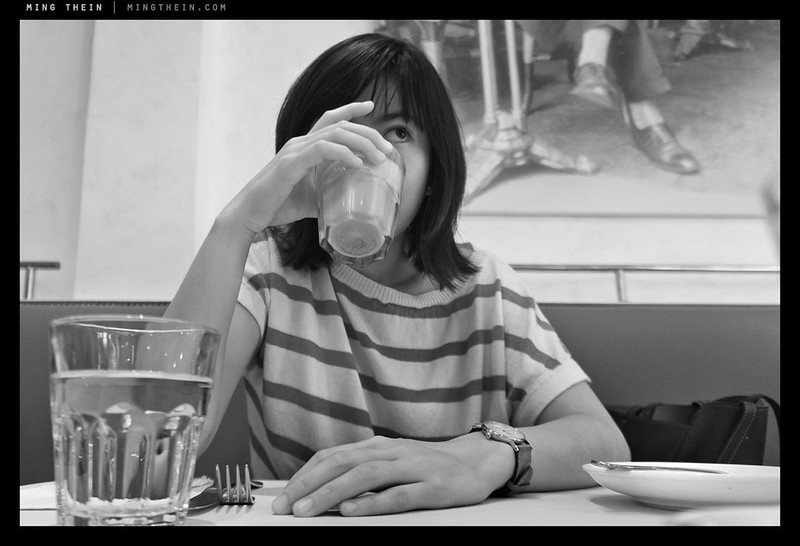
Understanding metering, part one: introduction

metering-2-master
An image from my recent Introduction to Wildlife workshop, and a very tricky metering situation – more importantly, do you know why, and what to do in a situation like this to achieve the desired exposure outcome?

One of the more important – yet almost always overlooked – aspects of camera operation is metering. Simply put, the meter determines what your final exposure is, and how bright or dark your image looks relative to the scene. Unless you are shooting manual – and even then – the camera’s exposure is determined by the meter. Add the fact that the eyes of a viewer tend to go to the brightest and/ or highest contrast portions of an image first (i.e. this should be your subject) – and it’s clear to see why it’s absolutely critical to understand both how metering works as a fundamental concept and any camera-specific peccadilloes that might exist. The last thing you want is to find that your camera drastically underexposed a once-in-a-lifetime shot of some critically important event because you didn’t know (or forgot) that the meter was extremely affected by point light sources*.

*This can actually happen. The meter in the Leica M8/9 is extremely sensitive to direct point light sources, and can often yield nonsensical readings of say 1/1000s ISO 160 for a shooting aperture of f4 at night – that’s because it’s picking up a street lamp. One can only hope the new M is less affected by this – the only solution to the problem I’ve been able to find is just go 100% manual at night.

How meters work
Depending on which exposure mode your camera is in, the meter will try to find a combination of settings that creates an image that averages out to middle gray in luminance, i.e. the histogram average is around level 127 or thereabouts. There are three exposure parameters the camera can use to control the amount of light reaching the image processor – note that the sensor is also now involved in the process – shutter speed, aperture and digital gain, i.e. ISO. If you fix any one of these variables manually – say by shooting aperture priority at a set ISO – then the camera varies the remaining parameters according to a set of rules in order to achieve the ‘correct’ exposure. If the correct exposure is out of adjustment range – e.g. the required shutter speed for a given aperture is too high – then you’re going to land up with an over or underexposed image.

In program mode, the camera controls both aperture and shutter values depending on its preset program; the photographer can usually shift the program to a different combination of values which still yield the same net amount of light hitting the sensor. In shutter priority, the user fixes the shutter value manually, so the camera alters the aperture. In aperture priority, it’s the other way around. In manual mode, the user fixes both values – the only thing the meter can do is display how far off the manually chosen exposure is from the correct exposure, or alter the ISO or flash. If auto-ISO is activated, then the camera will always default to the lowest possible ISO within the specified range in order to keep the shutter speed at or above a certain value – either user selected or 1/ focal length in second. (Note that for some cameras, using manual shutter and aperture values will cause the camera to shift the ISO rather than display the variance from correct exposure.)

Simple enough, right? So why are there so many different metering methods? My OM-D, for instance, has no less than five: matrix, centerweight, spot, spot low and spot high. The differences are down to the area of the frame the meter evaluates when deciding what the correct exposure should be. Note that in all situations, it will still try to expose the considered portion of the frame to middle gray – except this area might change. One uses the different metering methods in different subject situations. We’ll get into that in more detail later; first, there are a few more things that need explaining by way of background.

The meter itself is a photovoltaic cell, or combination of cells, whose output voltage over a certain area varies depending on how much light lands on it. The more light, the higher the voltage, which is translated into a brighter exposure. A particular chemistry’s electrical response is a fixed property of the material, and therefore consistent across different situations and cameras. Note that some meters require power to give a readout – this is because a base voltage must be applied across a semiconductor for it to respond to light, or to amplify the signal to a point where it gives an output that can be displayed – CCD meters are like this, for instance – other types of semiconductor photovoltaics do not require power because they already produce current on their own the minute light hits them. (Solar cells, for instance, fall into the latter category.)

Note that not all cameras have built-in meters; very early film cameras generally did not, and required the use of a separate handheld meter, or a particularly sensitive eyeball. My Nikon F2 Titan, for instance, comes standard with the unmetered/ plain DE-1 prism/ finder. Early Leicas are the same. A whole variety of hotshoe-based clip on meters are available, as well as handheld types. Modern digital cameras either use a separate metering CCD, usually located in the viewfinder (for an SLR) or use the imaging sensor (for any live-view based cameras) – this is obviously the most accurate possible method of metering given that the metering sensor also perfectly represents the response of the imaging sensor. (This was not always the case with film and separate meters; it was therefore highly important to know the characteristics of your particular chosen film.)

Incident vs reflective
All cameras’ built-in meters are of the reflective type. This is to say that they measure the amount of light reflected from the subject and hitting the camera; the advantage is that you don’t have to stand in the same light as your subject in order to obtain a reading – potentially problematic if your subject is say, a landscape that’s several kilometers away – but at the same time, they suffer from the disadvantage of not being able to obtain an accurate reading for very reflective subjects. Incident meters are always handheld (but handheld meters can be either incident or reflective) and are placed in the same light as the subject in order to obtain an accurate exposure reading. The photosensitive portion of the meter is covered by a matte white dome in order to ‘average out’ the light measured by the meter.

Exposure compensation
The use of exposure compensation is simply translated into an offset of the zero point of the meter. For instance, if you dial in +1 EV exposure compensation, then the meter will add this to the calculated exposure value before displaying the final settings.

Flash metering
Flash meters a slightly more complicated. There are two ways to determine how much flash power is required to achieve the correct exposure. The first is by using an incident light meter next to the subject, firing the flash, and setting the camera with the valued displayed on the meter. This is the most precise method, but again, is often impractical if you do not have time to repeat a shot. The second, more common method, uses a very short duration and low-power preflash of known output in conjunction with the reflective meter to determine how much additional power is required to make up the gap between the trial exposure and a correct exposure, with the given camera settings. The adjustment to flash power is made almost instantaneously and a second, correct power flash is fired along with the exposure. This entire process is so fast that there is almost zero added lag. The disadvantage again is that partially transparent or reflective objects may not be correctly exposed as the metering type is reflective-only.

Histograms and expose to the right
The exposure histogram represents the evolution of the light meter into the digital age. It not only shows you what the average exposure should be over the entire frame, but how that exposure is distributed. For instance, it is important to know whether you have one uniformly gray area across the entire frame, or say two halves of the frame divided into 100% black and 100% white areas. A simple exposure meter that evaluates the entire frame would give identical readings for both situations. However, in the second situation, you would probably expose for the highlight areas to prevent loss of tonal detail. This would actually result in a final exposure that is slightly darker then what the whole-frame evaluative meter would suggest. Learning to read a histogram, is therefore a very useful tool for digital photography. Histograms and digital actually come with two others very useful tools. The first is the ability to display areas of the image that are overexposed – usually in the form of a flashing highlights warning; the second, is the ability to redraw the histogram based on the specific area of the image displayed. Note that availability of both of these functions depends very much on the camera you’re using. Some cameras are able to display histograms and overexposure warnings for individual color channels, as well as overall luminance.

Metering is actually much more critical in the digital age, simply because of the tonal response characteristics of the imaging medium. With film, there was a degree of nonlinearity and reciprocity era which translated into a little bit of latitude in photosensitivity; for negative film, this may vary by as much as 1 to 2 stops: the same exposure with different batches of film, even if the same emulsion type, may not necessarily result in the same final luminance. Add variation in the developing chemistry to that mix, and you can see why having high precision wasn’t all that critical. (Slide film is a different story; it’s very sensitive to over or underexposure.) However, digital photography is nothing if not repeatably consistent. Two identical cameras with identical exposure settings will yield an identical image under any fixed given situation. Changing the exposure by as little as a sixth of a stop will be consistently visible.

There’s also one additional characteristic of the digital medium that we need to take into consideration. This is to do with signal amplification and noise, and also the origins of the ‘expose to the right’ motto. Exposed to the right refers to ensuring that the histogram graph touches the right-hand (highlight) side of the scale, but does not exceed it. The reason for this is to capture as much total information as possible, with as little noise as possible. Underexposure in a digital image may be corrected for by increasing brightness. This is achieved by amplifying the signal; doing so also amplifies any uncertainty in the signal, which translates into increased amounts of digital noise – obviously not a desirable characteristic in an image. The advantage of exposed to the right is that we maximize the amount of signal and minimize the amount of noise. The brightest tonal values in a digital image also contain the most information simply because of the way digital sensors respond to light. This translates into maximizing latitude for post processing, higher color accuracy, and less noise – in short, making the most of your image quality potential.

We therefore want to expose the image as brightly as possible, and then adjust the tonal map later in post processing – or do we? The reality is that in most situations this holds true. However, due to the nature of the total response of some sensors, there may be situations under which we do actually want to underexposed overexpose slightly in order to create a particular look due to the nonlinearity of tonal response. Of course, if you are a JPEG shooter and do not post process at all, you should expose at your intended final output level.

Note that this is much more of an issue for digital cameras than film ones, as the tonal response of film is non-linear – however, underexposure in a digital camera will usually result in undesirable noise when the luminance value is brought up to the desired level because it can only be done by amplifying a small signal. This in turn amplifies the uncertainty in the signal, i.e. noise.

White balance
One additional complication brought upon the digital photographer has to do with white balance and color temperature. Different colors have different luminosity values even under identical illumination; this is to do with the wavelengths that are reflected or transmitted to the imaging device, and their associated energy (luminance) levels. From a perceptual point of view, we see this as different brightness**. White balance is an important setting that comes into play here: it acts as the zero-offset point for color, effectively adding or subtracting different amounts of exposure compensation from the various channels to compensate for the ambient light. (This is how whites can still be rendered as white under extremely warm incandescent light if the correct white balance is used.)

**Nikon’s color matrix metering system has long compensated for this by using a metering CCD that had a color filter array over the top, both to aid scene recognition as well as increase exposure accuracy when presented with strongly colored subjects – for instance, yellow objects always render brighter than reds or purples of a given reflectance even if they’re illuminated under identical light – the color matrix meter compensates for this by increasing or decreasing the exposure if a scene is predominantly of one color or another.

We have several considerations here. The first and most obvious is of color accuracy – even so, this can be compensated for with the eyedropper tool in Photoshop providing we can find something white in the frame to set as a baseline. The less obvious problem is to do with individual channels. If the white balance is incorrect and a channel is overexposed, there is no way to recover this information afterwards. It is therefore important to set a white balance that is in the right ballpark – it doesn’t have to be perfect – to avoid this. Similarly, extreme underexposure of a channel will result in a lot of noise when compensated for afterwards. Generally, the auto white balance function in most cameras will get you in the right ballpark, but you will need to make adjustments afterwards.

The auto white balance function actually works in a similar way to an exposure meter – except instead of trying to average the scene out to middle gray in luminance, it tries to average out the scene to a perfectly neutral color.

The confluence of exposure metering and autofocus
As if the whole metering thing wasn’t complicated enough, DSLR manufacturers have started to use the metering CCDs to aid autofocus – after all, it’s an additional source of information that can be used to help track subjects especially when the mirror is down, and the main imaging sensor is not available. The flow of information is two way and affects both autofocus and metering. The autofocus system uses the spatial and color information from the metering sensor to track subjects by color and location across the frame, especially if they move out of coverage of the autofocus sensor array – the metering sensor always covers the entire frame. The exposure meter uses the autofocus information to determine which area in the frame is being focused on, and is presumably the subject, which the photographer presumably wants to have correctly exposed – in matrix metering mode, exposure is thus biased towards whatever subject is underneath the active autofocus point, or points.

I’m sure you can see there are a lot of presumptions involved. This of course means that the camera doesn’t always get either exposure or focus right when left to its own devices; the metering sensor may lack the resolution to distinguish between the desired subject and another similar-looking one, resulting in focusing errors; or the meter may be too heavily biased towards the area under the active focus area and thus yield erroneous exposures. A situation in which this might happen is say if your subject is much larger than the active focus area, and of a different luminance value. Anything small and reflective almost always causes problems, too.

The bottom line is that it pays to take control of both your meter and focusing system: without this, you can never be fully certain of what your camera is doing; I seldom use auto-anything especially with DSLRs since they do not meter off the imaging sensor (unless in live view, of course).

To be continued in part two! MT

____________

Visit our Teaching Store to up your photographic game – including Photoshop Workflow DVDs and customized Email School of Photography; or go mobile with the Photography Compendium for iPad. You can also get your gear from B&H and Amazon. Prices are the same as normal, however a small portion of your purchase value is referred back to me. Thanks!

Don’t forget to like us on Facebook and join the reader Flickr group!

appstorebadge

Images and content copyright Ming Thein | mingthein.com 2012 onwards. All rights reserved
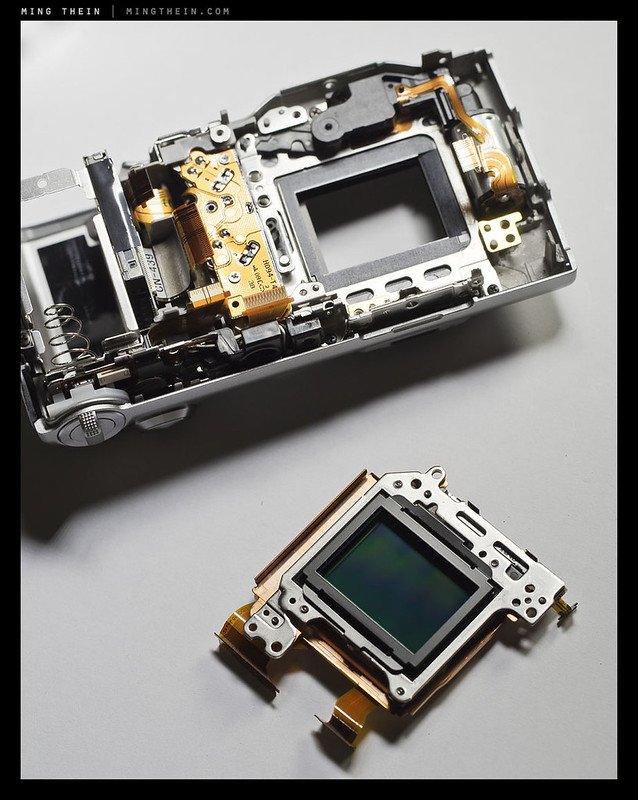
Photographic resolutions for the new year

_7026879 copy
Cheers! D700, 85/1.4G

Firstly, it’s been one hell of a year. I don’t think I’ve ever written and thought so much over such a sustained period of time; in producing content for the site and its readers, I’ve been forced to thoroughly think through all aspects of my photography and workflow. In fact, I’ve written so much that the keys on my primary computer have gone from brand-new-Apple-matte to mirror-polished-in-the-middle in that nine months. (I’m now on my way towards wearing out a new keyboard.) Thank you all for the support and the encouragement.

I’m assuming that those of you who are still here are the kind of photographer who cares about the kind of images they produce more than the equipment – or at least just as much as the equipment. Whilst I write a lot about gear – a good tradesman needs to be familiar with his tools, after all – I never forget that ultimately, it’s all about the images. I would love to find a set of equipment that works for me which I will never have to replace; give me two of those bodies and I’m all set. But, as we also all know, there is no such thing. So gear reviews will continue.

But, if you care about your images, then you surely care about the process of improvement and getting to the outcome you want; this necessarily means that it can also sometimes be a bit painful. We have to force ourselves out of our respective comfort zones in order to progress artistically. Even subjects, styles or locations that on the face of it might not have anything to do with our preferred material might well prove to impart a valuable lesson or two which we can use alter on. I’m all for cross-pollination of ideas; I know for a fact that my wildlife stalking certainly improved my street photography, and attempting to replicate the various lighting styles in paintings have helped both my commercial work and my personal work.

With that, I’d like to share my own personal photographic resolutions for the new year.

1. Shoot less.
Quality, not quantity*. And if you can have both, then tip the balance even further in favor of the quality mark. I’m shooting a lot – more than I’ve ever done – and the upshot is that I don’t always have the time to process all of that. Yet I realize that experimentation is very much part of the creative evolution process; for the two days I had on my own during the last Tokyo workshop, I shot over five thousand frames, 800 of which I kept to review in detail later on a computer, and about 200 which made the final cut. That’s still too many, in my mind: what if I could capture the essence of a place in say, 100, or even 50 truly outstanding images? I have to be even more ruthless with my seeing and editing process; conditioning yourself to throw out the crap is the only way to keep improving.

*This applies to my personal work. Commercial work is a slightly different matter; you simply can’t negotiate down a shot list – nor would you want to – if you’re being paid per-shot or billing an hourly rate.

2. Use what you’ve got.
We’re all guilty of buying something with a flimsy ‘rational’ justification when in reality it’s because we just want it; it’s about gratification rather than necessity. I think that has to stop; we need to recognize real necessity – if a job calls for 300mm, then you have to get a 300mm lens – as opposed to ‘I’ve always wanted a big lens therefore I’m going to get a 300/2.8.’ I’m sure there are pieces of equipment in my stores that are severely underused – the 45/2.8P for example – I should either pare down what I’m not using, or use it. I’m one of those strange people who feels guilty for having something sitting there, underutilized.

3. Try a new format.
If you shoot large, go small. If you shoot small, go larger. And that doesn’t mean going from a compact to medium format digital; you can try MF film for not that much money, and lose very little (if anything) if you procure all of your gear second hand. Different formats have different properties in the way of depth of field and sometimes also tonal rendition (to do with sensor/ film characteristics etc.); consequently, they can also help you to see and compose differently – which adds to the mental list of options for a particular scene. Alternatively, try shooting with a different aspect ratio – perhaps square or 16:9 – which will also help to find frames where you might perhaps have seen a photographic desert, or create something non-cliched in a popular spot.

4. Reverse your lighting.
Shoot with flash where you normally wouldn’t, and vice versa. Yes, the look will be odd and different at first, but it will help to improve one’s familiarity with light – both recognizing it, and creating it. I find that using lights makes me focus more on the composition because it imposes a higher level of discipline over your shot; you’re setting up and taking time which means that all of the elements are within your control. Similarly, shooting with available light forces you to have a higher awareness of the quality of ambient light, and the way it renders on your sensor/ film – it can really help you to previsualize compositions.

5. Travel more.
My wife always says I’m guilty of not taking enough time out to see the world – she’s right. Part of the reason why is that a consulting career completely killed the joy of travel for me; in one particularly memorable year, I’d flown 120 sectors. But travel for work and travel for personal exploration and education are completely different, and it’s taken me a while to realize that – all airports and airplanes look the same in the end. But perhaps instead of spending money on gear, I should spend money on finding new subjects. After all, there’s nothing better than a completely fresh subject to train one’s seeing and observation skills.

6. Share your knowledge.
I of course plan to continue this site in the forseeable future; I’ll certainly have to find more things to write about, but so far that doesn’t seem to have been a problem. One thing I do realize is that I rarely post on-assignment articles anymore; part of the reason is that I don’t have time on site, and part of the reason is that I’m so focused on the job at hand that I simply forget to shoot B-roll. I really need to hire an assistant.

7. Experiment with video.
One of the questions I’m frequently asked has to do with the video capabilities of the various cameras I test; to be honest, I’ve been a bit frightened of video production up to this point – I don’t really see things in sequences, and the whole production part scares me. What I’d really like to find is software that lets me edit video the same way I edit images – bulk color/ tone curve corrections etc – but I’m not sure I want to spend thousands on something I might not even use that often. I am advising on a number of small productions next year, however, so I’ll have an opportunity to have an in-depth chat with the production people – and hopefully shoot some interesting B-roll (or at the very least, stills) for the website.

8. Develop my own film.
I actually learned to do this many years ago at university, in the pre-digital days. My dissertation involved investigating the use of shorter wavelength lasers for increasing measurement precision using holography – we’re talking down to nanometers here – and of course the holograms had to be produced on film; if I remember correctly, it was Ilford PAN-F and some glass plates. (I still have those somewhere, but have no idea where exactly.) The process was slow and laborious – one exposure, three hours of developing time in a completely dark room – no safe light – and then repeat if you got the exposure wrong. Months and months of it. I think I bought my first music player around then. Now that I’m shooting with the F2T again, I want to regain control of that portion of the process – it’s not so much about throughput and efficiency as it is about furthering my understanding. We’ll see. I’ve got to somehow convince the wife that turning the spare bathroom into a darkroom is a good idea.

9. Conquer 35 and/or 50mm.
For some odd reason, I’ve always had a strong aversion to both focal lengths; 35mm more so than 50mm. They both just seem unintuitive to me – I don’t natively ‘see’ in either. I even sold a particularly excellent copy of the superlative Leica 35/1.4 ASPH FLE because I simply couldn’t get used to the focal length. 50mm I make do with on a rangefinder because it’s the longest practical focal length – the 75s and 90s tend to be a bit hit and miss with focusing due to the relative size of the frame and RF patch – but it’s not my favorite. 35 always seemed a bit tight to me, or not quite long enough – compositional no-man’s-land. The funny thing is that I have 40, 45, 50, 58 and 60mm lenses – yet I only use them for commercial work when required, and not for my own personal shooting. I suppose I should do the requisite shoot-for-a-month thing with one of them.

10. Streamline my workflow even more.
You can never be too efficient – the more throughput I can manage, the more work I can take on, or the more time I have to spend on other things – either site-related, or family related. The problem is the workload per image has increased because of file sizes; even if the compute/ conversion time is faster, the retouching time doesn’t speed up simply because I can only physically work so fast. But perhaps if I could improve the throughput for the files that don’t need retouching, I might find some time that way; I might well investigate Lightroom…

That’s it for me – you’re welcome to try any or all of them if you feel they might give you the creative kick you’ve been looking for. If you have any of your own, please feel free to share them with the other readers in the comments below – I’m sure we can all benefit from some ideas! In the meantime, enjoy the festivities and here’s wishing all of you a happy, creative, fulfilling and prosperous year ahead. MT

____________

If you enjoyed this post, please consider supporting me via Paypal ([email protected]). Visit our Teaching Store to up your photographic game – including Photoshop Workflow DVDs and customized Email School of Photography; or go mobile with the Photography Compendium for iPad. You can also get your gear from Amazon.comhere. Prices are the same as normal, however a small portion of your purchase value is referred back to me. Thanks!

Don’t forget to like us on Facebook and join the reader Flickr group!

appstorebadge

Images and content copyright Ming Thein | mingthein.com 2012 onwards. All rights reserved

Still life experiments

_RX100_DSC3094 copy
Legs

If you think about it, there’s actually not a huge leap between product photography and still life; after all, they are pretty much the same thing technically. The only tangible differences I can see are of course the intention/ message: one is to sell a product, the other is a visually interesting use of light and texture; and product photography tends to be with controlled lighting, whereas the majority of still lifes I’ve seen tend to use found available light. (Come to think of it, there’s not that much difference between still life and architecture or urbanscapes either, other than scale and occasional inclusion of human elements.) In fact, traditional still life photography was almost always of food – there’s an interesting avenue to explore for my next culinary assignment; it’d certainly be very different to the styles currently in vogue.

_RX100_DSC3103 copy
Better days past

Admittedly, it’s not something I’d consciously tried to shoot earlier. The main reason I’m now giving it a try is because I’m trying to further heighten my awareness of the quality of ambient light in order to improve both my available light photography (remember, light, subject, composition, idea) and of course the quality of my constructed light. This exercise has taken me down two paths: firstly, the use of film cameras forces me to get it right in camera, whether it’s observation or construction; I want to speed up my workflow even more by paring the amount of postprocessing work I have to do to the bare minimum and absolutely unavoidable. I’m also training my eyes to work as a meter; so far, not too bad – I’m within a stop most of the time, which is about as accurate as the meterless film Nikons can go anyway. (Some lenses give you half stops, shutter speeds are always whole stops; my ‘Blad gives me half stops on the lens.)

_RX100_DSC3064 copy
Real or artificial?

The second effort is focused on a study of the light used by the great painters of days gone by; they didn’t have the luxury of making their own in real life, so they had to be masters of observation, imagination and replication. In some ways, not having the technical constraints of execution probably made this easier; in others, it’s not easy to replicate realistic lighting entirely with paint! It of course goes without saying that the quality of light achieved by the Dutch masters, Da Vinci, the Italians hyperrealists like Canaletto et al was fantastic, if slightly impossible at times. Still, they conveyed mood perfectly with color and use of shadows. Though such light is seldom found in nature, we can create it now – and to some extent, make up the balance in postprocessing (the colour part, and dodging and burning for contrast, at any rate.)

_8016610 copy
Classical painting experiment I – hommage to the Dutch Masters.

_8016759 copy
Classical painting experiment II -hommage a Monet

The images in this set were mostly shot in the last couple of months with a variety of equipment, though there are a couple which date from earlier. I don’t think I’ve quite figured out what my style is for still lifes yet; I’m still in the imitation-experimentation phase, but feel quite drawn to darker imagery with strongly directional single light sources; I like to think of it as ‘tonal richness’. From a postprocessing point of view, it’s not easy to achieve because preserving the quarter tone contrast tends to result in oversaturated primary color channels, which you of course have to correct for individually, which results in hue shifts especially in non-primary colors. Once again, monitor gamut and calibration are critical in achieving the desired outcome.

_RX100_DSC3066 copy
This is not a carafe*

*Spot the Magritte reference

On the film front, since I’ve decided to eschew color in favor of the tonal possibilities offered by black and white – not to mention full end-to-end control over the process – it’s more about lighting management and attempting to visualize the native tonal response of the film, which is both very different from digital and not much like my normal postprocessed output, either. It doesn’t help that there’s the intermediate conversion step post-digitization which further complicates one’s ability to clearly imagine what the end results will look like. I like to think I’m fairly capable with Photoshop and can quite easily previsualize my end results at the time of shooting with digital, but that extra step has thrown me out. I suppose it’s a matter of consistency, practice, and getting to know the characteristics of one or two film emulsions very well.

Enjoy the images. I’m off to shoot some more. MT

On an unrelated note, if anybody has been wondering about the lack of On Assignment posts of late, it’s because I both simply haven’t had time on some of the more demanding recent assignments, or the setups haven’t been that exciting; just seeing me hold a camera in a still pose is not really very instructive or insightful. I’ve got a couple of jobs in the planning stages for next year that should be more interesting…

____________

Visit our Teaching Store to up your photographic game – including Photoshop Workflow DVDs and customized Email School of Photography; or go mobile with the Photography Compendium for iPad. You can also get your gear from B&H and Amazon. Prices are the same as normal, however a small portion of your purchase value is referred back to me. Thanks!

Don’t forget to like us on Facebook and join the reader Flickr group!

appstorebadge

Images and content copyright Ming Thein | mingthein.com 2012 onwards. All rights reserved

_5002731 copy
Cutlery

_5002793 copy
Spectrum

_5006897 copy
Froth

_5014201 copy
Wholecut

_RX100_DSC1746 copy
Before lunch

_5A00001 copy
Umbrellas

_5001007bw copy
Study of a lamp

Judging the 2012 Maybank Photo Awards

_RX100_DSC3105 copy

This article was originally published in The Malaysian Reserve on 7 December 2012. Reproduced with permission

For the whole 14th of November, a number of people sealed themselves into a room at Menara Maybank to pick five winners from a thousand shortlisted candidates. We looked for four things: light, subject, composition, and the idea; the ability to look into the image and at the scene through the eyes of the photographer.

Judging photo competitions is not as easy as you might think: firstly, photography is art, and art is subjective. What might count as a winner for adjudicator might not necessarily be so for another; I found myself both mediating disputes and causing them.

This is perhaps a good barometer for the contest itself: out of over 19,000 entries – larger than the 2012 National Geographic and DPReview photography competitions combined – there were enough that passed initial scrutiny to make life very difficult for us. We had clear winners in some categories but insufficient runner-ups; or a very close fight for first, or even no outstanding winner at all, with every candidate lacking something. More encouragingly though, several talented photographers entered and stood out in more than one category – our Photographer of the Year, Muhamad Saleh bin Dollah; Street Photography winner, Chau Sau Khiang and Studio winner, Hairul Azizi bin Harun in particular; and yes, we judged blind without knowing the identiy of the photographer.

These photographers showed strong images across disciplines, yet managed to maintain a consistent style, standard of technical execution and compositional balance. Contrary to popular belief, specialization is not always a good thing when it comes to the arts: the experience gained from being a multidisciplinary photographer helps you to apply different techniques across various subjects to achieve a unique look to one’s images.

Our Photographer of the Year had one quality that none of the others demonstrated: the ability to consistently edit and self-critique one’s own work. Whilst we saw a lot of technically and compositionally strong portfolios, the flow of the images submitted let them down; either there would be one black sheep image that stood out uncomfortably from the rest, or the images would be too similar and show a very breadth of skill. As a photographer, one important thing to remember is that you’re judged on the images people see, not the ones they don’t – conscious exclusion is therefore critical.

The results were both encouraging, and in a way, disappointing. Whilst it’s clear that there’s some real talent in this country and the level of enthusiasm was a very pleasant surprise, the average standard of some of the ‘professional’ entries was considerably below that of the amateurs. There is clearly better work out there in the media – I’m just surprised we didn’t see any of it entered. Professionalism means consistency and quality of delivery, not merely turning up to push a button. Many people would go to great lengths for the opportunity to make photography into a career – please don’t waste that; make the most of your opportunity and have some pride in your work. Any other way, and you risk damaging not only your own reputation but also that of the entire industry.

There was actually one entry that stood out to all of the judges: Kumaraguru Krishnan’s Photographer of The Year portfolio. It’s a series of out of focus images, with some vaguely people-shaped forms. Collectively, we believe that it was the only entry that really challenged creative boundaries and whose photographer actually stopped to question the rules. Even though the images may appear to be a series of mistakes, the consistency of theme, style, color – even the amount of defocus – indicate otherwise. The set was reasonably well edited – perhaps two of the images were too similar – but otherwise, it left a positive impression on us.

To all the photographers and entrants, thank you. For next year – assuming I’m still judging – what we’d like to see is a bit more creativity. The awards are a fantastic and very visible platform to get your work seen, and who knows, perhaps launch a photographic career. Don’t assume that rules must be followed (we had a landscape where all elements were precisely placed at the rule of thirds, but completely disregarded the natural flow of the scene and thus resulted in a boring, imbalanced image) – they’re merely there as a starting point to prompt you to think and challenge your eyes.

Don’t be afraid to submit something and not win – that’s an overly kiasu mentality. Instead, challenge yourself, and focus on showing us the way you see the world. At the end of the day, it’s that continuous need for challenge and self-improvement that differentiates humans from animals and the great from the mediocre. Remember, photography is subjective: a stronger photograph makes a stronger argument, and we can all gain something from a different point of view. MT

____________

If you enjoyed this post, please consider supporting me via Paypal ([email protected]). Visit our Teaching Store to up your photographic game – including Photoshop Workflow DVDs and customized Email School of Photography; or go mobile with the Photography Compendium for iPad. You can also get your gear from Amazon.comhere. Prices are the same as normal, however a small portion of your purchase value is referred back to me. Thanks!

Don’t forget to like us on Facebook and join the reader Flickr group!

appstorebadge

Images and content copyright Ming Thein | mingthein.com 2012 onwards. All rights reserved

To process or not to process?

_RX100_DSC2614b composite copy Ginza dusk.

This is the photographer’s analog of the classic fisherman’s dilemma: fish or cut bait?

I’ve always, for as long as I can remember being serious about photography, shot RAW and done some form of processing afterwards. The more potential the file had, the more processing; conversely, I’d also spend time trying to save files that probably weren’t compositionally worthwhile. And as much as I hate to admit it, in the early days, trying to hide photographic mistakes behind punchy processing. In effect, the processing was taking center stage instead of the image. One of the hardest things to do is create a strong, but natural looking image – both from a perspective and processing standpoint; in order for it to stand out well from reality, the light, subject and composition all have to be exceptional. The image has to tell a story – but that’s another topic I covered here and here.

Note: all images in this article are a half-and-half composite of Sony RX100 shots; the SOOC JPEGs are on the left half (especially obvious for the B&W images) and the processed RAW files on the right. The RAWs were converted to DNG first then run through my usual workflow; CS5.5 doesn’t natively support the RX100. Where the finished file was cropped to a different aspect ratio, I’ve followed the finished file. Some noise reduction was one on the high ISO files. As usual, go by what I say and not what you see – there’s web compression involved in the mix, and you aren’t looking at the original files on a calibrated monitor.

_RX100_DSC2614 crop
And a 100% crop of the above – a huge difference here, but aside from tonal density – not much in it at web sizes, is there?

For argument’s sake, I’m going to assume that you’re able to see, compose and execute the image you see at a particular scene when pressing the shutter. For the purposes of this discussion, I’m going to exclude conceptual and commercial work – there is simply no way you can achieve some frames in a single look, and it’s impossible to have a perfectly dust-free product in others – even if you can get the lighting perfect. We’re talking about creative, personal and documentary work only. The reality is that a lot of photojournalists and reports never leave the JPEG – and some even SRGB JPEG – realm as it is. There are many reasons for this; speed and throughput being the first, the display medium being the second – there’s no point in supplying a beautiful file that uses all 16 bits of the Prophoto gamut if it’s going to be printed on a halftone CMYK process on newsprint. It’s a waste of time. (That of course doesn’t mean you can’t shoot both a JPEG and a RAW and deal with the latter if you find yourself up for a Pulitzer.)

_RX100_DSC2172b composite copy
Giant chef. Either rendition works, frankly – I don’t mind the overall tonality of the SOOC image, even if it’s lacking the pop of the actual scene.

A recent email exchange with a hobbyist photographer friend has spurred me on to think about this topic a bit more. The question: is Photoshop really necessary? Shouldn’t a good image be able to stand on its own? Yes, but don’t good ingredients taste better when skilfully prepared and cooked? (The Japanese may disagree with the cooking part; I can’t blame them.)

To answer this, we need to backtrack a bit. In the early days of digital, JPEGs were simply not an option because cameras lacked the required processing power. Raw output was something that was simply a direct data dump off the sensor itself; the data stored (perhaps lightly compressed to save space) for later processing. JPEG file quality was simply, unusable compared to the standards of the day: film. It didn’t have the tonal subtlety, the dynamic range, the detail; to make things worse, there was an inherently blocky “digital-ness” to it that made images feel, well, unnatural. RAW processing was a way to partially get around that and reduce the gap – we could alter the conversion/ output algorithm to create an image whose shadow and highlight response more closely matched that of film. It was also a way to overcome some of the limitations of early sensors; notably color response, chroma noise and tonal accuracy.

_RX100_DSC2103b composite copy
Imperial Palace East Garden, Tokyo. The SOOC image is too green – the needles definitely didn’t look like that after a warm summer and heading into November.

_RX100_DSC2103 copy
100% crop. There’s quite a lot more detail and tonal subtlety in the processed image.

Postprocessing my raw files was a habit I acquired since shooting with a DSLR in 2004, and I haven’t shaken since. I don’t discount JPEG-only cameras, but I’d definitely take the availability of a RAW file into consideration when buying one. And I certainly don’t feel like an image quality evaluation is fair or exhaustive until I’ve run some RAWs through my normal workflow. However, recent experiences with first the Sony RX100 and more recently, the Fuji XF1, have made me revaluate this: in fact, the XF1 has such good JPEGs and such crappy RAW files (perhaps ACR is also to blame here) that I don’t think I’d ever shoot RAW on this camera; but I will still postprocess the JPEGs. However, this is not a RAW vs JPEG debate; it’s something a bit more fundamental: for non-critical applications, is it still worth spending time processing or not?

_RX100_DSC2046b composite copy
What happened here is perspective correction – nope, you can’t do this in-camera. Not much to fix with tonality, though.

Yes, the processed RAW files clearly look better at the 100% level, but you’d have to make a 120cm wide print to really see that. And for practical viewing purposes, the only difference was in the overall tonality (and sometimes not even then) of the image, which could easily be fixed by altered JPEG output settings. Downsizing hides all manner of dirty pixel-level flaws. Could it be that I’d been creating some unnecessary work for myself for some time, and hadn’t realized it? It was the same case with the JPEGs from the Nikon D600 I was testing around the same time; they looked great at typical display sizes, but started to fall apart at the pixel level. (Before you worry that I might have gone all Hipstagram on you, note that I’m always open to finding new ways to balance image quality and throughput – and that includes shooting Ilford PAN F in my F2T and then ‘scanning’ the negatives with a D800E. I’m just saying.)

Suppose you weren’t super-anal about image quality, though. Suppose you didn’t pixel-peep, or print large. Suppose you shared your images online or at most made 8×12″ prints. Remember the points of sufficiency; if your display medium is going to be that severely limited, then the reality is you might not see much of a difference if you set your camera up correctly. The strength of the image and its contents is of course going to make more of a difference; the camera is just a tool and medium.

_RX100_DSC1961b composite copy
Facebook break from shopping. Near zero difference in tonality, just a bit of shadow recovery and perspective correction. Again, the SOOC JPEG would be fine for 99% of uses.

The basic reason for shooting RAW and postprocessing is that there is no one-size-fits-all for camera settings; therefore it’s impossible to have these baked in to the JPEG development algorithms of a camera. Fair enough; however, these algorithms have been getting increasingly clever over time as processing power increases. (A lot of RAW files aren’t even composed of truly RAW data anymore, but that’s another topic altogether.) To push perfection with every frame, there’s no way around RAW and postprocessing, end of discussion. You simply cannot have a camera that’s smart enough to recognize when some parts of an image need to be dodged and burned; the day that happens, I think I’ll retire as a photographer.

There are cases where the format-imposed limitations can actually force you to make stronger images – spot metering for subject or highlights can result in more powerful compositions and fewer distractions, especially when you have very contrasty lighting. Alex Majoli’s early work with the Olympus compacts is a good example of this. I frequently use this technique to strengthen the mood of an image, regardless of what camera I’m using.

_RX100_DSC2062b composite copy
Port of Tokyo. The AWB got this one horribly wrong; it could have been the window I was shooting through that threw things off.

_RX100_DSC2062 crop
100% crop. Not as much extra detail as you would have thought.

Once again: pick the right tool for the job, and that includes your file formats. I think what might be useful is a set of guidelines as to when each method is useful; even for a person who can run through their entire RAW workflow for a file (excluding heavy duty retouching) in about 30 seconds, I’m considering moving to JPEG for some things. Firstly, I don’t need perfect files for everything; social/ personal/ family documentary etc. is one such thing. Secondly, I’ve been spending more and more time processing files as my workload increases and camera resolution gets higher; I simply don’t want to spend any more time in front of a computer than I have to. I’d rather be out shooting and meeting people. (An obvious solution would be to shoot less, but this somewhat defeats the point of being as photographer. And yes, I’m trying film again at the moment, too.) Client and professional work will always remain shot RAW of course – there’s no point in going to the nth degree to ensure pre-capture image quality with the best lenses and supports then throwing most of your tonal space away with a JPEG. And you never know what post-capture manipulations you might need to do later on.

The biggest downside of shooting JPEG is that your settings are pretty much baked unless you’re willing to change settings on the fly from scene to scene. (Some cameras offer bracketing for this, too.) In real terms, you have to make a conscious choice at the time of shooting whether you wan high key portrait color or low key B&W. On top of that, you have to deal with limited dynamic and tonal range, and that you have to get your exposure as close to perfect as possible in-camera. This is very different from shooting RAW with the aim to post-process afterwards; in this case, you always expose to the right (and even clip highlights slightly) to maximize tonal range in the low-noise highlight and midtone portions of the image. My RAW files look flat and a bit too bright; this is normal because matching exposure to the desired tonal map is a critical portion of the processing flow.

_RX100_DSC1931b composite copy
The camera got this one spot on – all I did was straighten out the perspectives a bit, and sharpen.

It’s important to note that you need to spend some time figuring out what the best JPEG settings are for your camera and shooting style; the rest of this article is meaningless if you’re shooting with the wrong settings. And regardless of whether you JPEG or not, I would always shoot RAW+JPEG – you never know when you might need the file later. Storage is cheap; do-overs are often impossible.

When it might be best to use a straight-out-of-camera JPEG (or film + minilab):

  • When file quality is secondary; anything intended for facebook or social email, for example. These distribution methods compress the hell out of the images, strip color information, and then to make things worse, viewing is almost always on a non-calibrated device. You can spend all the time in the world tweaking, but it’s going to look like crap if the display can’t make the required color.
  • In very high throughput situations, like sport or news or reportage. And dare I say it, wedding factories.
  • I’m cringing as I write this, but if you camera has a style preset you particularly like (and are okay adopting as your own style) then go right ahead…so far, I haven’t seen anything that fits the bill personally.
  • When you don’t have the time. If I go away for a week, I’ll shoot an average of 1,000-1,500 images a day; of this, perhaps 100 will be saved to review on a computer later; I’ll throw away another half, but the problem is now I’m stuck with 350 images to process. At say 1 min per image, that’s around six hours. A lot of what I shoot is documentary/ observation/ personal, and these don’t need processing. I am now being even more critical with my editing, but it’s still a lot of time to carve out when you don’t have any spare to begin with.
  • If you enjoy photography but don’t want to deal with the hidden back end that comes with it – the computers, the storage, ensuring you have enough power to run photoshop and that your converters are up to date…the list is endless.
  • What you see is pretty much what you get: if you’re learning, it’s much easier to see the effect of exposure or setting changes. With RAW, you have to use experience to visualize what you can get. This is probably the most common stumbling block I see amongst my students who are just starting to discover the power of Photoshop.
  • If your camera puts out lousy RAW files but amazing JPEGs – the XF1 is a great example of this.

_RX100_DSC2392bw composite copy
I’ve never used SOOC B&W before, though I doubt it would have been able to retain the slight tonal variation in the man’s trousers. I had to do quite a bit of dodging and burning to bring that out.

And in favor of RAW + Photoshop (or self-developed and printed film):

  • No question: when image quality is the first priority.
  • When you want to do something that can’t be done in camera; compositing, for instance.
  • When you don’t have many images to process
  • When you have no choice – either the JPEGs are crappy, or there are no JPEGs at all…
  • When you have to do perspective correction (and don’t have a tilt-shift lens).
  • In extreme lighting situations that can’t be handled out of camera.
  • When you need to make tonal/ exposure changes to part of the image only, and not the whole image; this is where dodging and burning comes in.
  • If you’re a control freak…

But wait, there’s a middle ground:

  • You can shoot RAW but batch process; I think Aperture and Lightroom are a good example of these halfway houses. The problem I see is that you’re spending nearly as much time as a full-blown individual Photoshop workover, but without the same control or output quality. And this somewhat defeats the point. That said, I do keep presets for various things – usually to do with color calibration for flash work or for certain types of lighting or cameras, or high ISO situations.
  • The other option is to have the camera output a very neutral JPEG and postprocess that; you can skip the RAW conversion step (although it is possible to open JPEGs in ACR and have the same adjustments, but not the same latitude of course). This actually frees up quite a bit of time; that minute can get down to 15 seconds or less if you have a fast computer – dodge and burn, curves, color correct, sharpen, save. And it does of course help that the files are much smaller, too. This is actually not a bad option – whenever I review a camera without RAW support, this is the method I use – but if you start to do any extreme tonal manipulations to the files, it will become obvious, especially at the pixel level.

_RX100_DSC1925b composite copy
Standing nap. Yes, it’s two files. Look carefully.

_RX100_DSC1925 crop
100% Crop. More noise, a smidge more detail, and slightly smoother tones; not a lot in it. And that’s with me looking at the full size files on my calibrated monitor, not the web crop; there’s even less difference here.

My currently preferred JPEG settings

Important note: currently, I’m using my JPEGs as preview images either for quick client contact sheets after a job. When shooting RAW-only, the JPEG settings apply to the preview image but not the RAW file – so I generally try to make them as close as possible to be representative of the tonal range I can get of the RAW file, i.e. flat and not saturated, but sharp. If I was shooting JPEG only, I’d run similar settings with the anticipation of doing some light processing work on them afterwards – the halfway house.

  • My current style is neutral and natural; I look for or create light first and foremost (though the latter doesn’t apply here; if I’m creating light, I’m also shooting RAW to maximize image quality). I want to retain a decent amount of the tonal range; however there’s no way to control the output curve for most cameras, which results in large dynamic range images appearing very flat. This means contrast is set to the lowest option, or close to it – depending on the camera.
  • It’s very easy to have individual color channels blow; thus reduce your saturation a notch or two.
  • Sharpening is a mixed bag; some cameras do this well, some don’t. But I don’t use zero sharpening, as a lot of the time this setting does actually affect the in-camera RAW conversion and the amount of detail extracted. It also helps you to determine if critical focus was achieved – I’ll usually run somewhere between neutral/ default and maximum.
  • White balance is on auto, but I will override it where necessary to avoid blown highlights.
  • Maximum quality and size, of course – with an extra RAW file saved, too.

There are still many reasons to shoot RAW – and even exclusively RAW – but I can’t help but feel those are eroding slightly; and for the vast majority of users – even serious hobbyists – it might not be necessary all the time. Admittedly, my main reason for revisiting this topic is in the interests of curiosity and efficiency; I don’t think there’s as much of an image quality penalty as there used to be, especially for smaller output sizes. I haven’t decided just how much SOOC JPEG I’m going to use at this point – edited JPEGs are probably as far as I’m going to go – but you can be assured that I won’t use it at all until I feel that I’m getting the image quality I want. And in any case, I can still apply my normal workflow to the JPEGs – the tradeoff is significantly shorter processing time against a bit less latitude. Moral of the story: get it right out of camera; if it’s not there, you’re not going to be able to add it in afterwards. MT

____________

Visit our Teaching Store to up your photographic game – including Photoshop Workflow DVDs and customized Email School of Photography; or go mobile with the Photography Compendium for iPad. You can also get your gear from B&H and Amazon. Prices are the same as normal, however a small portion of your purchase value is referred back to me. Thanks!

Don’t forget to like us on Facebook and join the reader Flickr group!

appstorebadge

Images and content copyright Ming Thein | mingthein.com 2012 onwards. All rights reserved

Film diaries: the first roll

_6001446 copy

Some months ago, I acquired a vintage Nikon F2 Titan in the hopes of both fulfilling a longtime photographic dream, as well as perhaps shooting a little film again in the name of stimulating creativity. Many of you have been anxious to see the results; I bet none more so than myself. The trouble is, I feel that I’ve set a standard here that I must uphold; if the images from this roll don’t meet that standard, then I think there’s going to be a lot of hand-wringing, rude gestures and cries of ‘pah, amateur’. In this post follows the highlights of that first roll.

2012-12-13-F2T-D100

Before I show any images, I want to give some background: I’ve shot film creatively before. I’ve even processed it before, as part of my dissertation on improving measurement precision using short-wavelength laser holography (don’t ask, because I don’t really remember). But I’ve never done both, and my processing days predate my creative photography days by a considerable period of time. Finally, the last time I shot film was in mid 2009, with a Leica M6TTL. Before that was 2005, with another Nikon – an F2A. Note: EXIF data will say ‘D800E and 50mm’, because that’s what I used to digitize the negatives.

_8025538bw copy

This roll is both the first roll of true B&W I’ve shot*, processed and scanned entirely singlehandedly. It shows, too: it’s grainy considering it’s Ilford Delta 100 exposed at ISO 100; in places it’s uneven, and there’s a streaking problem from where I got impatient and decided to try to wipe the film dry with a microfiber cloth. In hindsight, one of those Dyson Airblade hand dryers would be awesome for the task.

*An embarrassing, dirty confession: all of my previous film B&W work was C41 process (BW400CN, XP2-400) for convenience – finding somebody to develop black and white film in Kuala Lumpur is not a trivial task because serious shooters do their own, and consumers don’t do it at all.

_8025536bw copy

The ‘scanning’ was accomplished with an interesting hack-rig: my product photography lightbox, lit by a speedlight within, film passed through a cardboard mask (to prevent scratches) and the camera resting above, spaced perfectly with the long hood from a Zeiss ZF.2 2/100 Makro-Planar but fitted to the 2/50 Makro-Planar which coincidentally has the same bayonet. Add a 20mm extension tube, and the spacing is not only perfect, but I now have a 4000+DPI scanner.

_8025550bw copy

I’ve spent some time in Photoshop to automate the conversion process as much as possible, to try and keep the character of the film intact and consistent, and minimize the amount of individual work required on each image. I can’t say I’m 100% happy with the results yet, but we’re getting there. If I can run an entire roll of RAW files as an automated action – cropping excepted – then the total scan and process time is actually about the same as a comparable number of digital files.

_8025545bw copy

Anyway, more on that in another article. For now, I just want to leave you with one thought: resolution both matters, and doesn’t – we’re seriously spoiled by the degree of image quality obtainable from the current state-of-the-art FF digitals. Enjoy! MT

These images were shot with a 1979 Nikon F2 Titan on Ilford Delta 100, with a mixture of lenses – Voigtlander 28/2.8, Nikon 58/1.2 Noct-Nikkor, Nikon 45/2.8 AI-P, Zeiss ZF.2 2.8/21 Distagon, Zeiss ZF.2 2/50 Makro-Planar, Zeiss ZF.2 2/100 Makro-Planar. Can you tell which is which, other than through perspective? I can’t.

____________

Visit our Teaching Store to up your photographic game – including Photoshop Workflow DVDs and customized Email School of Photography; or go mobile with the Photography Compendium for iPad. You can also get your gear from B&H and Amazon. Prices are the same as normal, however a small portion of your purchase value is referred back to me. Thanks!

Don’t forget to like us on Facebook and join the reader Flickr group!

appstorebadge

Images and content copyright Ming Thein | mingthein.com 2012 onwards. All rights reserved

_8025531bw copy

_8025525bw copy

_8025515bw copy

_8025508bw copy

_8025502bw copy

_8025495bw copy

_8025499bw copy

Deconstructed photography, part two: compact camera masterclass

IMG_1780b copy
Imprint. Iphone 4

In part one, we deconstructed the essence of photography, and identified the critical qualities required for a good general-purpose camera. What about the candidates?

On this basis, we have a few potential candidates, in alphabetical order with specs and particular standout qualities:
– Canon G15 – 12MP, 1/1.7″, 28-140/1.8-2.8 – optical finder, zoom range, external controls
– Canon S110 – 12MP, 1/1.7″, 24-120/2.0-5.9 (!) – compactness
– Fuji FinePix X10 – 12MP, 2/3″, 28-112/2.0-2.8 – mechanical zoom, optical finder
– Fuji FinePix XF1 – 12MP, 2/3″, 25-100/1.8-4.9 – mechanical zoom, compactness, JPEG quality
– Leica D-Lux 6 – 10MP variable-aspect, 1/1.7″, 24-90/1.4(!)-2.3 – variable aspect ratios, lens speed, macro, extended warranty and Lightroom (over the LX7)
– Nikon P7700 – 12MP, 1/1.7″, 28-200/2.0-4.0 – telephoto reach, external controls
– Olympus XZ2 – 12MP, 1/1.7″, 28-112/1.8-2.5 – a safe middle of the road choice
– Panasonic LX7 – 10MP variable-aspect, 1/1.7″, 24-90/1.4(!)-2.3 – variable aspect ratios, lens speed, macro
– Sony RX100 – 20MP (!), 1″, 28-100/1.8-4.9 – low light use/ resolution/ dynamic range/ overall image quality, speed, video
– The Ricoh GR-Digital IV is a possible too, if you don’t mind a fixed 28mm lens – 10MP, 1/1.7″, 28/1.9 – steath, compactness, street/ hyperfocal photography, configurability

_RX100_DSC2925 copy
Church reflection, Melaka. RX100

Of these, I think the G15, X10, XZ2 and P7700 are probably on the large side of what you might want to carry, that said, they are loaded with external controls, and the most tactile of the group. The smaller cameras are more button-and-menu-driven, though they all have control dials whose functions can be assigned to your preferences. The X10 and XF1 are the only two cameras here with physical zoom rings; a neat touch that improves responsiveness (especially since the rings are linked to power-on). Almost all of them are based around the same sensor, and offer fast lenses at the wide end; the LX7 and DL6 are really fast (f1.4); others are consistently fast throughout. The more compact cameras (S110, XF1, RX100) trade off lens speed at the long end.

If you’re expecting me to pick a winner, you’re going to be disappointed. All are similar enough and offer sufficient control, image quality and responsiveness that any one will do for the majority of situations. Yet, they are also different enough in control philosophy and particular feature speciality that if you particularly need any one of these features, your choice may be skewed. If not, pick the one that feels best to you, the one your brand loyalty dictates, the one whose design you prefer – whatever. It doesn’t matter. You just need to like the camera enough to use it, and it should be intuitive enough that you will actually do so. Lower end cameras will work just fine, too – I’ve had great results with the ultracompact Canon SD780 IS and superzoom Panasonic TZ3.

_RX100_DSC2931 copy
May arches. RX100

Let’s get something straight upfront though: there are things you can do, and things you can’t. It’s important to know what falls into each category so you a) don’t waste your time attempting to shoot in a particular way then being disappointed by the results, and b) can play to the strengths of your equipment.

Strengths:
– Stealth
– Compressed perspectives
– Getting everything in focus/ hyperfocal photography
– Low key photography (in low light)
– Moderate to high contrast images
– Long exposures, with a relatively lightweight tripod, or IS system: the leaf shutters used in compacts have almost zero vibration, and hand shake can be eliminated almost entirely when paired with the self timer.
– Odd points of view, when used with a swivel screen

Don’t waste your time:
– Getting any sort of shallow depth of field. Only close up, with a distant background, maximum aperture and whatever lets you focus the closest. Otherwise, forget it.
– Tracking moving objects
– Very low light
– Manual focus – why bother?
– Working with thick gloves in cold environments

_RX100_DSC2958 copy
Two old ladies framed, Melaka. RX100

For the most part, there are few limitations. Most of the troubling ones can be worked around; the depth of field control one I consider to be more a compositional thing the photographer needs to learn around rather than a limitation of the camera. More problematic is the inability to track moving objects; AF-C is my preferred setting for street photography and reportage scenarios because it counters the effect of subject motion. That said, if you’re using a compact, you could either prefocus at the desired spot and release as your subject passes it, you can pan, or you can rely on the extended depth of field for a given field of view to cover you. Any one of these three approaches will work just fine. In very low light situations, a mini-pod can save you; alternatively, there’s self-timer and IS. But by far the best method is simply to shoot a low key image, or embrace the grain.

_RX100_DSC2245b copy
Tranquility. RX100

There are only a few key settings for general photography, in my mind; all of the cameras on the list above will be able to cope.

Program mode. 99.9% of the time, you will be at a focal length/ aperture/ distance combination that means everything in your scene will be in focus anyway; aperture control is meaningless. I’d rather have the camera able to shift exposure automatically to prevent overexposure/ underexposure rather than miss a shot.

Auto ISO. If you set the right limits for maximum ISO (probably around 800-1600 for the smaller-sensored cameras, and 3200 for the RX100) and minimum shutter speed (not always an option), combined with P mode, you’ll avoid missing shots because of insufficient shutter speed or exposure – but at the same time, not have to use an ISO higher than strictly necessary to maintain image quality. Yes, it appears that we’re basically transferring control of exposure over to the camera – but unless you really need to freeze motion or add it (panning, soft water etc.) then I cannot actually think of a situation in which you need to set these parameters manually.

_RX100_DSC2317b copy
A night out. RX100

Spot or center-weighted meter. The main reason I’m not an advocate for matrix metering on compacts is that it both tends to be a bit unpredictable, as well simultaneously critical due to the limited dynamic range of small sensors. Nothing screams unnatural in an image more than a blown highlight with a harsh edge transition; taking control of your meter by understanding how it responds to certain situations will help immensely to avoid this. If you use the spot meter, then add between 1/2 and 1 stop to bring the highlights up to the point just before they clip; if you’re using centerweight, then make sure you have a good mix of tonal ranges within the central spot. In either case, the priority is to ensure that the subject is exposed correctly; it’s also almost always the place where you want to focus, so having a spot meter linked to the focus point and exposure lock with a half press of the shutter is ideal – fortunately, this is also almost always the way compact cameras are set up to behave by default.

Exposure compensation easily reached. Regardless of whether you’re using spot or center-weighted meter, you’re inevitably going to need to use exposure compensation at some point – all meters are thrown out by very bright or very dark objects. Better that you either have a dedicated command dial for this, or better yet, a physical dial with the increments permanently marked.

_RX100_DSC2614b copy
Tokyo nights. RX100

Single point AF. As much as I’d love to turn over focus selection to the camera, I find that far too often it doesn’t focus on what I want it to, or it picks faces when I don’t want it to, or it finds faces in random geometric arrangements. Whilst this technology has come a long way, it’s still not perfect and can’t determine distance accurately – so the subject picked is almost always the most contrasty one, not the nearest. Just use the center AF point for focusing and metering, then recompose once both are locked.

Prefocus. A common myth is that compacts have huge shutter lag: they don’t. If anything, they have less shutter lag than most DSLRs because there’s no mirror to get out of the way before the exposure. The confusion comes when people include focus acquisition time in the mix; this is not right because you can seldom compare situations in a consistent manner. Prefocus shutter release lag for say the Nikon D4 – arguably one of the fastest cameras out there – is 42ms. By comparison, the RX100’s prefocus lag is just 13ms – so short that it takes your finger longer to physically move to depress the button by that additional fraction. Prefocusing thus obviously reduces overall response time, meaning fewer missed shots. You have to shoot a bit differently with a compact and a moving subject: with a DSLR, I’ll use AF-C and track my subject until it hits the point I want relative to the rest of the composition, then release. With a compact, I’ll frame and prefocus first, wait statically with the final framing intact, then shoot when the subject hits the point I want.

_RX100_DSC2452b copy
Duplicity. RX100

Stabilizer on. Small cameras held at arms’ length (and not braced against one’s face) are not the most stable of shooting platforms; without a stabilizer, you’ll probably need 1/2x focal length – or higher with higher resolution cameras – to maintain a pixel-sharp image. You can probably claw back around 3 stops with the best of the stabilization systems, of which Panasonic is currently king. Make sure it’s set to the mode which is always active so you can frame more precisely, too – some cameras only activate the stabilizer when shooting to save power.

RAW (with exceptions). Other than the Fujis – whose JPEG files, especially with DR400 set – are amazing – there are gains to be made by shooting RAW and postprocessing for all of the above cameras. The gap is smaller for the Sony RX100, but still noticeable. Note that some cameras like the LX7 add in-camera processing to remove CA and distortion; whilst you might get more detail and dynamic range in RAW, you’re going to be trading off automated lens corrections.

_RX100_DSC2014bw copy
Crossing. RX100

Burst mode. I don’t spray away at 10fps on my RX100 all the time, but I do have it set to CL and 4fps in case I need to shoot a sequence of something interesting; it’s the same way I have my DSLRs and OM-D set up. In lower light, keeping your finger down can partially alleviate any camera shake caused by the depressing motion.

Flash off. Unless you’re triggering remote speedlights, are shooting social images in a dark place, or perhaps trying something with rear-sync, then avoid the small built-in unit. It’s just going to look horrible, not to mention lack power to fill in daylight beyond a meter or so.

Highlight warning in playback, with zoom-to-focus-point. I find this particular combination of review settings useful because it lets me quickly assess if I nailed the shot or not: is it critically sharp (magnification amount for this will differ from camera to camera)? Are there any overexposed areas? Critical underexposure? The latter is especially important when you have both only the LCD to use in daylight to evaluate images, as well as limited dynamic range.

_RX100_DSC2054b copy
In front but not driving. RX100

Have a spare battery handy. Continuous live view drains batteries very quickly. Even the best of cameras will only manage perhaps 3 hours of continuous running time with the LCD on, which is probably about 200-250 images or thereabouts. If you are careful and turn the camera off between exposures and minimize your chimping, you might eke this out to about 5-600 shots; for me, this is bare minimum for a full day of shooting. A spare battery is therefore a must have, and allows you to keep going even when the main one is being charged.

I want to talk a bit about RAW, processing and sufficiency. Although I’ve been repeatedly revisiting the whole idea of postprocessing recently – first with film, then with medium format, and as a question in and of itself – I know I haven’t taken a position either way yet, but I don’t think not processing is an option for most compacts, with the exception of the Fuji X10 and XF1. This is because none of them have the native tonal qualities that are desirable in a photograph – namely smooth highlight and shadow transitions with reasonably punchy midtones – straight out of the camera. The files certainly have the potential to be that way, but they do require work post-capture; perhaps a bit more than a good file from a larger sensor camera. However, I wouldn’t be too worried about image quality: a good 12MP file that’s critically sharp at the pixel level will print just fine to A3 and perhaps one size beyond; needless to say it’s more than enough for web viewing. It’s often important to take a quick reality check in the pursuit of megapixels: when was the last time you printed larger than A3?

_RX100_DSC0645b copy
Imagined patterns.

In the end though, it all comes back down to the pictures, and the ideas encapsulated and communicated therein. The camera is merely a box, a tool; why should it be over-promoted to seemingly also be the endgame? My personal journey for creative evolution has taken me in a different direction: an increased focus on the purity of the idea, and continued liberation from equipment requirements. I want something that can capture what I see in a variety of perspectives; something that is unobtrusive, stealthy and doesn’t attract attention; something that’s flexible enough for most situations I might randomly encounter, but doesn’t require a great commitment in bulk or weight, preferably I shouldn’t even know it’s there. I don’t mind if it imposes some limitations on the way I shoot or the way I meter; these might turn out to be good things which provide small creative nudges in the right direction. As good as Micro Four Thirds is, by the time you load up on a lens or two, you still know you’re carrying a camera – and I would still take the OM-D for serious personal work – but for experimentation, and the kind of ligthbulb moments of experimentation that happen when you’re not planning them, it seems that for now a serious compact or two is the way to go. And the best thing of all is that if (and probably when) I get bored of it, it’s not going to be too painful to swap it for a new one and start the process all over again. MT

The various cameras mentioned in this article are available here at their respective links from Amazon: Canon G15, Canon S110, Fuji FinePix X10, Fuji FinePix XF1, Leica D-Lux 6, Nikon P7700, Olympus XZ2, Panasonic LX7, Sony RX100, Ricoh GR-Digital IV.

____________

Visit our Teaching Store to up your photographic game – including Photoshop Workflow DVDs and customized Email School of Photography; or go mobile with the Photography Compendium for iPad. You can also get your gear from B&H and Amazon. Prices are the same as normal, however a small portion of your purchase value is referred back to me. Thanks!

Don’t forget to like us on Facebook and join the reader Flickr group!

appstorebadge

Images and content copyright Ming Thein | mingthein.com 2012 onwards. All rights reserved