
…to be held in Kuala Lumpur on Fri 23rd and Sat 24th of November, next week. More details here – send me an email if you’re interested. Thanks! MT
reframing the world one picture at a time
…to be held in Kuala Lumpur on Fri 23rd and Sat 24th of November, next week. More details here – send me an email if you’re interested. Thanks! MT

Turning a cliche on its head. Leica M9-P, Zeiss ZM 2/50
Last weekend, a group of keen photographers braved the afternoon rains to join me for a workshop aimed at a bit of travel and street photography, but more importantly covering the fundamentals of composition and understanding what works in an image, and what doesn’t. One day of shooting on location in Melaka was followed by Introduction to Photoshop back at the studio in Kuala Lumpur. Aside from leaving with a newfound appreciation for quality of light, perspectives, natural frames, leading lines and cinematicness, perhaps the most important thing was opening eyes and creating awareness of a whole new bunch of photographic possibilities – there is always something to photograph.
And yes, I did shoot some film. But the results will have to wait a little until I get around to developing it.
Finally, a big thank you to all of the participants!
Side note: the M9-P held up very well in the rain despite not being weather sealed; it’s the second time I’ve shot it in adverse weather conditions (The Hong Kong and Macau workshop being the first) and other than water on the viewfinder windows, it didn’t miss a beat. Odd, considering the number of lockups I tend to get when the skies are fair…MT


Here are a few teaser images from my set; I’ll be posting more in a future photoessay.


The kind of weather that distinguishes between true weather sealing and mere bits of foam lining.
____________
If you enjoyed this post, please consider supporting the site via Paypal (mingthein2@gmail.com); Ming Thein’s Email School of Photography – learn exactly what you want to learn, when you want to learn it or learn how to achieve a similar look with our Photoshop workflow DVDs. You can also get your gear from Amazon.com via this referral link. Prices are the same as normal, however a small portion of your purchase value is referred back to me. Thanks!
Don’t forget to like us on Facebook and join the Flickr group!
Images and content copyright Ming Thein | mingthein.com 2012 onwards. All rights reserved

By popular demand, I’m going to be conducting one more workshop this month in Kuala Lumpur: an introduction to wildlife photography techniques. Due to our current weather and afternoon rains, the session will be split into two mornings – Friday 23 November, 9-1pm and Saturday 24 November, 9-1pm. The sessions run continuously, and the break in between allows for critiques and literal and figurative recharging of batteries between the two sessions.

Since wildlife photography can be very hit and miss – in the past, I’ve spent entire weekends in swamps with only five minutes of action – we will be conducting the workshop in a ‘safe’ environment where there definitely will be animals to shoot: the Kuala Lumpur Bird Park at Lake Gardens.

The topics covered will include:
– Long lens technique and shot discipline
– Approaching your subjects
– Understanding animal behaviour and what constitutes an interesting wildlife image
– Use of context and environment
– Metering techniques under difficult lighting
– Understanding and managing AF
There will also of course be feedback and critique sessions at the end of each half-day.
Finally, it’s worth remembering that wildlife photography isn’t just applicable to wildlife: the skills of anticipation and shot discipline are valuable for every type of photography. The workshop will be jointly supported by the local distributor of Gitzo tripods and monopods, Shriro. They will be bringing along a range of tripods and monopods to experience.
A quick note on equipment requirements: Although you can bring along your big guns and DSLRs – 300mm would be a minimum, and 400mm+ preferable – you can also produce compelling work with smaller formats such as a M4/3 camera and 100-300 zoom, or even a bridge camera – a lot of the images in this post were shot with a Leica V-Lux 3.
The price for both days with an experienced wildlife photographer – I shot mainly wildlife for five years, and my some of my work can be seen here – is just RM1,250 inclusive of park admission. Please send an email to mingthein2@gmail.com for bookings or more information. Thanks! MT

____________
If you enjoyed this post, please consider supporting the site via Paypal (mingthein2@gmail.com); Ming Thein’s Email School of Photography – learn exactly what you want to learn, when you want to learn it or learn how to achieve a similar look with our Photoshop workflow DVDs. You can also get your gear from Amazon.com via this referral link. Prices are the same as normal, however a small portion of your purchase value is referred back to me. Thanks!
Don’t forget to like us on Facebook and join the Flickr group!
Images and content copyright Ming Thein | mingthein.com 2012 onwards. All rights reserved
I thought I’d give my students a bit of a challenge this time: during one of my recent workshops, we covered a bit of motorsport and documentary photography at the VW Scirocco Cup at the Sepang International Circuit. The assignment was to tell the story of race weekend in 10 images with a compact – with the exception of the moving cars, of course. Of course there was some serious equipment involved, but I’m a big fan of teaching with compact cameras for several reasons:
1. They force you to focus on composition only, and not rely on depth of field or perspective (most of the time) as a crutch;
2. The lag forces you to work on your anticipation skills; it’s impossible to capture a moment when you’re only beginning to react at the instant of the moment itself
3. Very limited dynamic range forces you to think about metering: on your subject, or the scene? What’s going to blow out, and does it matter?
4. Working the files afterwards is both a good test of your photoshop skills, as well as the opportunity to learn some new ones.
There are a number of the images which made it into the reader pool, but I thought I’d contribute a few of my own here. I think this might well become a recurring theme for future workshops…

Forming up before the parade lap

Well-used pitlane

One that got away

Game face

Suiting up (II)

On the grid

Drive through

Meanwhile, in the hospitality box…

Spectator reflections

On the podium*
*not the same race

Press conference

Taking a break after the race

Obligatory unusual workshop group portrait

Image review time
The observant of you will note that a) there are some key moments missing in the action, like the start and finish; b) there are no photos of moving cars; c) not all of the scenes appear to be from the same race. There’s a simple answer to all of those: race circuits are huge places to be, and pros do not aim to cover every part of the track at once, much less over a race that only lasts 10 laps.
We used the compacts to gather b-roll and documentary material around the main shooting sessions with the big guns; the start of the race and actual race itself were shot from Turn One at the end of the main straight, which tends to be where most of the action happens – both at the start of the race when everybody is jostling for position, as well as during the race when drivers use the long run to try and make up places under braking. At Sepang, Turn One is actually a right hairpin followed by a left chicane; the complex of corners means the cars both travel slowly and close to the barriers, which make it an ideal area for photography.
Note that we did have the requisite pit, paddock and circuit media passes for the event. Also, motorsports is a very dangerous environment to shoot in – plenty of fast moving objects, people rushing around, hot surfaces, spilled oil and various other hazards. Safety always comes before getting the shot – unless of course you’re a journalist on assignment 🙂 MT
____________
If you enjoyed this post, please consider supporting the site via Paypal (mingthein2@gmail.com); Ming Thein’s Email School of Photography – learn exactly what you want to learn, when you want to learn it or learn how to achieve a similar look with our Photoshop workflow DVDs. You can also get your gear from Amazon.com via this referral link. Prices are the same as normal, however a small portion of your purchase value is referred back to me. Thanks!
Don’t forget to like us on Facebook and join the Flickr group!
Images and content copyright Ming Thein | mingthein.com 2012 onwards. All rights reserved

After the success of the last session in Kuala Lumpur (Making light, and Finding light) I’m pleased to announce another two new workshops for 3 and 4 November 2012:
The streets of Melaka: Saturday, 3 November 2012 (Melaka)
Intermediate street and travel photography techniques; from 10.30am to 7.30pm
All you need is a digital camera. Any camera; even a compact/ point and shoot is fine (bring it if you have one). I’ll show you how to see, how to translate that into an image, and how to make images where the equipment doesn’t matter – you’ll be liberated. The day concludes with an assessment of images and debrief.

Introduction to Photoshop Workflow for Photographers: Sunday, 4 November 2012 (Kuala Lumpur)
With digital photography, shooting is just half of the story: the other half is in both how you shoot to make the most of the output of your camera to maximize image quality, and how you optimize those images afterwards. Photoshop doesn’t have to be intimidating or slow – I spend less than a minute per image on average, but each one is individually optimized. Bring along your problem/ difficult images or images from the day before. I’ll cover the entire basic desk workflow from assessing/ editing and sorting to adjustments and output. You’ll need a laptop with Photoshop CS3 or higher plus an editing tablet – I like the Wacom Intuos series. Note that you can use the trial version of Photoshop for 30 days before deciding if you want to buy it or not. But, once you see what it can do, it’s not a lot of money to spend when you consider that you use it on every image.
Each session is RM1,000 per person, or book both for RM1,800. Please note that payment is due on confirmation to reserve your place.
Please email mingthein2@gmail.com for bookings or information. Places are strictly limited for both sessions (max. 6 for Melaka, and max. 10 for Intro to Photoshop) in order for me to help you get the most out of the session. MT

Group portrait with chiaroscuro. Sony RX100
Two days after the Making Light Workshop, three of the original (masochistic?) participants joined three more new ones for a part two: Finding Light. I originally decided to run these as a pair to collaborate with photographer Kristian Dowling, who was unfortunately not able to make either one of the workshops in the end. No biggie.

Quartered. Sony RX100
The underlying point behind the pair of workshop sessions was that street and studio are far more related than you might think: how are you going to create stunning light and compositions if you don’t know what it looks like? Similarly, how is one going to recognize it if you don’t know what is possible when all of the elements of the photograph are within the control of the photographer?

Why would this not be street photography? Olympus OM-D, ZD60/2.8
We started off with the obligatory coffee, a discussion on what street photography is and isn’t, and some thoughts on etiquette, before finishing with a quick critique of participant images. Street photography, to me, is something that is a very ill-defined genre (and to be the subject of another article, I think) – let’s just say for now that anything you see when walking is fair game – people, street scenes, abstracts, architecture. I generally approach it from a reportage perspective. On the subject of etiquette, I think it’s simple: don’t do anything you wouldn’t want done to you. This includes unflattering images and invasion of personal space.

Untitled. Sony RX100
For the first hour or so, we just walked – no cameras were allowed. This was to encourage participants to start seeing and looking for frames; I would stop and point out interesting things, compositions, geometries and other potential shots, to the point that before we reached the first staging point, there were several cameras out…
Exercise one covered seeing in place: conveniently, the place I selected for lunch was deliberately done so because of both the quality of its beef noodles, as well more importantly, the fact that it was an extremely rich photographic hunting ground. Once duly refueled, the participants were required to stay in their seats, and shoot from that position. Lens changes were allowed. This forced them to think carefully about perspectives, foregrounds, potentially intrusive elements, as well as of course composition and light.

Shooting in place. It forces you to find compositions in a scene; those little documentary moments.
For the second exercise we did something I like to call ‘stages’. The stage, in street photography, is a background or backdrop with a interesting texture or light; it’s a good way of teaching anticipation and timing because the composition is predetermined, and the photographer just waits for subject to walk through the right portion of the stage before pressing the shutter button.

A staged example. Sony RX100
Next came timing and anticipation – I like to use point and shoots to teach this because they have just about the right amount of shutter lag to represent your reaction time when shooting with a responsive camera; however for this exercise we substituted with a 2-second self timer.

Practicing timing with the help of a handy wall, and lots of pedestrians. The objective was to trap the pedestrian at the very edge of the wall – but while the 2-second self timer was running. Olympus OM-D, ZD60/2.8
Another tool I like to use is layering; this can be achieved by means of reflections, stacked foregrounds and backgrounds, or longer perspectives – or perhaps a combination of all three. This technique works quite well when there’s a lot of glass around, but becomes more challenging when you are in a ‘dirty’ environment and nothing is clean or reflective.

Bus reflections. Olympus OM-D, ZD60/2.8
The final, and most difficult exercise of the day was to learn to hold your ground and shoot through people – this lets you get very, very close indeed, to the point of having headshots with a 50mm. It requires some courage to position yourself in the middle of a stream of pedestrians, but once the participants built up their confidence, it became easy – just look like you belong.

Shoot through exercise. Sony RX100

And a result of this technique. Olympus OM-D, ZD60/2.8
Putting everything together wrapped up the day – an opportunity for the participants to figure out which of the techniques best suited their style by just shooting anything and everything – and I’m pleased to report a huge improvement in composition and angle from the images I saw at the first briefing. I think what was most telling is that none of them really had the same style – it was a consistent mix of the various techniques taught, and with different subjects. Well done!

Divided reality – my personal shot of the day. Note leading lines, quadrants, context, perspective use, human elements…Sony RX100
Based on the success and feedback of this session, I’ll probably be doing another introduction to street photography workshop in Kuala Lumpur at some point, as well as a standalone introduction to Photoshop day – both will be for a very limited number of participants – I like to keep things small because it allows me to give each person more attention – please visit again regularly for updates. MT

A visual metaphor for our banking system. Sony RX100
____________
If you enjoyed this post, please consider supporting the site via Paypal (mingthein2@gmail.com); Ming Thein’s Email School of Photography – learn exactly what you want to learn, when you want to learn it or learn how to achieve a similar look with our Photoshop workflow DVDs. You can also get your gear from Amazon.com via this referral link. Prices are the same as normal, however a small portion of your purchase value is referred back to me. Thanks!
Don’t forget to like us on Facebook and join the Flickr group!
Images and content copyright Ming Thein | mingthein.com 2012 onwards. All rights reserved

Our model for the day, Aliza Kim. Nikon D800E, 85/1.8 G
Although unfortunately Kristian Dowling couldn’t co-present in the end due to food poisoning, the show must go on, and it did: an intimate and dedicated class of participants joined me for a different look at making light in the studio. We started with a deconstruction and minor reprogramming of preconceptions: the use of a studio is about total control for all aspects of the image, not just lighting; why compromise when you are in a repeatable, 100% controllable environment?

A simple one-light portrait. Nikon D800E, Zeiss ZF.2 2/100 Makro-Planar

And setup shot for the above: only the 4×6″ softbox was in play.
The morning was spent examining firstly the basics of the principles of composition, color theory and psychology, the importance of perfect color and how to achieve it, and finally, deconstructing lighting under several increasingly complex scenarios – one light, two lights, reflectors, multiple lights, balancing with ambient…I’m proud to say that the students did an increasingly good job of figuring out what the light setups used were, even if I did throw them a few curve balls 🙂 (There’s a reason why this post comes at the end of the last week’s focus on lighting articles!)
After lunch, we moved on to replicating most of these setups, starting simple with one large softbox…

…a variety of poses, practice with timing, framing and anticipating where to leave space when the model moved…


…including setups involving two lights:


…harsh contrast…

…strong backlight (that’s the 4×6 softbox serving as backdrop in the left edge of the frame)…

…the addition of beauty dishes to balance out the background to provide a clean white look with flattering light bleed around the edges of limbs and torso…

Nikon D800E, Zeiss ZF.2 2/50 Makro-Planar

Setup shot
…some occasional theatrical emoting from the coach…

…and the use of a single-beauty light from a more oblique angle to create interesting silhouettes:

One more costume change later, and I demonstrated the versatility of speedlights for location work and ease of creating completely different effects by mixing diffuse and harsh light. Here, we used a three-light setup to create a very edgy, moody, feel; later on adding a cinematic and emotional element by varying the color tone of the final shot, or omitting it completely. The speedlights were set to manual output, triggered and controlled via iTTL for the Nikon shooters, and switched over to SU4 slave mode for the Canon shooters (and lone Sony RX100, the B-roll camera of yours truly.)

Flash cunningly triggered by the built-in on a Sony RX100, shot in manual mode

Sony RX100

Nikon D800E

Nikon D800E
We finished up the day with a quick Photoshop postprocessing demonstration to clean up a few files for print by the studio’s resident print master, Wesley Wong of Giclee Art – thus completing the imaging chain, and showing just how much further you can take your images when you’re in control of all of the elements. Even at 13×19″, the RX100 images were virtually indistinguishable from the D800E – we would have to go even further, probably to 25×40″ or so, before a significant difference would be discernable. Score one for the argument for sufficiency! I’m pleased to report that everybody had a great time and learned a lot (or at least were polite enough not to say otherwise 🙂 – in the words of one participant, “I think my head just exploded.”


Our group and model.
I’d like to conclude with a quick note on equipment: we were using Profoto Pro heads, a D4 pack, one beauty dish with and without 25deg grid, 4×6′ and 1×4′ softboxes, three Nikon SB900s, umbrellas and a whole array of clamps and stands for lighting; the model images in this post were shot by me (except for the one ‘Charlie’s Angels’ shot where noted) using a Nikon D800E, Nikon AFS 85/1.8 G, Zeiss ZF.2 2/50 and 2/100 Makro-Planars. B-roll, documentary, and one of the model images was shot using a Sony RX100, except of course the images of me which were shot by the students as the camera made its rounds to be fondled…
I’d like to say a big thank you to the participants, and Shriro-Malaysia/ Profoto for the use of the studio and lighting equipment. Stay tuned for more upcoming workshops!
____________
If you enjoyed this post, please consider supporting the site via Paypal (mingthein2@gmail.com); Ming Thein’s Email School of Photography – learn exactly what you want to learn, when you want to learn it or learn how to achieve a similar look with our Photoshop workflow DVDs. You can also get your gear from Amazon.com via this referral link. Prices are the same as normal, however a small portion of your purchase value is referred back to me. Thanks!
Don’t forget to like us on Facebook and join the Flickr group!
Images and content copyright Ming Thein | mingthein.com 2012 onwards. All rights reserved

Two weeks left to register!
I’m pleased to present both my first workshop and first collaboration, in Kuala Lumpur – I know I live here, but I’ve not actually done anything here yet either…
There will be two sessions with noted studio photographer Kristian Dowling from Australia, on the 28th and 30th of September 2012. Each session is limited to 12 participants, and is priced at RM600 per person per session, or RM1,000 for both sessions.
Profoto will be sponsoring lighting equipment for the studio session.
28 September 2012: Studio (Victor Studio, Shriro Building, Lot 22&24 Jalan 225, Petaling Jaya)
The morning session will begin with something simple, yet fundamental: how to evaluate an image, and understand what works and what doesn’t. I’ll then continue with color theory, compositional balance and a bit about the psychology of how viewers react to an image. Kristian will finish off with a session on studio lighting; bring your laptops, lights, tripods and everything you’d normally use on a studio shoot.
30 September 2012: Street (Starts at Pavilion Kuala Lumpur and keeps going on foot)
Kristian is a street photographer. In a previous life, I was a photojournalist. We both have different approaches to reportage – this session will be split into two halves; one group will go with myself, the other with Kristian and we’ll swap after lunch. Small groups mean that it’s easy to move around and not attract attention. This session will teach you three important skills:
1. How to anticipate and see a shot; what our thinking process is before raising camera to eye. A lot of composition is done even before looking through the viewfinder.
2. How to be ready and respond quickly
3. How to see the light and get the shot.
Please email either me – mingthein2@gmail.com, or Kristian – workshops@kristiandowling.com to book or for more information. MT

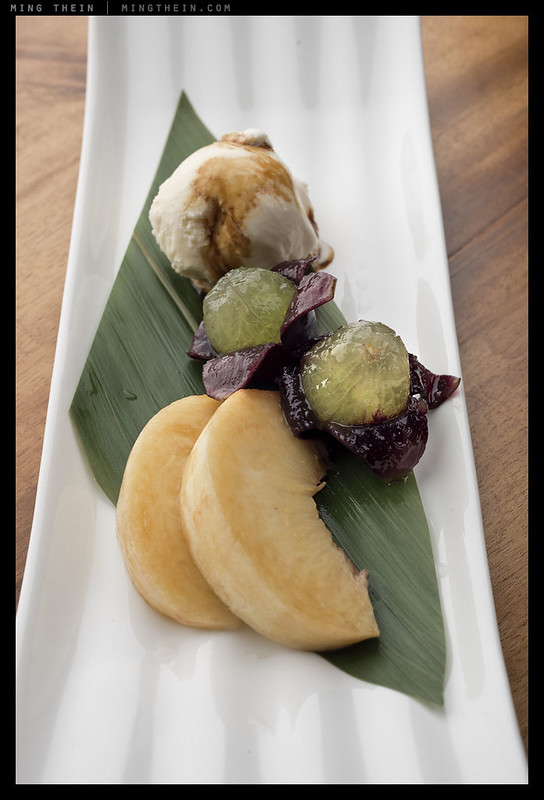
Last Saturday saw the first of the Carl Zeiss food photography masterclasses for this year, held at Hanare under chef Kenny Yew. The participants were mostly professionals from other genres of photography – weddings, pets, video, portraits. In attendance was also Philip Ong from Shriro, the Asia-Pacific representatives for Carl Zeiss, Profoto and Gitzo. I normally avoid using conventional flashes for this kind of work because of the heat; however, as the distances were small, and base ISO on a DSLR a lot higher than a MF camera, we had plenty of light to work with and the strobes were run at close to minimum power most of the time. The large softbox wasn’t much of a surprise, but served as a nice substitute for window light; more interesting was the little ProBox, which is a beamsplitter-cum-diffuser device that fits over the end of the head to provide a very even cube of light. I suppose it’s designed for product photography, but I can see it being useful for food as an alternative to my usual LED panels; it felt very intuitive to set up and use.

What did surprise me was that all of the participants were shooting Micro Four Thirds – and not just that, all Olympus cameras! I was the only one working off a Nikon D800E and tripod. Good thing we had a F-M43 adaptor – not surprisingly, the 2/50 Makro-Planar and 2/28 Distagon work very well on the smaller format (I guess I should know, because I use them myself on the OM-D for food photography too).

A good lunch was enjoyed by all – the menu included a number of seasonal specialities freshly-delivered from Japan the previous day, including ayu (river sweetfish), anago (conger eel), pumpkin and of course various kinds of sushi fish – apparently autumn is the best season for the firmer white fish such as yellowtail, as they’re just starting to put on the pre-winter fat.

Note that I’m not in any of the shots because I was either shooting, demonstrating or talking…images from this set with a Nikon D800E, Zeiss ZF.2 2/28 Distagon, 2/50 Makro-Planar and 2/100 Makro-Planar with lighting by Profoto.
The next workshop will be on the 6th of October at Bistro a Table, SS14, Petaling Jaya. Please send me an emailif you would like more details or to reserve a place. There are also more details in this post.


____________
If you enjoyed this post, please consider supporting the site via Paypal (mingthein2@gmail.com); Ming Thein’s Email School of Photography – learn exactly what you want to learn, when you want to learn it or learn how to achieve a similar look with our Photoshop workflow DVDs. You can also get your gear from Amazon.com via this referral link. Prices are the same as normal, however a small portion of your purchase value is referred back to me. Thanks!
Don’t forget to like us on Facebook and join the Flickr group!
Images and content copyright Ming Thein | mingthein.com 2012 onwards. All rights reserved
I’m pleased to present both my first workshop and first collaboration, in Kuala Lumpur – I know I live here, but I’ve not actually done anything here yet either…
There will be two sessions with noted studio photographer Kristian Dowling from Australia, on the 28th and 30th of September 2012. Each session is limited to 12 participants, and is priced at RM600 per person per session, or RM1,000 for both sessions.
Profoto will be sponsoring lighting equipment for the studio session.
28 September 2012: Studio (Victor Studio, Shriro Building, Lot 22&24 Jalan 225, Petaling Jaya)
The morning session will begin with something simple, yet fundamental: how to evaluate an image, and understand what works and what doesn’t. I’ll then continue with color theory, compositional balance and a bit about the psychology of how viewers react to an image. Kristian will finish off with a session on studio lighting; bring your laptops, lights, tripods and everything you’d normally use on a studio shoot.
30 September 2012: Street (Starts at Pavilion Kuala Lumpur and keeps going on foot)
Kristian is a street photographer. In a previous life, I was a photojournalist. We both have different approaches to reportage – this session will be split into two halves; one group will go with myself, the other with Kristian and we’ll swap after lunch. Small groups mean that it’s easy to move around and not attract attention. This session will teach you three important skills:
1. How to anticipate and see a shot; what our thinking process is before raising camera to eye. A lot of composition is done even before looking through the viewfinder.
2. How to be ready and respond quickly
3. How to see the light and get the shot.
Please email either me – mingthein2(at)gmail.com, or Kristian – workshops@kristiandowling.com to book or for more information. MT
Update – sorry, there was a typo in the second email address – if any of you sent an email to Kristian and didn’t get a reply, it’s because it should have read workshops@kristiandowling.com – sorry, but please send it again!
Behind the scenes videos


If you enjoyed the content, please consider  -ing or subscribing - thanks for your support!
