Simple explanations of important camera functions/ settings/ parameters

_RX100_DSC1299b copy

A recent email from a beginner/ amateur user on which camera settings to use under what conditions provided the motivation for this post. In addition to there never being a one-size-fits-all answer, it occurred to me that the reason why a lot of users are confused is partially down to poor product and UI design on the part of the camera companies, and overambition on the part of the user.

Cameras tend to come in one of two flavors: firstly, fully automated, dumbing down, hiding or completely eliminating all photographic functions/ controls or obfuscating them to the user behind language or parameters that doesn’t necessarily make sense intuitively, such as ‘blur control’. The second type of camera lets it all hang out: it’s so manually intimidating and complex, offering control over everything from critical exposure functions to the color of the LCD backlight or number of images taken when using the self timer, and at what interval – that the new or even slightly unfamiliar user has no idea where to begin. And to compound things, camera makers often make inexplicably baffling changes to the UI between each generation – for instance, the +/- indicators on the exposure compensation scale for the D700/D3 generation runs in the opposite direction to the D800/D4. Why? Nobody knows. Maybe the person designing the silk screen stencil for the top panel LCD didn’t refer to the previous model, or think that there might be photographers out there still using both generations of camera. (Sure, you can make the rotation direction of the dials match, but it doesn’t help the fact that either way, one of the cameras is going to have the display move in an unintuitive direction in use – which may slow you down enough to miss a shot, or you ignore it and land up drastically over- or under- exposed.)

_RX100_DSC1297b copy

Human nature forms the other barrier: whilst most of us have a decent idea of the limits of their own ability, we might not be so willing to admit it to others. And like it or not, in today’s consumer society, the size and complexity of your camera is a subtle, or perhaps not-so-subtle, telegraph to the rest of the world about both your spending power and your photographic prowess. (Of course, whether either is accurate or not is a completely different topic.) It seems to be especially true where I live, where you see almost everybody carrying a DSLR – yet using it in the green mode and looking surprised when the flash pops up by itself. The upshot of this is that almost every consumer will buy more camera than they need, either convinced by the marketing mantra of ‘more better’, the smooth-talking salesperson, wanting to outdo their friends, or thinking they can ‘grow into it’.

A casual survey of my non-serious-photographer friends reveals that most of them don’t know how to do anything more than turn the camera on, zoom, press the shutter to take a picture; and perhaps turn the flash on and off. It also makes me wonder why ‘simple’ compacts are still so darn complicated to operate. The disconnect is that there are also a good number of them using prosumer DSLRs – think D7000s or 60Ds and the like. It’s both a shame for them that due to the intimidating nature of the cameras, they may never progress any further; yet be frustrated that the camera doesn’t behave quite as expected. Why is the shot dark? Why is it always focusing on the background? Etc.

Important photographic controls boil down to two things: one set that controls the look of the image, and one set that controls the behaviour of the camera.

Image parameters, in order of importance

_3004159bw copy.jpg

Focal length – The perspective and field of view of your frame. Note that this comes before all other considerations, because if you misuse your perspective or select the wrong field of view for a given subject, then no matter how technically perfect the image, it won’t save you from poor composition.

_5100_DSC1558 copy

Aperture – The size of the lens opening; controls both the amount of light entering the camera, as well as the depth of field or the range that is in focus. Smaller f-numbers indicate a larger opening, which equals more light and higher shutter speeds, but also shallower depth of field. Isolate subjects with out-of-focus backgrounds by using a larger aperture. Using a small aperture in low light will yield insufficient shutter speed to produce a sharp image unless you’re using a tripod or very high ISO.

_5001724 copy

Shutter speed – The amount of time for which the shutter stays open. The longer this duration, the higher the chance of you, or the subject moving, and subsequently producing a blurred image. This can be desirable if there are clearly static elements in the scene to serve as a visual anchor point, such as rocks and blurred water, etc. The faster the subject, the higher the shutter speed you need to freeze its motion. To handhold a reasonably high-resolution camera safely and produce an image that is crisp at the 100% actual-pixel level (assuming the subject is in focus), you need 1/[focal length in 35mm equivalent]s, or half that (1/2x) to be safe.

X2-noisecrops2 copy

Sensitivity/ ISO – The ‘gain’ or amplification on the signal from the sensor. Doubling the ISO doubles the gain, which in turn doubles the shutter speed. However, you’re also doubling both the information part of the signal as well as the noise, so every increase in ISO necessarily comes with an associated penalty in image noise. However, most cameras have a decent usable range that makes it possible to set auto-ISO within this range, and let the camera automatically boost sensitivity when the shutter speed falls below the set threshold (usually 1/focal length or faster) – this way you both never miss a shot due to insufficient shutter speed, and cameras can frequently set finer increments than is possible manually, minimizing noise.

White balance – The neutral color point of the image, or the RGB gain mix required to achieve white under a particular ambient lighting situation. For the most part, you can leave this in automatic and tweak the RAW file afterwards; however for extremely warm or cold ambient light (tungsten, shade) you may want to manually choose the respective presets to prevent overexposure of a single channel – once a channel is blown, you can’t recover it afterwards.

Note that the simple way to reduce your workload is to run the camera in aperture priority, auto-ISO and auto-white balance; just make sure that your selected shutter speed thresholds for auto-ISO fall within your desired range – slower if you want to blur motion or are using a wider lens, and vice versa. I normally have my cameras configured this way, unless I’m doing work that requires me to balance flash and ambient, or color-critical work; in which case I’ll go manual for everything.

Camera control parameters, in order of importance

DSCF2621b copy.jpg

Focus point/area – The shallower the depth of field, the more important it is to have some control over exactly what the camera is focusing on. Without this, you will find your subject out of focus – especially if off center. The camera can’t read your mind (or at least not yet). This said, put your camera in either center point and do the focus-half press to lock-then recompose technique, or choose your focus point manually. Make sure your subject is the most contrasty thing under the selected point, and large enough to be picked up by the AF system.

Focus mode – Single (AF-S), continuous (AF-C), or manual (MF)? Single means that the camera stops focusing once focus has been achieved for the first time. This is good for static subjects. Continuous means that the camera will continue to adjust focus until you release the shutter, which is desirable for moving subjects or very shallow depth of field lenses (a situation that may appear static – a portrait, say – may actually have motion of a few millimetres in either direction by the subject or photographer, and that’s enough to cause noticeable softness when using a very shallow depth of field lens). And finally, manual focus of course means DIY. I always have my phase detect AF cameras (DSLRs) set in AF-C, and the contrast detect cameras in AF-S; the reason for the latter choice is simple: the hit rate is much higher, and contrast detect cameras all have smaller sensors, which makes them more tolerant of minor focus errors.

And to be honest, the rest you really don’t need to worry about. For years, we’ve managed with nothing but these controls – in fact, in the early film days, you couldn’t even change your ISO easily from shot to shot, there was no such thing as colour, and there was no such thing as AF-Tracking – so really, you should be able to make a strong image focusing only on three of the parameters.

Master these, and you’ll find that you now feel in control of your camera and the images it produces, instead of vice-versa. Shooting fully manual is a good way to both learn to control your camera instinctively, as well as build an intuitive understanding for how changing a given parameter affects the look of the image; eventually you’ll build a sense for what the right parameters should be for a given shooting situation. Even if you’re an experienced photographer, sometimes a little reminder to reprioritize the important things can be helpful – the fewer things you have to think about when shooting, the better. Note that we haven’t touched on composition – that was the subject of extensive analysis in this article. MT

____________

Visit our Teaching Store to up your photographic game – including Photoshop Workflow DVDs and customized Email School of Photography; or go mobile with the Photography Compendium for iPad. You can also get your gear from B&H and Amazon. Prices are the same as normal, however a small portion of your purchase value is referred back to me. Thanks!

Don’t forget to like us on Facebook and join the reader Flickr group!

appstorebadge

Images and content copyright Ming Thein | mingthein.com 2012 onwards. All rights reserved

Lighting tips and tricks

A little bonus to follow on from the previous five part series* on lighting.

*A primer on lighting equipment is here. Part one on single sources can be found here; part two on multiple sources, here; part three on balancing ambient, here; part four on continuous sources, here.

There are a few things worth bearing in mind when creating your own lighting:

There should always be a top.
This usually means lighting in such a way that the orientation of the subject is obvious; it doesn’t always mean that it has to be shot in this orientation. Often, this is physically impossible with some subjects. But what you can do is rotate camera, place your stronger light sources at the perceptual ‘top’ of the subject, then rotate the image afterwards. I frequently do this with watches – they don’t stand up by themselves!

DIY
Not all lighting equipment has to be bought. Some can be made at home – a rolled cardboard cone makes a fine snoot; you can cut gobos out of mount board with a hobby knife, and even softboxes can be made from wire and mount board with a little forethought. The most critical bit of equipment in my own arsenal – the watch diffuser – I made myself.

Start simple
Beginners often make the mistake of buying too many lights, stands, umbrellas etc. and then trying to deploy them all at once – you often don’t need to. The most effective, dramatic lighting setups usually only require one, or at most two, sources. Only increase the complexity of your setup if you absolutely have to – remember the number of variables for each light in the first article on single sources?

Use what you’ve got
Building on starting simple, often ambient light is both difficult to replicate and offers invaluable context. Don’t overlook it in your quest for control of light: it can be very helpful indeed. This is where the next tip comes in:

Master manual metering
Controlling all of the exposure parameters manually gives you perfect control over the relationship between ambient and made light; if you’re particularly masochistic or have a difficult subject (reflective objects for instance) you might even go manual for the flash output, too. Learn to visualize what various exposures look like, and you can both work a lot faster, and create better results, too.

Imperfection is perfection
Natural light is never perfectly even, or diffuse, or directional; it’s the little variations and imperfections caused by shoddy internal baffling in your home-made softbox that gives an image character. Embrace the imperfection, and let it work for you.

Watch your color termperatures
You can use a difference in color temperature between sources (differently gelled flashes, or ambient vs flash etc.) to isolate a subject or different zones in your image. You can also overdo it and land up with very strange color in some parts of your image; as with everything, just enough is the difference between something different and something overcooked.

There is such a thing as too much diffusion
Very large, flat sources are great when shooting a large object, but remember that the only thing that defines the shape of an object – any object, be it a car or person or watch – is the way the shadows and highlights fall. If you have very flat, even light, then you might find there is very little distinction between shadow and highlight; this is great for maximizing dynamic range, but it’s also going to make your subject look incredibly flat, too. What does work with such sources is to use the big soft light as the secondary source, dialled in a a stop or two below your primary source – something harder, and more directional, to maintain texture and shape in your subjects.

Zoom head settings don’t have to match lens position
Flashes have internal mechanisms to move the tube and/or reflectors and fresnel grids around so that the angle of coverage of the beam matches the angle of view of the lens used; this doesn’t always have to be the case. If you use a narrow beam with a wide lens, you create a spotlight effect; this can be useful to highlight a particular subject. Just don’t make the difference in exposure too great, or it’ll look unnatural.

High sync speed and lots of power are your friends
Higher sync speeds enable you to do many things: freeze motion, fill in very bright sunlight, and use less power while doing so. It isn’t so much a special trick on its own per se, but more of a means of extending your shooting envelope so you have more control and more options when ambient light is extremely bright. And more power means more control over apertures, more ability to use diffusers and modifiers (they all eat light – at least a stop, sometimes as much as two or three) without compromising range or depth of field. MT

____________

Visit our Teaching Store to up your photographic game – including Photoshop Workflow DVDs and customized Email School of Photography; or go mobile with the Photography Compendium for iPad. You can also get your gear from B&H and Amazon. Prices are the same as normal, however a small portion of your purchase value is referred back to me. Thanks!

Don’t forget to like us on Facebook and join the reader Flickr group!

appstorebadge

Images and content copyright Ming Thein | mingthein.com 2012 onwards. All rights reserved

Deconstructing light, part four: continuous sources

The final part in this introduction to lighting mini-series is a look at when continuous light sources can be useful, and how to best deploy them.

I use continuous lighting primarily for food photography – specifically, large, high-CRI LED panels – because the low temperature of the source doesn’t interfere with the subject. (Try blasting sashimi with flash repeatedly, and you’ll soon see just how fast delicate fish can cook.) However, it’s also useful in other situations – obviously, to give clients an idea of what the end result will look like; for videography, when flashes obviously aren’t feasible, and less obviously, when you’re working in a dark environment and actually need a reasonably accurate representation of what the light will look like in order to compose and focus.

The rules for using continuous lights are pretty much the same, but with a few limitations:
1. Color temperature usually isn’t variable, and for large sources, you might not be able to find gels big enough – so you will probably have to go with almost 100% artificial light in your exposure. Note that you can also find continuous tungsten lights, but these run very hot and have a very low color temperature, which can lead to problems with blues.
2. LED panels aren’t that bright, so you will need to work with a tripod, and again, watch ambient light – it will creep in because the exposure times will necessarily be longer than for flash photography.
3. Subject motion – another consequence of longer exposures, especially with human subjects.
4. Heat. If you’re using tungsten light, be careful with things accidentally coming in contact with the bulbs or heads and catching fire or burning. That includes your skin.
5. Power. You’ll need to be plugged into mains or large batteries for lights of any consequential power. Ensure you take this into account when planning for a shoot – extension cables and power strips are your friend!

Let’s look at some examples, shall we?

_DL5T_L1000740 copy
The end of sorbet. Leica D-Lux 5

Single small LED panel to the top; note the hot spot on the spoon. The problem with using panels is that they’re difficult diffuse without a significant loss in power; the only way to make it work is either live with the hot spots (not a major problem for food) or get bigger panels (very expensive). I wanted my panels to be versatile, so I’m now using 45x45cm models.

_MM1_L9995676bw copy
Test shot from the M-Monochrom review. Leica M-Monochrom, 50/2 APO

One large LED panel off to the right; since it was a test shot, I didn’t bother to clear the wire from the foreground…with human subjects, LED panels enable faster, more comfortable working as you don’t have to make as many trial and error adjustments with the flash, and it’s simply not as hot.

_DL5T_L1000648 copy
Bread. Leica D-Lux 5

Part of a series from a food photography class I ran for Leica earlier in the year. I had two small LED panels for this, spread out around the top of the image and on even power; they provided definition and shadow. Image was shot top-down, obviously.

_DL5T_L1000646 copy
Foie gras. Leica D-Lux 5

Two LED panels; one top left, one top right. Both slightly above the subject to highlight that moisty, oily sheen on the seared foie gras. LED panels are quite directional but yet with short throw; this means they’ve got to be fairly close to your subject, and you’ll need more than one to fill in the shadows.

_DL5T_L1000702 copy
Leica S2, using the D-Lux 5

This is an example of what you can do when you have 40 LED panels at your disposal – I demonstrated product photography using the mini-panels to create a ring of light around the subject, with some actually providing light on the subject, and some just there to provide background texture.

_DL5T_L1000981 copy
Sushi platter. Leica D-Lux 5

One medium panel from the top took care of lighting here – getting the height and angle right is the critical part, so that the subject is evenly lit but yet has definition to preserve the shape and texture of the fish. Panels were about 30cm above the subject in this case.

_5003422 copy
Rice cones. Olympus OM-D

I used two panels here – one on full power from the right side, slightly elevated relative to the plane of the plate, and slightly behind; the other was to the left and running 1/8th power to provide fill and keep the food looking fresh and ‘bright’ rather than shadowy and ‘heavy’. Lighting is all about psychology and creating the desired mood in the viewer…

A primer on lighting equipment is here. Part one on single sources can be found here; part two on multiple sources, here; part three on balancing ambient, here.

____________

Visit our Teaching Store to up your photographic game – including Photoshop Workflow DVDs and customized Email School of Photography; or go mobile with the Photography Compendium for iPad. You can also get your gear from B&H and Amazon. Prices are the same as normal, however a small portion of your purchase value is referred back to me. Thanks!

Don’t forget to like us on Facebook and join the reader Flickr group!

appstorebadge

Images and content copyright Ming Thein | mingthein.com 2012 onwards. All rights reserved

Deconstructing light, part three: balancing ambient

One of the neat things you can do when you’re controlling the light is highlighting your subject, but preserving the ambient atmosphere. Today’s post focuses on how to do that.

Ambient light is your friend: it helps you to fill in the background with pre-lit object, providing compositional context; but more importantly, you can use it to preserve the atmosphere of the scene, which can be difficult to recreate if you’re using 100% flash or strobe only. All of the previous control points for single and multiple lights apply, of course. The two major challenges with balancing ambient are exposure and color. I’ll deal with exposure first.

There’s no fixed rule for this, but the more ambient you want to preserve, the closer your exposure must be to ambient exposure; the best way to do this is by shooting in manual mode and balancing out your shutter speed and aperture until you’re around one stop underexposed; I wouldn’t do anything more than three stops of difference (unless you have very bright ambient point sources) because very little, if any, ambient sources will remain. You’ve got three parameters to play with here – shutter speed, aperture and ISO. Shutter speed should fall somewhere between your max sync speed and around 1/30s if you’re dealing with people; higher if there are moving objects, lower if static. Aperture should allow you to hold in focus whatever you need to. ISO is the remaining balancing factor once you have set the other two – try and keep this low to maintain image quality, however. I generally don’t go higher than 800. Note that flash power should be the last thing that’s altered (and done by the camera’s meter to balance out the required exposure) – this is because you are firstly setting your exposure based on ambient, then filling the primary subject with the precise amount of flash required for a proper exposure.

Color is actually simpler: if it’s daylight, or close to it, there’s no need to gel your flashes, because they operate at fairly close to daylight Kelvin temperatures. If it’s tungsten or fluorescent, you’ll need to use the correct gels over the front of the flash so they provide the same temperature color source as the ambient lighting; you’ll also then have to set the white balance in-camera to match ambient. Note that you don’t always have to match the flashes to ambient; sometimes having a bit of temperature difference isn’t a bad thing, as it can help to highlight the subject. Just don’t make the difference too glaringly obvious.

Let’s move on to the examples.

_8019332%20copy%20(deleted%205039fb5b-27ac4-01431194)
Omega Speedmaster 9300. Nikon D800E

One of the more common situations I face where I have to balance flash and ambient are lume shots of watches – you need a very long exposure to capture the glow luminous material; often 30s at f16 ISO 100, or longer. However, a luminous dial pattern on its own isn’t very interesting, so I usually supplement this with some ambient. You could do this two ways – composite a regular (but underexposed by several stops) shot in, or just add a manual flash kicker to define the case. Here, I used 1/16th power from top left through the diffuser box.

_7061864 copy
Sandwich. Nikon D700

The background glow is the restaurant decor; I had flashes reflecting off umbrellas left and right to illuminate the sandwich. Exposure was balanced out to expose two stops under ambient for the restaurant, with a longer exposure time and base ISO (sandwiches don’t do much moving).

_D90_DSC7112 copy
Autumn texture. Nikon D90

One flash from the left, not diffused to provide a bit of harsh light to add texture and definition to the subject; exposure 1/2 stop under ambient. I wanted to fill the shadows and create some cross-lighting effects rather than make things soft and diffuse; a very flat angle for the flash position was used to accomplish this.

_8018601 copy
MRI room. Some of you might recognize this from a previous on assignment post. Nikon D800E

The objective of this shoot was to show the clean, high-tech environment of the hospital’s new MRI machine. The MRI and room itself had ambient lighting on both the machine and ceiling; if we shot with this alone, firstly our models wouldn’t have been able to keep still for long enough, and secondly, the ambient light was far too cool with a large difference in color temperature to the machine. Hence, flashes were used to illuminate the room and models – one in a reflective umbrella to the top right corner of the room; I needed throw and definition for the whites. The second one was placed on top of the rear casing of the MRI to fill the back of the room.

_8018569 copy
Mammogram. Nikon D800E

Here, the client wanted to convey a warm, friendly feeling to the room; nothing says this better than warm lighting. The color temperature of the flashes were shifted with gels; the primary source source was a flash reflected off an umbrella behind and above the machine; a secondary flash was bounced off the wall behind me (and to the right of the patient) to provide fill at 1.5 stops under the main flash.

_7065341 copy
Sony RX100 product shot. Nikon D700

The final example is one of those deceptively complex shots: one flash from top right was fired through the diffuser to light the camera body and background, but the exposure was altered until it balanced out that of the screen. If I’d just used the native sync speed of 1/250s and stopped down, the screen would black out because it isn’t that bright.

Come back again tomorrow for the final part in this series! MT

A primer on lighting equipment is here. Part one on single sources can be found here; part two on multiple sources, here.

____________

Visit our Teaching Store to up your photographic game – including Photoshop Workflow DVDs and customized Email School of Photography; or go mobile with the Photography Compendium for iPad. You can also get your gear from B&H and Amazon. Prices are the same as normal, however a small portion of your purchase value is referred back to me. Thanks!

Don’t forget to like us on Facebook and join the reader Flickr group!

appstorebadge

Images and content copyright Ming Thein | mingthein.com 2012 onwards. All rights reserved

Deconstructing light, part two: multiple sources

Part two deals with multiple sources: how and where do you use them? What is the one key rule to remember?

Although you can do a lot with a single flash, there’s even more that can be done with two or more. For starters, you can fill in shadows; or if you want to get more adventurous, you can mix both hard and soft light (direct and diffused) for better definition, or more accurate replication of found light sources. (There’s one particular shot I’m rather fond of that I call ‘the Hollywood’, which I’ll go into later).

There’s one critical thing to remember when using multiple sources, though: there must always be a primary source. If you don’t have one, then you won’t have any subject definition – opposing sources will fill in the shadows, and shadows are what defines the shape of an object.

The same parameters you can control with a single source apply to multiple sources, of course. The more sources you have, the more complicated things get. It’s useful to decompose your thinking thusly:
1. Primary source, on main subject
2. Secondary source, on main subject – definition (rim light, not diffused) or fill (diffused, or reflected)?
3. Other sources, for background objects or secondary subject – take steps 1 and 2 and repeat.

I’m sure you can now see why Joe McNally needs several trunks full of speedlights. I’m not quite there yet, but I find that most of the time a two-light setup is sufficient; there are times where I’ll use three for watches, but I’ve yet to require four sources (except in situations where I need more power from one location, and have to add a second flash to turn the wick up a notch).

Let’s look at some examples.

_N207239 copy.jpg
Ferrari 250 GTO. Sadly, not a real one. Nikon D200

This one has two distinct sources, both flashes behind diffuser panels – one at left, and one at right. They’re actually slightly behind the subject to create a nice specular highlight that defines the curvature in the panels; if I’d put the sources at right angles, you’d have very flat illumination and not much of a feel for the 3-D shape of the car.

_3002397 copy.jpg
Nikon 14-24. Nikon D3

Some objects betray their lighting secrets very clearly – reflective hemispheres are perhaps the worst culprits. For something like this, the best thing to do is keep the light source simple; in this case, two softboxes from the left and right. Power was equal; if not, you wouldn’t get the nice multi-colored reflections off the coatings on the lens. Note that the softboxes were actually pretty close to the subject; the hemispherical shape makes them appear further away.

_7052948 copy
Lange Datograph. Nikon D700

Through a trick of optical projection, the watch actually appears floating in mid-air and truncated, even though it’s resting securely on the surface behind. Note that this was shot with the lens and watch resting on a flat surface, but lit as though vertical. The primary source was through a diffuser, aimed at the watch and shielded from lighting the lens in front; a secondary source, at reduced power, lit the nameplate of the lens; finally, a third source – again at reduced power – lit the background. A simple-looking shot, but a bugger to light.

_N215925bw copy.jpg
Panerai Arktos. Nikon D200

Sometimes you want hard definition; in such cases, a concentrated, direct source is the best way to go, without diffusion. Here, I used one flash from the top, and one from the bottom to provide fill. Both were positioned at a low angle to avoid flat-looking interference at the point of the subject closest to the camera, with a small baffle on one side of the flash preventing light spillage.

_7060545 copy
Steak. Nikon D700

This example is an instance of when two light sources look like one. A flash with reflective umbrella was used from the top right; you actually need to see a bit of harsh reflection off the oil on the steak to know it’s a juicy steak, making a reflective umbrella ideal. However, you still need to soften out the edges a bit, which is where the very low power secondary source comes in; if it’s too diffuse, you lose the defining effect of the first source, so there’s another flash reflecting off an umbrella from the left, too.

_3009669bw copy
The Hollywood. Nikon D3

There are actually four flashes in play here: two at the back to provide the spotlight effect and backlit definition on the subject’s hair; one from the right in a softbox as the primary source, and a fourth on the D3 to serve as remote commander.

_7056862 copy
Jaeger-LeCoultre Gyrotourbillon I. Nikon D700

Lighting at the macro scale is extremely tricky – partially because you don’t have a lot of working distance, and partially because your source has to be the right size: too large, and the light is too soft and lacks definition; too small, and you’re going to get harsh reflections and rough-looking surfaces. Here, I used one flash fairly close to the topmost diffuser, with a secondary one through the back diffuser to provide fill of the shadows – thanks to the handy aperture in the watch dial.

_7040287 copy
Seiko Fifty-five Fathoms. Nikon D700

We finish this section with a classic two-light: primary source upper back center, and secondary fill from the left to give the transparent domed objects – water and watch crystal – some definition. Not much power difference between the two flashes; the bigger difference was the location of the flashes. The back one was further away and with a wider spread than the left one; this created a larger source of almost equal brightness.

Come back tomorrow for part three! MT

A primer on lighting equipment is here. Part one on single sources can be found here.

____________

Visit our Teaching Store to up your photographic game – including Photoshop Workflow DVDs and customized Email School of Photography; or go mobile with the Photography Compendium for iPad. You can also get your gear from B&H and Amazon. Prices are the same as normal, however a small portion of your purchase value is referred back to me. Thanks!

Don’t forget to like us on Facebook and join the reader Flickr group!

appstorebadge

Images and content copyright Ming Thein | mingthein.com 2012 onwards. All rights reserved

Deconstructing light, part one: one light

_7056032bw copy

Over the next few days, we’ll look at a few examples of lighting, and specifically, deconstructing it: what lights were positioned where, and what was the logic of doing so?

Today, I’m going to start with some relatively simple setups: they only use one light, with or without additional modifiers. Quite often, you don’t actually need much more than that. Single light setups tend to have very well defined shadows and highlights; chiaroscuro is the term that’s used to refer to an image that is predominantly described by it shadows and negative spaces. Classical painters were masters of this technique; they lit things in ways that are very difficult to replicate in real life – partially because of the size of their sources, and partially because they weren’t strictly limited by the laws of physics.

For simplicity, let us assume that you’re shooting at your camera’s highest sync speed, and that ambient light is not really a factor into the equation. Note that everything said here applies to both speedlights and studio strobes. I’m not going to discuss built in or on-camera flash, because it simply will not give you the results you need or offer the flexibility required. There are few variables in a one-light setup:

1. Output power
How bright do you want it? Usually, your lights will alter power based solely on your desired depth of field – which translates into aperture, which in turn translates into the amount of power required to provide a correct exposure. Note that the shutter speed only affects ambient light, not the power output of the flash. Flash duration is often 1/1000s or even much shorter. Most cameras will sync to 1/250s or thereabouts; this is the maximum duration of a full power flash. Those that sync at higher speeds require the flash to fire several times to cover the focal plane, as this is the highest speed at which the entire sensor area is exposed at the same time. (Anything faster, and the opening between shutter curtains is effectively a narrow moving slit.)

2. Distance
More distance requires a higher guide number to provide the same given illumination. Distance also affects the perceived size of your source – in general, providing the light isn’t a single point, the farther away you are, the brighter your source has to be for a given illumination level. For more diffuse light, you want your primary source to be further away.

3. Beam coverage/ angle
Most flashes and heads can have their beam angle changed – you want to match the beam angle to the focal length to produce the optimal balance frame coverage and power consumption; lighting more than you need to is a waste of power, but less than your angle of view will produce hot spots. Of course, you could always do this deliberately for a spotlight effect. Note that a wide beam close to the subject and diffuser will not look the same as a spot (telephoto setting on the flash) beam farther away with a big diffuser; the latter will produce far softer light.

4. Diffusion
The best example of diffusion is the difference between a clear, cloudless day and an overcast one: look at the difference in shadows. A cloudless day produces very harsh shadows and wide dynamic range with high brightness in the highlights; it’s a dynamic range nightmare (especially for outdoor wedding shooters, because of all that black and white involved). The opposite is true for cloudy days – note how soft and diffuse the light is. The clouds are effectively adding as a diffuser. For photographic/ flash purposes, you can use a diffuser – not a small clip-on thing that goes on your flash, but something larger like a softbox. The further away your source is from the diffuser, the softer the light is going to be. Control diffusion, and you effectively control the subject’s tonal differentiation.

5. Angle of incidence/ positioning
This seems obvious, but where you put your light and how you aim it can make a huge difference to the look of the image. In fact, it’s possible to leave the orientation of subject and camera fixed in one position, and just move your lights to create several completely different-looking images.

A quicks note on color and white balance: assuming all of your exposure comes from flash, just set your white balance to flash or daylight – most cameras will do this automatically. We do need to start worrying about mixed color temperatures, but only when balancing ambient and artificial light.

Let’s look at some examples.

_X1_L1001004bw copy
Hair. Leica X1

Single speedlight in softbox; shot at 1/2000s sync speed – to freeze motion, I used a camera with a leaf shutter and high flash sync speed. The source was positioned at 45 degrees to the subject and camera to provide definition; it was not that far away from the subject to avoid too much diffusion – this way, you still get some highlight definition which helps give the subject shape.

_8004654 copy
Maitres du Temps Chapter 3 prototype dial. Nikon D800

Single speedlight behind diffuser panel to the top of the watch. The watch was inside a diffuser box to control reflections of surrounding objects off its polished surfaces. For images like this, the precise position of the flash relative to the diffuser and subject, as well as the beam angle, are very important – a small change in the position of the flash or beam angle changes the nature of the reflection significantly, as you will see demonstrated by the next image. For this image, the source was reasonably high up, far away, and with a wide beam angle to produce a soft reflection.

_7051614 copy
Lange Datograph. Nikon D700

This shot employed an almost identical setup to the previous one, except the flash was at a lower angle, much closer to the watch and with a tighter beam spread (longer zoom setting). Note how the reflection in this shot is very concentrated in one spot close to the top edge of the crystal, and is much ‘harder’ and more defined than in the previous shot.

_7058192 copy
Seasoning. Nikon D700

I used a flash in an reflective umbrella to the back left of the subject here; I wanted some diffusion but also some definition – too much diffusion and the pasta looks like a flat, matte amorphous blob. The source was partially behind the subject to provide a bit of backlight, which would define the grains of seasoning against the dark background of the person’s shirt. Note: there is such a thing as too much diffusion!

_7046623 copy
Girard-Perregaux F1-047. Nikon D700

Despite appearances, this shot actually employed direct flash with almost no diffusion. The watch itself is fairly matte, and the texture of the carbon-fiber dial is only apparent when struck with strongly directional light. I used a single flash to the right of the subject, almost touching the diffuser panel; this provided a minimal amount of softening of the edge of the flash source (so it wouldn’t appear as a hard point source in the minor reflections) but enough directionality to give the dial definition.

_7021997 copy
Prawns. Nikon D700

This example involves one flash again, but bounced off an umbrella fairly far away from the subject. Given that the room, tablecloth and surroundings were predominantly white, any light source used would reflect and provide some fill. This meant that the primary source had to be diffuse, yet directional – making an umbrella ideal.

_M223825bw copy.jpg
Eugenie. Nikon D200

The final example involves a combination of light modifiers – a snoot and a diffuser box. The snoot was used to concentrate the light to the center of the diffuser; the diffuser was used to soften the skin of the subject. The net effect was a soft spot – imagine a source about the size of a large dinner plate, with intensity dropping off towards the edges. Thus, we get the best of both worlds – chiaroscuro definition, and gentle tonal rolloff in the shadows and highlights.

Come back tomorrow for part two. MT

____________

Visit our Teaching Store to up your photographic game – including Photoshop Workflow DVDs and customized Email School of Photography; or go mobile with the Photography Compendium for iPad. You can also get your gear from B&H and Amazon. Prices are the same as normal, however a small portion of your purchase value is referred back to me. Thanks!

Don’t forget to like us on Facebook and join the reader Flickr group!

appstorebadge

Images and content copyright Ming Thein | mingthein.com 2012 onwards. All rights reserved

Lighting equipment: a primer

One of the overwhelmingly popular requests I seem to get is for an article on lighting – specifically, how I achieve what I achieve with my images. This article will be the first in a series of five, covering various aspects of lighting and deconstructing the source. It’ll also serve as a useful prelude to my studio lighting workshop tomorrow.

Before we do that, it’s important to establish a baseline: if you don’t know what it is you’re using, then it’s going to be both time consuming to explain, and difficult to understand. Thus, we’re going to begin with an explanation – a quick 101, really – of common lighting sources, tools and modifiers – and an explanation of what they’re useful for, and how one would deploy them. Please excuse the crude line drawings; I don’t have a lot of these objects myself, hence a lack of source images. We’ll go down the list in alphabetical order.

barndoor

Barn doors
Moving plates fixed to a light to control spill off. Useful for creating strongly directional light and preventing too much from reaching the background behind the subject.

beautydish

Beauty dish
A set of nestled reflectors fitted to the end of a studio strobe to create a ringlight effect for portraits/ faces – soft, without shadows, but still with some definition.

diffuser dome

Diffuser dome
A clip on bit of translucent plastic that goes over the end of a flash to soften its output. Usually makes almost no difference but eats a lot of power.

diffuserpanel

Diffuser panel
Any sheet of semi-translucent material that goes in front of a light source to soften the directionality of its output; varies in thickness and opacity.

flash

Flash/ Speedlight
Small, portable, self-powered light source. Usually mounted to the camera, and communicates with the camera’s meter using electronic contacts to control output power. More sophisticated models are capable of wireless operations, triggered optically by another flash and with metering taken care of by the camera. The flash head itself has some modifiers built in – usually zoom, which controls beam spread, in addition to being aimable.

gel

Gel
A piece of transparent, colored plastic that filters the output of any light to balance it with ambient sources; usually yellow/orange or green to balance tungsten and fluorescent sources respectively.

gobo

Gobo
An opaque piece of material with a cutout to permit light to pass through; usually with a shape or design. Used more frequently for productions than photography. The best example of a gobo is perhaps the Batman sign…

grid

Grid
Exactly what it sounds like – a grid of panels placed at right angles to the light source. Acts like an array of 90 degree barn doors; controls light spillage and ensures that most of the light goes in one direction, but without the hard edges that barn doors produce.

HMI light
Very bright incandescent source in the form of a studio strobe – used for video production. Compatible with all normal accessories, e.g. softboxes/ gobos/ diffusers etc.

_5001017bw copy

LED Panel
Continuous, low-temperature light source. Nowhere near as bright as HMI lights, but also nowhere near as hot. Useful on location when you have to operate off batteries, or when you have to photograph temperature-sensative objects – ice cream, for example.

monoblock

Monoblock
Any self-contained studio light that doesn’t require a separate power source or transformer. Plugs directly into the wall.

radiotrigger

Radio triggers
Wireless trigger for flashes or strobes that isn’t restricted by line of sight. Requires one controller on-camera, and one for each flash unit.

reflector

Reflector
A piece of material – usually white/ silver or gold (warm) – held below a or to one side of a subject to provide fill light on the shadow side by reflecting the primary light source. Softens out the shadows. Usually requires an assistant, as in, ‘Tilt the reflector down a bit more, thanks.’

ringflash

Ringlight/ Ringflash
A flash with a circular tube, or a light shaper in the form of a ring that simulates the effect of a circular tube. Once again, useful for portraits.

softbox

Softbox
A tent of sorts – usually fabric – which the light source fires into at one end, with a semi-translucent window at the other end. The insides are usually reflective to minimize light loss. Creates a large, soft, diffuse light source; comes in many sizes. Useful for anything and everything. Can be used in conjunction with grids, barn doors, etc.

snoot

Snoot
A cone-shaped object, open at both ends that goes over the end of a light source to create a very tight, intense beam of light – effectively a spotlight.

stand

Stand
Anything used to hold your lights or accessories.

Strobe
Large studio flashes – much more powerful than portable flashes/ speedlights, but require mains power or large lead-acid battery packs to run.

umbrella

Umbrella
Umbrellas come in two varieties: shoot through and reflective. The former act as diffusers; the latter produce a slightly harsher, more directional (but still diffuse) light. Usually deployed in conjunction with flashes or smaller studio strobes. More light loss than a softbox because the sides are open; not always a bad thing because sometimes a little ambient illumination is required.

zoom head

Zoom head
The part of a flash that allows control of the beam spread – it’s called a zoom head because it allows the photographer to match the angle of coverage with the field of view of the lens, with minimal power wastage.

Stay tuned for subsequent parts – we’ll cover reverse engineering setups, and some more advanced techniques and tricks. MT

____________

Visit our Teaching Store to up your photographic game – including Photoshop Workflow DVDs and customized Email School of Photography; or go mobile with the Photography Compendium for iPad. You can also get your gear from B&H and Amazon. Prices are the same as normal, however a small portion of your purchase value is referred back to me. Thanks!

Don’t forget to like us on Facebook and join the reader Flickr group!

appstorebadge

Images and content copyright Ming Thein | mingthein.com 2012 onwards. All rights reserved

10×10: 100 ways to improve your photography

This article was originally posted in a series of 10 mini-exerpts back in the very early days of the site; Google Analytics tells me that it was hardly viewed, which is probably a shame – so I’ve re-packaged, updated and re-presented it again here as a monster all-in-one reference. Enjoy. MT

Disclaimer: I’m assuming you already know the basics.

Part one: Compact cameras

Pretty much everybody has a compact, even if it’s only the one built into your phone. It’s no good for serious photography. Or is it? You might find yourself using it more if you try some of these ideas…

10: Carry spare batteries. One in the camera, one in your pocket or one charging. This lets you keep going – especially important since compact battery life is often terrible.

_0011755bw copy

Crossing thoughts. Ricoh GRDIII

9: Use the hand strap. It seems obvious, doesn’t it? But you’d be surprised how many people don’t, and then land up having to buy new cameras.

IMG_1330b copy

Car reflection. Ricoh GRDIII

8: Shoot bursts, if you have a useable buffer. Without the buffer, you’ll just have to rely on timing and counting shots – think of it as a revolver rather than a machine gun. The same rules about the middle shot being stable and sharp in a burst also apply to compacts.

_0011033bw copy

Zoom. Ricoh GRDIII

7: Keep ISO as low as possible, and make use of the stabilizer. Most good compacts have stabilizers; this is because even with the 1/focal length rule, there’ll be enough camera shake to blur things – you’re holding a light object at arms’ length and trying to keep it still. Granted, there’s no mirror slap, but there’s also nothing to brace against, either. Keeping the ISO as low as possible lets you maximize image quality. There’s usually a big difference between even base ISO and one stop up; know the limits of usability and don’t exceed them.

_0011069bw copy
Crossing, London. Ricoh GRDIII

6: Look at the whole frame. I’m not sure how to say this more succinctly: there are things compacts can do that larger sensor cameras can’t – think of telephoto/ compressed perspective shots where everything is in focus, for example – and vice versa (shallow depth of field, wide FoV). Look at the whole scene, and see how you can use these strengths to your advantage. Images shot with compacts that work actually force you to have a much stronger composition, because you cannot rely on the crutch of bokeh or let the lens do the talking.

_0011492 copy
On set in the afternoon. Ricoh GRDIII

5: Spot meter. Dynamic range on all compacts is limited because the pixels are small. This means losing the shadows or the highlights is inevitable under most situations; you need to decide which one is important. The spot meter (and a half press to lock exposure) helps you to do that. High key = keep the shadows and lose the highlights; low key = keep the highlights and lose the shadows; most important however is making sure the subject is properly exposed – use the spot meter over faces, for instance. The other alternative is to use the spot meter on highlights and add a stop of exposure compensation – the meter will try to average a middle gray exposure out of whatever you place the box over; you know the camera has a little more tonal range in it if the highlights are at middle gray, so you can safely add some positive exposure compensation. This generally makes the rest of the image a little dark – especially under harsh light – but it also has the side benefit of making the colors richer.

_0012133 copy
The fountain of capitalism. Ricoh GRDIII

4: Use P mode. I’d say leave it in full auto, except most of the time that doesn’t let you control exposure compensation and metering – those are important. Why not use aperture priority, as I’d recommend with a larger sensor camera? Simple: there’s no point. The real focal length is so wide and the lenses usually so slow that DoF is enormous, and changing the aperture isn’t going to do anything other than reduce the amount of light reaching the sensor. Great if it’s bright, but if you stop down too much, you’re going to to induce diffraction and just land up with soft images.

_0011105bw copy
Affection waiting for the bus. Ricoh GRDIII

3: Keep the lens clean. I’m constantly surprised by how many people have dirty lenses on their cameras and then complain that the images aren’t sharp, or that they can’t see anything in the finder – but there’s fingerprints all over it. It’s especially important on a compact as the small sensor and high pixel density are very demanding of lenses; the more aberrations you have on yours, the lower resolving power is going to be.

_780_IMG_1719bw copy
After prayers. Canon SD780IS

2: Prefocus. Although focusing speeds have improved dramatically, what’s really nice about most point and shoots is the half press to full press lag is actually quite low – but you need to be prefocused first. In any case, the huge DoF will cover any minor focus errors. Most fleeing moments can be captured with a compact and a little anticipation.

_0011588 copy
Break. Ricoh GRDIII

1: Set up your camera to either shoot raw, or output as neutral a jpeg as possible. If you can’t get a raw file, there’s still a lot that can be done with a good jpeg – what I usually do is reduce contrast to minimum to preserve the highlights and shadows; turn saturation down, and lower (but not zero) sharpening. Reason being that if you zero sharpening, you do generally lose some detail on compacts as this step is applied to the raw data in the imaging engine before being saved as a jpeg. You’ll be surprised how much you can do with one of these files afterwards in photoshop. Similarly, avoid those fake HDR or extended dynamic range modes; they might appear to help but what they actually do is make highlights look very unnatural because the tonal values overlap with other parts of the luminance range.

IMG_0861b copy
Vehicular architecture. Apple iPhone 4

See more of my small-sensor compact camera work here on flickr: click here

Part two: DSLRs

Disclaimer: I’m assuming you know the basics already, but want to get serious.

10: Control your view. Use the viewfinder when you can; there’s less lag, you can brace the camera against your face to increase stability, the dynamic range and resolution are higher, it’s a more direct connection to your subject and it saves power to boot. But why not use live view if you’ve got it, especially coupled with a swiveling screen? For critical focus, odd angles, and video, it’s actually pretty handy. Though I personally avoid it like the plague unless i have no choice.

_X1_L1001362 copy
The big brass band. Not strictly an SLR shot, but live view did help me to get this angle without sticking my face on the floor. Leica X1

9: Shutter button technique matters. You’d be surprised how many people just jab the button and wonder why the camera isn’t responding. Firstly, don’t jab. Roll your finger gently to reduce camera shake. Secondly, prefocus; the shutter button has two stages – the first activating autofocus, the second, shutter release. If you have focus already going, then your lag is going to be much, much shorter than if the camera has to do all the work when you press the button – even on the fastest cameras. Finally, you’d be surprised how many people use the horizontal release in portrait orientation even if they have a vertical one – don’t. It’s less stable, and frankly you just look silly.

_7033388 copy
Night party. It looks bright, but the EXIF will tell you otherwise. I needed every single trick in the book to get this shot: stratospheric ISOs, low shutter speeds, and a fast f1.4 lens wide open. Nikon D700, 24/1.4.

8: Turn the in-camera sharpening and contrast up to maximum. What? Why? There’ll be haloes! I can hear the cries of incomprehension and derision already. First caveat: you must shoot raw. Second caveat: use a raw processor that ignores the camera’s proprietary processing tags, e.g. Adobe Camera Raw. The reason why you want to crank both of these things up is that the camera’s preview engine generates a jpeg based on these settings; if your exposure is okay with the contrast at maximum, then you know you’ll have more shadow and highlight latitude. And high sharpening accentuates the differences between in focus and out of focus.And it also accentuates noise; basically, the combination of these settings makes it easier for you to tell if you’ve nailed it or not.

_3035242 copy
Work that perspective. Nikon D3, 70-300VR

7: Don’t let zoom lenses make you lazy. Select a focal length based on perspective, not angle of view: in other words, don’t use a wide lens because you want to get more of the scenery in, or a telephoto because you want to get closer. Instead, wide is for accentuating perspective, telephoto is for compressing it.

_7021180 copy
Action. An interpretation of the famous first series of motor drive images that showed a galloping horse’s legs do in fact leave the ground simultaneously. Nikon D700, 28-300VR

6: Shoot in bursts. Events evolve. The first shot may not be the best, or you or your subject may move. A burst is insurance, and if they’re all perfectly focused and exposed, then it lets you select the best image – say for minor variations in facial expression of a portrait. Note that I don’t mean machine gunning the shutter until your buffer is full; three or four shots is usually plenty.

_3100_DSC2015 copy
Fire. The balloon was firing on and off unpredictably. It would be a lot more difficult to get this shot without auto ISO. Nikon D3100, 85/1.4 G

5: Use auto-ISO, but only if it’s configurable. If the minimum shutter speed is not configurable, you don’t know at what shutter speed the camera is going to start bumping the sensitivity; if it’s too early, your images will be grainer than they need to be. If it’s too late, then you may not have enough shutter speed for a sharp shot.

_7026879 copy
Cheers. Tough lighting; how do you know what your camera is going to expose for if you haven’t tried it out? Nikon D700, 85/1.4 G

4: Know what your camera is doing: AF, metering, auto-ISO. This is actually very, very important. If you don’t know how your camera responds under a given situation, how do you know if you can get the image or not? There’s no shortcut to this other than a lot of practice and experimentation.

_3033422 copy
Alien. I prefocused on the spot where the man would be when the light was exactly behind and over him, then waited. Nikon D3, 24-70/2.8 G

3: Have some way to control your AF: either use AF-ON or AF-L, together with continuous focusing. Autofocus is an aid, not a crutch. Auto-select point systems will seldom select the point you want; they’re useful, but only in an environment where you have a lot of randomly moving subjects and need to pick the closest one. When you have something a bit more sedate, tell the camera what to focus on. Use continuous autofocus, because everything moves, if only slightly; the larger your aperture, the more this will matter because depth of field is shallower and probably won’t be sufficient to cover subject movement. I prefer to have AF activation on the shutter button and an AF-Lock button configured under my right thumb – this is so I know I can just press one button and have a high chance of getting the shot – but I also know of plenty (most sports shooters?) who configure AF-ON under the thumb, and the shutter button to capture the image only. AF Lock for that configuration is of course done by releasing the AF-ON button. Try both and see which works for you.

_7025384 copy
This was actually shot in a well lit carpark, but with a stopped down lens and fast shutter speed to eliminate ambient and have nearly 100% of the exposure provided by the flash. If I’d shot aperture priority, I’d still be able to see the surroundings. Nikon D700, 28-300VR and three SB900s.

2: Shoot aperture priority, except for flash. This is the easiest way to maximize control of your camera: aperture priority to control depth of field, manual mode if you need to balance flash and ambient lighting.

_7030982 copy
Watching the world pass by. Imagine this frame without the edge intrusions: it’d feel pretty different, wouldn’t it? Nikon D700, 85/1.4 G

1: Watch the edges of your frame. I’ll say it time and again: what usually makes or breaks a photo, or the difference between an excellent image and an outstanding one, is how well the subject stands out. This is both a function of subject lighting, positioning and focus, as well as the inverse: what other things are there in the frame that take attention away from the subject? Intrusions into edges are one of the main ones. Conversely, there are also compositions where edge intrusions are welcome, or even make the image: they suggest things that might not be there, or leave things to the imagination of the reader. Use with care!

Part three: Mirrorless cameras

Mirrorless: the middle child? Maybe. But even a diehard sceptic like me has discovered that these things have their uses –just be clear about your expectations.

10: Spare batteries are an absolute must. Due to the large sensor, LCD and high demands from lens focusing motors, stabilizers and the like, mirrorless cameras have the highest power draw of any type of camera (other than medium format digital, it seems). Make sure you have at least two to get you through a day, maybe with an additional spare.

_PM05280 copy
Moon over Prague Castle tower. Olympus E-PM1, 45/1.8

9: When selecting a camera, look at two things: useability (including lens choices) and raw sensor quality. I’ve tried the Panasonics, Sonys, Fuji and Olympus systems; of all of these, only the Olympus E-PM1 Pen Mini stayed more than a month. Why? Because it’s the most responsive and configurable of them all. The Panasonics are very configurable but not very user friendly. The Fuji X100 has the best image quality, but the firmware is a disaster and it’s slow as molasses. The Sony is reasonably responsive, but not so easily configurable and the lens choices are pretty limited. And the NEX-5 I owned had a strange color palette. And don’t pick one so big that you might as well take your DSLR.

_PM03783 copy
Lange Datograph. Olympus E-PM1, Panasonic 20/1.7

8: Use a hand strap instead of a neck strap. If it’s in your hand, you’ll be ready faster. And more likely to use it. And the weight/ size aren’t so bad you need to hang it around your neck or shoulder for relief. It also takes up less space in your bag when you have to store it.

_PM00545 copy
Reflections. Olympus E-PM1, 14-42 kit lens

7: Adaptors are useless. Although they seem like a good idea, mirrorless systems are optimized for telecentric lenses with very short back flange distances; conventional SLR or RF lenses aren’t designed like this and thus don’t work well on mirrorless cameras. It’s quite well known that RF wides have numerous issues like cyan/magenta shifted corners, increased CA and vignetting. Adapted lenses are also bulky and lacking in automation – no AF, no aperture control, no stabilizer. And accurately manually focusing something held at arms’ length is near impossible.

_PM03612 copy
Burlesque. Olympus E-PM1, Panasonic 20/1.7

6: Remember the lag. Even though release lag may be in the 30-40ms range, you’re going to have another lag induced by the LCD itself – the best models refresh at 60hz, which means you’re looking at least another 15-20ms (or more) of additional lag as the screen refreshes to show the current scene. Practice to get a feel for the rhythm of the camera.

_DSF1891bw copy
Garage classic. Fuji X100

5: Avoid continuous AF. Contrast detect AF systems still aren’t good enough to track moving subjects – with the exception of the hybrid system in the Nikon V1 that also has phase detect photosites built into the sensor – so either prefocus and anticipate, or cover with DOF.

_DSF1421 copy
After school in Kathmandu. Fuji X100

4: Carry it everywhere. No point sacrificing image quality if you’re going to leave it at home like the full size camera. This is also why I’m drawn to the smaller, more pocketable mirrorless cameras like the Olympus Pen Mini. I’ve put it on a hand strap and use a pancake lens most of the time; it’s not a lot bigger than a compact but produces vastly better image quality.

_N5_DSC0100 copy
Mosque architecture. Sony NEX-5, 18-55 kit lens.

3: Use the EVF if you’ve got one. Like any optical finder, bracing the camera against your face helps stability immensely. I’m not recommending going out and buying an add-on finder; these are usually flimsy, unwieldy and dramatically increase the size of the camera – defeating the point of mirrorless in the first place.

_N5_DSC0111 copy
Before prayers. Sony NEX-5, 18-55 kit lens.

2: 1/focal length rule doesn’t apply anymore. Why not, aside from crop factor? Because most of the time you’ll be using live view and holding the camera at arms’ length – this means increased propensity towards camera shake. Double, or even triple that for critical shots or action. Or use a flash. And while stabilizers help, they probably bring the safe speed into the 1/fl rule or maybe very slightly better.

_N5_DSC1260 copy
Arch. Sony NEX-5, 18-55 kit lens.

1: Compose like an SLR, shoot like a compact. They’re hybrids, right? Treat them as such. You get the DOF of an SLR – which means you have to watch your focus point, and take care in choosing perspectives. But you also have the limitations of a compact – so remember to watch your exposure/ highlights/ shadows; prefocus; don’t expect it to be able to track moving objects. Remember the limitations of both, and that should give you a good idea of how to get the most out of your mirrorless camera.

_PM04986 copy
Hitchcock scene, Vienna. Olympus E-PM1, 45/1.8

See more of my work from the various large-sensor mirrorless cameras here on flickr: Olympus Pen Mini E-PM1; Sony NEX-5; Fuji X100; Leica X1

Part four: Rangefinders

10: Timing, timing, timing: shoot lots and get to know the lag rhythm of your camera. It might feel instant, but it isn’t. That split second can make or break the difference in a critical shot, especially during a fast-paced situation – that fleeting expression, or arrangement of people.

_M9P1_L1011219 copy
Entranced. Leica M9-P, 35/1.4 ASPH FLE

9: Get to know your lenses: There is no such thing as the perfect lens. All of them have idiosyncrasies, be it focus breathing, focus shift, curved focus planes, flare under certain conditions, or maybe the ability to produce brilliant 14-pointed stars from point light sources at f16. (Don’t laugh, the Leica 21 Summilux ASPH does this.) The better you know your lenses and the way they draw, the more you can exploit their properties to help your pictorial rendition of a given situation. It’s also why I’ve got eight ways to get to 28mm – there’s a huge difference between the Zeiss ZF.2 2/28 ‘Hollywood’ Distagon and the Ricoh GR-Digital III, for instance.

_M9P1_L1003203 copy
Gluhwein time, Vienna. Leica M9-P, 50/1.4 ASPH

8: Use a soft release and thumb grip (and maybe front grip). Anything that can make your grip more secure or comfortable, and your shutter release action more gentle, is your friend. I like the Thumbs Up, personally.

_M9P1_L1014802 copy
Seeing the wood from the trees. Leica M9-P, 21/3.4 Super Elmar ASPH

7: Don’t limit your subjects to the center focus point. You can focus and then recompose. But remember that most lenses aren’t flat field (especially rangefinder designs, which are usually non-retrofocus and spherical) so a little tweak to the focus ring is required for edge subjects – usually to make the focus point slightly closer, as the focal plane will be curved slightly around you. Experience is required to determine exactly how much and when to shift – this is why I also highly recommend using fewer lenses but knowing them well.

_M9P1_L1003347 copy
Morning mass, Stefansdom. Leica M9-P, 28/2.8 ASPH

6: Use the DoF scales to prefocus. Especially useful with wide lenses, whose large DoF means that you might even be able to shoot hyper focal and not have to focus at all: especially great for being fast and reducing time between seeing the shot and capturing it. Very important skill for street photography and photojournalism. You can practice this by estimating distances and setting your lens with the camera at waist level, then checking in the finder.

_M92_L9998120bw copy
Self portraits. Leica M9, 35/1.4 ASPH FLE

5: Pay attention to the edges. The frame lines are a suggestion: there will be more included. With experience, you can push the composition a bit and still get everything in.

_M9P1_L1015932 copy
Color wall. Leica M9-P, 50/2 APO

4: Shoot with both eyes open. The nice, bright, high-magnification finders are great for letting you a) see what’s outside your frame and might make composition better or worse if included or excluded; and b) you can keep both eyes open to enhance your peripheral vision. It’ll also stop you from getting run over.

_M9P1_L1003513bw copy
Tea time. Leica M9-P, 28/2.8 ASPH

3: Know the limitations of the system. By their nature, your finder will probably only cover 28-135, and not be very accurate for 90 and 135. So really, the strengths of the system lie in the 28-75mm range; don’t try and do birding with one of these things and wonder why your results aren’t up to par. (Note: I do use my M9-P for macro work, but that’s a different story entirely.)

_M9P1_L1013066 copy
Bangkok. Leica M9-P, 35/1.4 ASPH FLE

2: Less is more. Rangefinders are small and light: why burden yourself and turn photography into endurance sherpa-ing? Try reducing your regular kit to two, or better yet, one lens. Either something which provides to distinctly different perspectives, or perhaps something in-between. I choose 28/50, after a long time trying to make the single 35 work for me. It just didn’t agree with the way my eyes worked, which is a shame because the 35/1.4 ASPH FLE I had was easily one of the best lenses I’d ever used, period.

_M9P1_L1007298 copy
As above, so below. Leica M9-P, 28/2.8 ASPH

1: Check your rangefinder calibration. There’s nothing worse than shooting an entire series at f1.4 and thinking you nailed focus – or at least remembered doing so in the finder while shooting – then being horrified as you open up the set only to find your subjects’ noses in focus and their eyes a distant plane away. If you know how to calibrate your rangefinder, great; if not, it might be the subject of a future post here (but I take no responsibility if you damage something or void your warranty). If you don’t dare, send it in to your dealer. The best thing you can do is have your body calibrated to match all of your lenses – so send them all in at the same time. The next best thing is to have it calibrated for the lens with the shallowest DoF; the one exception is if the lens suffers from focus shift. Then you’ve got no choice but to calibrate for your most frequently used lens and remember which direction to adjust for later. Check calibration often and if you get a new, shallower DoF lens. One last related point: make sure all of your viewfinder windows (VF, RF patch, frame lines, front VF) are clean – you’ll be surprised how much easier it is to focus!

Bonus for Leica M8/9 users: The meter is center weighted and very heavily biased towards protecting highlights. So, for backlit subjects there are a few ways of compensating. a) Lock exposure with the camera aimed at something of roughly equal luminance but not backlit; this works on the shutter half-press position (with a little dot displayed at the top between the leftmost digits in the finder) if you’ve got the release mode set to standard. b) For M9 users, use the rear dial to activate exposure compensation. I personally don’t like this, because I have no idea if I have it set or not, and if so, how much. c) If you’re shooting with fixed and not auto-ISO, then note the shutter reading in the finder, and move the shutter dial to something appropriate. I use a slightly more complicated method, with auto-ISO: if the shutter speed displayed is over the minimum you set, then you know the camera is in base ISO. I just manually set it to something lower; the camera can’t lower the ISO any more, so it overexposes as desired. If the situation is dark and you’re above base ISO, this doesn’t work. In very dark situations, I usually just leave the camera at ISO 1250 and go manual with the exposure. 

See more of my work with the Leica M9-P here on Flickr: click here And for earlier work with the M8, click here

Part five: Photojournalism and street

Photojournalism (hereafter PJ) and street photography go hand in hand: they’re about capturing a moment of life. PJ goes a bit further by adding a story to that moment; street can just be an aesthetically pleasing moment in and of itself. Both though require the photographer to be observant and ready. This is what works for me.

_M9P1_L1004918bw copy
Protest Kabila, Prague. Leica M9-P, 28/2.8 ASPH

10: Watch your shutter speeds. You’re going to need more than 1/focal length – maybe 1/2x to be safe, or even 1/3x if you’re running and gunning. You’re moving, your subject is moving, and nothing is steady. Remember also that the higher the resolution your camera, the less forgiving it is of focus errors and camera shake.

_0010613bw copy
Rain, London. Ricoh GRDIII

9: Small, nondescript cameras are best. They don’t draw attention to you – especially in the current day and age of everybody carrying a camera, nobody is going to take you seriously if you have a small black compact. You’d be surprised how much I get away with using the iPhone or Ricoh GR-Digital III. People simply don’t perceive it as threatening in the same way a pro DSLR and 70-200 might be. Compacts also give you more depth of field for a given aperture.

_0010654bw copy
Morning paper, London. Ricoh GRDIII

8: Shoot wide and close. The perspective produces a stronger image; wide lenses are also more forgiving to focus errors and camera shake. And as a bonus, you get context in the frame as par for the course.

_M8_L1024678bw copy
Learning English. London. Leica M8, 21/1.4

7: Anticipate and observe. To quote the Cartier-Bresson: pick the decisive moment. To do so, you need to be aware of everything around you; really look. Pay attention to the details. People are fairly predictable; it should be easy to spot if something out of the ordinary is about to happen. Anticipation of the action gives you a vital few seconds more to prepare and be in position, or have the camera out.

_7032151bw copy
Bicycle, Kathmandu. Nikon D700, 24/1.4

6: Blend in. Act like you belong, dress nondescript, and nobody will pay you a second glance. It will make your job a lot easier. If you draw attention to yourself – be it by being uncertain or provocative – then people of course notice.

_220_IMG_0251bw copy
Oblivious. I was standing 3 feet in front of them. Canon IXUS 220HS

5: Always have the camera to hand. How are you going to get a quick shot off if the camera is in your bag? You should be able to get a shot in less than 5 seconds – sometimes your window is even shorter than that.

_7030375bw copy
Trekking office, Kathmandu. Nikon D700, 85/1.4 G

4: In a real emergency, help. Yes, our duty as a PJ is to record, document, communicate and raise awareness about the events around you; you help by telling a story. But you don’t have to shoot all the time. Get your shot and then help out the people. Remember that at the end of the day, we’re all human.

_7026532 copy
Street party. They would need help the following morning. I didn’t stay that long. Nikon D700, 85/1.4 G

3: Practice, practice, practice. Use your camera until you’re fast and proficient; you should be able to visualize the frame and field of view without having to raise the camera to your eye. You should be able to set things by muscle memory and have a group of settings (if your camera supports this) that configures the camera to be ready to go.

_X1_L1000191bw copy
Reflections. Leica X1

2: If spotted, acknowledge your subject. A friendly smile, a sincere nod – all of these things make people feel comfortable with your presence and make your life easy. You don’t have to stop and talk or explain what you’re doing if nobody is asking. Smile and move on. Done.

_PM01880bw copy
Smoking break. Olympus E-PM1, 45/1.8

1: Be confident. It is better to say sorry rather than ask permission and miss the shot. With that, go out and be productive.

_7036946 copy
Martial law, Kathmandu. Nikon D700, 24/1.4

See more of my photojournalism work here on flickr: click here

Part six: Lighting

This post deals with the light you create. You can’t always find what you need, so it’s important to know the dos and don’ts of off camera lighting. My tips apply to speedlight users; I’ve never been a huge fan of monoblocks, nor have I used them very much since Nikon launched their CLS system. Sure, sometimes you wish for more power, but then again you remember that you can go for hundreds, if not nearly thousands, of shots on a set or two of AAs – instead of carrying a 50kg lead acid lump around. Read on.

10: Always shoot in manual mode with flash. Otherwise, there’s no way you can balance your flash and ambient exposure; if you want all flash, then you can dial in the highest sync speed possible – this will help you avoid camera shake. If you let the camera decide, it will usually only get it right for the center portion of the frame when the flash exposure is much greater than the ambient exposure. This is to say, most camera systems are useless at daylight fill, especially under very bright conditions.

_3009512bw copy
Inspector. Note how inside/ outside luminance is balanced. Nikon D3, 24-70, one SB900 in a soft box.

9: Imperfect diffusers and softboxes add character to portraits, but not product shots. Uneven lighting for most product shots just makes the object look odd. For people, it can be strangely flattering. Consider making some shoddy homemade internal baffles for your portrait soft boxes.

_M220416bw copy.jpg
Shoddy baffling adds character! D200, 17-55/2.8, 2xSB600s in homemade soft boxes.

8: If you’re controlling lighting, you shouldn’t have blown highlights or blocked up shadows – unless you want them. Self-explanatory. Your lighting isn’t balanced properly. Try again.

_3007528bw copy
Intentional outline. Nikon D3, 105VR, one SB900 off camera.

7: Those clip on diffusers are pointless. A small light source can never replicate a big light source unless you expand (and diffuse) it – be it bouncing off the ceiling, or a softbox. A little clip on diffuser is just going to make a small, diffuse source – which at any distance, looks like a small intense source except weaker. You’ll get the same reflections and general lighting feel. All you’ll have done is a) look stupid b) wasted your money and c) lost at least two stops of light. I’ve never even used the diffuser domes supplied with any of my flashes; they’re still in the plastic bags they came in.

_7049184 copy
Unrelated shot. Speake-Marin perpetual calendar. Nikon D700, 60/2.8 G, one SB900 and diffuser.

6: Duct tape is your friend. Use it to tape flashes in odd positions to whatever supports might be handy; sometimes you just can’t erect a flash stand in the place you want it. But you could tape the flash to the ceiling. I’ve done it before.

_3009669bw copy
The Hollywood shot. Flashes duct taped to curtain poles. Seriously. D3, 24-70/2.8 and three SB900s

5: More flashes are better. I’ve got four; two primary units, one spare, and one more unit to use as a commander on cameras without a built in (Leica M9-P, I’m looking at you). Legend has it that Joe McNally travels with an entire suitcase of SB800s. I dread to think how many batteries he goes through every year.

_7047913 copy
Alfabeti. Nikon D700, 60/2.8 G 2xSB900s

4: If you’re short of lights, consider a reflector. Positioning one light directly opposite the reflector gives you another pseudo-light – depending on the reflector, it could be as little as 1 stop light loss – think of a mirror, for instance. A more diffuse reflector can provide gentle fill.

_X1_L1001004bw copy
Leaf shutter benefits. Leica X1, SB900, 1/2000s.

3: Higher sync speeds are better. Pro DSLRs top out at 1/250s for full power, or less power and faster – but these are not true ‘flash speeds’, because the flash has to fire for longer but at reduced power – note how the flash no longer freezes motion at 1/8000s as much as it did at 1/250s. Leaf shutter compacts like the Ricoh GRDIII and Leica X1 both sync to 1/2000s; they’re great for capturing motion or providing balanced daylight fill, where your ambient shutter speed might be very high. You won’t lose the highlights, and you also won’t lose the shadows – thanks to your high sync speed.

_7022462 copy
Dessert. Balanced with ambient daylight in restaurant. Nikon D700, Zeiss 2/28 Distagon, 2xSB900

2: Remember the eyes. For living subjects, a little catch light reflected in the eye can make all the difference between a flat, boring shot and a portrait that looks alive. Use a reflector, or if you’re using Nikon CLS, the trigger flash on your camera works fine too.

_X1_L1000981bw copy
Note the eyes. Leica X1, SB900.

1: Spare batteries are important. Never get caught short. I avoid NiMH as they tend to exhibit the memory effect, especially if not used frequently – as would be typical for your second or third spare set. The Sanyo Eneloop batteries are fantastic – they really do hold charge like alkalines, but have the reuseability and current draw properties of NiMH. I’ve got eight sets of these for my flashes, and only charge them when depleted.

_7040287 copy
Macro lighting is quite a different game entirely. There isn’t a lot of working distance, and you need a lot of diffusion to create the same apparent perceived light source size.

Part seven: Postproduction and editing

Photoshop is a fix all for everything, right? It’s also come to represent a dirty word; when something has been ‘Photoshopped’ it’s no longer authentic or original, and the skill of the photographer has been severely diminished. Wrong, think again. Photoshop is the equivalent of the darkroom from the film days: sure, you can add things to the scene, but they look odd and unnatural. The main thing you did in the darkroom was finalize the exposure: adjust the density and brightness, and fiddle with the contrast. Maybe some dodge and burn. How? Chemical mixes, timing and cutout masks. We do the same now – except the chemicals are your raw converter and curves layer, the fixer is your save button, and dodge and burn is a brush tool.

So what is editing exactly? The process of removing unwanted material – in this case photographs – to leave a more coherent story or narrative; being selective about what you show is just as important as having something to show in the first place. There’s no point in having technically brilliant but boring images – but you can make a story out of perfectly timed moments, even if they’re a little noisy or blurred.

_7051046 copy
The flying Vianney Halter for Goldpfeil. Nikon D700, 60/2.8 G

10: Keep all of your raw files. You never know when somebody might ask for a color version of a B&W image; don’t lose that sale because you were trying to be cheap on storage. Storage IS cheap.

_M9P1_L1005824bw copy
Sinister chitty chitty bang bang. Leica M9-P, 28/2.8 ASPH

9: Sharpening should be the last step. If you sharpen too early on, you’re to end up with extra noise and less tonal information, especially for images with a lot of fine detail. Why? Because of the way sharpening works. It increases apparent acuity between adjacent areas of different luminance by increasing the difference in luminosity between them. Making something brighter or darker – with images containing a lot of fine detail, this means a change to a large area of the image – will inevitably destroy some tonal information, especially at the extreme ends of the tonal range.

_7046623b copy
If the G-P F1-047 was titanium and on a blue strap…it’s really aluminum and on a tan strap. Nikon D700, 60/2.8 G

8: Let your images mature before deleting. Look at your images immediately after a shoot and pick out your favorites. Then do this exercise again two weeks later. You’ll probably find that there’s been a big change. Why? Immediately after the shoot, you remember how difficult it was to get one shot; that effort put in affects your artistic judgment. Two weeks later, you’ll probably not remember as clearly, and you’re more likely to go with your first instincts. Go with the latter selection.

_m9p1_l1007784 copy

_m9p1_l1007781 copy

A tale of two frames. I initially preferred the first frame; but a month later, I think there’s more of a story and more contrasts in the second one. M9-P, 28/2.8 ASPH

7: Calibrate your monitor. Whether you use one of the Spyders or the built in utility in OS X, it’s important to adjust your monitor to produce as accurate color as possible – this is important for both print and screen; you want to make sure that other people see the same thing you put in so much effort to create. For print, you can attach the color profile to the file; a good printer will be able to match the print to what you see on screen. It’s also important to know the gamut of your monitor; I’ll never do any serious editing on my 11” MacBook Air because the screen has terrible color. On the other hand, the 27” iMac/ Cinema Displays are fantastic, as are the 15” and 17” MacBook Pros.

_M8_L1023901 copy
Intentional color. Leica M8, 21/1.4 ASPH

6: Do most of your adjustments in the raw converter. This is important, because the data is in its highest bitrate form – which means making large changes to the file at this stage has the least impact on image quality. If you do highlight recovery on a 16 bit raw file, you’ll probably have a decent stop or two (assuming a good sensor) before you get posterization or false color. Now try doing the same to a jpeg and you’ll see what I mean. By the same token, keep your files in the highest bitrate form until you’re absolutely sure you’re not going to change anything again – and that might be a Photoshop file in 16 bit with all layers, or it might be a quality 12 jpeg. I generally don’t edit again, so I save my finished files as a maximum quality jpeg. Remember that print doesn’t have as much dynamic range as a computer screen, so if it looks fine on a calibrated monitor, it’ll probably look fine in print.

_D90_DSC5601 copy
Sunset shadow. Nikon D90, 18-200VR.

5: Buy a good tablet. I like the Wacom Intuos 4. It will help you immensely to lay precise masks and control your dodge and burn; the tip is pressure and tilt sensitive to control brush size and density. It’s much faster than doing things with the mouse, too – once you get used to how the entire tablet area maps to your screen. Get one that suits your screen size. The medium 6×9” is perfect for my 15” MacBook Pro.

_M8_L1017183 copy
The Beach. Leica M8, 50/1.4 ASPH

4: Don’t overdo anything. Turning it up to 11 works for some shots, but not most. Too much sharpening leaves haloes. Too much contrast loses tonal detail. Too much saturation makes it feel unnatural and cartoonish. Etc. And don’t even get me started on overuse of HDR; overlapping tonal values are jarring to the eyes.

_D90_DSC2987 copy
Turning it up to 11. Nikon D90, 105VR

3: Always have backups of your backups. I’ve had a situation where a new OS caused some serious issues with my primary computer; the upshot was that none of the files were readable. My primary backup drive – a Maxtor; I’ll never buy one of those again, just too many have failed – started making the click of death when I connected it, and I was able to get most of my data off in time before the drive crashed and died. Good thing there was one more backup copy. My current management strategy is to keep all finished jpegs on my editing computer; there are two duplicate backups with all the raw files (in the same file structure) on external drives, one of which lives in my bag and goes with me everywhere; I also time machine the primary drive whenever I do a backup to the externals. Generally I’ll do a backup once I finish editing a batch, which might be 50 or 100 images or thereabouts. Storage is cheap. Lost files are priceless.

_3029853 copy
Blue water. Nikon D3, 24-70/2.8 G

2: Integrity matters, especially for photojournalists. Whilst I’ll have no compulsion removing dust from a watch product shot or litter from fine art street photography, I absolutely will NOT touch the content of the image for photojournalism. This is because once you do, and if you get caught, your credibility is instantly nonexistent.

_7047519 copy
Panerai Mare Nostrum, on a GuB Marine Chronometer. Clean well, because even at this relatively low magnification, it’s very visible. Nikon D700, 60/2.8 G

1: You can’t polish a turd. Don’t think that you can rescue a compositionally weak image ‘in Photoshop’. You can’t. You can’t change the lighting. If you didn’t get it mostly right in-camera, you’re not going to be able to fix it in Photoshop. You can fix exposure, color, contrast and the way the image appears; you can’t change the content. If an image is good, however, you can make it extraordinary.

_7049521 copy
Color palette and tonality hugely affects the feel of an image. But the content must be there to tone in the first place. Nikon D700, 28-300VR


Part Eight: General tips for all photographers

Here are some suggestions that apply to everybody, regardless of what or how you shoot.

_M9P1_L1007399 copy
Prague. Leica M9-P, 28/2.8 ASPH

10: Shoot raw and expose a little bit hot. There’s always a bit of potential to recover highlights in your raw files; some cameras more than others. Know how much yours can tolerate before blowing highlights completely. It’s not just a way to expand dynamic range; exposing hot and bringing down the exposure later actually reduces shadow noise, too. For those of you using a third party RAW converter that doesn’t read proprietary image settings, crank your sharpening in camera up to maximum – it won’t affect the raw file (only the jpeg preview), but you will be able to more easily see if things are in focus or not when using the image review screen.

_M8_L1017249 copy
But we all have favorites. Billingham Hadley Pro. Leica M8, 50/1.4 ASPH

9: There is no perfect bag. Just accept it, and move on. Buy a new one if it takes your fancy but don’t expect it to solve all of your problems. Most of the time I only use a bag if I have other non-photographic items to transport. If it’s camera-only then it just goes over my shoulder.

_M9P1_L1004990bw copy
At the station. Note clean edges and overall feel of the image. Leica M9-P, 28/2.8 ASPH

8: Watch the edges of your frame. Your subject is identified by a) light; b) position in the composition; c) context. The edges add or remove context – and with it, distractions. Use them carefully.

_PM03439 copy
Spotlight. I’d have missed this if I was fiddling with my settings. Olympus E-PM1, Panasonic 20/1.7

7: Learn your equipment. You should be able to operate your cameras like it’s second nature. Muscle memory is your friend, and can make the difference between responding instinctively and getting the shot, or missing it altogether. Practice is the only way to do this.

_PM03858 copy
The ephemeral sushi. Nothing is in focus, the saturation is all over the place, there are hot spots, the color isn’t accurate…but somehow, it works. Olympus E-PM1, Panasonic 20/1.7

6: Look at lots of images. Famous works. Not so famous works. Flickr. It’s a good source of both inspiration and way of helping you to hone your sense of composition.

_D90_DSC0431bw copy
But surely it will make me a better photographer!

5: Don’t buy new gear unless you’re sure you’re not the limitation. Make sure you know exactly what it is that your current gear isn’t doing for you and how the new gear will solve it.

_PM05623 copy
Homage a Rene Magritte. Prague. Olympus E-PM1, 45/1.8

4: Look at other mediums of art for inspiration. It could be painting, design, architecture; for instance I love the way Magritte renders clouds, and I look for that kind of light when shooting skies.

_M9P1_L1005830bw copy
Gorilla in the shadows, Prague. Leica M9-P, 28/2.8 ASPH

3: Look for interesting light, not just interesting subjects. But of course it’s best to have both. The best photos present an unusual subject in an extraordinary way.

_7036002 copy
Precision. I waited for both the sun and the bird. Nikon D700, 24/1.4

2: Be very, very selective with your keepers. Keep only the best. I throw away 99% of what I shoot. Not because it’s bad, but because if you shoot good pictures, then keeping only excellent will make you excellent after a while; if you shoot excellent on average and keep only outstanding, then you’ll be outstanding. And so on. Continually push and challenge yourself – set assignments, practice, tasks. Go outside of your comfort zone, and the persistence will yield results.

_0012621 copy
Serendipity. Interesting things happen when you stick a compact inside a marine chronometer then do wide-angle macrophotography with it; this was my first time trying it. Ricoh GR-Digital III

1: Shoot lots. Practice, practice, practice. Experiment. If it doesn’t work, at least you’ve learned not to do it. If it does, great – another technique to add to the arsenal. I always get asked ‘how do I pick it up? How did you pick it up?’ and my answer is the same: I experimented and shot a lot. But I also made sure I made a note of what I did, so I learned something from the experience. When I started, I was probably doing a thousand frames a day – 99.9% were crap, of course – but slowly that ratio swung. Always carry a camera – even if it’s just your phone – and don’t be afraid to use it.

Part nine: Birding and wildlife

The focus of this post is on birding and wildlife: it’s something that every aspiring serious amateur photographer will probably try at least once, usually right after they purchase an enormous telephoto lens. Bragging rights are only good if you have the images to go along with the lens.

_3022426 copy

Cattle egret. Nikon D3, 400/2.8 VRII

10: Dress right, bring mosquito/ insect repellant, and carry a bottle of water and a hat. The environment where some animals live can be harsh and remote. You’re not going to be concentrating on the photography if you’re not comfortable.

_3020442 copy

Scarlet ibises. Nikon D3, 70-300VR

9: Pay attention to the time of day. There’s no wrong or right time to shoot, but there is good light and bad light. Bad light is flat and uninteresting, and doesn’t flatter your subject. Good light is always tangential and thus creates contrasts; better still, it can isolate your subject from the background. And if there’s plenty of it, that’s a bonus because you can use a higher shutter speed.

_D3T1396 copy.jpg

Eagle. Nikon D3, 300/2.8 VR + 1.4x

8: A sharp but noisy image is better than a noise-free but blur one. Unless your intention is to be artistic or atmospheric, it’s better to have grain than none but also no idea what the subject actually is. This goes for all subjects, and types of photography: if your subject and composition are strong enough, nobody is going to care that the shot is grainy – look at Robert Capa’s Normandy Beach landing photos.

_D3T1215 copy.jpg

Albino peacock. Nikon D3, 300/2.8 VR + 1.4x TC

7: Use single point continuous AF. Avoid the temptation to let the camera decide the AF point; it will almost never focus on the eyes, and certainly won’t be able to recognize animal faces (except perhaps some chimpanzees.) Continuous AF is necessary because your depth of field is razor thin; a little movement to and fro either by you or your subject can move focus dramatically.

_N212242bw copy.jpg

A thoughtful scratch. Nikon D200, 300/2.8 VR + 1.4x TC

6: Shoot in bursts. Two reasons for this: action usually unfolds in a sequence, and the first image may not be the most interesting; secondly, if you’re using a borderline shutter speed, then the burst helps to negate the effects of your finger pushing the shutter (and also camera). The first and last shots will usually be blur, but the middle group will be sharp because you didn’t have to move your finger in between.

_N210426 copy.jpg

Stealth duck. Nikon D200, 300/2.8 VR + 1.4x TC

5: Focus on the eyes. With all living things, the eyes are the key to the soul. I can’t explain why, but everybody knows that a portrait with the subject looking at the camera is a lot more powerful than one where you just see the back of the person’s head. The same goes for wildlife. Better yet if you can get a catchlight in the pupil, be it the sun or a very small fill flash.

_N208281 copy.jpg

Caught in the act of lunch. Nikon D200, AI 500/4 P

4: Have support. I don’t mean a sherpa team or an agony aunt. The longer the lens, the more support you’re going to need. A 0.1 degree camera movement with a wide lens covering 100 degrees horizontally is going to produce 0.1% blur, which you can probably get away with on a small print; but an 0.1 degree camera movement with a 5 degree field of view – corresponding to a 500mm lens – is equivalent to a whopping 2% blur. That shot will be so bad it might as well be completely out of focus. A gimbal head and solid tripod legs are great, but not very mobile. What I prefer to do is use a stout carbon-fiber monopod and rest my arm on the top of the lens to tension the system; if I’ve got something convenient to lean on, then I’ll use a bean bag to support the lens. This gets worse as your lenses get longer – I normally used an old manual focus 500/4 with 1.4x converter on DX, meaning 1,050mm equivalent. Handheld, this is an impossible combination to aim and hold, let alone get a steady shot with. With the monopod technique, 1/50s was routinely possible.

_7030609 copy.jpg

Angry cassowary. Olympus E-410, Nikon AI 500/4 P + 1.4x TC

3: Know our subject. Do your research, learn behavioral patterns, feeding patterns and anything else such as favorite watering spots or trees; the more you know about your subject, the easier it will be to find it and go unnoticed. Also, identify rare or unusual behavior – further adding something unique to your image.

_1D31619 copy.jpg

The bird with the sun hat. Canon 1D Mark III, 500/4 L IS

2: Patience, patience, patience. The rarer your subject, the longer it’s going to take for you to a) find it and b) get into a position where you can shoot it, or where it stays still for long enough for you to get a good image. Give up and call it a day only when you absolutely can’t stand waiting any longer; some of the most stunning wildlife images – think of the BBC Planet Earth series – were only captured after years of waiting.

_MT70034bw copy.jpg

Dancing flamingoes. Nikon D2H, 55-200/4-5.6 DX

1: Be ready and stay alert. Usually most interesting action happens in a split second; if you’re not ready with your settings fixed and your finger on the shutter, you’re going to miss it. This one seems to conflict with #2, but it really doesn’t; it’s what makes wildlife photography so difficult. Endless waiting, but the need to be vigilant. In the end though, the results pay off.

More of my nature and wildlife work can be seen here on flickr

Part 10: Macrophotography

_7051614 copy
Lange Datograph. Nikon D700, 60/2.8 G

10: Watch your reflections! Every time I shoot something polished and reflective, I keep thinking of this viral internet meme called reflectoporn. Don’t google it. You have been warned.

_7053570bw copy
Jaeger Le-Coultre Gyrotourbillon 2 tourbillon. Nikon D700, 60/2.8 G with 72mm extension.

9: Use bellows or extension tubes to get more magnification. I’ve got both; remember you need to compensate exposure for light loss as your magnification increases. The Nikons do this automatically, but most other cameras don’t. Macro lenses and extension tubes/ bellows work great; make sure they’re high quality items because cheap ones will have non-planar mounts, and result in odd distortion. Note that some lenses won’t work with bellows or tubes because they either bring the focal point inside the rear element of the lens, or the lens design isn’t compatible because the focusing elements are internal.

_3024681 copy
There’s no way you’re getting the entire dragonfly in focus without focus stacking. And they don’t stay still for that long. Nikon D3, 105/2.8 VR + 1.4x TC

8: Diffraction vs. DoF: a tradeoff. Pick one. As you stop down more, your DoF increases; but go too far and you also start to lose resolution because of diffraction. Exactly when this kicks in depends on your focal length and the pixel pitch of your camera; on the D700 with a 60mm lens, it starts around f22 and becomes very noticeable by f32. There are a couple of solutions: use a shorter focal length – the 35 ASPH FLE gives me more DoF by f16; or use a tilt shift lens.

_N201289 copy.jpg
Ants are skittish. Don’t get too close. I’ve had bugs jump on my lens before. Nikon D200, 105/2.8 VR

7: Working distance is your friend. There’s more room for lighting, and less chance of disturbing the subject (especially for those of you who shoot small bugs or insects). For product shoots, since you’re further away, reflections are smaller – and thus require less retouching.

_7055968 copy
Speake-Marin Immortal Dragon. Nikon D700, Zeiss ZM 2.8/28 Biogon

6: Macro lenses are used for macro work for a reason. That’s because they’re optimized for near subject distances; the plane of focus is flat and they have correction for common aberrations (spherical, lateral CA, LoCA) especially close up. With a normal lens, as you get closer, the aberrations and distortions get more and more obvious – which is why you don’t want to use a normal lens and extension tubes. There are two exceptions: when you have no choice, and when using certain particular lenses. A good example is the Leica 35/1.4 Summilux-M ASPH FLE; who’d have thought a documentary/ reportage lens with a 70cm near focus limit performs spectacularly on a D700 with extension tubes?

_7057011 copy
Jaeger Le-Coultre Gyrotourbillon I. Nikon D700, Leica 35/1.4 Summilux-M ASPH FLE

5: Continuous light sources are good. Not for primary lighting, but for helping focus and composition. Better yet if you mirror your lighting position with the secondary lights. I use a pair of 120 LED video light panels.

_7051800 copy
Critical focus plane. Roger Dubuis MuchMore. Nikon D700, 60/2.8 G + 36mm extension tube.

4: Use DOF preview to check your composition. DOF preview? Composition? How are there related? Simple: as you stop down, your composition changes again. And there’s a big difference between f2.8 and f22 at macro distances.

_7003522 copy
Sinn 556. This looked very different in the finder because almost nothing was in the plane of focus. Nikon D700, 60/2.8 G

3: Clean your subject well! The better the lighting, the more uniform the subject texture, and the higher the magnification, the more dust you’re going to see. It’s much easier to clean the real object than try to do it in photoshop.

_7052413-33 copy
Lange Datograph. Nikon D700, 60/2.8 G. Focus stack of 20 images with bellows and extension tubes. Magnification set, then camera moved on a rail. If I didn’t, the images wouldn’t align properly because they’d all be at different magnifications. The blue screws at left are about 0.5mm across.

2: Set magnification, not focus. What’s the difference? Each lens gives a certain magnification ratio for a particular focus distance; if you focus first (or only focus) then you’ll find the composition changing – especially at the borders – as the image snaps into focus. I decide how much of the subject I want to cover, and then move the camera to focus. This is especially important at high magnifications – I work all the way up to 6:1.

_7044210 copy
Speake-Marin SM2. A short exposure time stops the balance dead – and this thing rotates through 270 degrees eight times per second. Nikon D700, 60/2.8 G + 72mm of extension tubes.

1: Keep your exposure times short. You’re going to be wondering how. I use a flash and the highest sync speed the camera supports; because you’re stopped down and at base ISO, 99.9% or more of the light comes from the flash. And flash times – even at maximum power – are less than 1/1000s usually. Lower power ratings are even faster – this is more than enough to stop camera shake even at very high magnifications. The upshot? I don’t use tripods; they’ve been relegated to holding my flashes! I value the freedom of composition given by handholding the rig. The one exception to this rule is when I need to do focus stacking.

_7046623b copy
Be creative. Girard Perregaux F1-047. Nikon D700, 60/2.8 G

More of my watch work can be seen here on flickr

____________

Visit our Teaching Store to up your photographic game – including Photoshop Workflow DVDs and customized Email School of Photography; or go mobile with the Photography Compendium for iPad. You can also get your gear from B&H and Amazon. Prices are the same as normal, however a small portion of your purchase value is referred back to me. Thanks!

Don’t forget to like us on Facebook and join the reader Flickr group!

appstorebadge

Images and content copyright Ming Thein | mingthein.com 2012 onwards. All rights reserved

Long lens technique and tips

_3032710 copy
Snow duck, Hokkaido, Japan. Nikon D3, 70-300VR

Today’s article is going to be a little bit out of character for me – one of my great photographic passions used to be birding and wildlife; I don’t know how I got drawn into it, but my neighbor (and Photoshop guru, illustrator Gordon Hurden) happening to be on probably had something to do with it. I gladly spent my weekends in humid swamps, with nothing but mosquitoes and bugs for company; fortunately I managed to avoid dengue despite averaging at least a dozen bites from every session – inevitably on the tiny slivers of skin I’d forget to cover in repellant. I learned three important things from this period in my photographic career: one, patience and timing are everything; two, know your subject; and three, how to handle a long lens.

_D3T1396 copy.jpg
Eagle-Hawk. Nikon D3, AFS 300/2.8 VR

The first thing I can’t teach you, unfortunately; the second requires self-study, and the third is the subject of this article. For the purposes of simplicity, I’m going to wear the hat of a wildlife photographer, and discuss exceptions/ applications to other types of photography (sport, landscape, macro) at the end of the article. But before we begin, there are some golden rules that need to be shared and explained:

_N213460 copy.jpg
Gray heron in flight. Nikon D200, AFS 300/2.8 VR + 2x TC

Forget about hand holding: Sure, you might get off a good shot or two, but try hefting that thing around all day and not getting tired – even if you are built like Arnie in his heyday, you’re not going to be at all stable. Remember: the longer the lens, the higher the magnification; the higher the magnification, the more obvious a given degree of angular shake is going to be proportional to the size of the frame (angular frame coverage decreases as focal length increases).

You get what you pay for: Cheap, optically good, and fast: when it comes to long lenses, pick any two. There are no bargains in the super telephoto world, unless you count some of the older manual focus lenses; then you lose AF, VR and gain a whole load of weight (no carbon-fiber hoods and helicoids here). This also applies to heads, tripods and any other part of the system you can think of.

Size does matter: For small, nervous animals – some birds are a great example of this – you can never have enough millimeters. And more millimeters means more reach, but also more shake. More shake means you need to go up a size for tripods, heads, etc – anything that forms part of your imaging system and associated supports.

You may be perfectly stationary, but your subject isn’t: Even if your system is rock-solid and can give you a perfectly sharp image consistently at say 1/10s and slower, your subject is probably not going to be able to stay still for that long – don’t forget this when you’re trying to figure out why there’s still motion blur in your image: it may not be from your camera or tripod.

_N214856 copy.jpg
Bluetit. Nikon D200, AFS 300/2.8 VR + 2x TC

With that in mind, let’s take a look at the things we can do to minimize camera shake.

Increase shutter speed.
This seems like a no-brainer, but the inevitable tradeoff is shutter speed against noise: would you rather have a blurry image, or one that’s sharp but noisy? Personally, the latter gives you some options for processing afterwards, but the former may just land up being frustrating. Throw the 1/focal length rule out of the window: how slow you can go depends on your technique/ support system and subject – I limit this to about 1/60 with relatively lethargic birds, and 1/500 for hyperactive ones (hummingbirds are a good example). 1/60 also avoids the danger zone of most support systems, and You’re not going to be able to handhold a 600mm lens at 1/600s, so give up that idea.

_N212587bw copy.jpg
Duck. Nikon D200, AFS 300/2.8 VR + 1.4x TC

Mirror lockup.
Most the vibration in an exposure comes from either the action of depressing the shutter, or recoil from the mirror raising into position immediately before the shutter fires. The shutter itself is designed to be as light as possible with very little inertia so it requires little energy to move; it contributes relative little shake. Although mirror lockup (or at very least, a self timer) is a great way of removing this issue from long exposures, the main problem with wildlife photography and mirror lockup is that response is not immediate, and you’ll almost certainly land up missing the critical moment. The best way around this is to use live view, and fire the shutter that way – on most of the newer live view cameras (D800 and D4, for instance) the mirror doesn’t have to cycle before firing a frame; only the shutter fires, resulting in much lower vibration. Some cameras even have an electronic first shutter option (D4) which further lowers vibration. Needless to say, the mirrorless CSCs are the best type of camera for this kind of work thanks to their combination of reach/ crop factor and lack of a mirror; it’s just a shame that there are no serious long lens options currently available. (A good 300/4 wouldn’t cost that much and give 600/4 equivalent reach and speed – are any of the manufacturers reading this?)

_N212564 copy.jpg
Grooming. Nikon D200, AFS 300/2.8 VR + 1.4x TC

Continuous AF, or manual focus
Long lenses have extremely shallow depth of field; if your subject (or you) move by a small distance, this is very obviously translated into the focal plane sand not covered by depth of field; you will need to either use continuous AF, and control the point used manually (hint: cover the near eye of your subject) or focus manually. I did most of my wildlife photography with an old manual-focus Nikon AI 500/4 P telephoto, which was both lighter than the autofocus versions, as well as being considerably cheaper.

_N208163 copy.jpg
Moorhen. Nikon D200, AI 500/4 P and 1.4x TC

Shutter technique
I mentioned the act of depressing the shutter earlier – jabbing vertically at the button is almost certainly going to ruin your exposure through photographer-induced shake; slowly stroke the button instead from left to right, or roll the pad of your finger onto it from right to left. Either way, be gentle. Curiously the position of the shutter on the top plate makes depressing it especially susceptible to causing camera shake; I don’t know why none of the camera makers have cottoned on to this and implemented a more vertical release instead – squeezing the grip would produce far less shake, and still be just as ergonomic, if not more so. The only cameras that come to mind with a nearly vertical release are the old Olympus C-8080 and to a lesser extent, the Leica S2 – none of which are at all suitable for wildlife photography.

_N212512 copy.jpg
Hanging on. Nikon D200, AFS 300/2.8 VR

Tripods
A good tripod is your best friend, and a must for prolonged telephoto lens use. Monopods are better for mobility, but lack the ultimate stability and require constant attention to keep upright – a tripod, on the other hand, is happy to stand by itself all day (unless attacked by a bear) and is far less fatiguing to use. It’s tempting to get something light – especially since you know you’re going to have to carry it to the shooting location, which might be quite far from your transport – but don’t fall into that temptation, even if some of the lighter tripods have higher load ratings than your camera system. The reason for this is small tubes – both in thickness and diameter – will be far less effective at absorbing vibration than larger ones, and smaller joins will always be less rigid. Again: you get what you pay for. Carbon fiber is preferable to steel or aluminum because of both weight and damping properties; the orientation of the weave helps with this. Wood is also another option, but a bit heavier and not so happy with moisture. I highly recommend the Gitzo 5-series systematic tripods for serious telephoto users.

_N209570 copy.jpg
The only good image I managed of a robin – they’re fast fliers and don’t stay put for long. Nikon D200, AI 500/4 P

Monopods
If you need to run and gun, or are shooting with better light, or don’t plan to be out for long, then consider a monopod – it’s lighter, easier to set up, and more flexible. The same rules apply as for tripods – get the thickest, sturdiest one you can find; either attach it directly to the lens foot, or use a rigid monopod head (that permits only tilt) to minimize slop in the system. With the right technique, (see bracing below) I’ve been able to get critically sharp results from a monopod and 750mm equivalent lens at 1/30s. Note: monopods are not recommended if it’s windy; enormous lenses and their hoods tend to act like sails and windsocks and start to swing about a bit in the breeze.

_M223240 copy.jpg
Lorikeet portrait. Nikon D200, AI 500/4 P

Heads
There’s no point in spending a lot of money on a good tripod or monopod then letting it down with a lousy head – this is the critical portion of the support system. The most important thing is that the head must not be able to suddenly unlock and let go of your lens; this will make it both highly likely to result in an expensive accident, and difficult for you to adjust framing precisely. At very least, use a ballhead with tension control; I like the Manfrotto 468MG Hydrostat series. Ideally though, you probably want a gimbal head of some sort; this allows you to leave the system unlocked (providing you’ve mounted the lens at its balance point, of course) and simply aim the camera like a good artillery piece. Monopods should either have no head (screw the top of the monopod straight to the lens foot) or a dedicated monopod-only head to provide tilt. And this may sound stupid, but don’t forget to lock down the rotating collar on the lens – if it didn’t have any play in it, you wouldn’t be able to turn it. But at the same time, that play is death to stability.

_1D31556 copy.jpg
Black-crowned crane. Canon 1DIII, 500/4 L IS

Beanbags
If you have something to lean on, like a tree trunk, vehicle door or a wall, a beanbag can be an interesting option because it’s both stable and allows for a range of positioning; the beans mould to the shape of the lens and absorb vibration. In fact, this is one of the most stable support methods available. A cheaper (but heavier) alternative is a sack of rice. Just make sure you don’t let go of the lens, because it’s not attached to anything…

_M80_DSC4930 copy.jpg
Hummingbird. Nikon D80, AI 500/4 P + 1.4x TC

Bracing
Bracing the camera lightly against your forehead via the eyecup is also a very effective way of dampening motion, because it couples it to the greater mass of your body. This is critical for monopod users, and of less importance for tripod shooters. In addition, if you’re using a monopod, it’s a good idea to put a little pressure on the monopod to keep everything under tension; hard to describe but what I usually do is stub one toe into the monopod’s foot, hold the camera at the grip and put a hand over the attachment point of the lens, whilst pushing forward slightly on the whole rig. This anchors the monopod firmly to the ground, as well as preventing the end of the lens from wobbling.

_N210426 copy.jpg
Stealth duck. Nikon D200, AFS 300/2.8 VR and 1.4x TC

Breathing techniques
Similar to bracing, this is of importance to monopod users, but less so for tripod users as you should be shooting with the head locked down, and the entire setup static. Monopods are never static by definition, so you need all the tricks in the book to maximize stability. Don’t hold your breath when you shoot; this actually increases your heart rate over time. If you’re using a long enough lens – around 700mm and up – and hold your breath and stabilize the camera against your forehead/ eye socket, you’ll actually see the finder jump a little every time your heart beats. This is obviously counterproductive. The best technique to maintain an even heartbeat (shared with me by a competition pistol markswoman) is to exhale slowly when firi…oops, I meant depressing the shutter button.

_7190026 copy.jpg
Cattle egret. Olympus E-410, Nikon AI 500/4 P

Burst shooting
Since we’ve already established that mirror lockup is not practical for wildlife photography because of the lag involved, the next best thing is to shoot in three-shot bursts – this helps with both finger-induced motion (your finger is static for the middle burst) and mirror-induced motion, and works best with high frame rate cameras. The idea is that the camera will be displaced during the first frame, stay there during the second, and move back to the rest position during the third (where you lift off) – all I can say is that it works.

_7030609 copy.jpg
Cassowary portrait. Olympus E-410, Nikon AI 500/4 P

Stabilizers
Optical stabilizers work much better than sensor-based ones when using long lenses – this is because being at the nodal point of the optical system, they can correct for a much greater range of angular motion. However, they have their limitations – above a certain shutter speed threshold, stabilizers should be turned off; they simply don’t react fast enough and can actually cause double images. If you’re locked down on a tripod, they should be turned off too; these systems have a tendency to overcompensate for small movements of the kind that might be experienced on a tripod. Finally, although they can reduce camera motion, they can’t compensate for subject motion. Most of the time, I shot with stabilizers off.

_7020985 copy
Polo. Nikon D700, AFS 28-300VR

Application to sport photography
Most sports are shot at high enough shutter speeds (to freeze action) that a monopod is sufficient, stabilizers aren’t really required, and although the refined techniques described above can help, they’re not strictly necessary until you start to get into the borderline 1/500s region – (due to the necessity to freeze fast action). Tripods generally get in the way and don’t allow the photographer to respond fast enough to changes in action.

_M102965 copy.jpg
Blue mountains, Courchavel, France. Nikon D2H, 70-200/2.8 VR I + 1.4x TC

Application to landscape photography
Although landscape photographers tend to not use such long lenses, a sturdy tripod is still recommended especially if long exposures are required; here mirror lockup (or at very least, the self timer) will help immensely with stability. Most support systems have issues around the 1/10-1/50s region; try and avoid this if possible, especially with longer focal lengths.

_3024681 copy
Prismatic red eyes. Nikon D3, AFS 105/2.8 VR

Application to macrophotography
At first glance, this may seem out of place, but in reality, macrophotography techniques are quite similar to those for handling long telephoto lenses; stability is paramount, and the smallest camera movement is hugely magnified. The main difference is your ability to control subject lighting with flash; this allows you to freeze motion (both camera and subject) through an artificially short exposure time – limited to the actual flash duration. All of the tripod-based techniques described above are useful to the macrophotographer; I can’t think of any situation in which a monopod would be useful.

You might also enjoy my review of the Gitzo 1542 Traveller and 5562 Systematic tripods here.

____________

Visit our Teaching Store to up your photographic game – including Photoshop Workflow DVDs and customized Email School of Photography; or go mobile with the Photography Compendium for iPad. You can also get your gear from B&H and Amazon. Prices are the same as normal, however a small portion of your purchase value is referred back to me. Thanks!

Don’t forget to like us on Facebook and join the reader Flickr group!

appstorebadge

Images and content copyright Ming Thein | mingthein.com 2012 onwards. All rights reserved

Teaching update: Photoshop workflow DVD, August Email School intake

1. By popular demand…presenting Ming Thein’s Introduction to Photoshop Workflow DVD!

Thank you to everybody who participated in the earlier survey on whether a DVD covering my Photoshop workflow would be useful – it seems that nearly a thousand of you thought it would be, and that’s more than enough justification for me to produce one. I’m just sorry it’s taken this long – commercial work and everything else gets in the way…

However, I’m pleased to announce that the DVD is finally complete and available for sale; it covers:
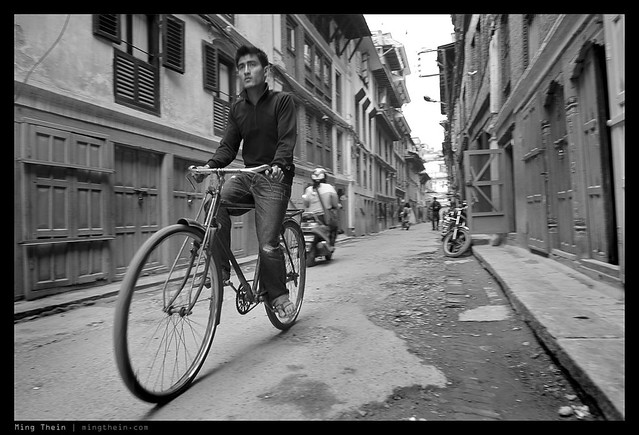
  • A basic explanation of the working environment of Bridge and Photoshop, following CS5.5 (CS3,4, 5 and 6 are similar; I don’t use any tools here that aren’t available in the other versions, so it’s a very flexible workflow)
  • A runthrough of the functions of Camera Raw
  • My personal workflow – if you’ve ever wondered what my postprocessing process is, or how I get the style and look you see on the site and in my commercial work, this is for you.
  • Several end to end processing examples – I’ve picked a number of files that I’d consider difficult or processing-intensive to use as step by step walkthroughs.
  • The Camera Raw portion – where about half the work is done – also applies to Lightroom and Photoshop Elements, too. The buttons may be different, but the fundamental principles of tools don’t change between software – dodge is dodge, burn is burn, and curves are curves.

Total runtime is about 1h 15min.

Checkout now via PayPal

This will be the first in a series of many DVDs in which I’ll spend more time detailing and explaining the various functions of Photoshop and their application to photographers, but it makes the ideal starting point for anybody who would like to get started in serious postprocessing, or perhaps are wondering why their images lack that punch and sparkle.

Please note – for KL residents, happy to do MEPS – please send me an email to make arrangements.

2. Email School of Photography August intake

I’ve now cleared the pipeline somewhat, which means I can take on a fresh batch of students for my Email School of Photography – more details here. It’s a unique, fully-customized correspondence course tailored to your skill level and photographic objectives – learn what you want to learn, at your convenience. So for all of you who were on the fence, now’s the time to sign up.

The course is just US$800 for ten sessions including a detailed portfolio review; once again payable via paypal to mingthein2(at)gmail.com.

Thanks in advance for your support – all these little things help me keep producing content and keep this site running. MT

____________

Visit our Teaching Store to up your photographic game – including Photoshop Workflow DVDs and customized Email School of Photography; or go mobile with the Photography Compendium for iPad. You can also get your gear from B&H and Amazon. Prices are the same as normal, however a small portion of your purchase value is referred back to me. Thanks!

Don’t forget to like us on Facebook and join the reader Flickr group!

appstorebadge

Images and content copyright Ming Thein | mingthein.com 2012 onwards. All rights reserved