Contact sheets, and how to use them

This article is a lead on from my earlier review of the Magnum Contact Sheets book.

Contact sheets are a tool that date from the days of film: basically, the developed negatives are laid out directly on top of photographic printing paper, exposed for the appropriate duration, and fixed. They aren’t ‘proper’ prints per se, but a provide the photographer and editor a quick way of looking at all of the images in a sequence at once.


A printed (or from negatives) contact sheet would probably look something like this.

The photographer would then mark out his first and second cut images, followed by the verification from the editor; the chosen images would then be printed properly from the original negatives, with any tweaks required (such as dodging and burning, increasing exposure, changing print density etc.) With the analog photography process, that marked the end of the line for the photographer unless they also did their own printing – which was rare.

Interestingly, contact sheets were considered something of a luxury item for photographers because of the cost of producing them – especially when there were a lot of rolls of film to go through – most photographers just used a loupe and light table, or if desperate, held the negatives up to a window.

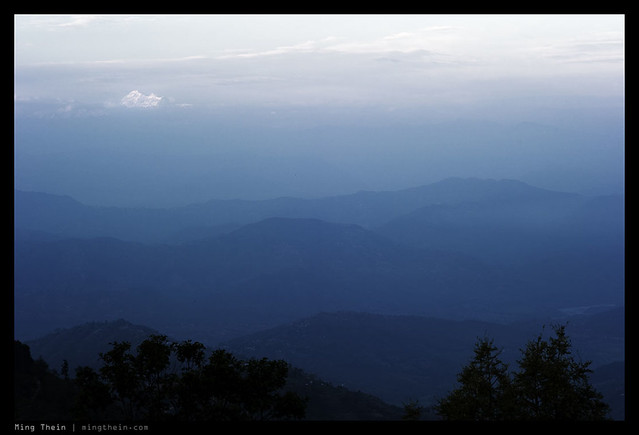
Contact sheets still remain a useful tool, not just because they allow you to see all images at once and judge their relative merits, but also because they force you to look at the distilled essence of an image: if a shot makes a compelling thumbnail, it’s generally also quite powerful at larger sizes. However, the reverse isn’t true: some shots need to be printed large to work well, landscapes, for instance. With images like this, contact sheets aren’t necessarily the best tool (unless you’re shooting medium format, or have larger thumbnails to work with).

Not shooting film? Don’t worry. We can still do the same thing today in the digital world. Photoshop itself has an automated tool (File>Automate>Contact Sheet) to create contact sheets of images; these are useful to print or send to clients. Alternatively, programs such as Bridge and Lightroom effectively let you create digital contact sheets which you can interact with on the fly:


Today’s contact sheet: screenshot of Adobe Bridge, thumbnail view.

What these programs let you do is a) see everything at once; b) see only the ones you wanted; c) use a magnifying loupe to check sharpness on a particular image or several images to compare; d) here’s the important bit: rate images. With Bridge and LR, Command-[number] lets you tag a star rating from 1-5; later on, you can filter by images rated at a certain level or above. And it works for raw files too, so long as the camera is supported by Adobe Camera Raw.

My current process is to keep all images from a shoot (except the obvious duds or unsuccessful experiments, which I bin in camera) and then conduct a first pass edit using the contact sheet view as soon as they’re in the computer – I’ll rate my images 3, 4 and 5*; 3* are kept because they’re useful for stock or remembering a particular event; 4* are good images and deliverable to clients; 5* are portfolio grade, best-of. The rest aren’t worth keeping and get binned. I’ll work on the 5* images first, and go down the quality ladder from there. That way, my best images are immediately ready to go, and if I don’t get a chance to make a final file (analogous to printing) of the 3*s, I can always come back later.

As photographers, we often fall into the trap of either being overcritical (bin all) or sentimental (bin none) – neither approach is good. For personal work, using contact sheets helps you to edit and see what worked and what didn’t (and by combination, what ideas might work in future if combined). On assignment, it lets you see the relative merits of each image and ensure that you’re only turning in the very best. Contact sheets are a powerful tool to help you achieve this – and the cost of printing is no longer really an excuse. MT

Look out for a future article on Editing: how to select images.

Perspectives, revisited

The two images below demonstrate the difference between choosing your perspective before you shoot and then composing around it, against choosing your angle of view then just picking whichever focal length happens to match where you are standing:

_3027115 copy
2008. (Yurakucho, Tokyo; Nikon D3, 24-70)

Being self-critical, I was trying to ensure that all parts of the frame were filled; shooting with 24mm on full frame was a new experience for me, and the one mistake I continually made was not putting the subjects close enough to the foreground to be identifiable. Whilst a visually appealing image with nice lighting and geometry, there’s no real focus; the man should be in the gap closer to the traffic light to balance out that space. The most important thing to note here is that I wanted to get the whole scene in the frame to give it context – but failed to put a subject in.

_M9P1_L1003753 copy
Late 2011. (Vienna U-Bahn, Leica M9-P, 50/1.4 ASPH)

Note how the diagonals converge onto the center of the image, precisely where it’s focused; there’s symmetry in the arrangement of the people to the left and right of the pillar, which balances the composition. I was shooting with a normal lens this time, and still managed to get some perspective in the frame. The red frame further focuses your eye onto the subject, which (in a large print) would be clear – the sign. The image is a metaphor for choices – left, right, back, forward – everybody is different, so everybody makes the choice that suits them best, which is why there are people on both sides of the platform. I’m pleased with this image now, but I have no doubt that I’ll find something to improve on if I look at it another five years down the road.

Metaphors and stories in an image aren’t so easy to capture, especially when you only have a very short amount of time to get the shot – most of the time it’s instinctive, if you happen to capture anything of deeper meaning at all. If you don’t, try again and practice until it does actually become intuitive. I’ll be the first to admit that I don’t manage this consistently, and it’s something I need to work on. MT

How-to: Improving your autofocus performance with the AF Fine Tune setting

Over the last few days and in the light of focus criticality with the Nikon D800, I’ve had a huge number of questions specifically regarding focus precision, and whether there’s anything we can do about lenses that are obviously off. Specifically, how does the AF fine tune setting work, and how does one calibrate their lenses?

1. Make sure your camera has AF fine tune. Any of the newer Nikons or Canons offer this feature, and perhaps other brands, too.

2. Find a suitably well-lit target that you and the camera can focus, and preferably one that’s flat but slightly off-plane to the camera, so it offers a variety of different focus distances. An ideal test chart is a world map on a wall, but with the camera to a slight angle to the wall (i.e. sensor plane is not perfectly parallel.)

3. Use a sturdy tripod, and set single AF. This is to rule out camera shake or false-AF movements from the camera attempting tracking.

4. Perform this test with the aperture set wide open. Stopped down, depth of field will hide focus errors.

5. If you have live view (I believe most cameras with AF fine tune do), then use magnified live view to achieve critical focus and take one shot. This will be your benchmark image – the sharpest that the lens can possibly deliver, when focused perfectly.

6. Switch back to single AF, and viewfinder mode.

7. Defocus the lens between attempts: this is important, otherwise the camera may be trying to move the focus gearing in too small an increment to overcome backlash.

8. Let the camera focus normally, and take a shot.

9. Compare the image from step 5 with the image from step 8 – if they’re the same at 100% size, then you’re fine – move on to the next lens.

10. If the images from 5 and 8 aren’t the same, then adjust the AF fine tune setting – say by 5 notches (if you have +/- 20 notches like the Nikons) and repeat 7, 8, and 9. If it’s better, keep going – do another 5-notch adjustment in the direction that created your improvement. If worse, then go back in the opposite direction. Reduce the adjustment amount changes and keep going. Basically, you want to iterate the process until you match your viewfinder-AF image with your live view focused image.

11. Save the adjustment value – if you can’t save camera settings to a card, you might want to write it down somewhere just in case.

12. Repeat for all of your other lenses.

A special note for zooms: most AF fine tune functions don’t let you input separate values for different focal lengths, so you’ll just have to try both ends of the zoom range and see which is worse; then run steps 1-12. Try to find a compromise setting that works acceptably well for all focal lengths in the range. Or, if you use one particular end of the zoom more than the other, you might want to weight your adjustment to this end of the range. MT

Watch photography, part three: Getting Serious

The final article in this mini-series assumes the reader has familiarity with photographic technique and terminology, as well as the right equipment. The entry point here is a camera with a dedicated macro lens: DSLRs and ILCs (Micro 4/3s, Sony NEX etc).

Reposted from my original article on Fratellowatches from late 2011.

P1070237b copy.jpg
All images can be clicked for larger versions. 

I will start by saying one thing: by and large, what camera or lens you use does not really matter, beyond the lens focal length and maximum magnification. Why? Because you will be shooting under conditions where you can almost always extract maximum image quality from the camera, which has been sufficient for the most demanding applications for some time now. Either you will be using a sturdy tripod or flash, in either case, always shooting at base ISO and with good optics. Most macro lenses are extremely good, even the third party ones; it is not difficult to make a slow-ish aperture normal or short telephoto with high resolution.

That said, I have been shooting Nikon for my watch photography work since 2004; not because of the cameras or lenses (both excellent), but because it had the best flash system; most accurate metering and the ability to remotely control multiple flashes using the built in unit on the camera. As I said earlier: lighting control is critical. All of the Micro-Nikkors are excellent; I currently use the AFS 60/2.8 G because it has the lowest lateral and longitudinal chromatic aberration of the current bunch, and enables maximum magnification with the minimum number of extension tubes. I use a D700 most of the time, or a D5100 if I need additional magnification (1:1 magnification means a 24x36mm subject on the D700, or a 18x24mm subject on the D5100.)

_3002581 copy.jpg
DIY diffuser, made from mount board and tracing paper. Cut a hole in the bottom for a tripod mount.

Let’s talk about lighting. I use a self-built diffuser box with movable panels; it allows me to control very precisely the amount of light and specular highlights seen on the subject inside it. It’s not that big, but big enough to photograph a whole watch without seeing the edges of the diffuser in the frame.

_M221265 copy.jpg
View from behind the camera.

I also use multiple flashes, controlled by the pop-up unit built into the camera as mentioned earlier. One flash will give strong, directional lighting; it’s nice but sometimes variety is good, and fill is required. It may not be enough if you have to stop down to extreme apertures to get sufficient depth of field, though. Especially if using diffusers. Two flashes are generally enough for all situations; one primary light and one to provide fill, or light your background. Three flashes is overkill unless you want very flat, even lighting; this generally lands up being boring because everything is too evenly lit.

_M221269 copy.jpg
This is pretty close to my current setup, minus the tripod

Experiment with where you put the flashes, and how you angle the watch; Blu-Tack or plasticine is your friend here. It’s also very useful for removing stubborn dust specks; I will typically spend up to fifteen minutes cleaning and dusting a watch prior to shooting. It’s much easier than having to retouch it after the shot.

_7040024 copy
There’s a catch: some things you just don’t retouch, like this vintage Fifty Fathoms.

I don’t use a tripod. I find it restricts the spontaneity of my compositions. If I need precise positioning for high magnification work – with extension tubes, for instance – I will brace my hand against the table. How do I avoid camera shake? Simple – the flashes do the work for me. Set your camera to the maximum sync speed – usually 1/180, 1/200 or 1/250s – and light from the flash will be nearly 100% of the light captured by the camera, especially if you are shooting indoors with the lens stopped down. The actual duration of the flash pulse is even shorter; don’t worry about motion blur.

_7046234 copy
Extension tubes give you serious magnification. Patek 5055

_M220809 copy.jpg
This isn’t a crop – the full frame shows every single perfect (or imperfect) detail. Lange 1815

Two special pieces of equipment I want to mention are extension tubes and tilt-shift lenses. Extension tubes are basically spacers that sit between the lens and camera and allow you more magnification; (you lose infinity focus, but you weren’t using that anyway). They usually have electronic contacts for the camera to communicate with the lens. You will have to switch to manual focus and set magnification on the lens, then move the camera. Depth of field decreases dramatically as magnification increases; even with relatively short focal length lenses like the 60mm, the best autofocus systems simply can’t cope.

_DSC0558bw copy.jpg
Note interesting depth of field plane: Girard-Perregaux Tourbillon Sous Trois Ponts d’Or, Nikon D2Hs with a PC 85/2.8 tilt-shift macro. Phew, that was a mouthful.

Tilt-shift lenses allow you to use an optical trick known as the Scheimpflug Principle to get more depth of field for a given aperture; effectively you are tilting your plane of focus parallel with your subject plane so that more of your subject is in focus. It can be an effective way of increasing your depth of field, but requires some practice to use effectively. Unfortunately, magnification on these lenses is typically restricted to 1:2 or less, limiting high magnification use (ironically where they would be most useful) due to the unwieldy number of extension tubes required to achieve sufficient magnification.

_M80_DSC3872 copy.jpg
Art or too much Photoshop? AP Royal Oak Jumbo

I’d like to conclude by talking about postprocessing. Photoshop used to be a dirty word amongst photographers, with the implications of changing the content and removing or adding things from the frame. Whilst you can use it for that, a better way to think of it is your digital darkroom. The curves tool is especially handy for controlling contrast. Used together with the masking tools, you can very effectively control the contrast across the different parts of your image; for instance, you might want more contrast in the movement, but not in the case or background; you can just mask off the movement and work on the different portions separately. Likewise, it’s important to shoot RAW to get full control over your exposure and color balance; I frequently tweak the color channels of my image using the Hue/Saturation tool once I’m happy with the contrast. Finally, you can deal with the inevitable dust: some photographers may not care, others – like myself, a holdover from my commercial photography days – are militant about every last speck. The healing brush and clone tools are your friend here; but the better a job you do with cleaning the real object, the less you have to deal with afterwards. Pay particular attention to any fingerprints – they are almost impossible to remove digitally.

_T3X0696 copy
No trickery here, just reflections. Glycine Incusore Blackjack

You’ll notice I haven’t mentioned film here anywhere. It is still a viable alternative for watch photography, but the main problem is that it is very difficult to visualize the output and make the appropriate adjustments; most metering systems will require tweaking to cope with complex situations like multiple off camera flash + diffusers + little working distance between camera and lens. That said, I have shot commercial grade watch work on a Nikon F2, calculating guide numbers manually and using flash stacking to replicate the effect of multiple flashes.

_7046087 copy
Surprise!

Try and introduce an element of surprise into your shot: it gives the viewer something different and memorable. It might take a few tries to get it right, but that’s the beauty of experimentation – you never know what you might get out of it. Lastly, have fun. Unless it’s work, if you’re not having fun, perhaps you’re taking it too seriously and it’s time for a break. MT

_7057662 copy
Breguet La Tradition

If you want to get really crazy, you could always try shooting watches with a Leica M system.


Watch photography, part two: Using what you’ve got

Part two. Reposted from my original article on Fratellowatches from late 2011

_0012664 copy
1950s GUB Deck Chronometer, Ricoh GR Digital III. Click all images for larger versions.

Don’t think you need to immediately rush out to buy a DSLR, macro lens and lighting setup to capture good images. They help, but good work can still be done with a compact camera that has a macro mode, and some creative lighting and composition. Side note: every image in this article was shot with a compact camera.

_0012621 copy
1950s GUB Deck Chronometer, Ricoh GR Digital III. Click all images for larger versions.

There are two major differences between compact cameras and DSLRs/ ILCs (Micro Four Thirds, Sony NEX and the like). The first is that almost every compact camera has a macro mode; this tells the camera to allow the lens to focus closer, and in some cases locks the lens to the minimum (i.e. widest) focal length. In every case, closest focus and maximum magnification with a compact will be achieved with the lens at its widest position. Zooming in will usually result in the camera not being able to find focus. Whilst you can typically get within 5cm; and in some cases, 1cm; you are going to have huge perspective distortion. This is a property of wide angle lenses; objects closer to the camera will have a much greater relative share of the frame than those further away. This can be useful in some cases.

P1000573b copy
Sinn 756 S UTC. Panasonic LX3.

The second major difference is that depth of field – controlling what is in focus and what isn’t – generally isn’t an issue with a compact camera, as a consequence of the small sensor and requisite optics mean much is in focus all of the time. A larger sensor camera will allow you to selectively focus on objects – and in some cases, even be unable to achieve sufficient depth of field to get the entire watch in focus at an angle without resorting to some trick optics, or stacking software.

_780_IMG_1052b copy
See my review of this watch on Fratellowatches: Jaeger Le-Coultre Reverso Grande GMT. Canon IXUS SD780IS.

IMG_0799b copy
Nomos Tangomat GMT-12. Apple iPhone 4.

Recall lesson three from the last article: pay attention to the light. Yes, most cameras have an on-board flash, but at typical watch photography distances, it will be too powerful and result in an extremely overexposed image. Even worse, it’s direct, undiffused and going to show every single scratch and dust spot. Once again, there are exceptions.

_780_IMG_2812b copy
MB&F HM3. Canon IXUS SD780IS, with flash.

The easiest way to take care of lighting is to find a nice, bright location where the light isn’t harsh; for instance, a white room with a large window is good. You want to start away from the window to avoid direct light (and unwanted reflections). If there isn’t enough light, your shutter speed will drop to the point that you will either have to a) increase sensitivity, resulting in digital grain and degradation in image quality; or b) get a tripod and use the self-timer.

_780_IMG_2000b copy

_780_IMG_1993b copy
Both shots: Chronoswiss Pathos. Canon IXUS SD780IS, with a handy nearby spotlight.

Once again, pay attention to backgrounds and details – things in the corner of the frame or at the edges can make or break an image. You don’t want to distract the viewer from the main subject. Make sure the watch is properly in focus and exposed; some compacts have a histogram function that will show you if your subject is overexposed – this happens if the histogram is bunched up hard against the right hand side.

_780_IMG_1035bw copy
Jaeger Le-Coultre Reverso Grande GMT. Note background. Canon IXUS SD780IS

Remember the on-board flash? It isn’t entirely useless. Get a plain white piece of A3 paper, fold it in half, and cut a hole in it for the lens. You can fold it into a half-pipe and place the watch in the middle, if you wish. Now use the flash. Compare the effect before and after: big difference! What you have effectively made is a diffuser. It helps to even out and soften the light from the flash. The white paper acts as a bonus shield to cut unwanted reflections. You might find the images a little flat, but some contrast adjustment either on the camera or in your favorite image editing software can help.

_0011713bw copy
See my article on beta testing this watch on Fratellowatches – the Nomos Tangomat GMT-12. Ricoh GR Digital III, with a little photoshop help.

What if you already have a DSLR lying around, but perhaps not a dedicated macro lens? Well, not to worry. You might not be able to get as close as a compact camera, but the kit lenses bundled with the camera generally do a decent job and focus fairly close. Use the maximum focal length (zoom in fully), and find out how close you can go. You might want to switch to manual focus, set the minimum focus distance and move the camera back and forth instead. Closing down the aperture – f number – will help to increase your depth of field. The same rules about lighting apply: find somewhere bright and diffuse, use the paper trick, or get a tripod.

_GXR_0010101 copy
Sinn 556. Ricoh GXR and 50/2.5 A12 macro.

In both cases, taking a manual white balance reading off a white sheet of paper in the same location as where you intend to photograph the watch will greatly help with your color accuracy (and remove that horrible yellow cast if you have no choice but to shoot under a desk lamp at night, for instance).

_780_IMG_1785bw copy
Omega Seamaster. Canon IXUS SD780IS. If all else fails and you can’t get the color right, go black and white.

_780_IMG_1913bw copy
Girard-Perregaux Vintage 1945. Canon IXUS SD780IS.

An important thing I haven’t mentioned is that learning to use your camera is quite critical. Familiarity with its functions and controls will make your photography experience much more fluid rather than frustrating. Regular practice is a good way to improve both your composition and familiarity with your tool. Remember, a person who has been shooting the same (now outdated) camera for the last ten years will almost always produce much better images than somebody with a new expensive toy.

Now, go out and practice! MT

P1000102 copy
Sinn 756 S UTC. Panasonic LX3. Don’t forget the fun element!

_780_IMG_1031b copy
Jaeger Le-Coultre Reverso Grande GMT. Canon IXUS SD780IS.


Watch photography, part one: Introduction

_0012303bw copy
Nikon D700 and Carl Zeiss ZF.2 2/28 Distagon. This is my watch photography workhorse, though with a different lens. I’ve often been asked why I tape over the logos on my cameras – simple: I don’t want to retouch out a ‘Nikon’ reflection from the watch case! Click on all images for larger versions.

Reposted from my original article on Fratellowatches from late 2011

Trivia: I started taking photography seriously only after I got interested in horology. I wanted to be able to capture the mechanical beauty of timepieces and their movements; all the more so as thanks to the generosity of many forum members and collectors, I was able to see many rare pieces – but of course not own them. Learning to photograph them properly would let me appreciate the craftsmanship and detail long after they went home with their owners.

_MT58945 copy.jpg
Daniel Roth Classique.

That was 2002. Fast forward nearly ten years, and photography has turned into the dominant passion for me. Watches, however, remain a subject that close to my heart.

It’s not uncommon for other people to get into photography the same way – I know more than a good handful of my watch collector friends have also taken up cameras to capture their timepieces. And in some ways, collecting camera equipment can be just as satisfying (and expensive!) if not more so than watches. There is a degree of interactivity and possibility for creative expression from the collector, far more so than even the best grande complication.

_D90_DSC7248 copy
Leica M8, 1,4/21 Summilux-M ASPH, Leica hand grip M, Voigtlander 28/35 mini-finder, ThumbsUp grip. How can this not also appeal to the watch collector? Mind you, this combination is absolutely useless for watch photography.

This will be the first of a series of three articles about the subject. I will start by taking a step back and examining the objectives of photography in general, how other factors will influence your ability as a watch photographer, and how to develop the first skill: composition. The second article can be treated as a primer: how to make the most of what you’ve got. We will finish with an article for those who want to get really serious: I will share the techniques and equipment I use, as well as a note or two about post processing and retouching.

_MT89188bw copy.jpg
Panerai Luminor 1950 Flyback

Let us begin.

Why do we take photographs? Usually, to capture something, a moment, a feeling, an image – the image we see in our mind’s eye. This is usually quite different to how it turns out on the camera – but don’t worry, it’s fixable. We need to learn how to see like a camera, and in turn make the camera see like us (i.e. make it do what we want it to do). Part of this is learning to visualize, part of it is learning technical skills and how to operate your camera and what its limitations are, and all of it is discipline and practice.

_MT52393 copy.jpg
Jaquet Droz Grand Date

The human eye sees things in two general ways: our greater field of vision perceives a fairly wide scene, equivalent to somewhere between a 24-28mm lens. When we focus on something, our visual field narrows to something closer to about 50-60mm. The brain corrects for distortion, perspective, color, low light, and extreme highlights and shadows; furthermore, most things are in focus all of the time (unless we go very close to something). There is one further complication: we have two eyes. So our sense of perspective is also affected by depth perception, something we do not have control over with 2D cameras and images.

_M217813 copy.jpg
Jaeger Le-Coultre Master Perpetual Skeleton Prototype

Replicating a human perspective is quite tricky, actually. It has its advantages – you can capture something very close to what you saw, which may be what you want; but similarly, there are things you can do with a camera that the naked eye will never be able to achieve – isolation through extremely shallow depth of field, for instance. Or exaggerated or compressed perspectives.

Let’s go back to watches. Think for a moment: what is it about the watch that you find attractive? The whole case? A particular detail on the movement? Or perhaps something else, the way the light reflects off the dial texture? What is the essential quantity, element or detail that represents the watch? For example, this would be the crown locking bridge on a Panerai, or the bezel on a Royal Oak, or perhaps the screwed chatons of a Lange.

_M80_DSC4527bw copy.jpg
Panerai Luminor Arktos

First lesson: a good photograph always captures the essence of the subject. It should make the viewer think, but its intended subject should always be identifiable.

For most people, watch photography means getting the entire watch in frame, in focus and reasonably well lit. The first two things aren’t always required: look at some of the photoessays I have posted on Fratellowatches, and notice how few shots actually show the entire watch, or have everything in focus!

Beauty can be in form and detail. Don’t afraid to leave things out to only capture the interesting bits. The clichéd saying is ‘less is more’ – it should be restated more accurately as it requires effort to decide what is non-essential to your composition and can be left out.

_M217888 copy.jpg
Jaeger Le-Coultre Extreme World Alarm

What about popular rules of photography, like the ‘rule of thirds’ (divide your frame into three, horizontally and vertically, and only place subjects at the intersection of those lines) and suchlike? They are there as a guide. While they are generally useful, there are a lot of compositions that defy all of these rules and somehow still manage to be visually arresting. The only rule that I follow is that the frame must be visually balanced: for instance, I generally won’t put the watch at one corner and leave the rest of the frame empty. It might be filled with a shadow, some interesting texture in the background, or the curl of a strap – these elements are deliberately there to provide visual balance. Why do you think watch hands are always set to 10:10, 1:50, 4:40, 8:20 or some other similar time? They provide balance. Similarly, pay attention to things in the corners or at the edges of your frame: they can be distracting and draw your eye away from the main subject.

_M220748 copy.jpg
Timefactors PRS-2 Dreadnought

Lesson two: Look at the details; balance is important. They define the subject but can also often draw the eye away if they are in the wrong place.

Let’s talk a bit about light. Light is perhaps the most important element for any photograph – without light there is no subject, and this makes even composition secondary. For a subject like watches, beginners will just look at the subject, or perhaps technical elements of the camera or composition. Amateurs will look for good light; professionals will create their own (and through this, manage to realize the shot they are visualizing).

Lesson three: If you are using ambient light, pay attention to how the light falls; reflections, shadows, etc. Diffuse light is flattering, but will not show texture well. Similarly, direct, bright light is great for showing texture – including dust and scratches.

_MT98459 copy.jpg
Blancpain Leman Alarm GMT

Lesson four: Clean and dust your watches before photographing them – the closer you get, the higher resolution your camera, the bigger and more obvious the dust!

Finally, lesson five: spend some time just looking at the watch before you begin. Identify the angles from which it looks best; which details are distinctive; what do you want to capture? MT

The importance of shot discipline

I’m going to start by defining shot discipline. There are two aspects: timing and technique.

_7035186 copy
Miss it, and the moment is gone. Procession, Nepal. Nikon D700, 24/1.4

Part one: Timing

Imagine having a revolver, and say four enemies that are going to come towards you in a short space of time – too short for you to reload. You’ve got six shots. If you’re good, you’ll only need four; if you miss three times, you’re screwed. How is this relevant to photography? What part of the workflow is limited to just a few shots? Your buffer, especially during fast paced action. (Why do you think pro cameras have huge buffers? Insurance.) Anticipation and waiting for the critical moment – that peak in action when everything comes together – is very important; more so if your camera doesn’t have a motor drive or a huge buffer.

The revolver analogy is a good one. I’d compare a D3/D4 class camera to a machine gun with a telescopic sight: it’s complicated, but you can spray and pray indefinitely and probably get something good – even if you have no skill or experience whatsoever, simply by the sheer weight of statistics. (If you take a thousand photographs, one or two will probably be okay – similarly, aim in the right general direction and you’ll probably hit the target once or twice). In experienced hands, it’s impossible NOT to get the shot.

Honestly, I found shooting with the D3 too easy. Same goes for the D700. The M9-P, on the other hand, is a completely different beast. It’s like a Magnum .44 or a Desert Eagle 50 Cal; utterly useless to a beginner, but a fantastic tool if you know how to use it. But, you pretty much only get six RAW shots when the barrel is hot. See why timing is important while shooting action?

Do I find it limiting? Yes, but only if I’m not paying attention. And guess what: that was the simple part to shot discipline.

_7037390 copy
Spot the Himalayas. Would more resolution be better? Actually no, it wouldn’t have made a difference. The scene itself was resolution-limited by atmospheric mist. Nikon D700, 85/1.4 G

Part two: Technique

The higher the pixel density of your camera, the more technique matters. For a fixed sensor size, small movement on a low-resolution camera matters less than on a high resolution one. Let’s say camera A has 4MP, and camera B has 16MP – that’s double the resolution, not quadruple (2x in each linear axis). If you move by a factor of half a pixel on camera A, the image is still pretty much aligned with the original pixel it was focused on; your edges might be a bit blur, but you could probably use unsharp masking to fix the perceived acuity. If you move by the same factor on camera B, you’re going to be out by a whole pixel. And that’s not fixable by unsharp masking. Increase the resolution further, and the effect is compounded. Those original 2.7MP APSC cameras were pretty forgiving, actually. The 24MP APSC ones will not be.

Technique actually covers several things.

1. Stability. This is the biggest one. If you don’t move, then your edges will stay where you focused them on the sensor plane. All will be sharp. So how do we achieve this? Several ways – the easiest is a sturdy tripod. Good shutter tripping technique – roll gently, don’t jab. And the last way is to reduce apparent movement by maintaining a high shutter speed, either by cranking the ISO, using faster lenses, or using a flash.

_D90_DSC3428 copy
mmm, lenses.

2. Lenses. Good lenses have better resolving power, right? Yes, but these days, the difference is mostly visible only when shot at maximum aperture. By f8 or f11, most lenses are capable of resolving identically to near as enough makes no difference at the sensor plane. And certainly not enough to be noticed in a moderately-sized print. Having said that, test your lenses carefully to determine what the optimal aperture is, and by what point resolution is ‘acceptable’. Look at the corners. It’s pretty important to do this before buying too, to avoid any issues or inconvenience later on. Just one of the reasons I’m still happy to go to a real retail store to buy stuff; I want to make sure the lens I’m going to use is going to perform the way I expect it.

_7055995 copy
Speake-Marin Immortal Dragon. The eternal fight between more DoF and diffraction limits. I cheated a little by using a wider focal length, which has more DOF for a given aperture. Nikon D700, Zeiss ZM 2.8/28 Biogon

3. Watch out for diffraction. Although all lenses have an optimal aperture, the smaller the pixels, the closer the diffraction limit will be to wide open. Most compact cameras – especially the 1/2.33″ kind – will resolve optimally wide open, and be noticeably softer if set to f5.6 or f8. (This is one reason most manufacturers use a switchable ND filter rather than a real aperture; also on a sensor that small, everything is in focus all the time.) For instance: I can use f45 to shoot macros on the 4.1MP D2H without noticing any diffraction softening; however, by f27 on the D700, I’m seeing a noticeable reduction in acuity. That limit becomes f16 on the 16MP APS-C cameras, and I suspect as low as f11 on 24MP APS-C. F8 is as far as I’d go with any lens on Micro Four Thirds.

_7008297bw copy
Missed focus in either direction would turn this from a keeper into junk. Nikon D700, Zeiss ZF 1.4/85 Planar – manual focus

4. Focusing. If you’re shooting a rangefinder, make sure the RF is properly calibrated for the lenses you normally use. Be aware of focus shift with aperture stop down. If you’re shooting an SLR, make sure your AF system is properly calibrated, especially for wide open lenses; use the AF fine tune function if you’ve got one. Shoot live view, wide open, manual focus and magnified to determine what the absolute best result you can obtain is, and then adjust your AF system until you achieve that consistently. AF accuracy matters most when shooting wide open – sadly these days SLR focus screens are optimized for brightness rather than focusing snap, which means it’s much harder to see when something is in focus or not. (Camera makers want to sell you the latest AF lenses, so they discourage you from focusing yourself.) It isn’t helped either by tiny viewfinders. If you’re going to use your SLR manual-focus, it’s worth adjusting your mirror zero position and focus screen shimming to ensure that what you see in the finder does in fact match what the sensor sees. And a coarser matte split prism or micro prism screen helps immensely, too. Don’t try to do this yourself, however – it’s difficult and there are a lot of fragile, easily scratched components inside the finder which can be irreparably damaged if you don’t know what you’re doing.

5. Maintenance. This also covers several things: make sure your lenses and mounts are clean, for one. Clean lenses are obvious. Clean mounts, less so: a little bit of misalignment between the lens/ mount/ sensor combination can cause noticeable softness on one side of the image. It mattered less in the days of film because the ‘sensor’ plane had some thickness to it; you could be off by a bit and the image would still be focused on the emulsion. A digital sensor is a perfectly flat single plane, with no forgiveness in the front-back direction.

_M8_L1026119bw copy
A good example of condition-induced limits. Paris. Leica M8, 21/1.4 ASPH

Bottom line: if you don’t think you can handle that many pixels, shoot in a binned and downsized raw mode, or get a camera with fewer pixels. You’ll save yourself the hassle of handling enormous files, too. I know that under certain conditions – photojournalism and street, for example – it’s extremely unlikely that I’ll be able to fully achieve more than 12MP of resolution on a full frame camera. This isn’t because I’ve got poor technique, but simply because there are restrictions put on you by the shooting conditions – for instance, being jostled by people; having to shoot in extremely dark environments at high ISO; using a MF rangefinder with wide open shallow-DOF lenses on a moving subject. The list of excuses goes on. Bottom line: I know I’m the weak link in the imaging process here; I’ll try to improve, but I also recognize my limits and won’t fall into the trap of thinking more MP will make for a better image. It won’t. In the studio however, that’s a totally different matter. MT

10X10: 100 ways to improve your photography: Processing and Editing

Today’s post is the final one of 10 in the 10×10 series. While the previous posts have dealt with the during-shooting part, today’s post is appropriately going to deal with the last thing you do after shooting: processing and editing.

Photoshop is a fix all for everything, right? It’s also come to represent a dirty word; when something has been ‘Photoshopped’ it’s no longer authentic or original, and the skill of the photographer has been severely diminished. Wrong, think again. Photoshop is the equivalent of the darkroom from the film days: sure, you can add things to the scene, but they look odd and unnatural. The main thing you did in the darkroom was finalize the exposure: adjust the density and brightness, and fiddle with the contrast. Maybe some dodge and burn. How? Chemical mixes, timing and cutout masks. We do the same now – except the chemicals are your raw converter and curves layer, the fixer is your save button, and dodge and burn is a brush tool.

So what is editing exactly? The process of removing unwanted material – in this case photographs – to leave a more coherent story or narrative; being selective about what you show is just as important as having something to show in the first place. There’s no point in having technically brilliant but boring images – but you can make a story out of perfectly timed moments, even if they’re a little noisy or blurred.

Disclaimer: As with every other article in this series, I’m assuming you know the basics already.

_7051046 copy
The flying Vianney Halter for Goldpfeil. Nikon D700, 60/2.8 G

10: Keep all of your raw files. You never know when somebody might ask for a color version of a B&W image; don’t lose that sale because you were trying to be cheap on storage. Storage IS cheap.

_M9P1_L1005824bw copy
Sinister chitty chitty bang bang. Leica M9-P, 28/2.8 ASPH

9: Sharpening should be the last step. If you sharpen too early on, you’re to end up with extra noise and less tonal information, especially for images with a lot of fine detail. Why? Because of the way sharpening works. It increases apparent acuity between adjacent areas of different luminance by increasing the difference in luminosity between them. Making something brighter or darker – with images containing a lot of fine detail, this means a change to a large area of the image – will inevitably destroy some tonal information, especially at the extreme ends of the tonal range.

_7046623b copy
If the G-P F1-047 was titanium and on a blue strap…it’s really aluminum and on a tan strap. Nikon D700, 60/2.8 G

8: Let your images mature before deleting. Look at your images immediately after a shoot and pick out your favorites. Then do this exercise again two weeks later. You’ll probably find that there’s been a big change. Why? Immediately after the shoot, you remember how difficult it was to get one shot; that effort put in affects your artistic judgment. Two weeks later, you’ll probably not remember as clearly, and you’re more likely to go with your first instincts. Go with the latter selection.

_m9p1_l1007784 copy

_m9p1_l1007781 copy

A tale of two frames. I initially preferred the first frame; but a month later, I think there’s more of a story and more contrasts in the second one. M9-P, 28/2.8 ASPH

7: Calibrate your monitor. Whether you use one of the Spyders or the built in utility in OS X, it’s important to adjust your monitor to produce as accurate color as possible – this is important for both print and screen; you want to make sure that other people see the same thing you put in so much effort to create. For print, you can attach the color profile to the file; a good printer will be able to match the print to what you see on screen. It’s also important to know the gamut of your monitor; I’ll never do any serious editing on my 11” MacBook Air because the screen has terrible color. On the other hand, the 27” iMac/ Cinema Displays are fantastic, as are the 15” and 17” MacBook Pros.

_M8_L1023901 copy
Intentional color. Leica M8, 21/1.4 ASPH

6: Do most of your adjustments in the raw converter. This is important, because the data is in its highest bitrate form – which means making large changes to the file at this stage has the least impact on image quality. If you do highlight recovery on a 16 bit raw file, you’ll probably have a decent stop or two (assuming a good sensor) before you get posterization or false color. Now try doing the same to a jpeg and you’ll see what I mean. By the same token, keep your files in the highest bitrate form until you’re absolutely sure you’re not going to change anything again – and that might be a Photoshop file in 16 bit with all layers, or it might be a quality 12 jpeg. I generally don’t edit again, so I save my finished files as a maximum quality jpeg. Remember that print doesn’t have as much dynamic range as a computer screen, so if it looks fine on a calibrated monitor, it’ll probably look fine in print.

_D90_DSC5601 copy
Sunset shadow. Nikon D90, 18-200VR.

5: Buy a good tablet. I like the Wacom Intuos 4. It will help you immensely to lay precise masks and control your dodge and burn; the tip is pressure and tilt sensitive to control brush size and density. It’s much faster than doing things with the mouse, too – once you get used to how the entire tablet area maps to your screen. Get one that suits your screen size. The medium 6×9” is perfect for my 15” MacBook Pro.

_M8_L1017183 copy
The Beach. Leica M8, 50/1.4 ASPH

4: Don’t overdo anything. Turning it up to 11 works for some shots, but not most. Too much sharpening leaves haloes. Too much contrast loses tonal detail. Too much saturation makes it feel unnatural and cartoonish. Etc. And don’t even get me started on overuse of HDR; overlapping tonal values are jarring to the eyes.

_D90_DSC2987 copy
Turning it up to 11. Nikon D90, 105VR

3: Always have backups of your backups. I’ve had a situation where a new OS caused some serious issues with my primary computer; the upshot was that none of the files were readable. My primary backup drive – a Maxtor; I’ll never buy one of those again, just too many have failed – started making the click of death when I connected it, and I was able to get most of my data off in time before the drive crashed and died. Good thing there was one more backup copy. My current management strategy is to keep all finished jpegs on my editing computer; there are two duplicate backups with all the raw files (in the same file structure) on external drives, one of which lives in my bag and goes with me everywhere; I also time machine the primary drive whenever I do a backup to the externals. Generally I’ll do a backup once I finish editing a batch, which might be 50 or 100 images or thereabouts. Storage is cheap. Lost files are priceless.

_3029853 copy
Blue water. Nikon D3, 24-70/2.8 G

2: Integrity matters, especially for photojournalists. Whilst I’ll have no compulsion removing dust from a watch product shot or litter from fine art street photography, I absolutely will NOT touch the content of the image for photojournalism. This is because once you do, and if you get caught, your credibility is instantly nonexistent.

_7047519 copy
Panerai Mare Nostrum, on a GuB Marine Chronometer. Clean well, because even at this relatively low magnification, it’s very visible. Nikon D700, 60/2.8 G

1: You can’t polish a turd. Don’t think that you can rescue a compositionally weak image ‘in Photoshop’. You can’t. You can’t change the lighting. If you didn’t get it mostly right in-camera, you’re not going to be able to fix it in Photoshop. You can fix exposure, color, contrast and the way the image appears; you can’t change the content. If an image is good, however, you can make it extraordinary. MT

_7049521 copy
Color palette and tonality hugely affects the feel of an image. But the content must be there to tone in the first place. Nikon D700, 28-300VR

Note: Observant readers will have noticed different frames/ watermarks on my images. They date to different eras in my photography career. The very latest set (Feb 2012 onwards) has a black frame and watermark at the top left – because I found that the Facebook buttons obscure it if placed at the bottom. Slightly earlier images have black frames and ‘Ming Thein | mingthein.com’ in the bottom left. Those date from early 2010-Feb 2012. Mid to late 2009/ early 2010 have ‘Ming Thein | AGENCIA VM’ and black frames; anything before that is frameless and ‘Ming Thein / *photohorologer MING’. I stopped using that last tagline after numerous people copied it. Just in case any of you were curious.

10X10: 100 ways to improve your photography: Lighting

This post deals with the light you create. You can’t always find what you need, so it’s important to know the dos and don’ts of off camera lighting. My tips apply to speedlight users; I’ve never been a huge fan of monoblocks, nor have I used them very much since Nikon launched their CLS system. Sure, sometimes you wish for more power, but then again you remember that you can go for hundreds, if not nearly thousands, of shots on a set or two of AAs – instead of carrying a 50kg lead acid lump around. Read on.

Disclaimer: As with every other article in this series, I’m assuming you know the basics already.

_7056032bw copy My current array of lighting: three SB900s, one SB700, two 120-LED daylight balanced continuous panels.

10: Always shoot in manual mode. Otherwise, there’s no way you can balance your flash and ambient exposure; if you want all flash, then you can dial in the highest sync speed possible – this will help you avoid camera shake. If you let the camera decide, it will usually only get it right for the center portion of the frame when the flash exposure is much greater than the ambient exposure. This is to say, most camera systems are useless at daylight fill, especially under very bright conditions.

_3009512bw copy
Inspector. Note how inside/ outside luminance is balanced. Nikon D3, 24-70, one SB900 in a soft box.

9: Imperfect diffusers and softboxes add character to portraits, but not product shots. Uneven lighting for most product shots just makes the object look odd. For people, it can be strangely flattering. Consider making some shoddy homemade internal baffles for your portrait soft boxes.

_M220416bw copy.jpg
Shoddy baffling adds character! D200, 17-55/2.8, 2xSB600s in homemade soft boxes.

8: If you’re controlling lighting, you shouldn’t have blown highlights or blocked up shadows – unless you want them. Self-explanatory. Your lighting isn’t balanced properly. Try again.

_3007528bw copy
Intentional outline. Nikon D3, 105VR, one SB900 off camera.

7: Those clip on diffusers are pointless. A small light source can never replicate a big light source unless you expand (and diffuse) it – be it bouncing off the ceiling, or a softbox. A little clip on diffuser is just going to make a small, diffuse source – which at any distance, looks like a small intense source except weaker. You’ll get the same reflections and general lighting feel. All you’ll have done is a) look stupid b) wasted your money and c) lost at least two stops of light. I’ve never even used the diffuser domes supplied with any of my flashes; they’re still in the plastic bags they came in.

_7049184 copy
Unrelated shot. Speake-Marin perpetual calendar. Nikon D700, 60/2.8 G, one SB900 and diffuser.

6: Duct tape is your friend. Use it to tape flashes in odd positions to whatever supports might be handy; sometimes you just can’t erect a flash stand in the place you want it. But you could tape the flash to the ceiling. I’ve done it before.

_3009669bw copy
The Hollywood shot. Flashes duct taped to curtain poles. Seriously. D3, 24-70/2.8 and three SB900s

5: More flashes are better. I’ve got four; two primary units, one spare, and one more unit to use as a commander on cameras without a built in (Leica M9-P, I’m looking at you). Legend has it that Joe McNally travels with an entire suitcase of SB800s. I dread to think how many batteries he goes through every year.

_7047913 copy
Alfabeti. Nikon D700, 60/2.8 G 2xSB900s

4: If you’re short of lights, consider a reflector. Positioning one light directly opposite the reflector gives you another pseudo-light – depending on the reflector, it could be as little as 1 stop light loss – think of a mirror, for instance. A more diffuse reflector can provide gentle fill.

_X1_L1001004bw copy
Leaf shutter benefits. Leica X1, SB900, 1/2000s.

3: Higher sync speeds are better. Pro DSLRs top out at 1/250s for full power, or less power and faster – but these are not true ‘flash speeds’, because the flash has to fire for longer but at reduced power – note how the flash no longer freezes motion at 1/8000s as much as it did at 1/250s. Leaf shutter compacts like the Ricoh GRDIII and Leica X1 both sync to 1/2000s; they’re great for capturing motion or providing balanced daylight fill, where your ambient shutter speed might be very high. You won’t lose the highlights, and you also won’t lose the shadows – thanks to your high sync speed.

_7022462 copy
Dessert. Balanced with ambient daylight in restaurant. Nikon D700, Zeiss 2/28 Distagon, 2xSB900

2: Remember the eyes. For living subjects, a little catch light reflected in the eye can make all the difference between a flat, boring shot and a portrait that looks alive. Use a reflector, or if you’re using Nikon CLS, the trigger flash on your camera works fine too.

_X1_L1000981bw copy
Note the eyes. Leica X1, SB900.

1: Spare batteries are important. Never get caught short. I avoid NiMH as they tend to exhibit the memory effect, especially if not used frequently – as would be typical for your second or third spare set. The Sanyo Eneloop batteries are fantastic – they really do hold charge like alkalines, but have the reuseability and current draw properties of NiMH. I’ve got eight sets of these for my flashes, and only charge them when depleted. MT

_7040287 copy
Macro lighting is quite a different game entirely. There isn’t a lot of working distance, and you need a lot of diffusion to create the same apparent perceived light source size.

10X10: 100 ways to improve your photography: General tips for all photographers

Here are some suggestions that apply to everybody, regardless of what or how you shoot.

Disclaimer: As with every other article in this series, I’m assuming you know the basics already.

_M9P1_L1007399 copy
Prague. Leica M9-P, 28/2.8 ASPH

10: Shoot raw and expose a little bit hot. There’s always a bit of potential to recover highlights in your raw files; some cameras more than others. Know how much yours can tolerate before blowing highlights completely. It’s not just a way to expand dynamic range; exposing hot and bringing down the exposure later actually reduces shadow noise, too. For those of you using a third party RAW converter that doesn’t read proprietary image settings, crank your sharpening in camera up to maximum – it won’t affect the raw file (only the jpeg preview), but you will be able to more easily see if things are in focus or not when using the image review screen.

_M8_L1017249 copy
But we all have favorites. Billingham Hadley Pro. Leica M8, 50/1.4 ASPH

9: There is no perfect bag. Just accept it, and move on. Buy a new one if it takes your fancy but don’t expect it to solve all of your problems. Most of the time I only use a bag if I have other non-photographic items to transport. If it’s camera-only then it just goes over my shoulder.

_M9P1_L1004990bw copy
At the station. Note clean edges and overall feel of the image. Leica M9-P, 28/2.8 ASPH

8: Watch the edges of your frame. Your subject is identified by a) light; b) position in the composition; c) context. The edges add or remove context – and with it, distractions. Use them carefully.

_PM03439 copy
Spotlight. I’d have missed this if I was fiddling with my settings. Olympus E-PM1, Panasonic 20/1.7

7: Learn your equipment. You should be able to operate your cameras like it’s second nature. Muscle memory is your friend, and can make the difference between responding instinctively and getting the shot, or missing it altogether. Practice is the only way to do this.

_PM03858 copy
The ephemeral sushi. Nothing is in focus, the saturation is all over the place, there are hot spots, the color isn’t accurate…but somehow, it works. Olympus E-PM1, Panasonic 20/1.7

6: Look at lots of images. Famous works. Not so famous works. Flickr. It’s a good source of both inspiration and way of helping you to hone your sense of composition.

_D90_DSC0431bw copy
But surely it will make me a better photographer!

5: Don’t buy new gear unless you’re sure you’re not the limitation. Make sure you know exactly what it is that your current gear isn’t doing for you and how the new gear will solve it.

_PM05623 copy
Hommage a Rene Magritte. Prague. Olympus E-PM1, 45/1.8

4: Look at other mediums of art for inspiration. It could be painting, design, architecture; for instance I love the way Magritte renders clouds, and I look for that kind of light when shooting skies.

_M9P1_L1005830bw copy
Gorilla in the shadows, Prague. Leica M9-P, 28/2.8 ASPH

3: Look for interesting light, not just interesting subjects. But of course it’s best to have both. The best photos present an unusual subject in an extraordinary way.

_7036002 copy
Precision. I waited for both the sun and the bird. Nikon D700, 24/1.4

2: Be very, very selective with your keepers. Keep only the best. I throw away 99% of what I shoot. Not because it’s bad, but because if you shoot good pictures, then keeping only excellent will make you excellent after a while; if you shoot excellent on average and keep only outstanding, then you’ll be outstanding. And so on. Continually push and challenge yourself – set assignments, practice, tasks. Go outside of your comfort zone, and the persistence will yield results.

_0012621 copy
Serendipity. Interesting things happen when you stick a compact inside a marine chronometer then do wide-angle macrophotography with it; this was my first time trying it. Ricoh GR-Digital III

1: Shoot lots. Practice, practice, practice. Experiment. If it doesn’t work, at least you’ve learned not to do it. If it does, great – another technique to add to the arsenal. I always get asked ‘how do I pick it up? How did you pick it up?’ and my answer is the same: I experimented and shot a lot. But I also made sure I made a note of what I did, so I learned something from the experience. When I started, I was probably doing a thousand frames a day – 99.9% were crap, of course – but slowly that ratio swung. Always carry a camera – even if it’s just your phone – and don’t be afraid to use it. MT