An enormous amount of visual material needs to be generated before any new car launch; both stills and motion. The first part of this article will look at something I am very familiar with – normal studio photography.
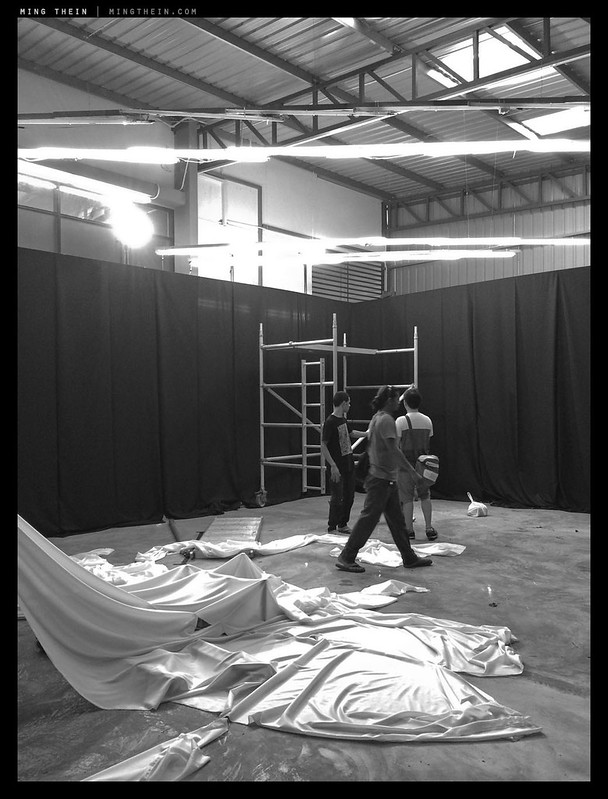
Set building, I
As ever, creation of images in a project this large is a collaborative process between photographer, client and agency; ultimately the client has the final say, so even if we may believe that some angles are better than others…unfortunately, they may not always be used. However, that’s where the liberty of the director’s cut comes in; the final product images I’ve used here are the ones I personally like, some of which were used in unaltered form, some of which were integrated into other graphics by the agency, and others which will never see the light of day except for here.
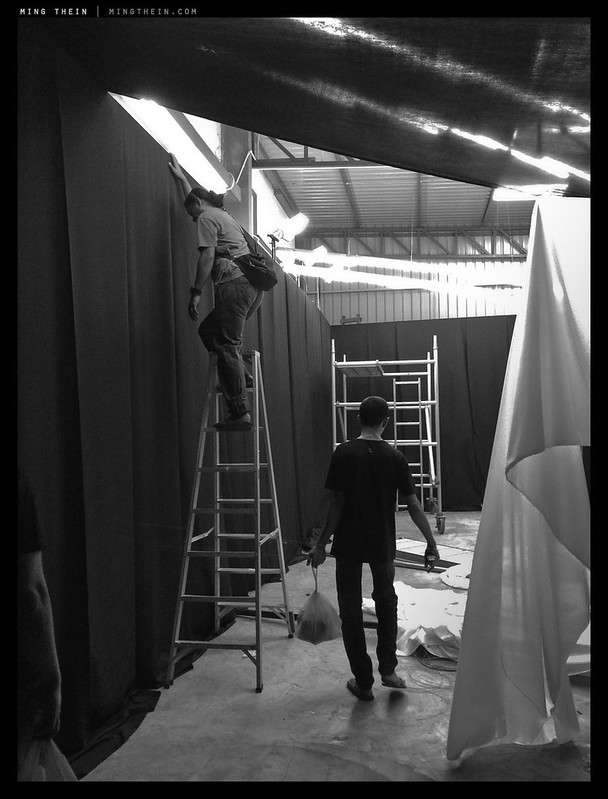
Set building, II
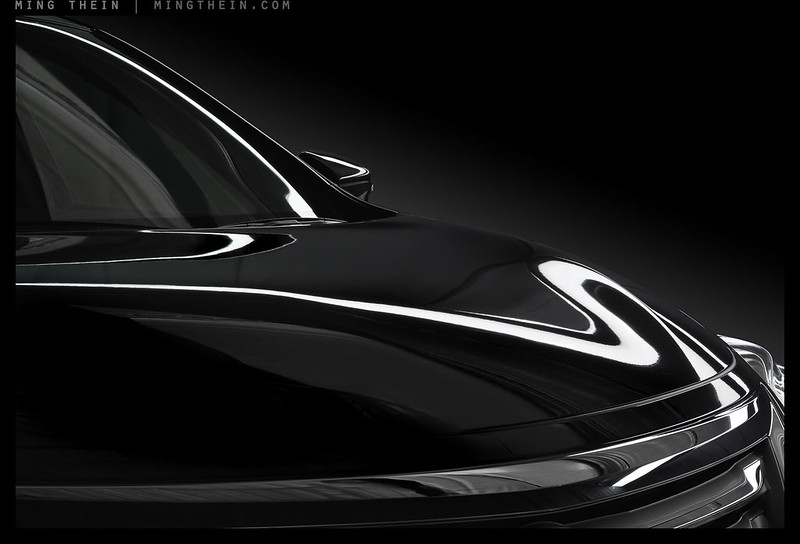
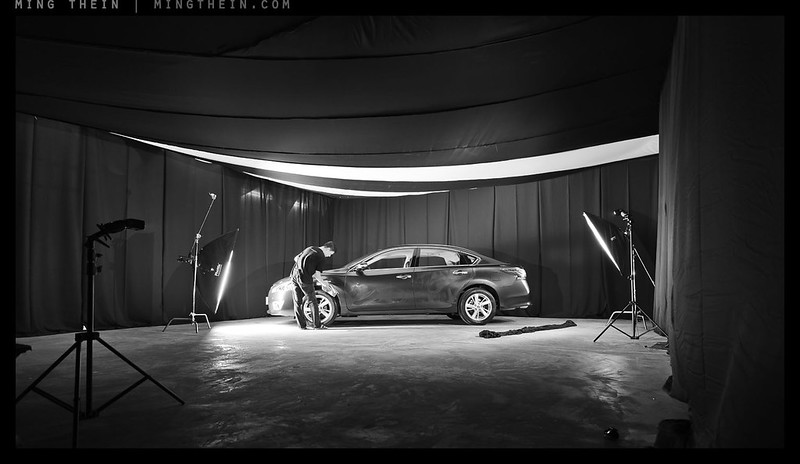
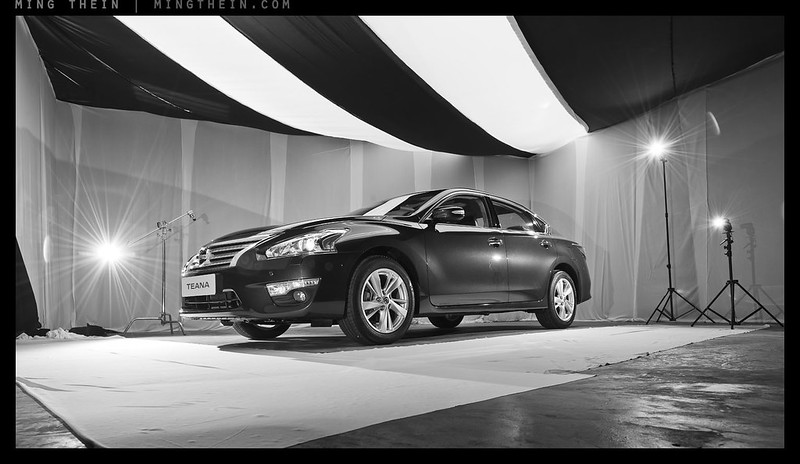
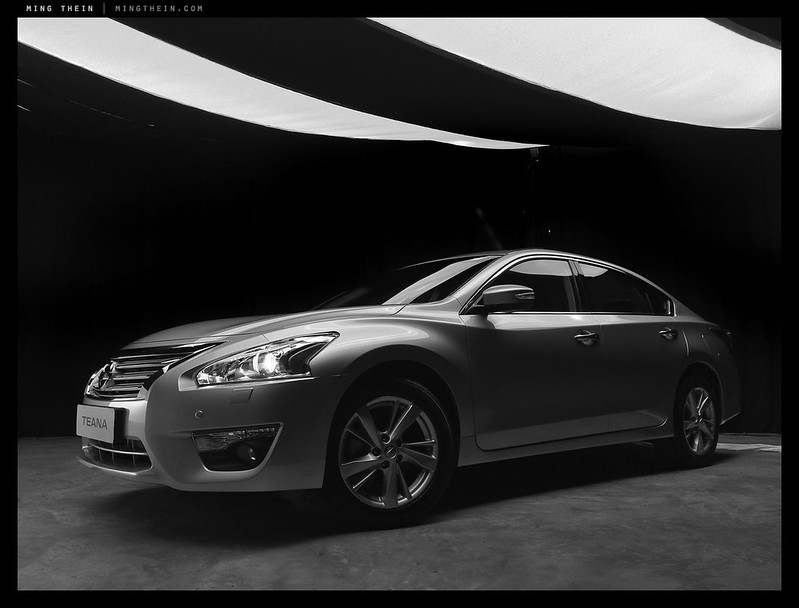
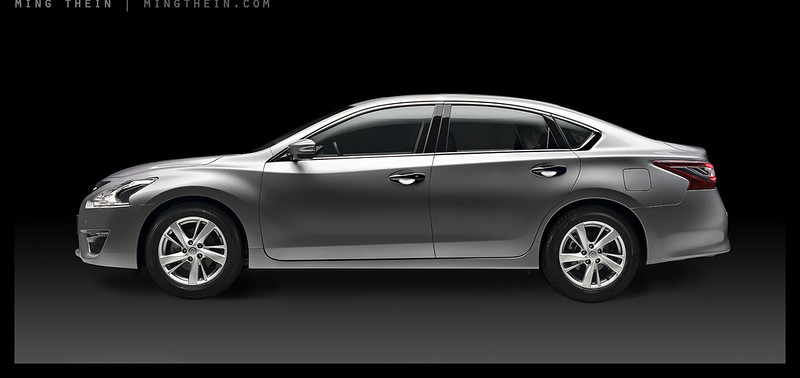
New car, new challenge. Some of you will recall an earlier On Assignment post where I shot this car’s predecessor; this time the client wanted to push the visuals a bit further than the last car but still maintain some degree of stylistic coherence. I saw much stronger lines running the length of the car, which would mean we need a much longer light source to create the reflections necessary to accentuate those lines; lighting an object this big is all about constructing reflections A light strip on a dark background is the only way to go, otherwise you land up with strange black lines reflected in the car; in the end, we landed up constructing a studio inside a warehouse.
A framework of poles and girders went up, which was then draped in blackout cloth with two openings for white translucent cloth; fluro and white metal halide lamps were aimed at the cloth to create the highlight. I think we used close to 100 fluro tubes and 10 halide lamps in all – enough for a 1/60s exposure at f5.6. The number and type of lamps were calculated to get us as close to daylight as possible, which would balance with the flashes I’d use inside the tent to sculpt the sides of the car.

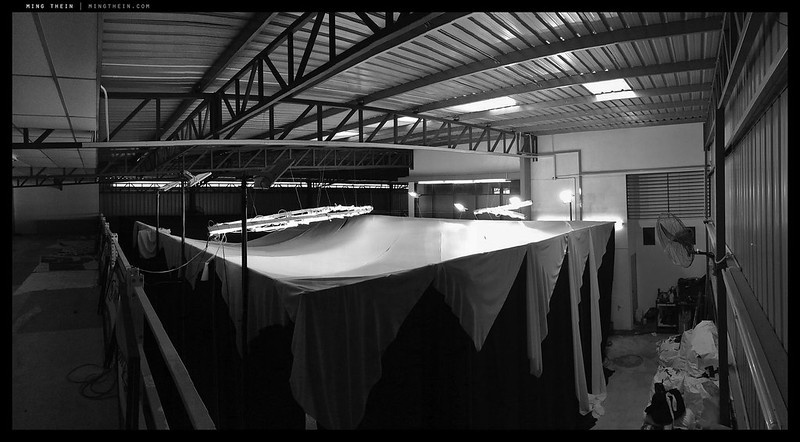
Tent complete; ready to go for first thing in the morning.
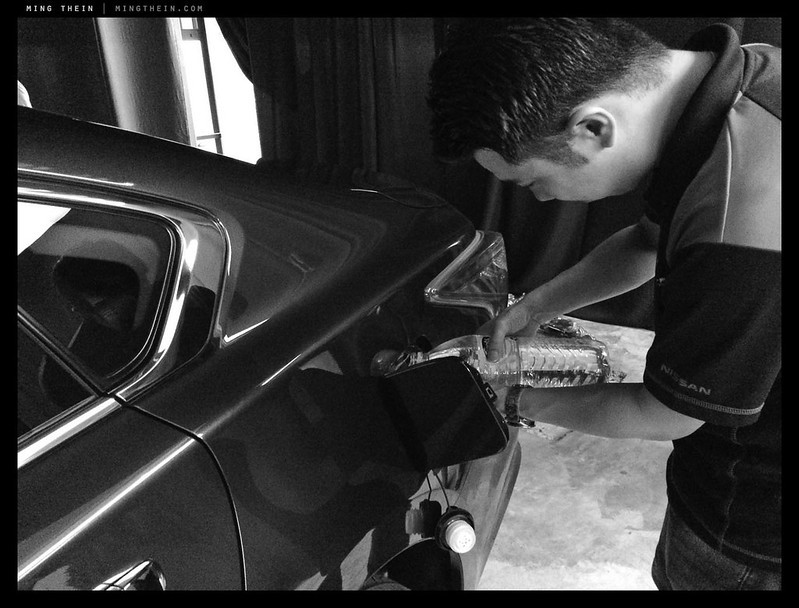
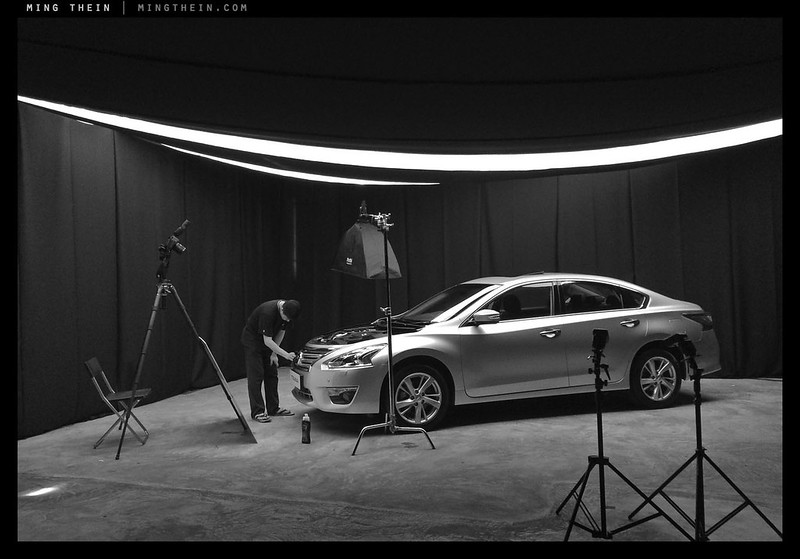
A little fill to top off the tank and move the needles
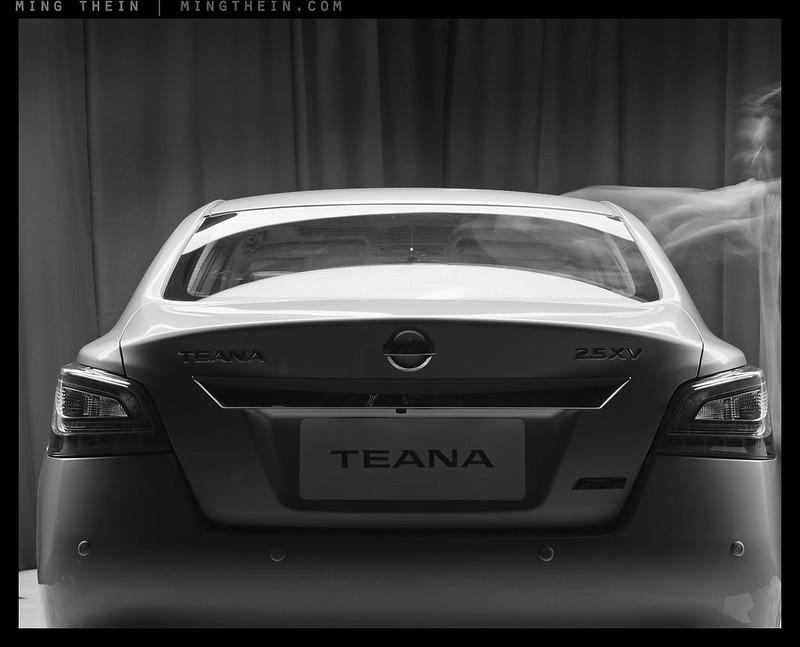
The tent was made large enough to a) move the car around and keep the roof light source static; b) let me shoot the front and rear angles with 135mm, which is just as well as the client asked for a compressed 90/10 head on and rear on angle at the last minute. Moral of the story: always build a bit of contingency capability into the budget and the rest of the shoot.
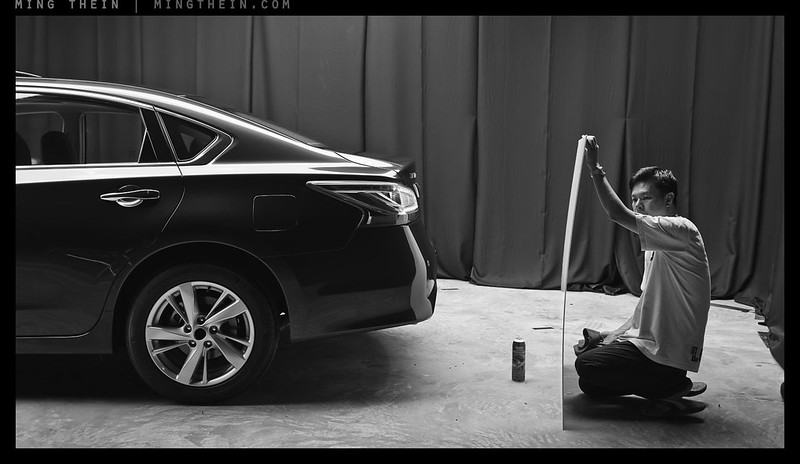
Polishing and prep
Yet more polishing
And more touchups
One final pass.
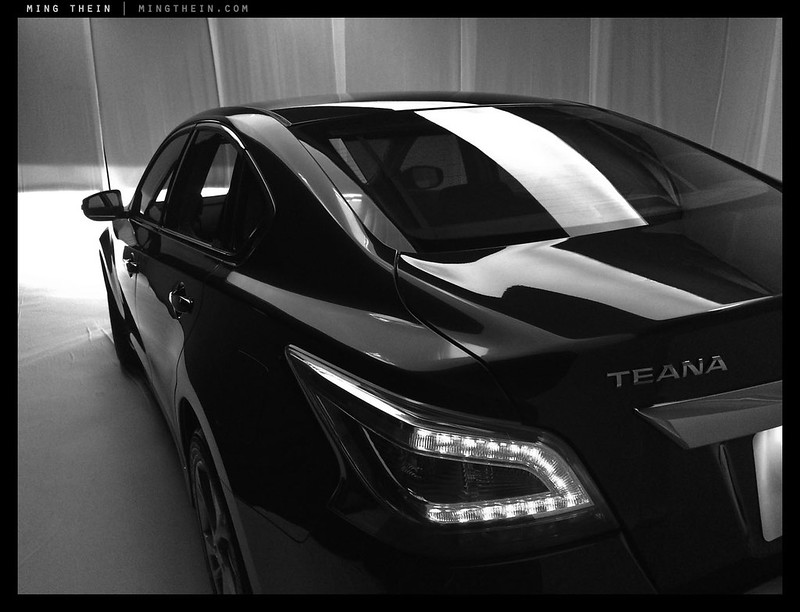
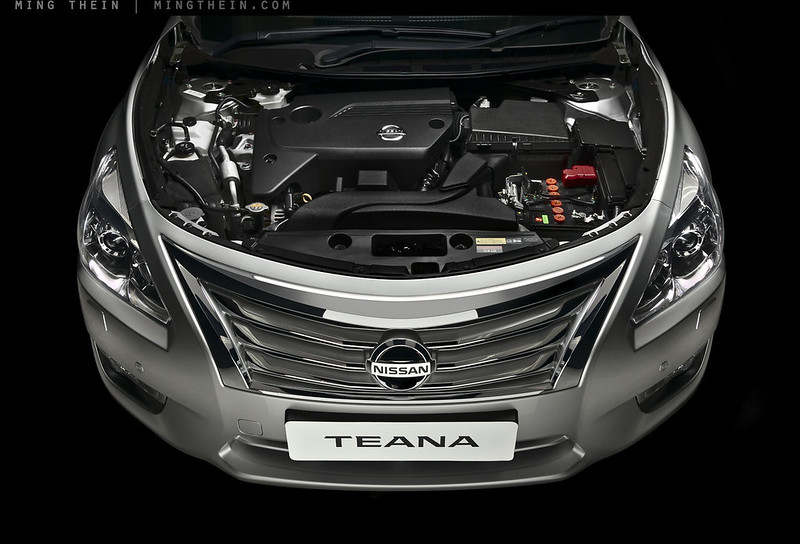
One of the biggest challenges on this shoot was the car itself: the original plan was to shoot a dark blue car, but there being only a couple of cars in the country at the time and needed for other purposes, the specific vehicle we were given was not exactly in the best of condition – it’d already been through the QC and training wars, and bore battle scars (read: paint swirls) to match. In the end, my assistant and I landed up spending many many hours polishing the thing with pretty much every compound known to man; the problem with dark colours is the minute you hit them with a flash, every single paint swirl and defect is visible. They are also both dust magnets and dust highlighters. This is fine on a fresh/ new car, but it can also potentially be a disaster. In the end, though we did shoot a few key angles on blue (and I nearly got strangled by my retoucher because every panel had to be effectively ‘repainted’), most of the visuals were done with a silver car.
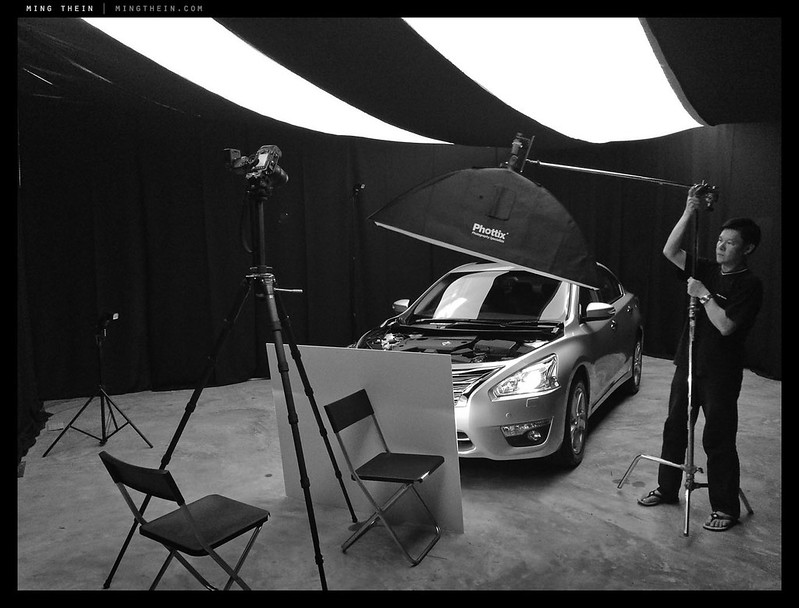
A different kind of fill
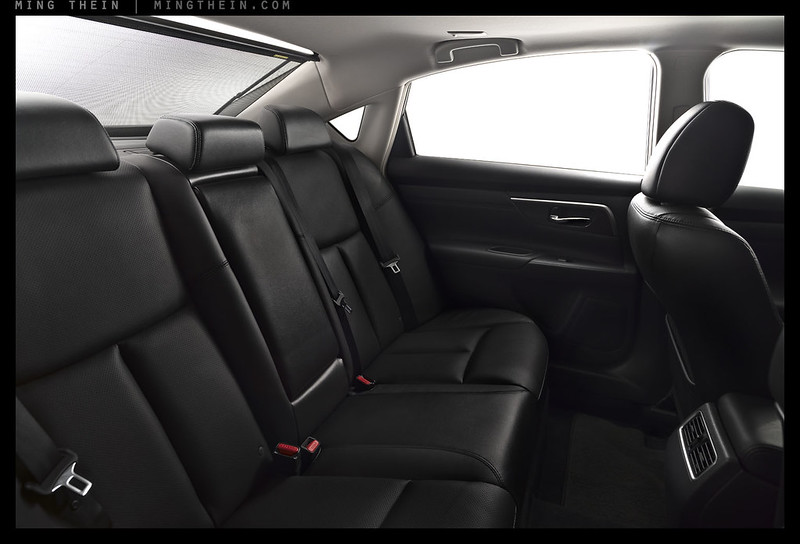
On the equipment front, life stayed pretty much the same as last time (and every other studio setup I’ve done): a pair of D800Es, one for backup, a bag full of speedlights, stands, modifiers and clamps, enough batteries to cause a small environmental disaster if they leaked (don’t worry, they’re rechargeable Eneloops – amazingly, I’m still using some of the original ones I bought four or five years ago) and lenses geared at maximum image quality: this meant all Zeiss primes (2/21 Distagon for interiors, 2/28 Distagon, 1.4/55 Otus APO Distagon, 2/135 APO Sonnar) and Nikon PCE lenses. My subjects don’t move and I have the luxury of being able to use live view and optimal apertures, so why not? Needless to say, a tripod is part of the equation – my usual Gitzo 5562 LTS and Arca-Swiss Cube.
iPhone angle #1
iPhone angle #2
iPhone angle #3
iPhone angle #4
There was also an iPhone involved for quick behind-the-scenes grabs – if you’re wondering why I didn’t use the GR, I am now, too: I’m pretty sure it’s because my mind was more focused on the final product than the b-roll. I admit that I did consider using the Hasselblad 501CM and CFV-39; however, I didn’t need the 1/500s sync (balancing with continuous sources, remember), I would have to go wider than the 35mm-e I have for the interior images, and personally, I didn’t fancy running hundreds of feet of sync cables around the place, either. The Pentax 645Z might have been an option except it wasn’t available at the time (April – and if you’re wondering why there’s such a lag between the shoots and the On Assignment posts, it’s usually because of embargoes or time limitations on my part). Would I do the same again? Sure. The only time I ran into a resolution issue on this job was when the agency wanted to use an extremely small crop (>0.5MP) to enlarge to wall size – even if I’d had 80MP, that would still be physically impossible. And I personally don’t think it’s a good idea to encourage this kind of ‘planning’.
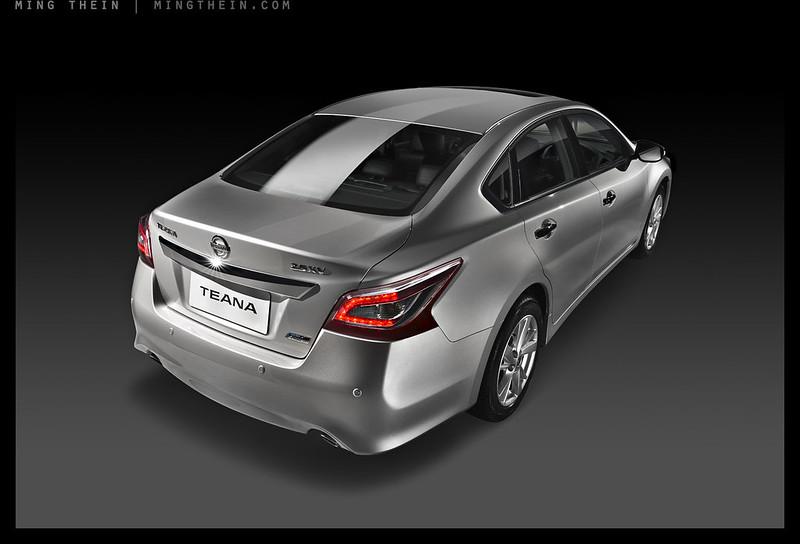
In any case, I think it’s time to let the final result speak for itself. The images on a gradient grey background are delivered with the understanding they’ll be comped into something else later; I’ve just put them on the gradient here because they look less jarring and odd than a plain-color background.
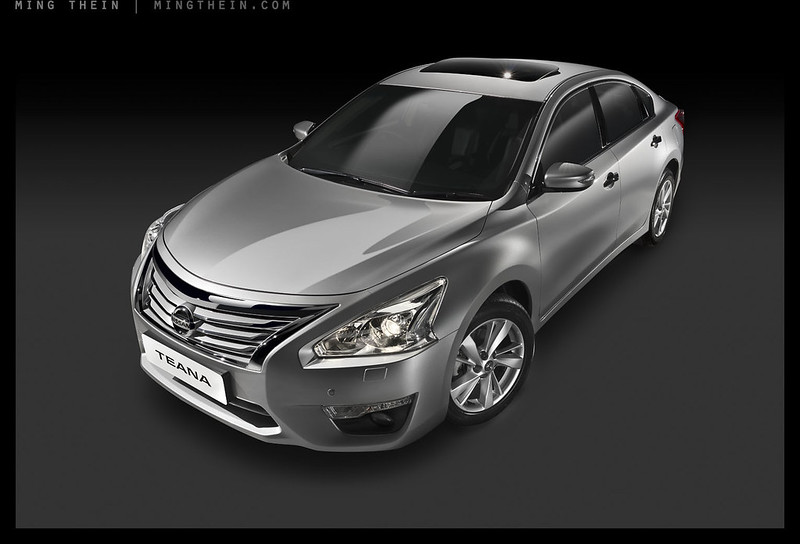

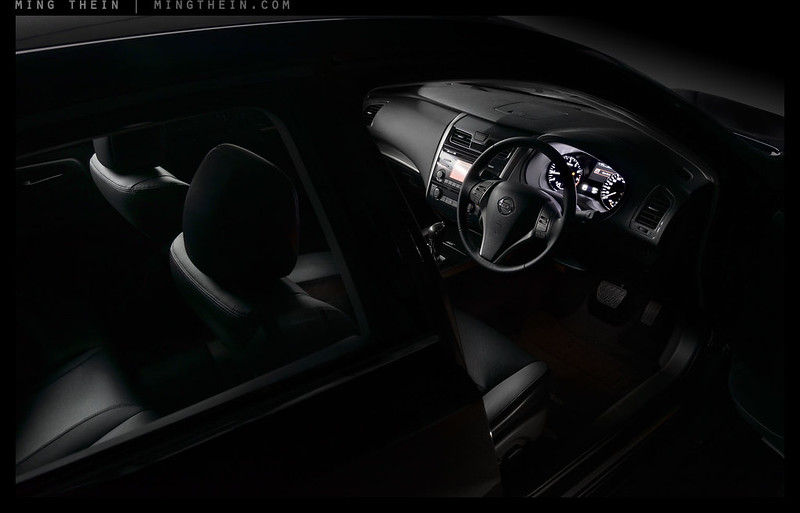
In the end, this proved to be one of the most challenging shoots I’ve done: firstly, time pressure due to a combination of budget, deadlines, the extra car prep required, and additional angle requests that keep popping up during the shoot – this is generally normal, to some degree. Secondly, because I find that once you get thrown out of the zone, it can sometimes take you a while to get back into it: there’s only so much perturbation you can take before the external factors (such as car cleaning) take your mind away from the creative portion of the work. Overall though, I’m very satisfied with the outcome (if not so much what the agency did with them afterwards). There’s a good mix of well-executed standard angles, and some more sexy stuff that both shows off the lines of the car, as well as some elegant lighting. This is only the second car I’ve shot properly – I don’t count my own – and of course I’m very grateful for the opportunity. Now, time for me to start figuring out what to do with next year’s model…MT
The full gallery of behind the scenes images and final output can be found here on flickr. The next article will take a look behind the scenes of the making of the TV commercial…

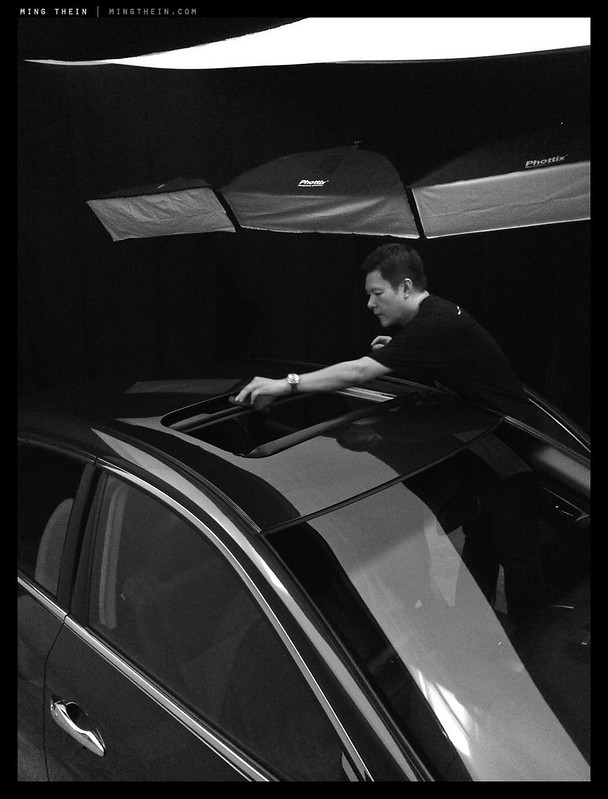
Teardown (actually, adjusting roof cloth).
__________________
A few places left for Making Outstanding Images Chicago (September 2014), Masterclass San Francisco (September 2014). Masterclass Venice (November 2014) now open for booking – click here to book or for more info
____________
Visit the Teaching Store to up your photographic game – including workshop and Photoshop Workflow videos and the customized Email School of Photography; or go mobile with the Photography Compendium for iPad. You can also get your gear from B&H and Amazon. Prices are the same as normal, however a small portion of your purchase value is referred back to me. Thanks!
Don’t forget to like us on Facebook and join the reader Flickr group!

Images and content copyright Ming Thein | mingthein.com 2012 onwards. All rights reserved


“I nearly got strangled by my retoucher because every panel had to be effectively ‘repainted’”
Have you ever discussed the nature of retouching in your commercial work, and its relationship to the photography?
Is it simply a “cleaning up” of the image, or do you get something that is more than what is possible in photography alone?
It’s usually just cleaning up dust spots, scratches etc. unless the client specifically wants something that isn’t deliverable in a single image. If you’re shooting in studio and fully in control of light and composition, there should be no need to retouch otherwise.
Thanks for the article MT! Even if I’m not into product photography, it is ever a pleasure reading how a professional do things, it is a great chance to learn something new!
No problem.
I hope BMW will use you on their next launch. The quality never fails to amaze me, I suppose something to be expected from an Oxford grad!
Not sure how they’re related, but yes…I hope BMW will give me a call one day. 🙂
Thanks so much for sharing. Really really interesting to see behind the 4th wall !
Really admire your work Ming! I recently I had to do a photoshoot for some colleagues at our workplace and the lighting was terrible… I can only imagine the amount of effort that would’ve gone into setting up the right light for the perfect shots you take! Highly commendable!
Thank you.
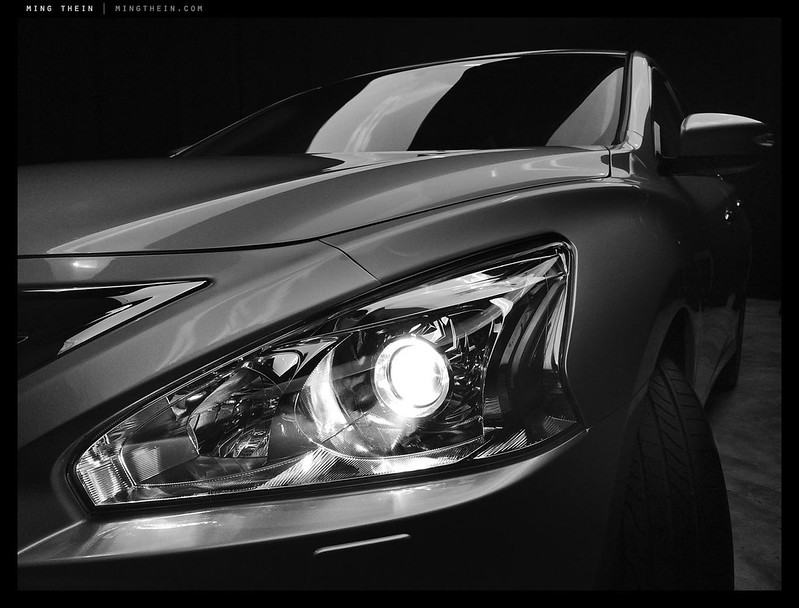
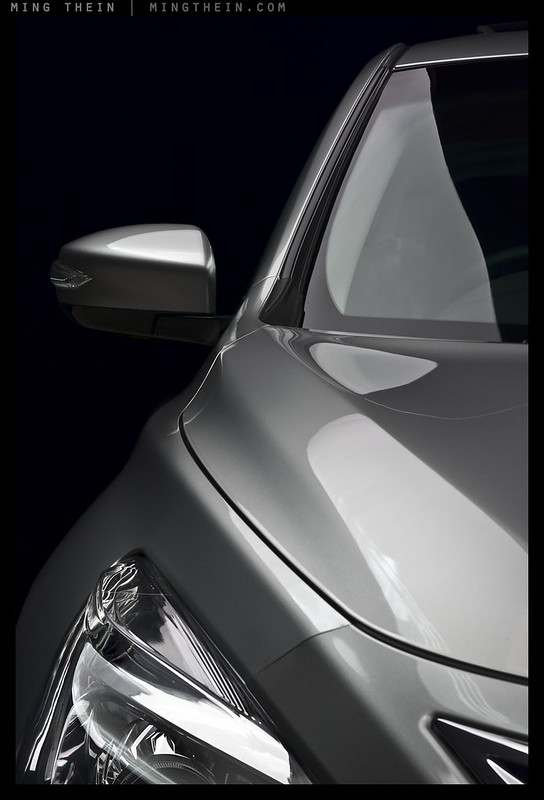
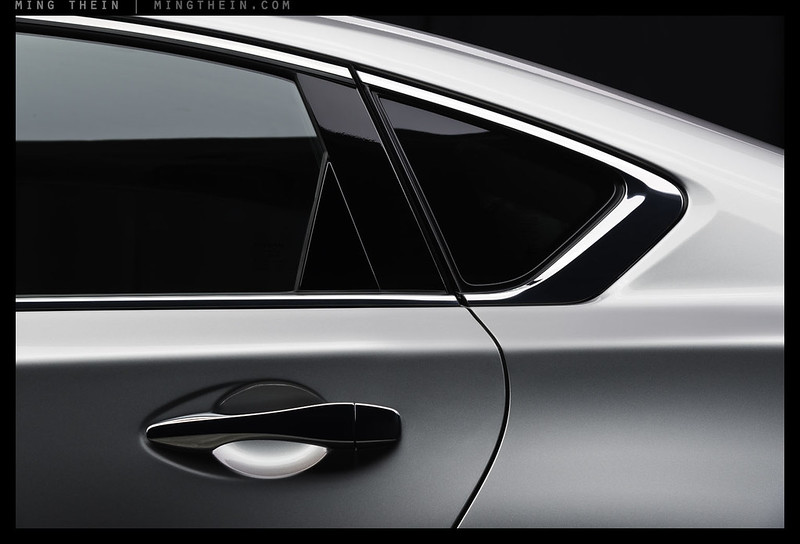
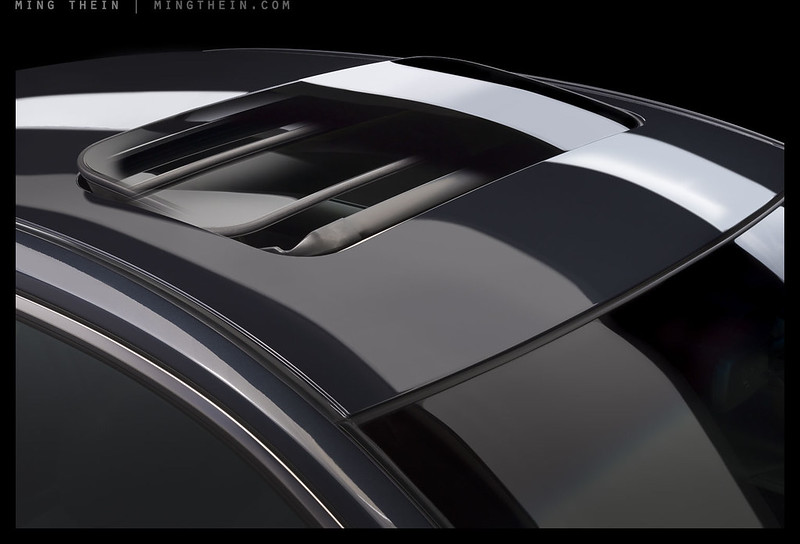
I like the way the curve of the windshield and bonnet bend the straight overhead strip into looking something like cream being poured into black coffee (lead photo)—it’s a beautiful effect and I’m never sure which impresses me more: the fact that natural physics (QED) makes this so, or the fact we make use of it and it has such an effect on us.
I’m not sure I like the hard point sources reflected in the sunroof, on the boot [first two stills of the finished car against a gradient] and on the side window pane (blue car detail photo); but can only think the client asked you for them—the ones on the sunroof and boot seem especially asked for to me. Maybe they even added them in to your work? I’m not sure I’ve ever seen you allow unintended or uncontrolled light sources or reflections into your product stills, so am assuming these are intentional (though perhaps not what you might have wanted; I appreciate this is paid client work).
Thanks again for another On Assignment MT. Great stuff! 🙂
Actually, the hard point sources are a personal thing – I deliberately include them because like the stars…
Interesting! I’ll have to go back and study previous work a little more—the stars are an eye catching feature.
It’s funny because it’s the more the controlled diffuse lights which always strike me as an MT signature. Back on the watch work, the seemingly double diffused lights with very broad and nice highlight transitions into the darks are the kind of “MT light” I always think of. I guess the other thing is using the light as a player itself in the image—like that sumptuous black coffee and cream highlight composition you made on the bonnet in the lead photo… that seems a strong “MT” trope.
It’s actually quite nice to discover another little lighting thing you like; as I say, another brush stroke to look for in your other work!
Use of controlled specular highlights and shooting into the source – which I think this counts as – is definitely there, even if I’m not controlling the source…
What a boring car. Nice photographs, though.
We work with what we’ve got…
Looks beautiful. (Small head’s up, there are 404’s on the Flickr links at the moment.)
They should work, but it appears flickr is having issues…
Ahh, Flickr problems. Seems like situation normal to me, that.
I meant beautiful work, by the way; I had been referring to your photography not the car.
Haha, thank you.
I can’t believe the car guys used an old water bottle to top up the gas tank. Shouldn’t they use a safety gas can? Petroleum products should never be stored in food or drink containers. What if someone threw it away not quite empty of petrol? A potential little fire bomb! What if a child found it and took a drink out of it? Potential poisoning!
Good clean pictures though.
That’s exactly what I was thinking. Seems crazy.
Welcome to Malaysia. Wasn’t my idea though!
I’m sure it happens all over the world! Well, maybe not in Antarctica.
There must have been a commercial made there…
Agreed about that water bottle; it gave me a double-take the instant I saw it.
At least he didn’t have a lit cigar in his mouth 🙂
It always boggles the mind to see how much real, intense work goes into a typical commercial shoot. It all has to concentrate on a few creative in the nano-seconds everything is ready, just before teardown. Photography is a very different thing to most amateurs.
Fashion, architectural and product photography are strange crafts. The task is to apply art to another’s art.
Looking at images of Stahl House (http://stahlhouse.com/index.php?option=com_content&view=article&id=2&Itemid=113), you can’t help wonder how dependent Koenig and modern architecture was on Shulman and his peers. How well do you present the Teana designers’ vision in your images?
Art upon art.
-Charlie
Good question. I suspect unlike architecture this was design by consortium though…
Which is hardly ever ok. They say a camel is a horse designed by a committee…
Let’s not even go there 🙂
BTW, I love the angles that you found to present something mundane as a Teana… Beautiful product shots!
Thanks!
Extraordinarily interesting, this kind of articles, Ming. BTW, I have always admired your product shooting tremendously, like the watch pictures… Yet, there are two more things that interest me.
First: how do you decide what lines you accentuate, with how much light contrast. I don’t know if I put this right, but it’s mainly the artistic process, that I’m referring to, apart from the demands of the client (like in the photoshoot of your own car). I’m always flabbergasted in how you succeed in adding so much artistry in (what many think, but is far from dull) “product shooting”.
Second: the budget. Are you allowed to tell us about what kind of budget we’re talking? I guess many of the readers will be surprised about this as well, next to how much work it is to avoid all unwented reflections (for one), as you explained so well in this article. I’m also wondering if there is kind of a negotiation with the client about what the budget will be (seems very meaningfull to me). And I’m surprised that Nisson Malaysia is ordering this kind of artwork, while I’m sure the Japaneese mother company will have artwork already done and available to their distributors.
All in all, I love these posts, and I love the images even more. Thanks for sharing!
Lighting – I have to say it’s down to feel and the textures and lines of the actual object itself. Not helpful, I know – but experience matters…
Budget: a lot less than you’d think, and less than overseas…sadly. 😉
I am clearly very sad. I find this kind of thing far more interesting than the gear (which is interesting too, but just less so) – the craft and effort that goes into a shoot like this is eye opening. When you talk about how you’ve lit and prepared a subject like this, that’s the stuff that blows my mind. I think many people think you turn up, take some photos with bounce flash and wander off. Anyway, very, very interesting and thanks for sharing.
I too wish it was that simple!
The images look even better than the real thing, I really admire your ATD, craftsmanship and sharing Ming.
Thank you!
When I saw the noise (albeit very well controlled!) in the behind the scenes shots, I thought, GR – no way! Then I saw that it was an iPhone, lol. Damn good anyway.
Blown away, even with Flickr restrictions, by the final product. Seriously superb!
Thank you. Well, we were rushed for time so I grabbed with whatever I had handy. Light was challenging hence iPhone noise…
Beautiful work Ming! Amazing photos.
Thanks.
Bravo, Ming.
Thanks!
If you want to learn something, about perfect professional Car Photography, you should volunteer at the RENÉ STAUD Studios!
Like they accept volunteers galore… 🙂
Of course they deliver state of the art hyper professional work. But… well… personally… I prefer Ming’s style.
Job well done!
–Ken
Thanks!