
Bird photography is an increasingly popular genre that requires effective technical execution, specialized gear and incredible patience, the last of which I unfortunately lack in sufficient quantities. The excitement and fulfillment of bird shooting is not just about the photography, but also spotting and identifying the species, gender and origin of the birds. A huge part of the fun comes from the hunt itself, with photographers venturing deep into the forest or a hiking trail to spot the birds. While I admit I am not a pro bird shooter, I have been approached and asked several times about optimizing the Olympus Micro Four Thirds camera system for bird shooting. The requests are frequent enough to motivate me to pen down my recommendations and suggestions on shooting birds using the Olympus OM-D system.
Let me start by clarifying this article is not about recommending which gear is suitable for bird photography – I am merely sharing my experience using the Micro Four Thirds system. I fully acknowledge the pros and cons of using Micro Four Thirds for bird photography. A lighter and smaller camera system is a blessing on long hikes and extended shoots, but in situations requiring very high ISO (if the bird is under heavy shade and is not keeping very still, for example) the results can be unusable from even the best Olympus or Panasonic Micro Four Thirds cameras today. For each choice you make there is compromise so let’s not waste too much time debating this. Assume you currently own an Olympus OM-D camera and this article explores how you can optimize your setup for the best possible outcome.
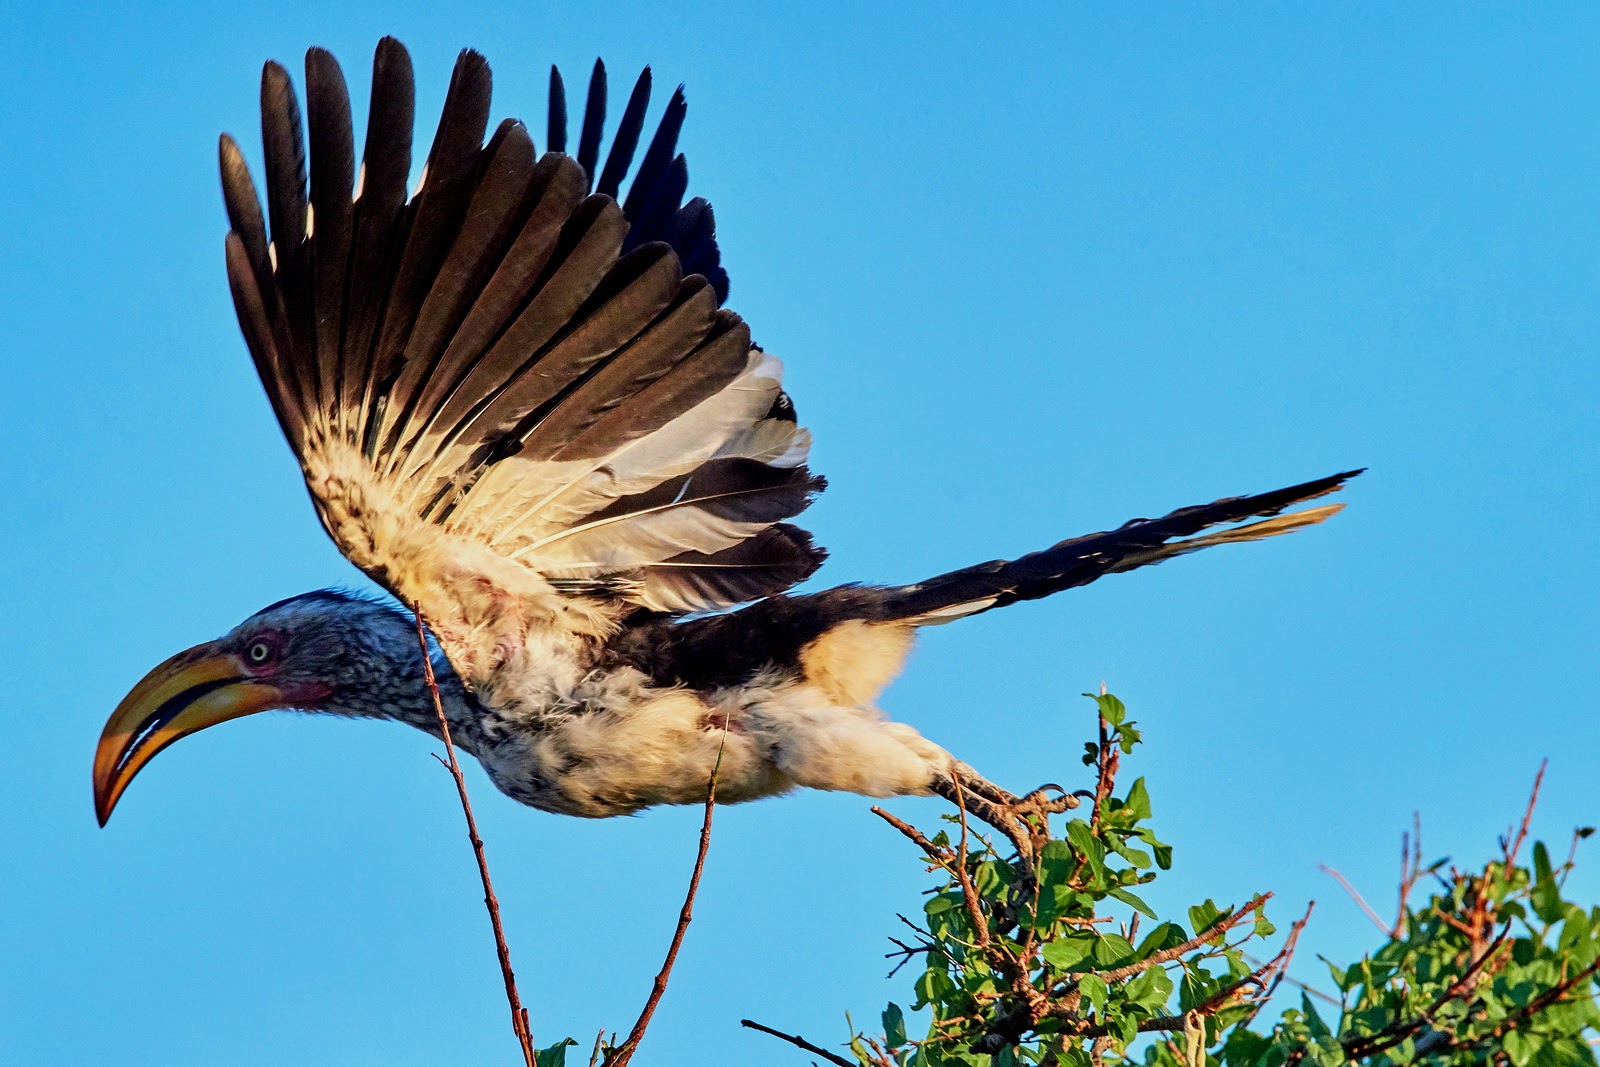
All images in this article were shot with the Olympus OM-D E-M1X and M.Zuiko 300mm F4 IS PRO or 40-150mm F2.8 PRO. In some shots, the teleconverter MC-14 was used.
USE PRO CAPTURE MODE
Birds fly, so instead of just taking still portraits of birds, capturing them in some of the most dramatic poses like the moment when they take flight can add more impact to your outcome. One extremely useful feature for bird photography is the Pro Capture Mode in which the camera starts recording images to the temporary storage when you half press the shutter button. The images are stored in full RAW at 60 frames per second thanks to the electronic shutter. For example, while waiting for the bird to take flight, it is always difficult to predict the exact moment of launch. Once the bird takes flight and as you press the shutter button, the camera will record the current shot and the previous shots (up to 35 frames before capture) and save them to the memory card. This means that even if you are half a second late in pressing the shutter button, you will be able to capture the “action”.
ACTIVATE ANTI-SHOCK
Shutter vibration is a common issue that exists in many cameras and can be exaggerated when shooting with long lenses. MT has previously reported the severe case of shutter shock during his use of the original E-M1 (since mitigated with a firmware upgrade) (article here). In that firmware upgrade, Olympus introduced the “anti-shock 0 second” setting, which is basically first curtain electronic shutter. In theory, this should eliminate shutter shock and has been the default setting on all my OM-D cameras ever since its release. I have conducted several photography walkabouts with local enthusiasts to the National Zoo as well as KL Bird Park, and have found that when dealing with long lenses (eg 75-300mm, or 300mm PRO) the anti-shock setting does make a significant difference. If you use an Olympus OM-D, I highly suggest leaving the anti-shock 0 second feature active at all times.
TAKE ADVANTAGE OF 5-AXIS IMAGE STABILIZATION
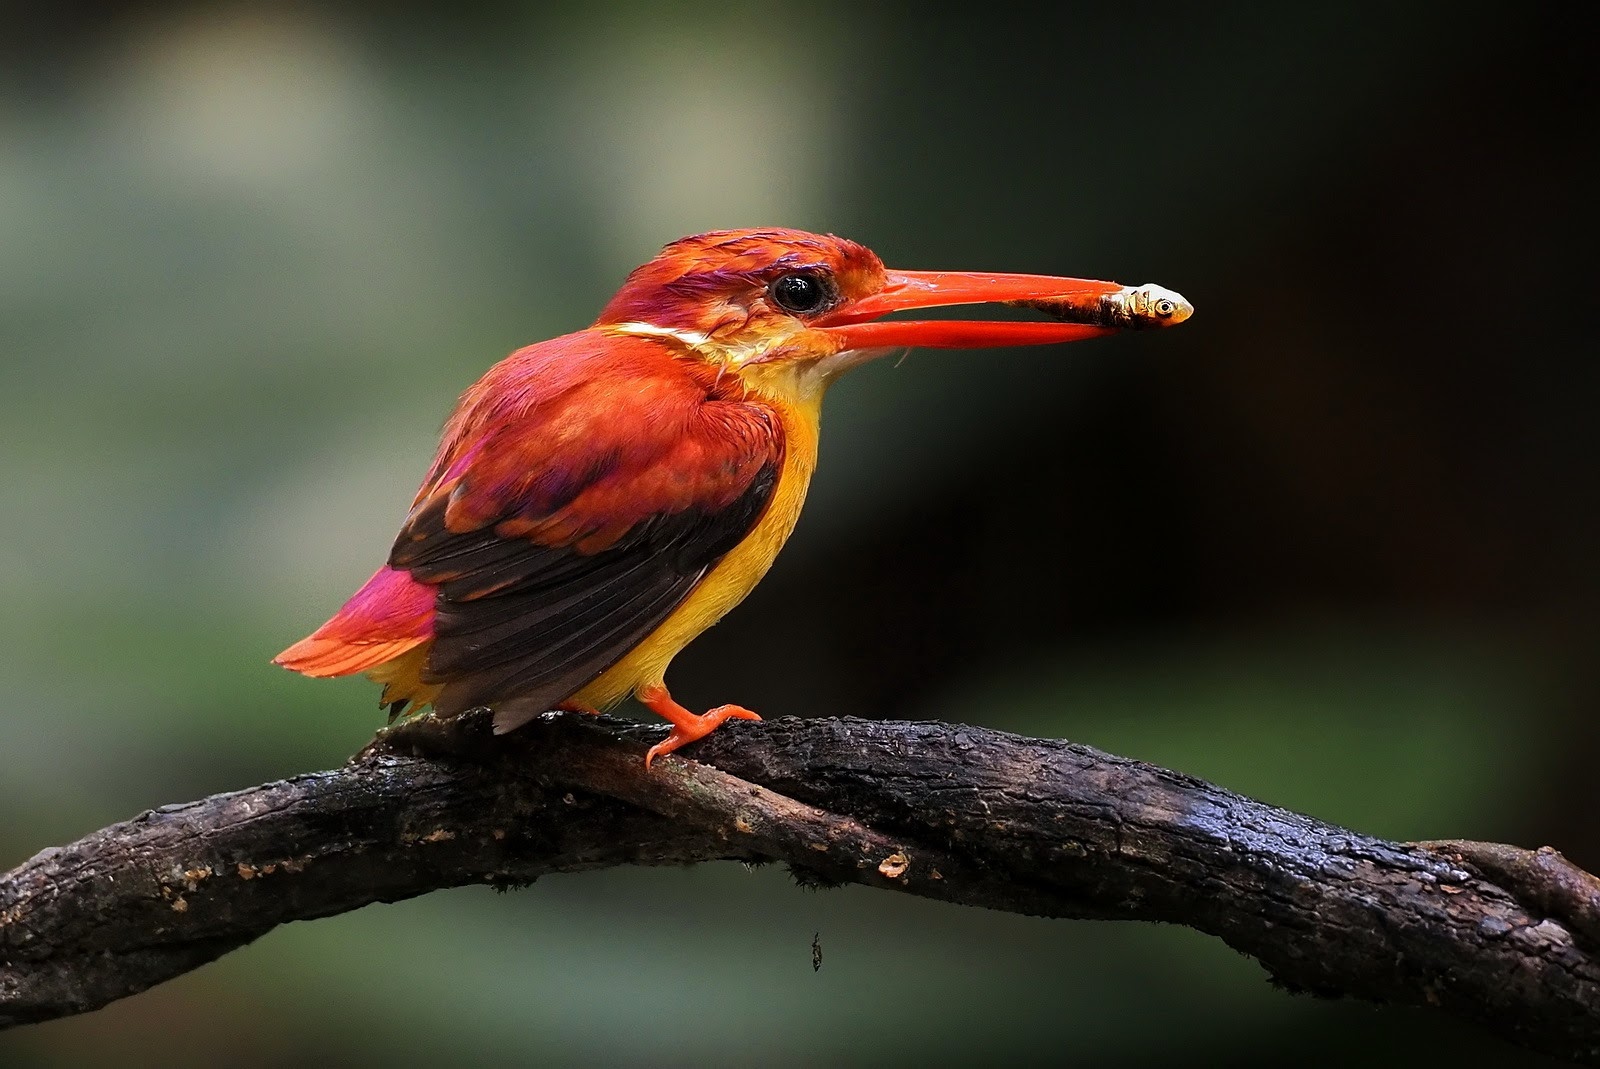
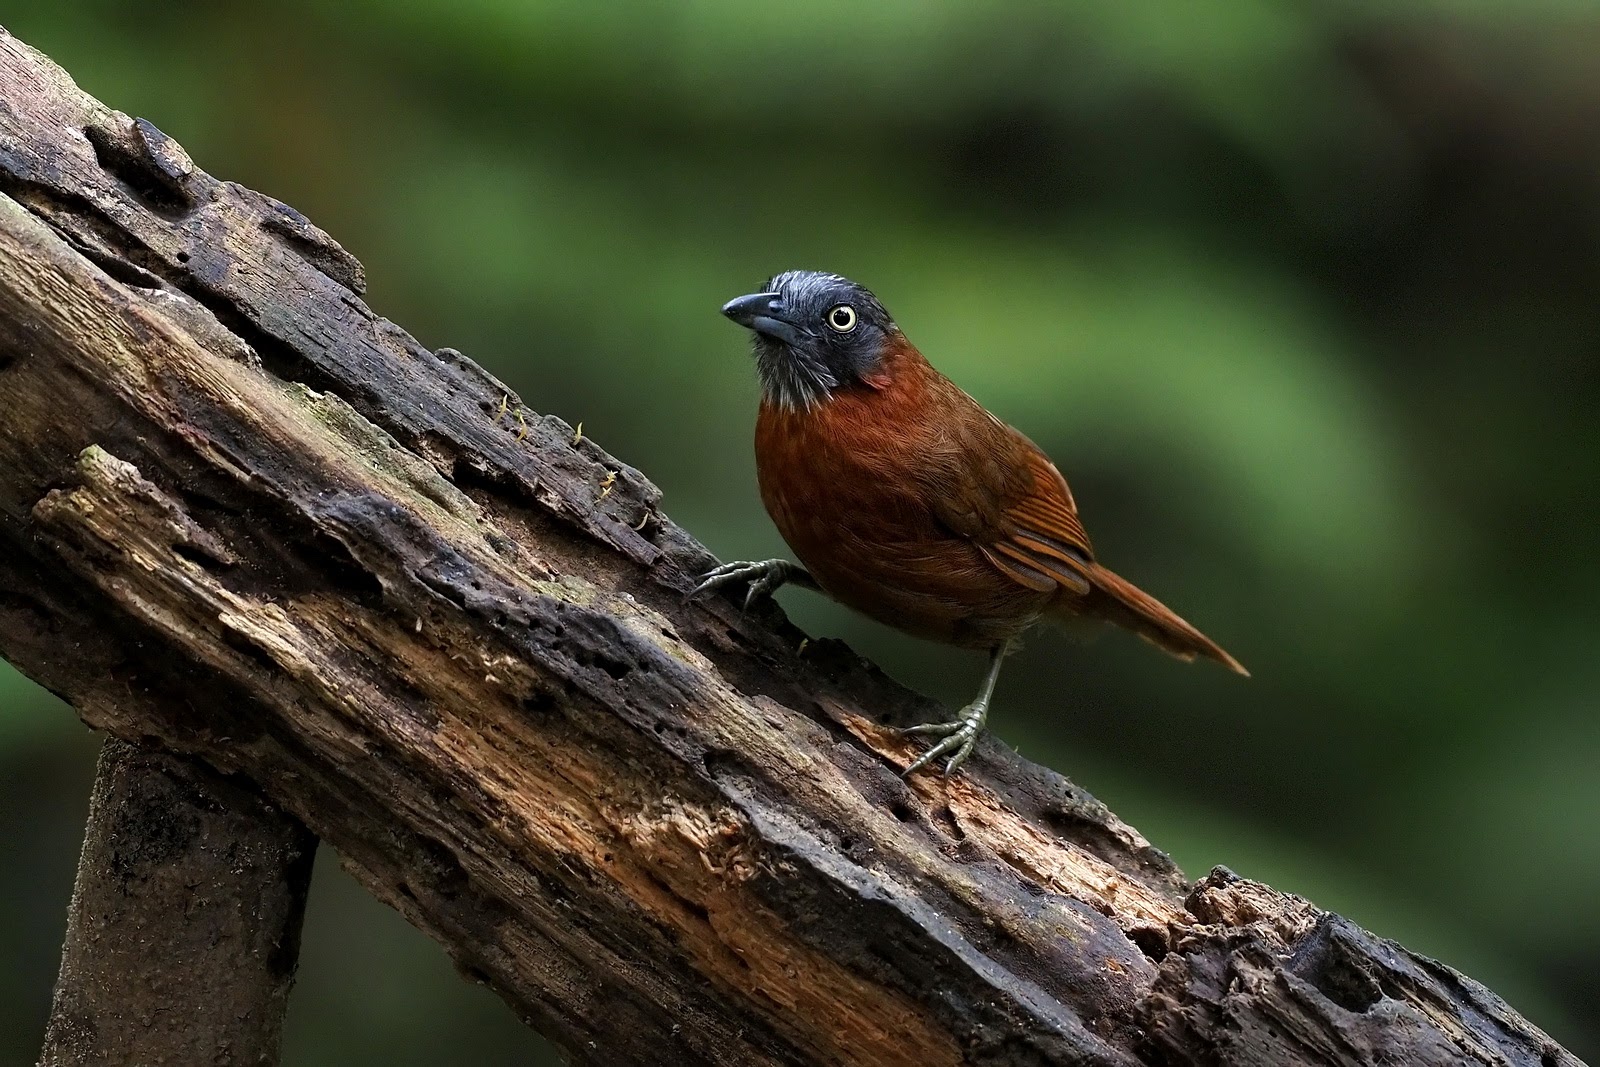
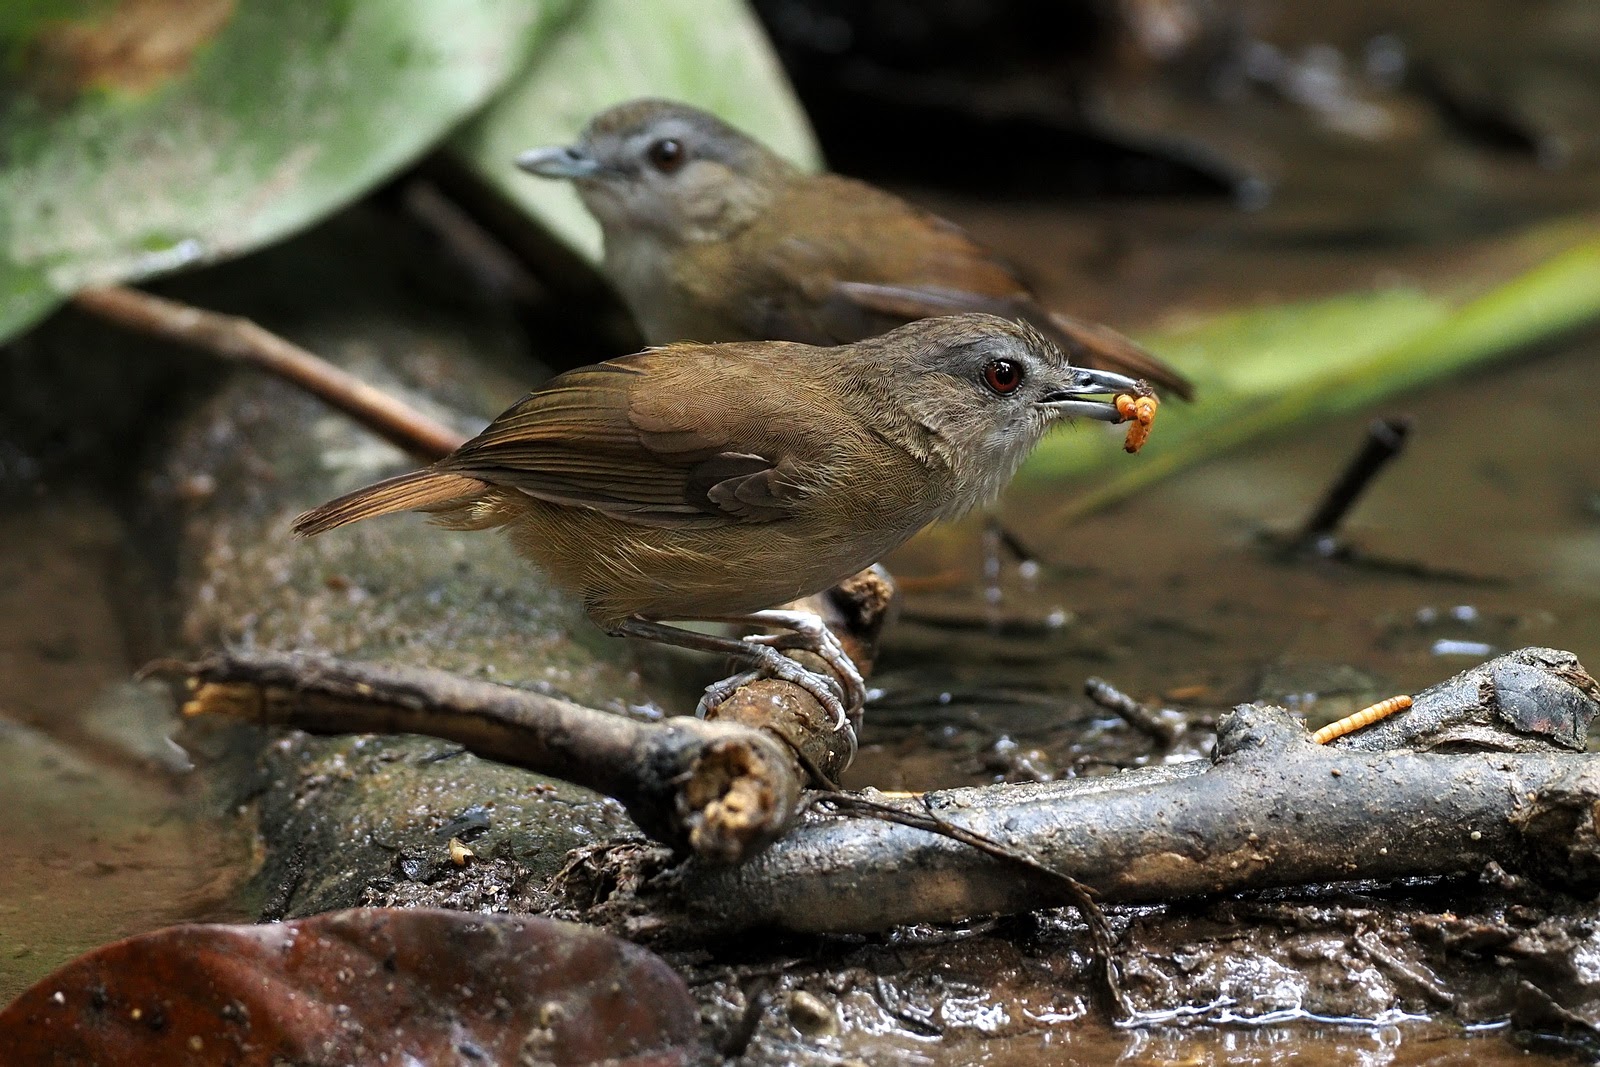
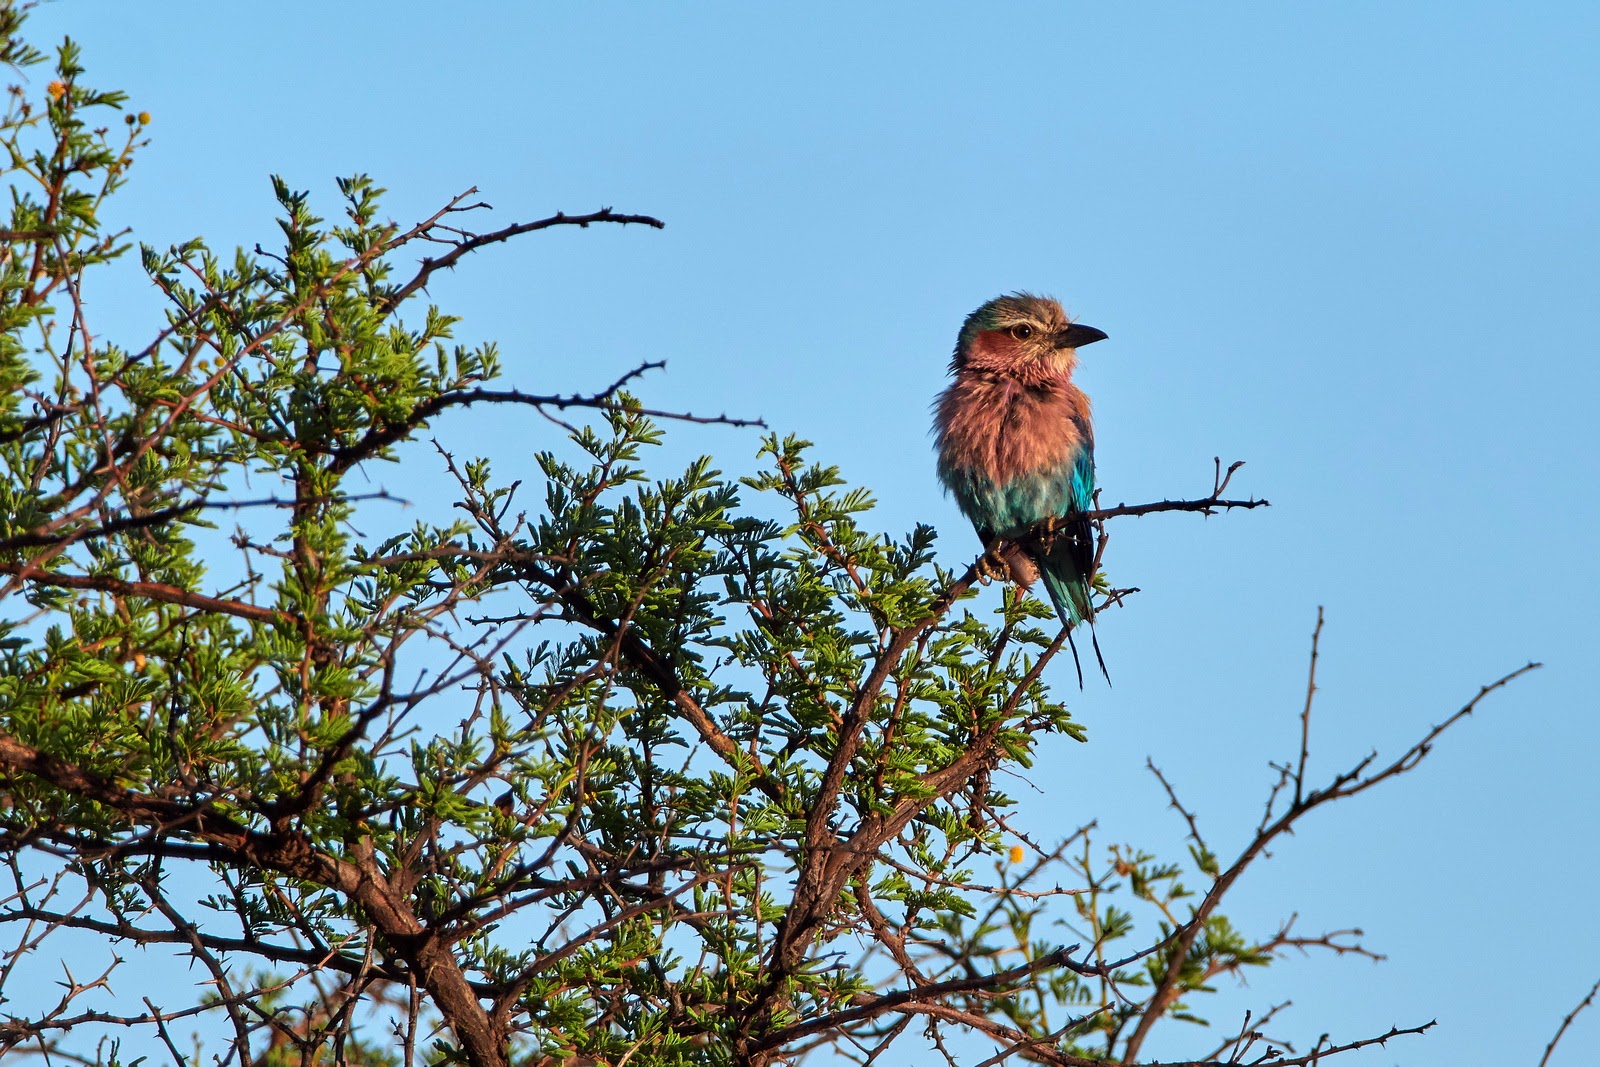
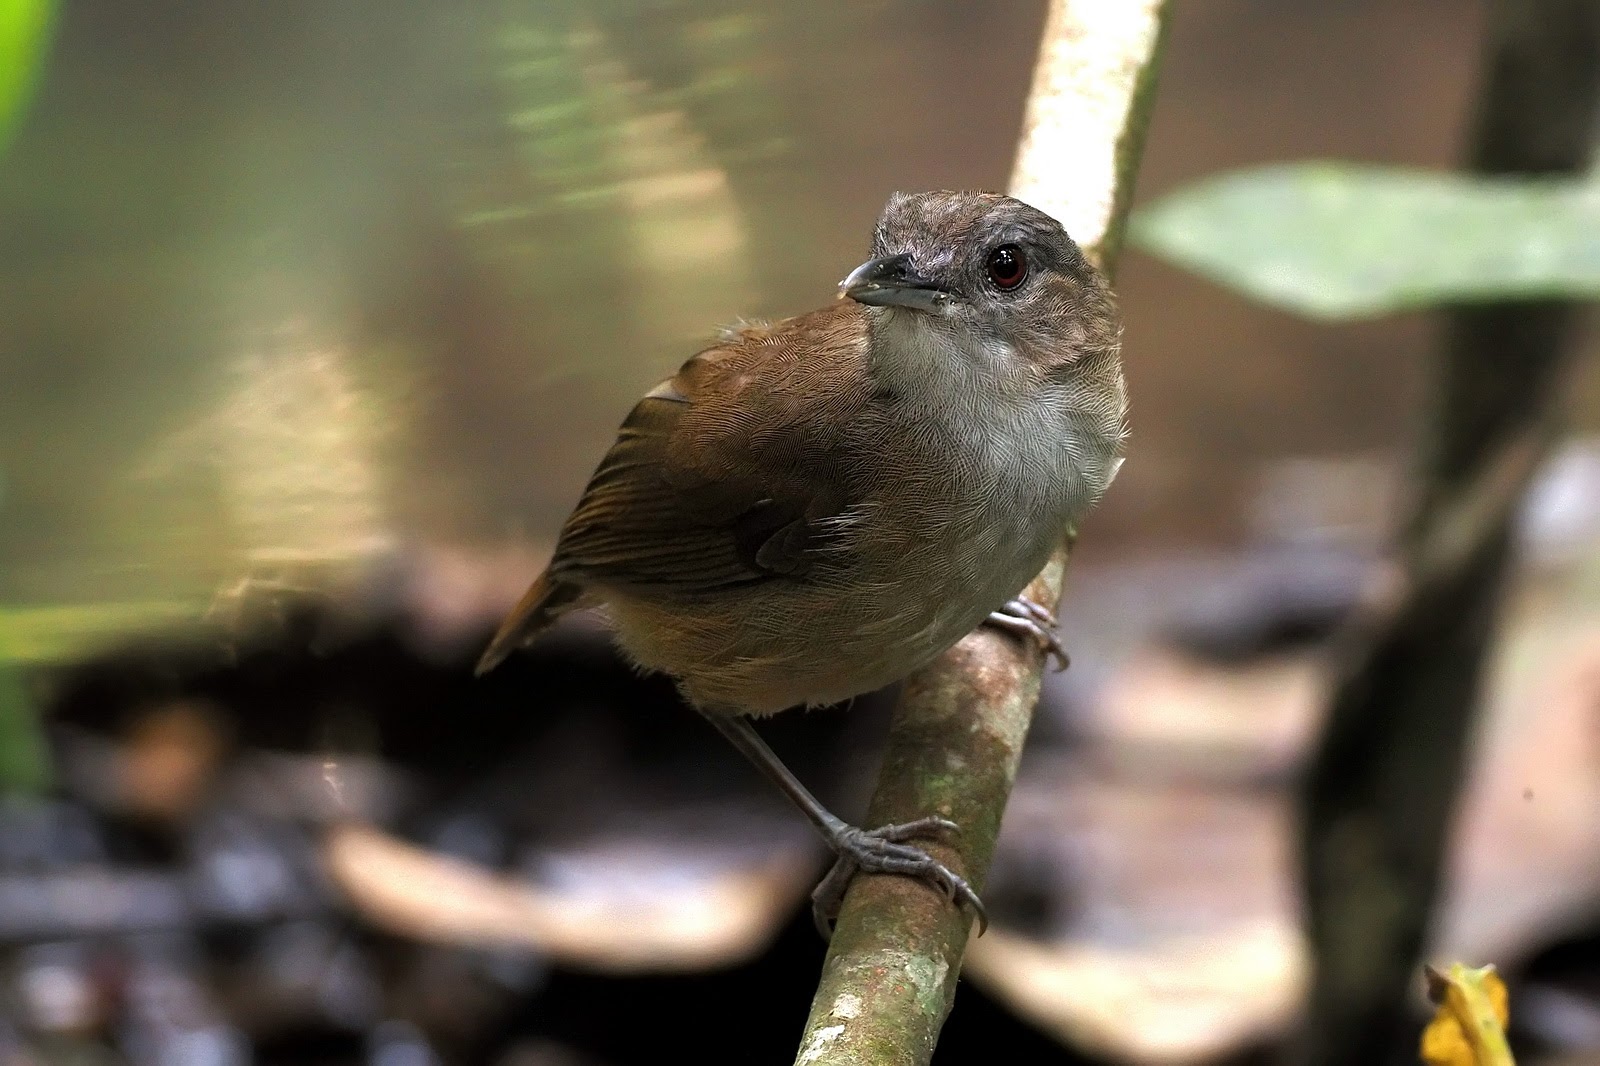
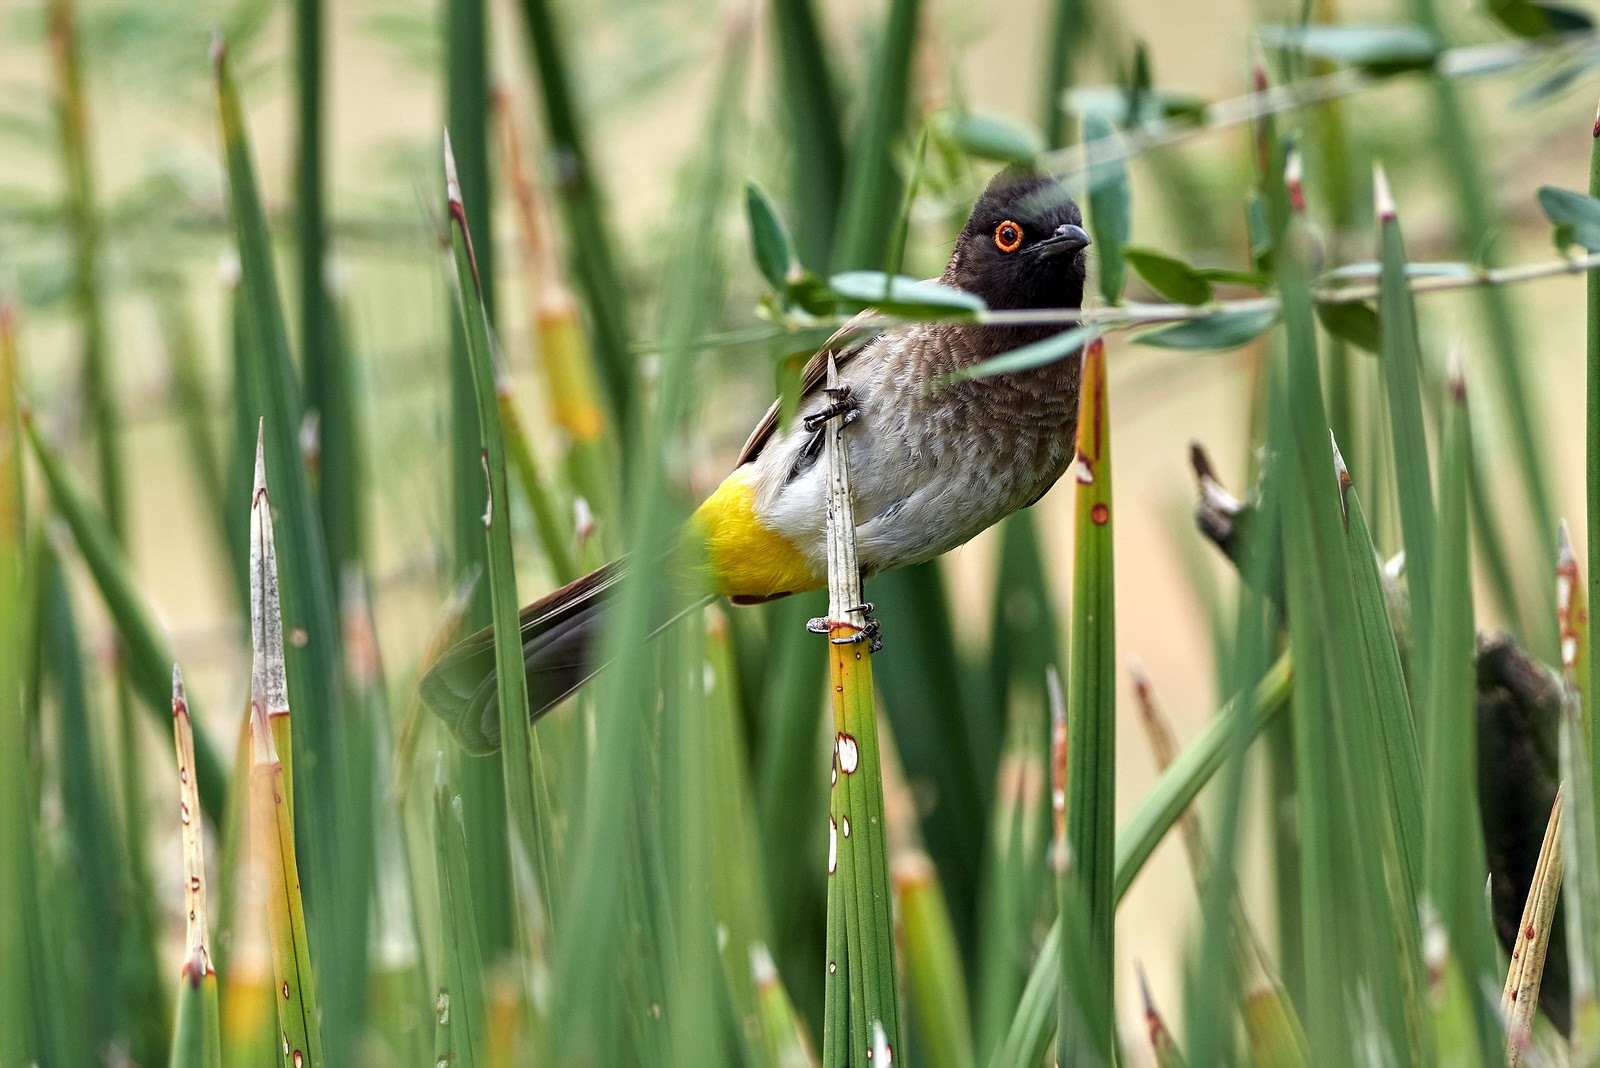
Micro Four Thirds isn’t great at handling high ISOs but the 5-Axis Image Stabilization can claw back a lot of ground by lowering the need for higher ISOs. I have observed that many bird shooters play it too safe by keeping shutter speeds as high as 1/200 seconds or more; just in case the bird moves. Yes the bird will always move, but there are also moments when the birds do stay very still and cameras these days respond instantaneously to the click of the shutter. By leveraging the powerful image stabilization on the Olympus OM-D, I managed to shoot hand-held using the M.Zuiko 300mm F4 IS PRO down to shutter speeds of 1/20th of a second, which in turn allowed me to use ISO800 or lower. Is there a risk of ending up with motion-blurred shots? Absolutely. But the hit rates are high enough to take the risk. The three “bird portrait” images shown above were all shot hand-held at around 1/20th to 1/60th. Obviously this is intended for stationary shots. Higher shutter speeds are necessary for birds in flight or in motion.
HAND-HOLDING TELEPHOTO LENSES
Perhaps the largest convenience of using Micro Four Thirds for bird shooting is not needing to use a tripod or monopod which allows for better mobility and reaction time. Not being weighed down by heavy gear is a plus point for adventurous hikes or long walks to find that elusive bird. While a tripod can guarantee stability, what happens if the bird appears behind you? Readjusting the tripod and camera is not an instantaneous process. To save even more weight, leave the tripod collar and hood behind. The tripod collars add 205g and 120g to the M.Zuiko 300mm F4 IS PRO and 40-150mm F2.8 PRO lenses respectively. The weight may not sound like a lot but hand-holding the lenses for a long period of time will strain your shoulders, neck and wrists.
OPTIMIZING C-AF SHOOTING – LOW BURSTS ONLY
I am no expert when it comes to shooting birds in flight but it is important to remember that Olympus Continuous AF (both C-AF and C-AF + Tracking) modes only work at low sequential burst modes in all Olympus cameras. For example, on the E-M1X and E-M1 Mark II, if you intend to shoot burst sequential shots on continuous AF, you must select the LOW burst speed (10 fps on mechanical shutter, 18 fps on electronic shutter). If you select HIGH speeds, C-AF will not work. This is the primary cause of many C-AF shooting failures experienced by camera reviewers and other photographers. Olympus hasn’t done a stellar job of communicating best practices and optimization of camera settings either.
For those intending to explore bird photography using the Olympus OM-D system, I sure hope these tips come in handy! If you do have more to share, I will be glad to hear from you in the comments section.
__________________
We are also on Facebook and there is a curated reader Flickr pool.
Images and content copyright Robin Wong 2018 onwards. All rights reserved


I have found that for me, the Achilles’ heel of the Olympus system is its lack of a fill-flash system comparable to what you have available with Nikon and Canon. With my Nikon gear, I set the camera for “auto FP” and I get sufficient flash power with high speed sync that fill flash at say, a feeder setup is satisfactory. With Olympus/Panasonic gear the HSS seems very low-power by comparison, even when using a large flash unit like the biggest offered by Panasonic. I don’t routinely use flash in bird photography but sometimes it is an attractive option. If anyone knows how to coax effective HSS flash with M43 at distances of 20′ or more, I would love to learn.
Look into flash extenders such as the Better Beamer. A flash extender is a plastic fresnel lens (thin rectangular panel) held in place by two plastic arms attached with velcro tape to the flash head. It can extend the flash power a little more than 2 stops. It’s useful since HSS cuts flash power in half. Another option is to increase iso as this also extends the reach of your flash, albeit at the expense of image quality IF the iso is too high.
I read your article providing very good shooting and focusing tips for photographing birds in flight with the Olympus OMD EM1X. Recently, I purchased the Olympus OMD EM1X primarily for bird in flight shots, and have had a pretty good “keeper rate” for those shots where the bird is positioned with only the sky in the background. Nonetheless, I have experienced a very low “keeper rate” where the bird is flying against a more busy background such as trees or even a body of water (e.g. where the eagle is grabbing a fish from the bay). I have adjusted the sensitivity of the auto focus to all of the different settings (i.e. -2 through +2), I have utilized many different shapes and sizes for the auto focus catch area (including the recommended five boxes shaped in a cross) and I have shot with and without the tele-exetender, and yet still I get mostly photos where the background is in focus but the flying bird is out of focus-indeed, even where the bird is a color which vastly contrasts with the background such as a white egret against a greed treed background. I would genuinely appreciate some advice as to how to shoot birds in flight where the bird is flying against a busy background and how to get the bird in focus rather than the background. My email is israelsonlaw@gmail.com. Thank you. Paul Israelson
Love the bird images. When I lived in Asia I studied the birds a lot. Can you ID these ones?
Hi Robin– Great shots! When you use the 300mm without a tripod collar, what do you do for a strap? The lens manual says that the camera isn’t happy supporting the weight of the lens. Do you work without a strap, just holding the camera + lens?
Did anyone notice the ant taking a nose dive off the branch in the last shot as if to say “No way I am this birds next meal . . . I am OUT OF HERE!”
Hi Robin,
Awesome images! Should you have the chance, would you be testing the EM1X with the older Four Thirds lenses such as the 150mm f2.0?
Thanks for the suggestions for bird photography. I use an E-M1.2 with PL100-400. I look forward to trying slower shutter speeds for sitting birds and anti-shock.
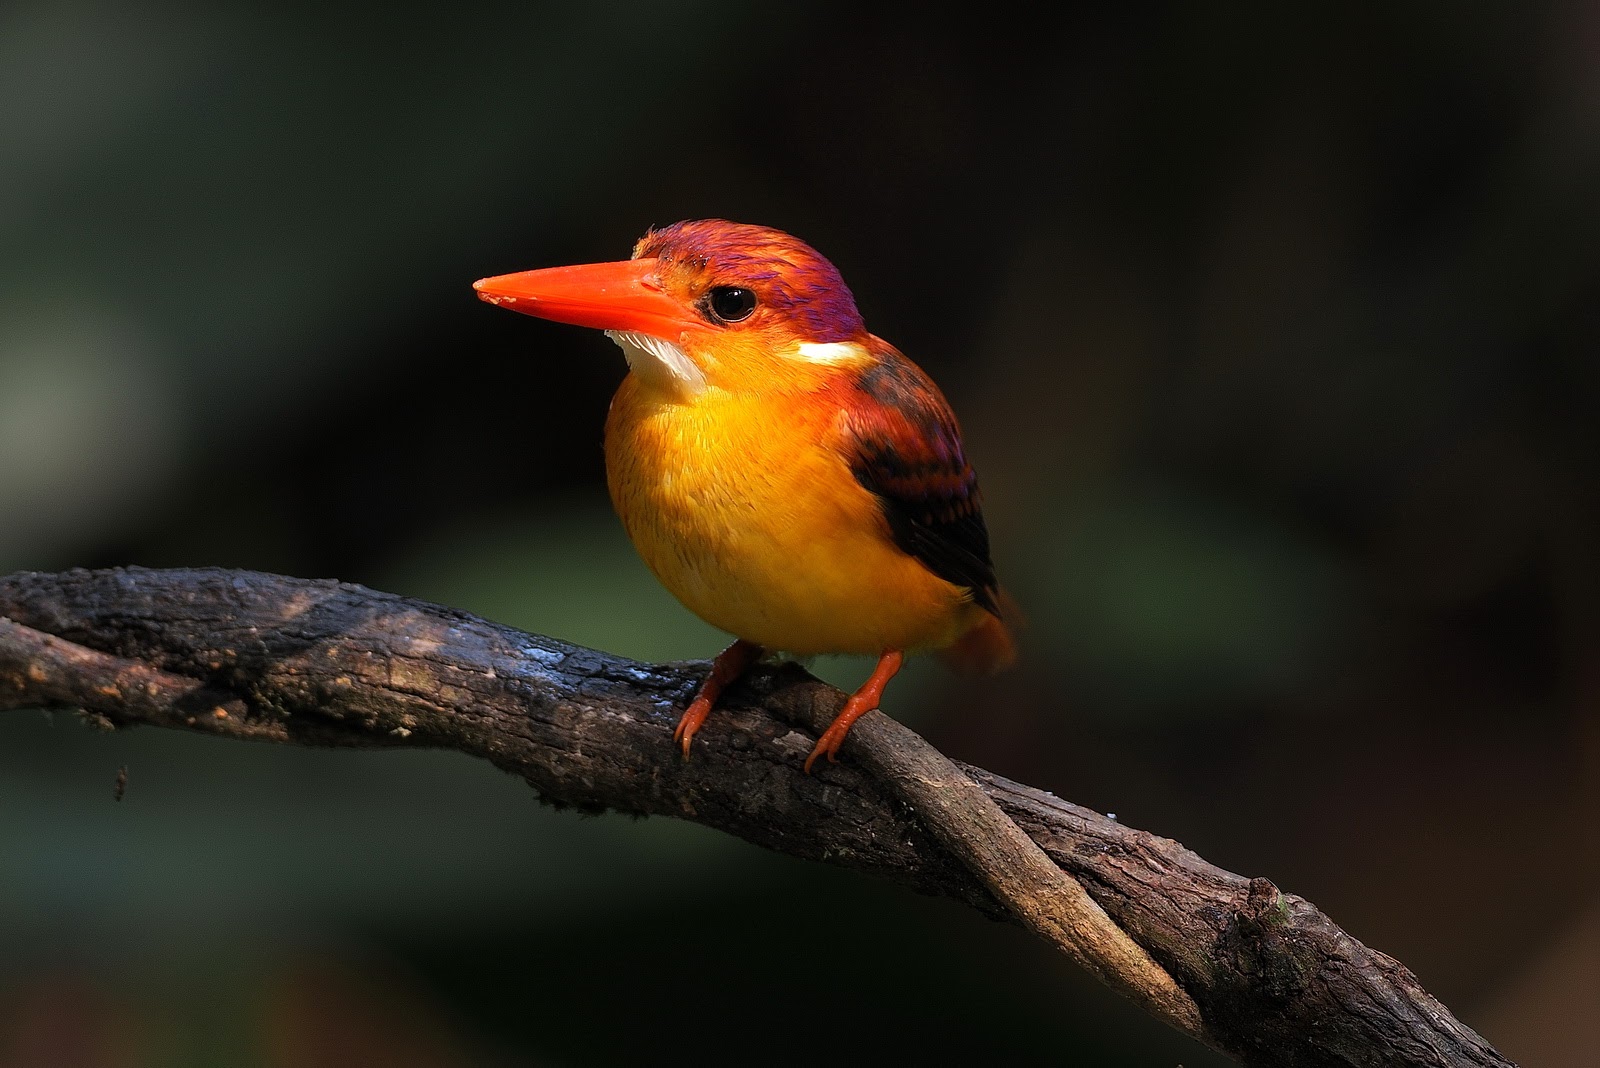
Thank you Robin. Amazing shots. The fourth one is my favourite- it is perfect. Can you say with what lens did you take it and with which aperture?
Thanks! That was the 300mm PRO wide open at F4.
Robin, You made some really good points. I use a lot of my 35mm SLR glass for birding simply because I have it in longer focal lengths and larger apertures than what I have in MFT glass.
I do however love the M. Zuiko 300mm F4 IS Pro. It is perhaps the one I use most on my OM-D E-M1. It’s expensive for an F4 though.
Thanks Bill. The 300mm F4 PRO is Olympus’s sharpest lens! Of course that won’t be cheap
Having recently acquired an E-M1 mk II, and already had a play with CA-F, subject tracking and pro shot, this article is timely. Thanks.
Thanks Jason, glad that you have found the article useful!
A very informative article,Robin. Thank you. The EM-1 series has features that other cameras drool over. —- Peter
Thanks Peter! I am sure everyone else wants that same 5-Axis IS from Olympus!
Robin, your conventional bird poses are simply stunning. I’m not, nor ever have been, interested in bird photography (I’m also not a bird watcher) but I do love seeing images that show them off to their best and admiring their plumage. However, back in October 2012, I was paying a visit to a local botanical garden with a newly acquired Panasonic FZ200 (eq.600mm). It was a bright sunny day, and given the time of year, crisp lighting, when I heard a bird, turned out to be a young robin, who was whistling away merrily up in the tree branches. Using the FZ at its 600mm (eq) setting I took four shots. It wasn’t easy with the new toy and craning my neck looking up, but I was absolutely delighted when I saw the results on screen. Whilst taking the pics I couldn’t really judge what I was actually capturing, but the little bird came up trumps with his poses!
A camera like the FZ200, despite its small sensor, worked on this occasion because I could use f4 and the lighting at the time permitted exposures of 1/320 and 1/400 sec.
Looking back, these four pics could have turned out to be flops. The fact that they weren’t makes me cherish them more because they were, in reality, off the cuff moments.
hey Terry,
Thanks for the kind words. I myself am not a bird shooter, and I don’t use long lenses that often. Having a superzoom camera helps a lot! There was a time I was seriously considering between a superzoom and a DSLR (this was 2008). I ended up going for DSLR, a decision that I did not regret, but a part of me always wanted that super long reach!
Stunning stuff, I’ve been debating on whether to go M43 for birding for awhile. Currently shooting with a 500mm f4 lens on apsc and I’m happy with my results but going lighter and keeping a similar of image quality and focus accuracy is very tempting.
I have a few friends who use Micro Four Thirds just for birding and they are all happy with the results they get! Managing expectations is also important.